
BioID Web Service
#Overview
BioID Web Service is a "Biometrics as a service" provider. This document will explain how to use Gluu's BioID interception script to configure the Gluu Server for a two-step authentication process with username and password as the first step, and BioID's biometric authentication as the second step.
In order to use this authentication mechanism your organization will need to register for a BioID account.
#Prerequisites
- A Gluu Server (installation instructions);
- BioID interception script (included in the default Gluu Server distribution);
- An account with BioID.
#Properties
The mandatory properties in the BioID authentication script are as follows
| Property | Description | Example |
|---|---|---|
| ENDPOINT | URL of the BioID Web Service | https://bws.bioid.com/extension/ |
| APP_IDENTIFIER | API key | c20b04cc-776a-45ed-7a1f-06347f8edf6c |
| APP_SECRET | API secret | sTGB4n4HAkvc2BnJp6KeNUTk |
| STORAGE | The storage name assigned by BioID depending on the type of contract you have. | bws |
| PARTITION | A number assigned to your company by BioID. | 12345 |
#Configure BioID Account
Sign up for a BioID account.
Upon registration, you will recieve an email with the instance name (listed as STORAGE in Gluu's BioID authentication script), partition number(listed as PARTITION in Gluu's BioID authentication script).
As the owner of this instance, you are entitled to access BWS Portal at https://bwsportal.bioid.com using the account associated with your email. With the BWS Portal, you can do the following: a. View your trial information such as your credentials (e.g. your client certificate), enrolled classes, BWS logs and more. b. Create your App ID and App secret, under "Web API keys".
#BioID Documentation
You can find all API reference at https://developer.bioid.com/bwsreference. Lots of useful information about BWS is available at https://developer.bioid.com/blog. For liveness detection, you will find information about motion trigger helpful: https://developer.bioid.com/app-developer-guide/bioid-motion-detection
#Configure oxTrust
Follow the steps below to configure the BioID module in the oxTrust Admin GUI.
Navigate to
Configuration>Person Authentication Scripts.Scroll down to the BioID authentication script
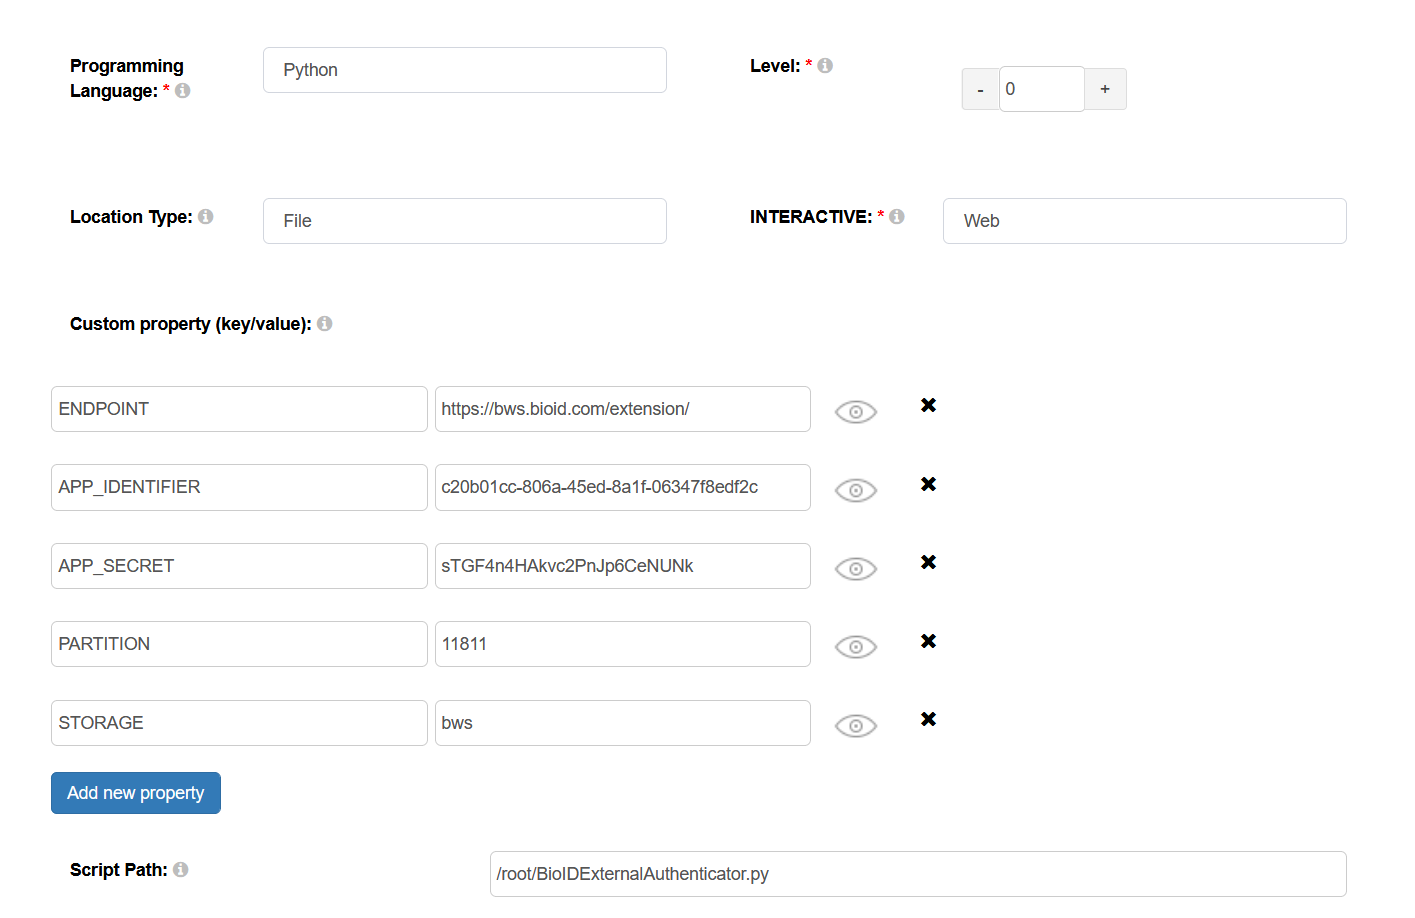
Configure the properties, all of which are mandatory, according to your API
Enable the script by ticking the check box

Now BioID's biometric authentication is available as an authentication mechanism for your Gluu Server. This means that, using OpenID Connect acr_values, applications can now request BioID biometric authentication for users.
#Make BioID the Default Authentication Mechanism
Now applications can request BioID's biometric authentication. To make BioID biometic authentication your default authentication mechanism, follow these instructions:
Navigate to
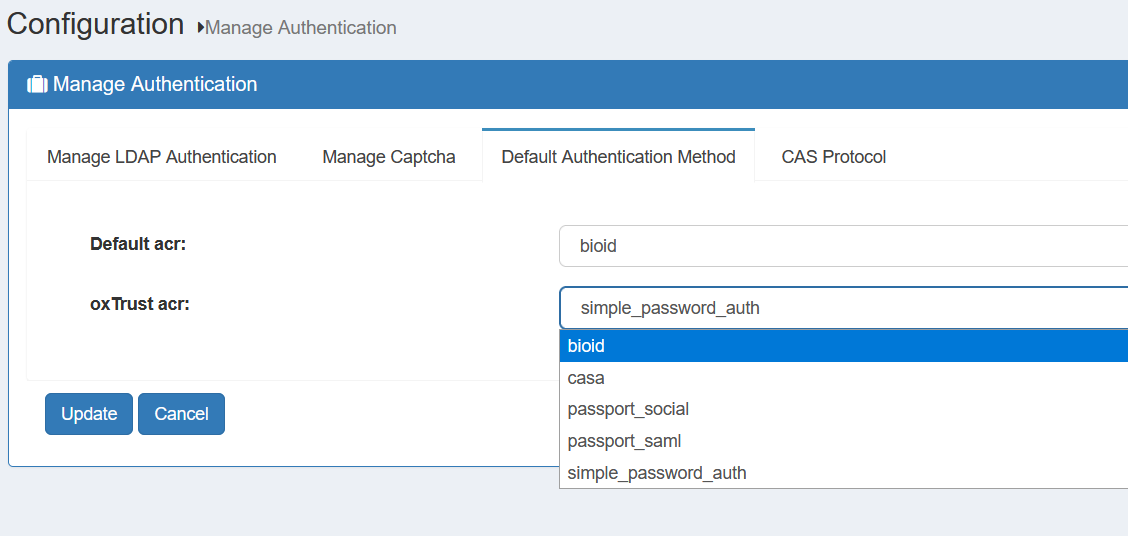
Configuration>Manage Authentication.Select the
Default Authentication Methodtab.In the Default Authentication Method window you will see two options:
Default acrandoxTrust acr.- The
oxTrust acrfield controls the authentication mechanism that is presented to access the oxTrust dashboard GUI (the application you are in). - The
Default acrfield controls the default authentication mechanism that is presented to users from all applications that leverage your Gluu Server for authentication.
- The
You can change one or both fields to BioID authentication as you see fit. If you want BioID to be the default authentication mechanism for access to oxTrust and all other applications that leverage your Gluu Server, change both fields to bioid.
#Testing the script
If you use the default BioID interception script, a user's facial and periocular traits are enrolled during the first authentication attempt. Subsequently, the user's facial and periocular traits are verified.
Enrolling Biometric traits
Validating a user based on their biometric traits: