
Shibboleth SAML SP
#Apache SAML
#Configuring Apache Shibboleth SP in CentOS
#System Preparation
Add Shibboleth repository for CentOS
- The file
shib.repocontains the following entry:
[security_shibboleth]
name=Shibboleth (CentOS_CentOS-6)
type=rpm-md
baseurl=http://download.opensuse.org/repositories/security:/shibboleth/CentOS_CentOS-6/
gpgcheck=1
gpgkey=http://download.opensuse.org/repositories/security:/shibboleth/CentOS_CentOS-6/repodata/repomd.xml.key
enabled=1- Download the Shibboleth security repo key from here:
http://download.opensuse.org/repositories/security:/shibboleth/CentOS_CentOS-6/security:shibboleth.repo#Shibboleth SP Installation
To install the Shibboleth SP, run the following commands in a terminal:
# yum install shibboleth
# service shibd start
# chkconfig shibd on#Install and Configure httpd
#Installation
The following commands will both install, and start the Apache web server on your machine/Linux environment:
# yum install httpd
# service httpd start
# service iptables stop #Configuration
Edit the file httpd.conf, and do the following changes:
Change the
ServerNamedirective to the server name of the SP.Set
UseCanonicalName On.Restart the
httpdservice.
#httpd Testing
Create an
index.htmlfile inside the directory/var/www/html.Restart the
httpdservice.Check from your browser if the file
index.htmlis visible.
#SP Key Certificate
Create both a private key, and a certificate, and place those in the file
/etc/shibboleth.Change the permissions of these files so that the web server can read the files.
#Shibboleth SP Configuration
This section describes how to configure the file shibboleth2.xml.
Provide the
entityIDof the according SP in:<ApplicationDefaults entityID="http://sp.example.org/Shibboleth"> section
Provide the
entityIDof the IdP in:<SSO entityID="https://idp.gluu.org/idp/shibboleth"> section
Adjust the entry of the metadata provider. In most cases this is the Gluu IdP metadata link:
<MetadataProvider type="XML" uri="https://idp.gluu.org/idp/shibboleth"> section
Provide both the key and certificate of the SP in:
<CredentialResolver type="File" key="spkey.key" certificate="spcrt.crt"> section
#Shibboleth Manual Configuration (one Physical SP):
Create a directory named under
/var/www/secure.Change the permissions for that directory
securetoapache:apache(owner and group of the web server).httpd.confchange the ServerName
<hostname_of_server>Define the Location, and the authorization type:
<Location /secure>
    AuthType shibboleth
    ShibRequestSetting requireSession 1
    ShibUseHeaders on
    Require valid-user
</Location>
configure
shibboleth2.xmlSet the EntityID of the SP:
ApplicationDefaults entityID="http://hostname/secure"Provide the EntityID of the IDP:
SSO entityID="https://idp.gluu.org/idp/shibboleth"Set both the Metadata Provider, and the IDP:
MetadataProvider type="XML" uri="https://idp.gluu.org/idp/shibboleth"
Restart both the
shibdandapache2services.Create a Trust Relationship for this SP in your desired IdP.
#Configure Apache
These are the steps to configure your Apache webserver properly:
# apt-get install apache2 libshibsp6 libapache2-mod-shib2
# a2enmod cgi
# a2enmod ssl
# a2enmod shib2
# a2ensite default-ssl
# mkdir /etc/certs
# cd /etc/certs
# openssl genrsa -des3 -out sp.key 2048
# openssl rsa -in sp.key -out sp.key.insecure
# mv sp.key.insecure sp.key
# openssl req -new -key sp.key -out sp.csr
# openssl x509 -req -days 365 -in sp.csr -signkey sp.key -out sp.crt
# shib-metagen -c /etc/certs/sp.crt -h sp.gluu.info > /etc/shibboleth/SP-metadata.xmlThen, start the apache2 and shibd services.
Download SP-metadata.xml to your machine. You will need this file later when you create the Trust Relationship in the Gluu Server.
# mkdir /var/www/protected
# touch /var/www/protected/printHeaders.py
# chmod ugo+x /var/www/protected/printHeaders.pyEdit printHeaders.py, and add this simple script. It will show you the HTTP headers:
#!/usr/bin/python

import os

d = os.environ
k = d.keys()
k.sort()

print "Content-type: text/html\n\n"

print "<HTML><HEAD><TITLE>Print Env Variables</TITLE></Head><BODY>"
print "<h1>Environment Variables</H1>"
for item in k:
	print "<p><B>%s</B>: %s </p>" % (item, d[item])
print "</BODY></HTML>"Edit the default site at /etc/apache2/sites-available/default-ssl.conf, and add this part:
ScriptAlias /protected/ /var/www/protected/
<Directory /var/www/protected>
	AddHandler cgi-script .py
	Options +ExecCGI
	SSLOptions +StdEnvVars
	AuthType shibboleth
	ShibRequestSetting requireSession 1
	Require valid-user
</Directory>#Test
Test the CGI script at https://minnow.gluu.info/protected/printHeaders.py.
Enter both the valid username and password (like admin and your
initial admin password). The output will contain something like this:
**Environment Variables**

AUTH_TYPE: shibboleth
CONTEXT_DOCUMENT_ROOT: /var/www/protected/
CONTEXT_PREFIX: /protected/
DOCUMENT_ROOT: /var/www/html
GATEWAY_INTERFACE: CGI/1.1
HTTPS: on
HTTP_ACCEPT: text/html,application/xhtml+xml,application/xml;q=0.9,image/webp,*/*;q=0.8
HTTP_ACCEPT_ENCODING: gzip, deflate, sdch
HTTP_ACCEPT_LANGUAGE: en-US,en;q=0.8
HTTP_CONNECTION: keep-alive
HTTP_COOKIE: _shibsession_64656661756c7468747470733a2f2f6d696e6e6f772e676c75752e696e666f2f73686962626f6c657468=_6aab7e287072bcc123989d8bf5f0ed5e
HTTP_DNT: 1
HTTP_HOST: minnow.gluu.info
HTTP_UPGRADE_INSECURE_REQUESTS: 1
HTTP_USER_AGENT: Mozilla/5.0 (Windows NT 6.1; WOW64) AppleWebKit/537.36 (KHTML, like Gecko) Chrome/45.0.2454.85 Safari/537.36
PATH: /usr/local/sbin:/usr/local/bin:/usr/sbin:/usr/bin:/sbin:/bin
QUERY_STRING:
REMOTE_ADDR: 192.168.88.1
REMOTE_PORT: 52140
REMOTE_USER: mike
REQUEST_METHOD: GET
REQUEST_SCHEME: https
REQUEST_URI: /protected/printHeaders.py
SCRIPT_FILENAME: /var/www/protected/printHeaders.py
SCRIPT_NAME: /protected/printHeaders.py
SERVER_ADDR: 192.168.88.133
SERVER_ADMIN: webmaster@localhost
SERVER_NAME: minnow.gluu.info
SERVER_PORT: 443
SERVER_PROTOCOL: HTTP/1.1
SERVER_SIGNATURE:
Apache/2.4.7 (Ubuntu) Server at minnow.gluu.info Port 443
SERVER_SOFTWARE: Apache/2.4.7 (Ubuntu)
SHIB_Shib_Application_ID: default
SHIB_Shib_Authentication_Instant: 2015-09-17T01:13:23.278Z
SHIB_Shib_Authentication_Method: urn:oasis:names:tc:SAML:2.0:ac:classes:PasswordProtectedTransport
SHIB_Shib_AuthnContext_Class: urn:oasis:names:tc:SAML:2.0:ac:classes:PasswordProtectedTransport
SHIB_Shib_Identity_Provider: https://brookie.gluu.info/idp/shibboleth
SHIB_Shib_Session_ID: _6aab7e287072bcc123989d8bf5f0ed5e
SHIB_Shib_Session_Index: _40e4b17668a13e0d406e41cc9f6bf116
SHIB_displayName: Mike Schwartz
SHIB_givenName: Michael
SHIB_mail: mike@gmail.com
SHIB_sn: Schwartz
SHIB_uid: mike
SSL_CIPHER: ECDHE-RSA-AES128-GCM-SHA256
SSL_CIPHER_ALGKEYSIZE: 128
SSL_CIPHER_EXPORT: false
SSL_CIPHER_USEKEYSIZE: 128
SSL_CLIENT_VERIFY: NONE
SSL_COMPRESS_METHOD: NULL
SSL_PROTOCOL: TLSv1.2
SSL_SECURE_RENEG: true
SSL_SERVER_A_KEY: rsaEncryption
SSL_SERVER_A_SIG: sha256WithRSAEncryption
SSL_SERVER_I_DN: emailAddress=mike@gluu.org,CN=minnow.gluu.info,O=Gluu,L=Austin,ST=TX,C=US
SSL_SERVER_I_DN_C: US
SSL_SERVER_I_DN_CN: minnow.gluu.info
SSL_SERVER_I_DN_Email: mike@gmail.com
SSL_SERVER_I_DN_L: Austin
SSL_SERVER_I_DN_O: Gluu
SSL_SERVER_I_DN_ST: TX
SSL_SERVER_M_SERIAL: 9F5E4F891590BB53
SSL_SERVER_M_VERSION: 1
SSL_SERVER_S_DN: emailAddress=mike@gluu.org,CN=minnow.gluu.info,O=Gluu,L=Austin,ST=TX,C=US
SSL_SERVER_S_DN_C: US
SSL_SERVER_S_DN_CN: minnow.gluu.info
SSL_SERVER_S_DN_Email: mike@gmail.com
SSL_SERVER_S_DN_L: Austin
SSL_SERVER_S_DN_O: Gluu
SSL_SERVER_S_DN_ST: TX
SSL_SERVER_V_END: Sep 10 18:46:32 2016 GMT
SSL_SERVER_V_START: Sep 11 18:46:32 2015 GMT
SSL_SESSION_RESUMED: Initial
SSL_TLS_SNI: minnow.gluu.info
SSL_VERSION_INTERFACE: mod_ssl/2.4.7
SSL_VERSION_LIBRARY: OpenSSL/1.0.1f#Troubleshooting
Make sure you update your hosts file on the Gluu Server, Apache server, and your workstation--this won't work with IP addresses, only.
Check the Shibboleth log file
/opt/idp/logs/idp-process.logif you don't see the headers or REMOTE_USER environment variables. Also, restart theidentityservice to make sure the new Shibboleth IDP xml files were loaded.Clear the cookies in your web browser for both the Apache site, and the Gluu Server if you are logging in and logging out with lots of server restarts.
If you do test in local environment and using proxies you may need to bypass proxy address checking by setting checkAddress="false" in shibboleth2.xml configuration
#IIS SAML Configuration
#IIS Configuration in Windows 7
Start>Control Panel>Programs>Turn Windows features on or offSelect (i) IIS (ii) Web Management Tools (iii) II6 Management Compatibility (iv) IIS Management Console (v) IIS Management Scripts and Tools (vi) IIS Management Service
Select (i) World Wide Web Services (ii) CGI (iii) ISAPI Filters (iv) ISAPI Extensions --> Press OK.
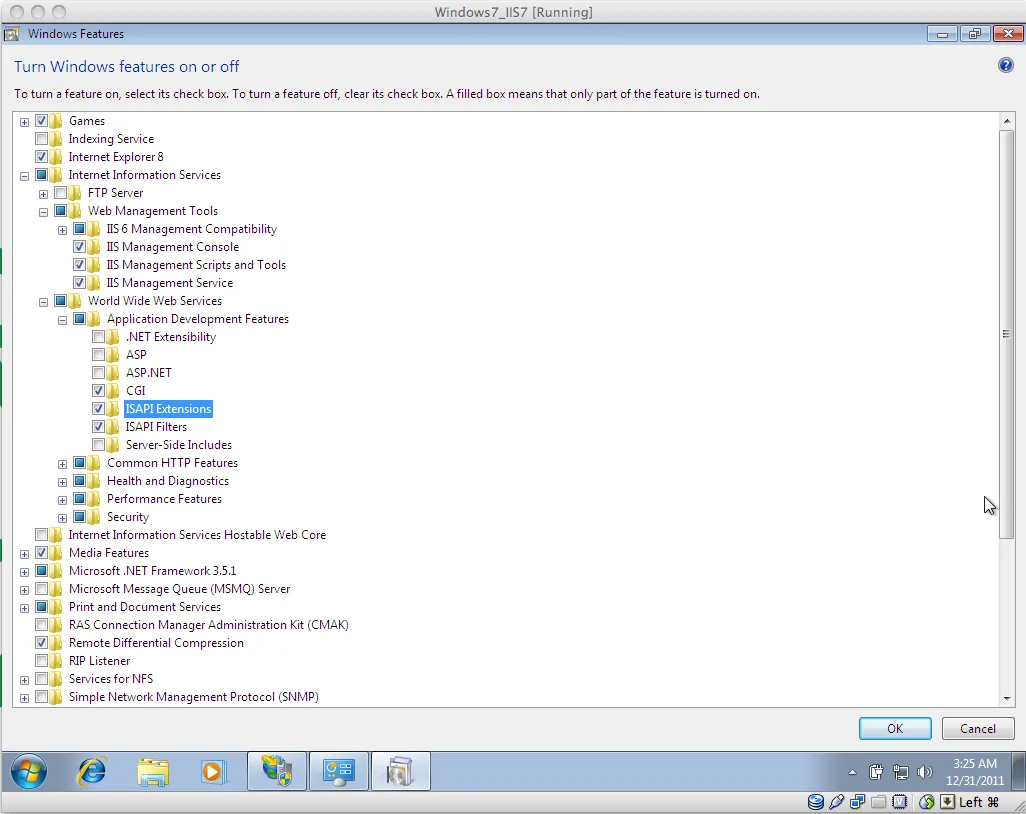
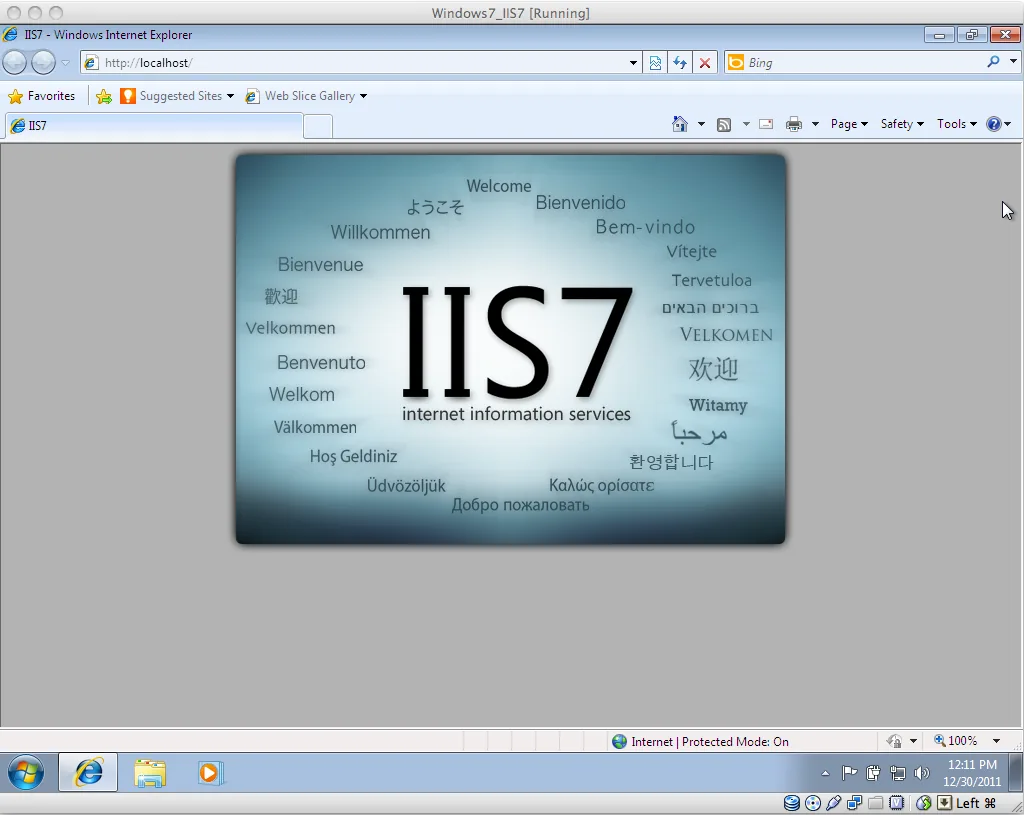
- Test IIS to see if it is installed in your system with "127.0.0.1" in the web browser. For our test case, we used IIS7.
#ISAPI Filter Configuration
Open IIS Manager (Start --> Administrative Tools --> Internet Information Service/IIS Manager)
Double click on "ISAPI and CGI Restrictions"
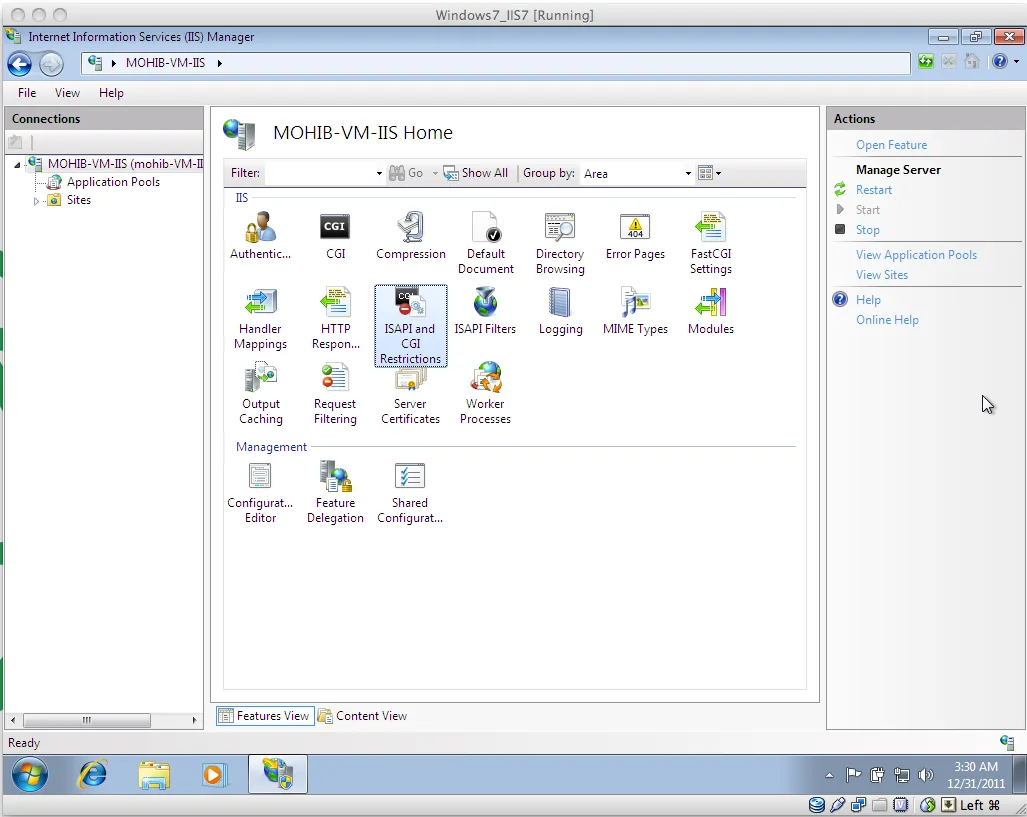
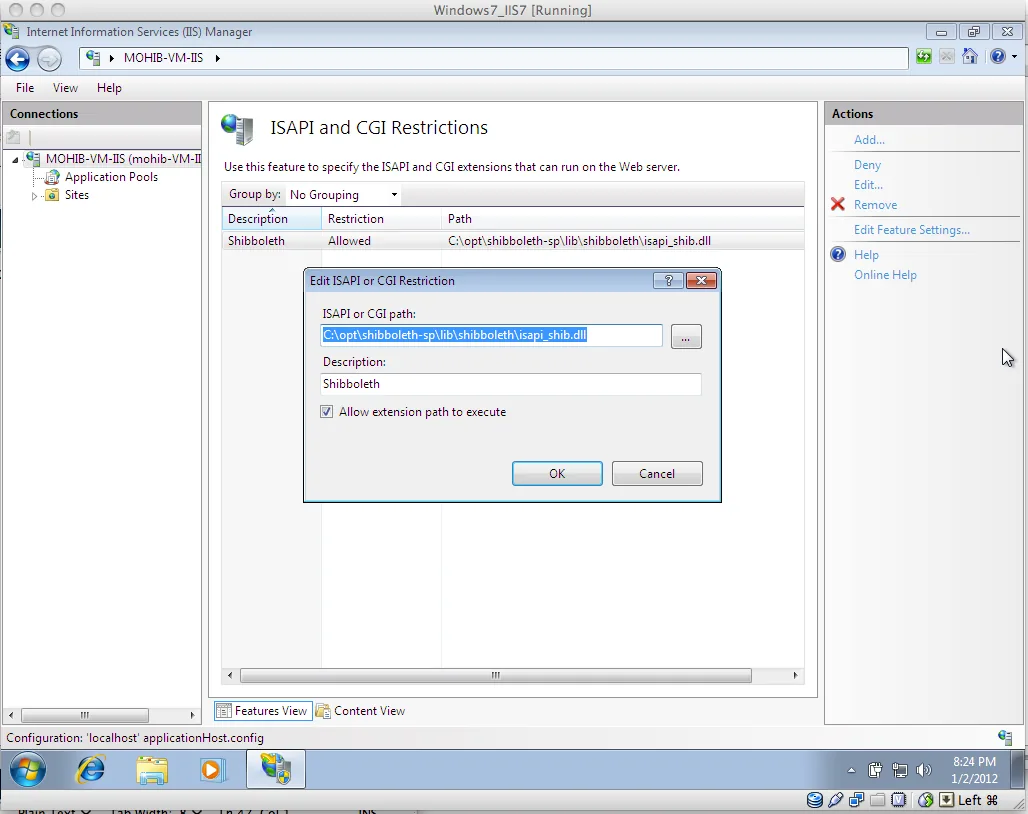
- Add a new Filter
a. Click Actions --> Add (upper right corner)
b. Select "\opt\shibboleth-sp\lib\shibboleth\isapi_shib.dll"
c. Description: "Shibboleth"
d. Click "Allow" (from the right hand side)
e. Back to IIS Manager --> ISAPI Filters
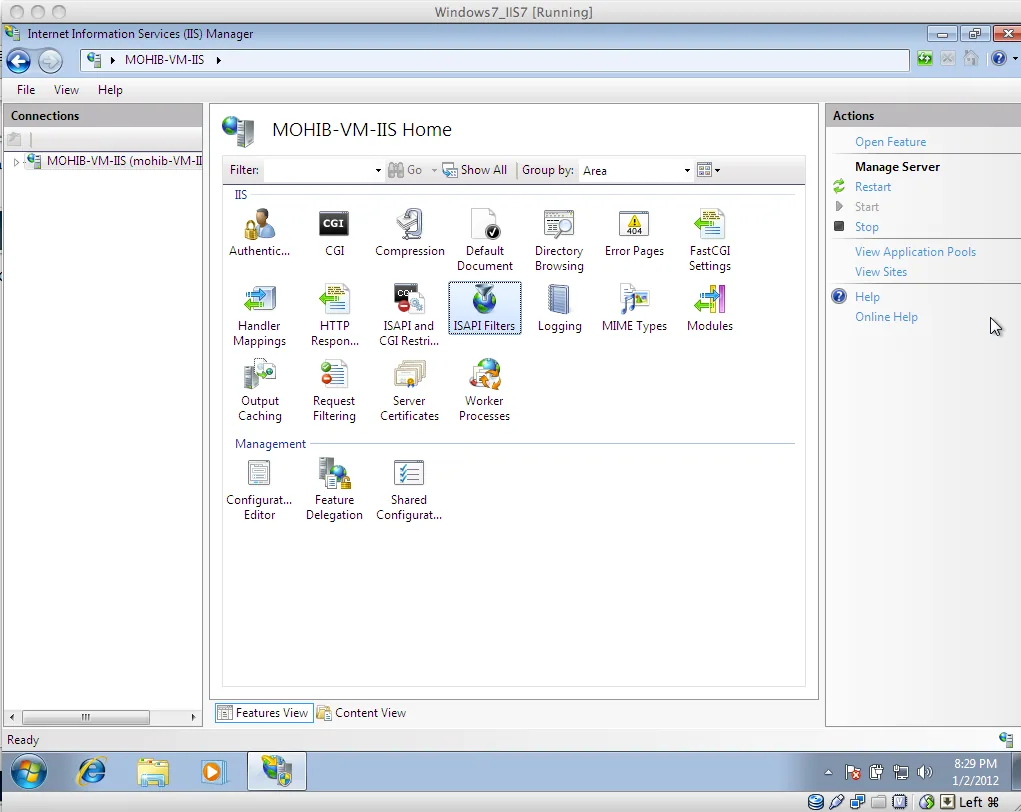
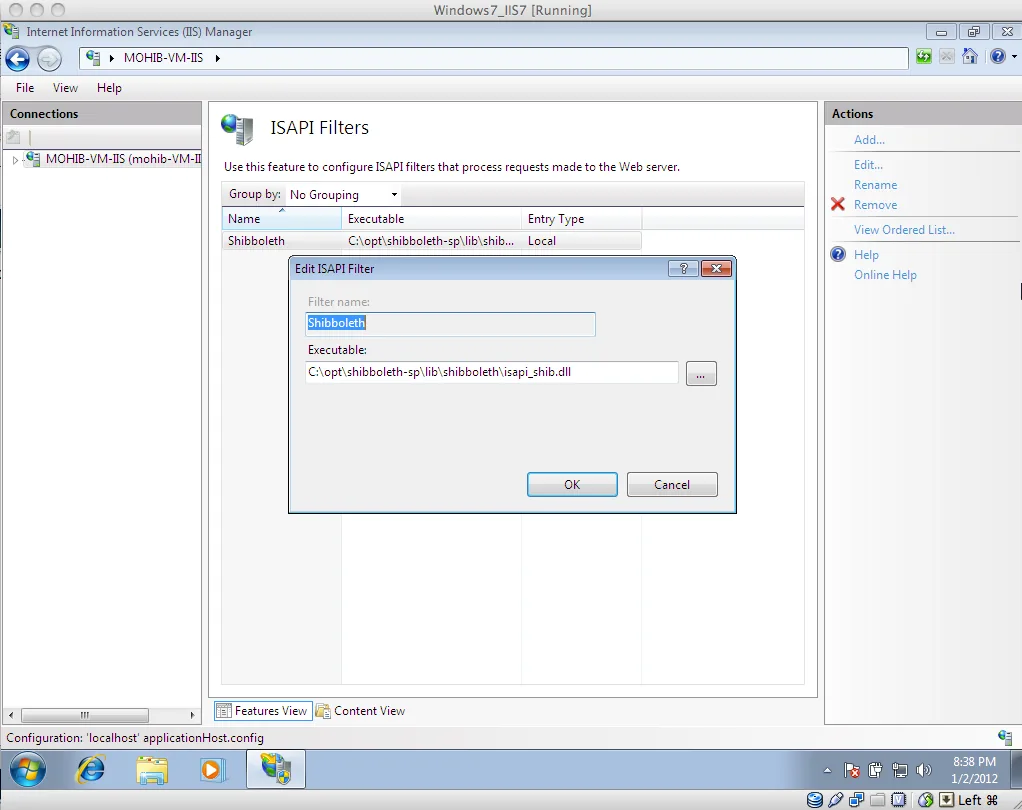
Click "Add" (upper right corner)
Filter Name: Shibboleth
Executable: "\opt\shibboleth-sp\lib\shibboleth\isapi_shib.dll"
f. SSO file extension mapping
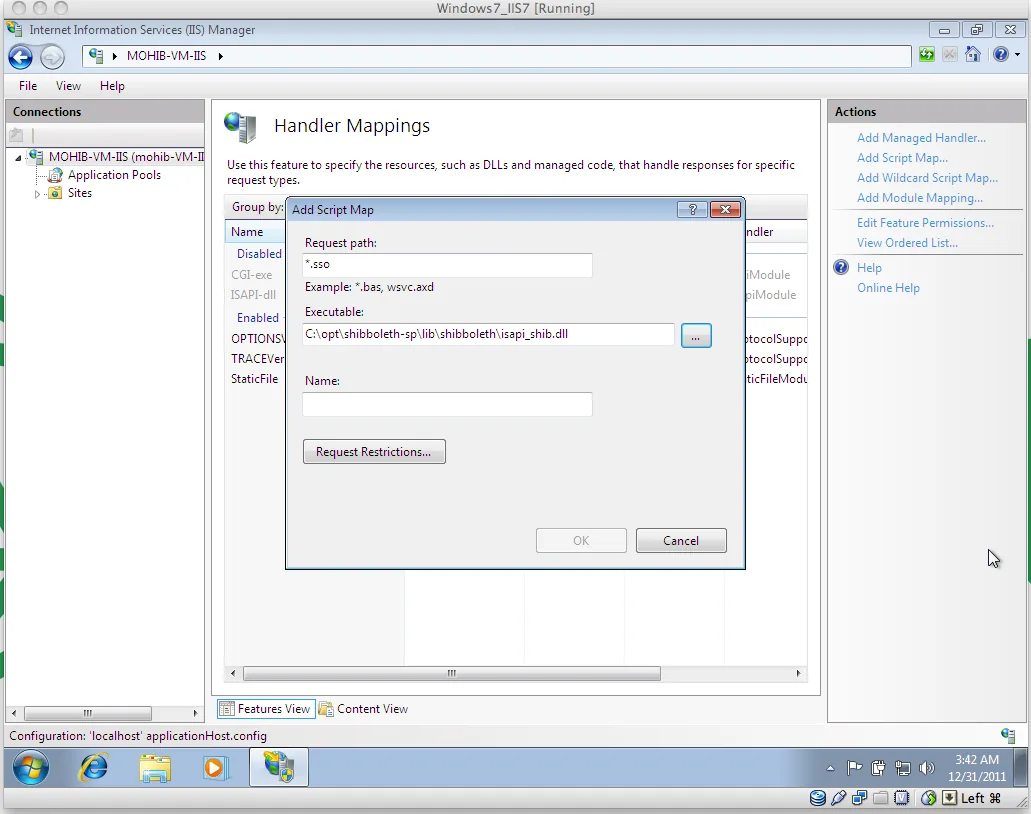
- Click on "Handler Mapping" from main page
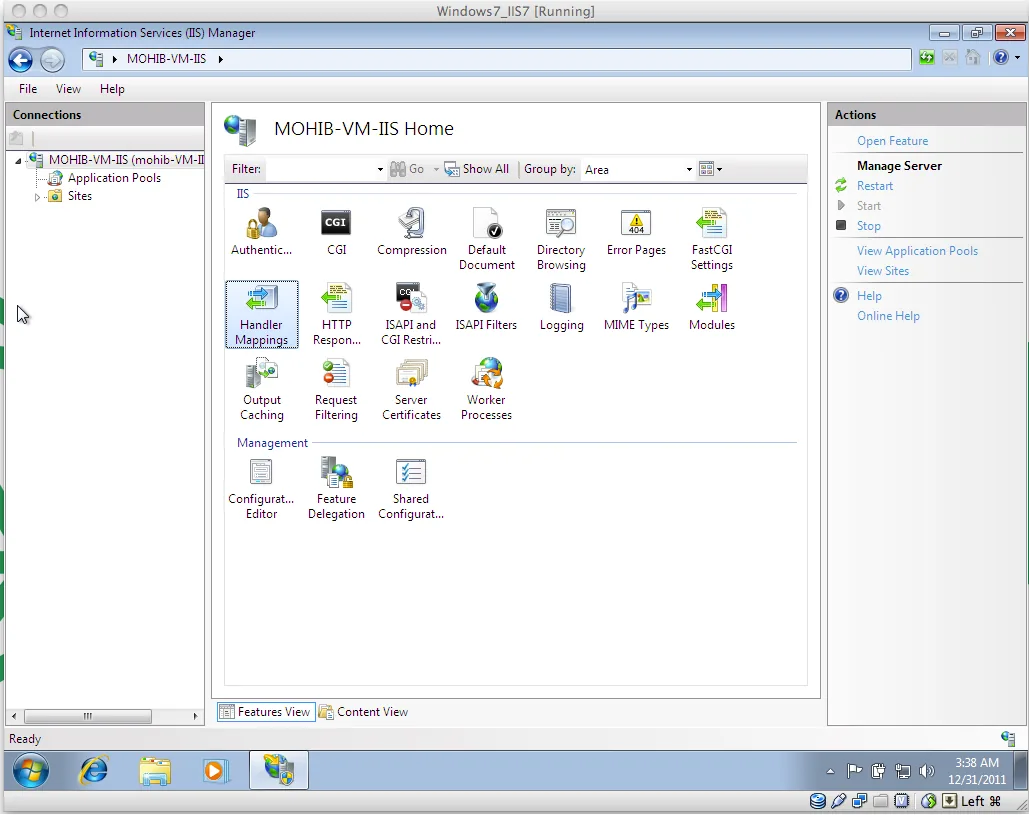
2. Click "Add Script Map" from Action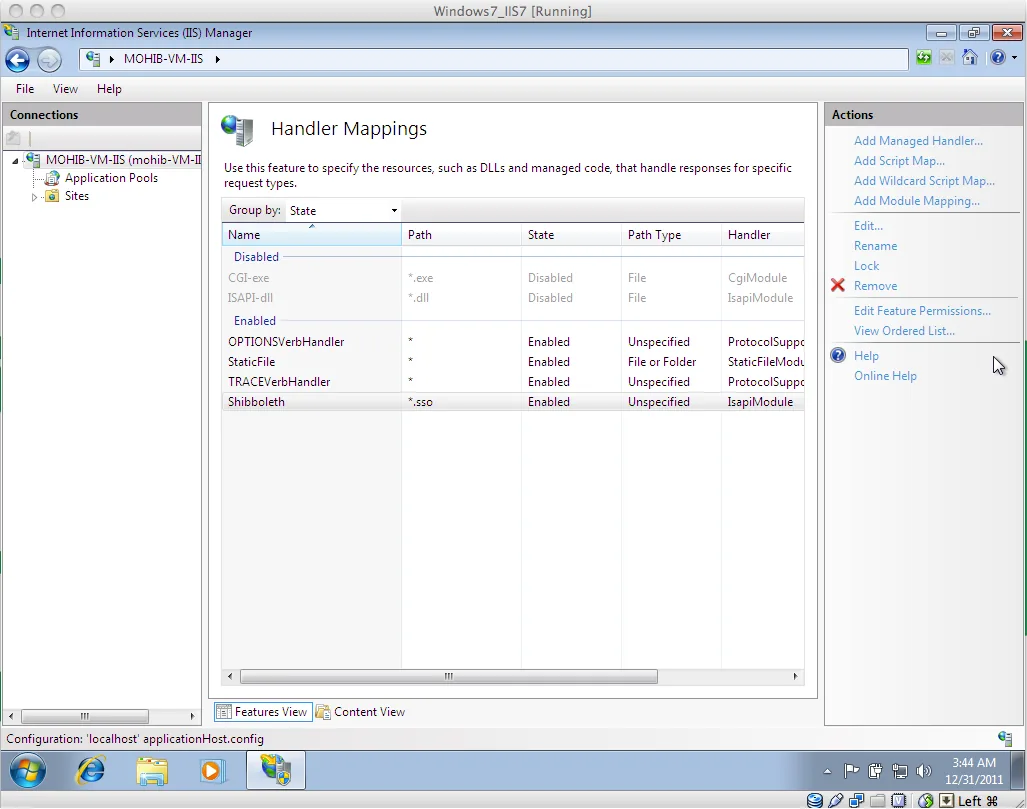
Request Path :".sso"
Executable should be pointed to "isapi_shib.dll"
g. Restart IIS
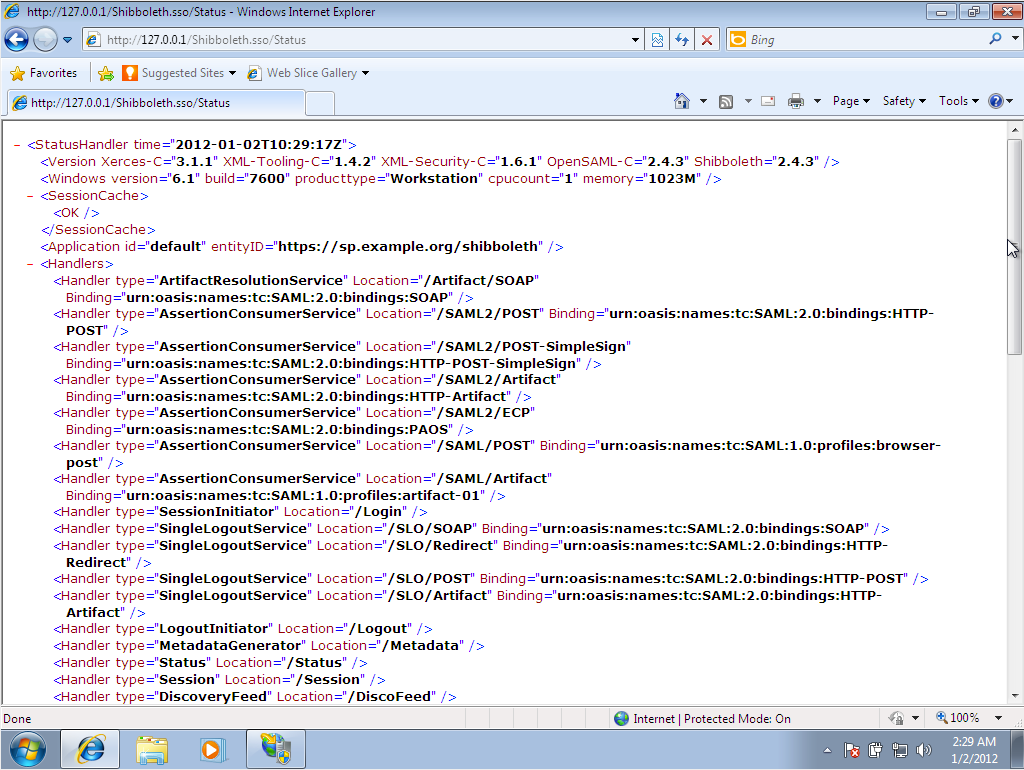
h. Check Status
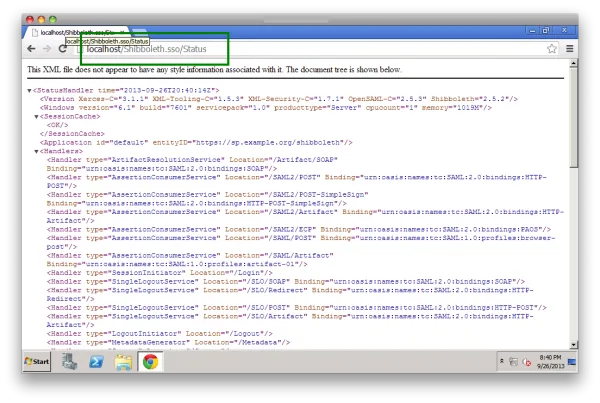
Check Status by typing in "http://127.0.0.1/Shibboleth.sso/Status" in the web browser. If it displays an XML document, then the Shibboleth SP Installation in Windows IIS7 in complete.
#Shibboleth SP Setup in Windows 2008 R2 with IIS7
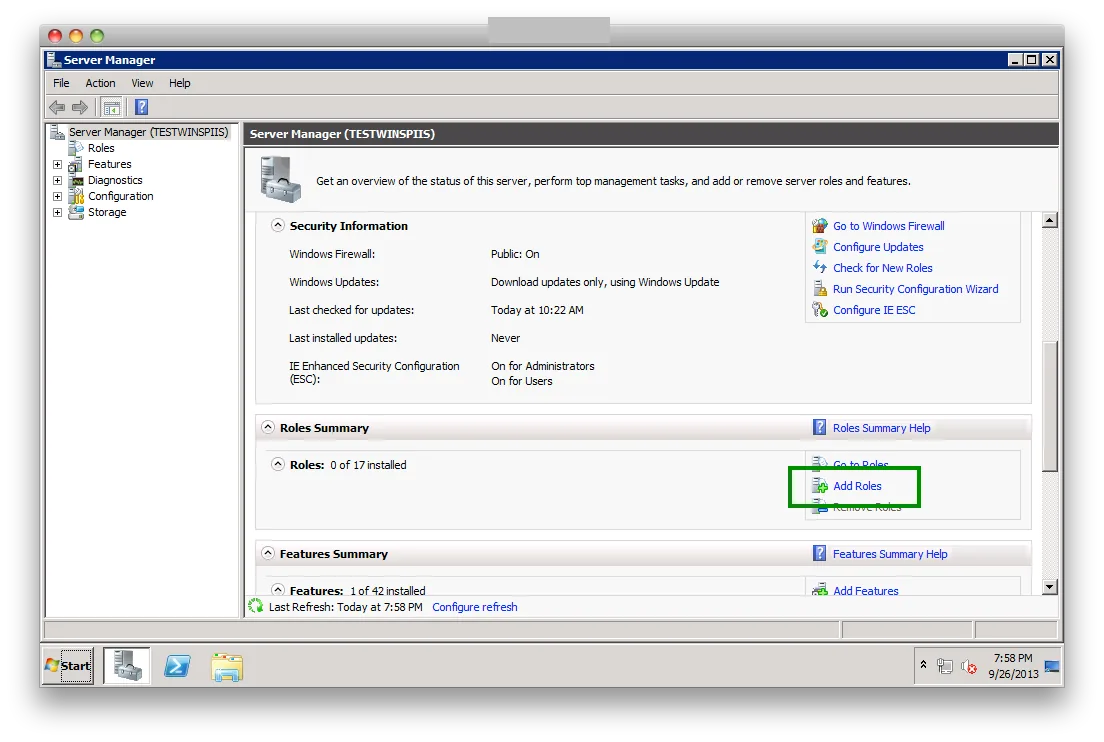
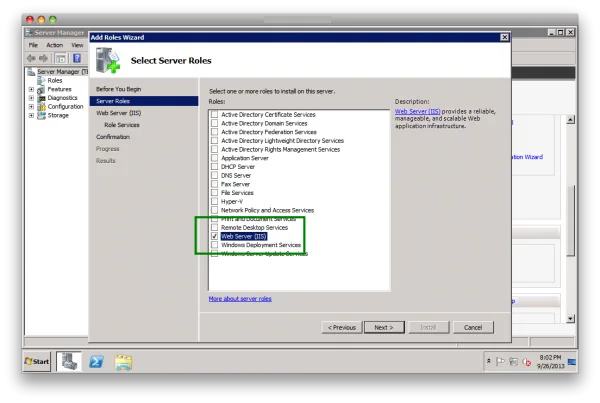
Open up "Server Manager", scroll down and click on "Add Roles".
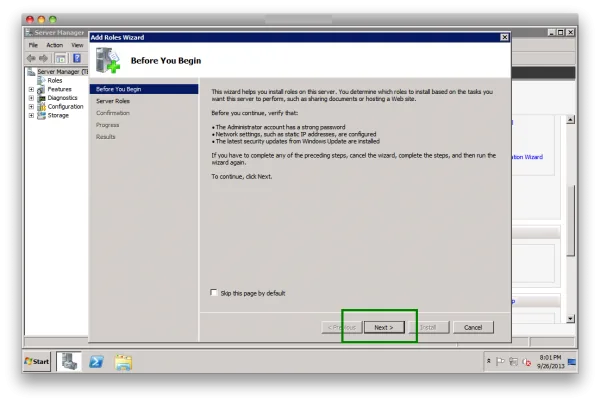
Hit "Next"
Select "Web Server (IIS)", hit "Next"
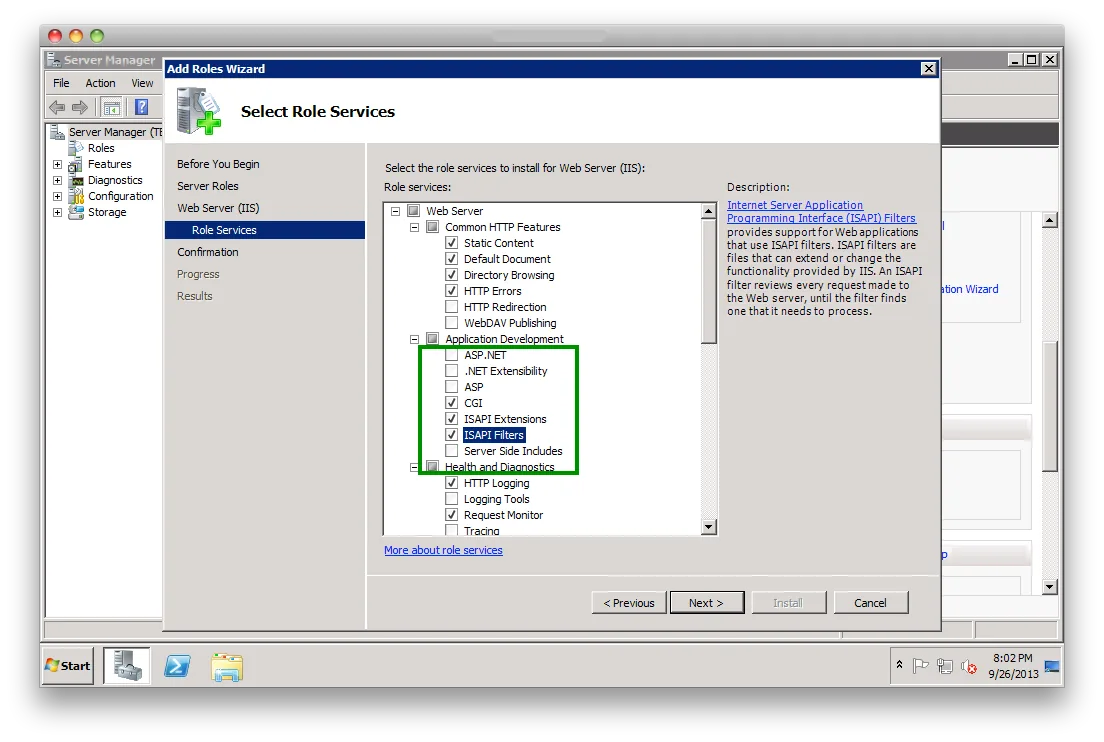
Select
CGI
ISAPI Extensions
ISAPI Filters
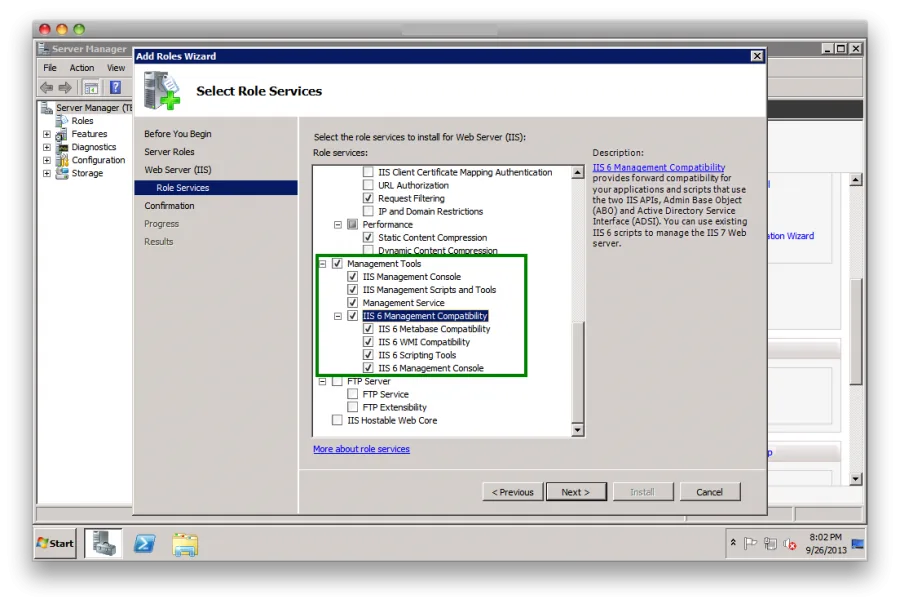
Management Tools
IIS Management Console
IIS Management Scripts and Tools
Management Service
All IIS6 Management Compatibility
Hit "Next", for the confirmation, check the list of plugins.
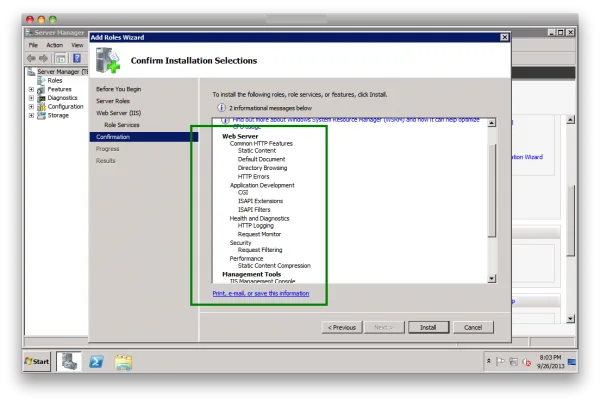
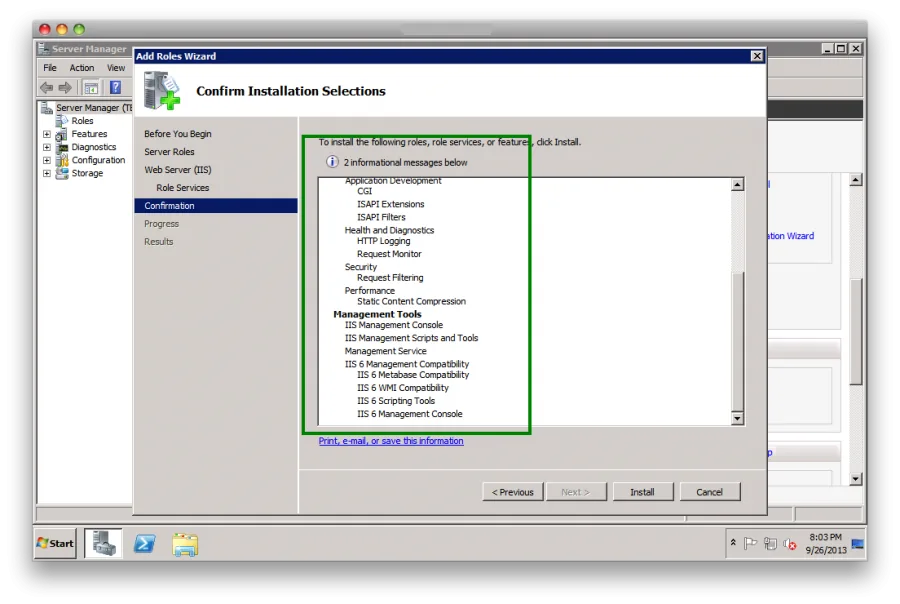
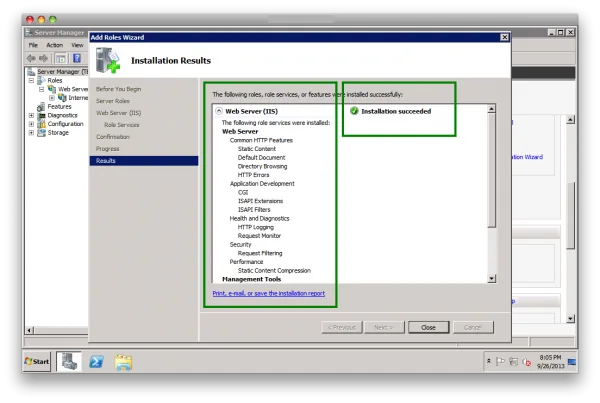
Hit "Install" and Windows 2008 will complete the installation. A confirmation window shall appear which resembles the screenshot below.
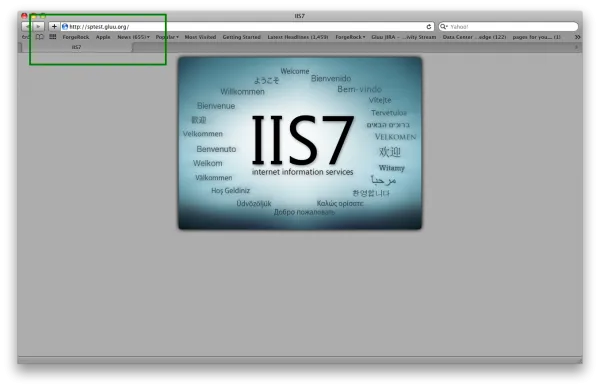
7.Test IIS7 setup from the Internet.
#Shibboleth SP 2.5.x Setup
Down the Shibboleth SP 2.5.x
Start the installation, keep the default path, Select "Install ISAPI modules into IIS", IIS Script Extension must be ".sso" and Hit "Next".
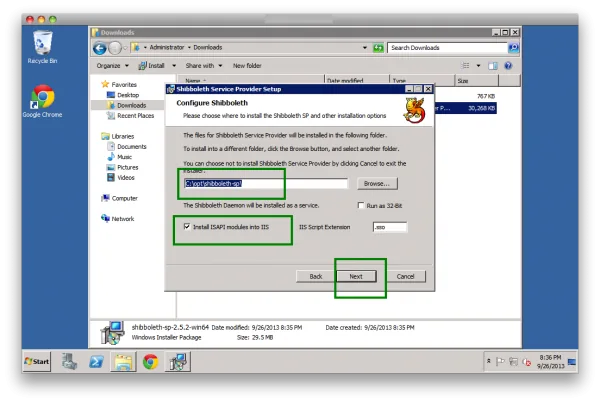
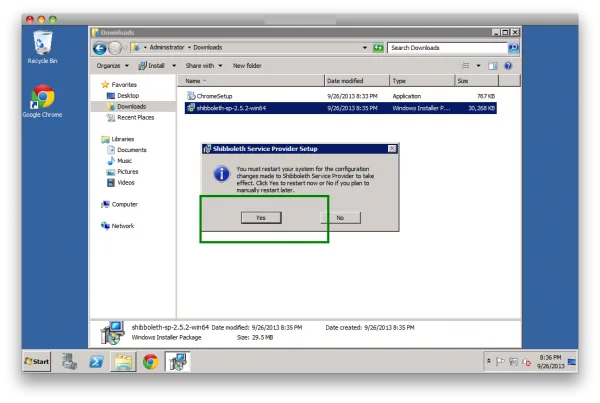
After the completion of the installation, the system will ask to reboot the system; hit "Yes".
Test the Shibboleth SP installation from the SP VM using the URL "localhost/Shibboleth.sso/Status" in the address bar of the Web Browser.
#Trust Relationship in IdP
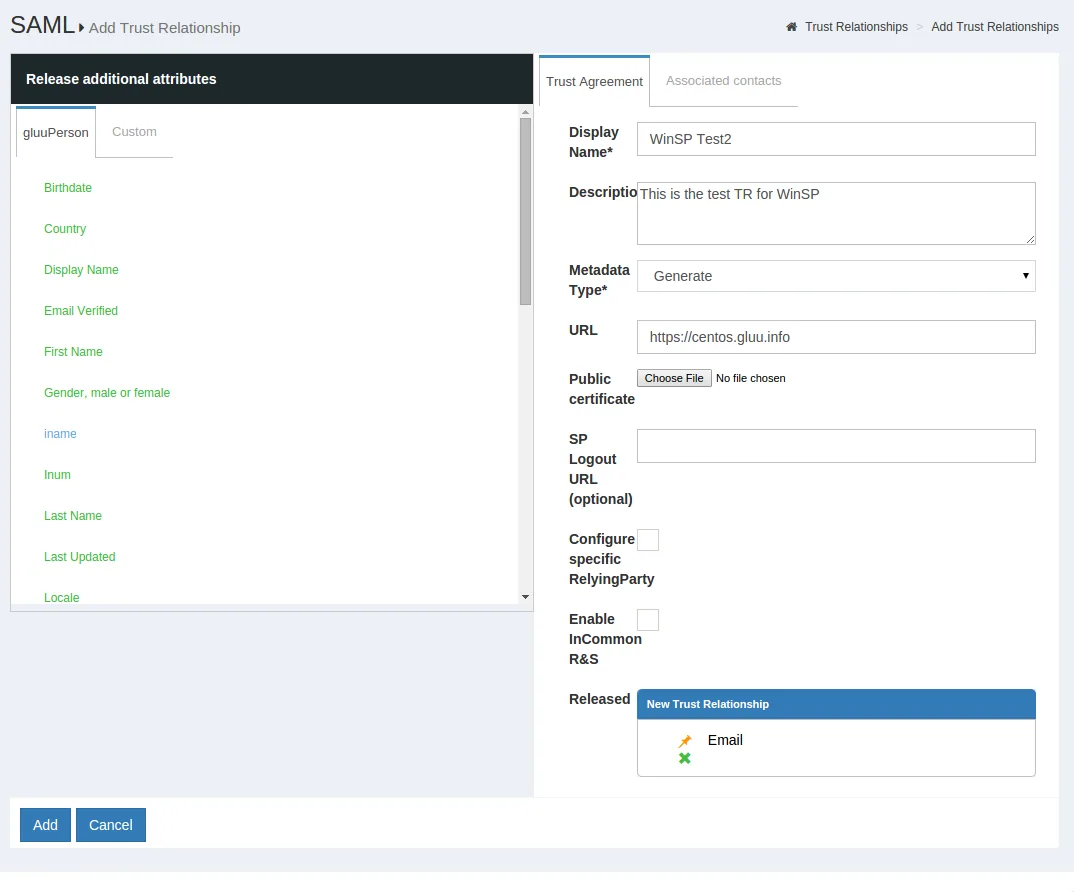
Create a Trust Relationship for the new SP in the IdP. It is necessary to upload the Public Certificate of the new SP in the IdP. Please note that the CN of the public certificate MUST BE the same as Hostname of the SP. Hit "Add".
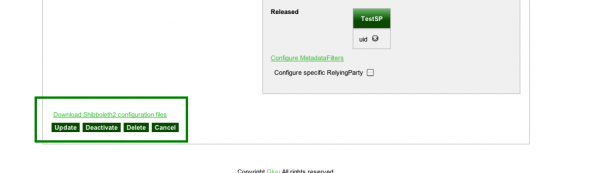
Download the IdP generated configuration files for Shib SP modification.
#SP Configuration
The files from the IdP must be placed in the SP Configuration.
Before placing them inside the SP Configuration please check
The "spcert.crt" file has the CN same as the SP hostname.
The "spcert.crt" and "spkey.key" has the same md5sum value.
The IdP-metadata is perfectly placed inside the SP Configuration.
The downloaded "shibboleth2.xml" file has values resembling the file content below.
For testing purpose, we are going to protect a directory named "secure" with the IdP. Create a folder/directory in the IIS Root Directory and restart Shibd and IIS.
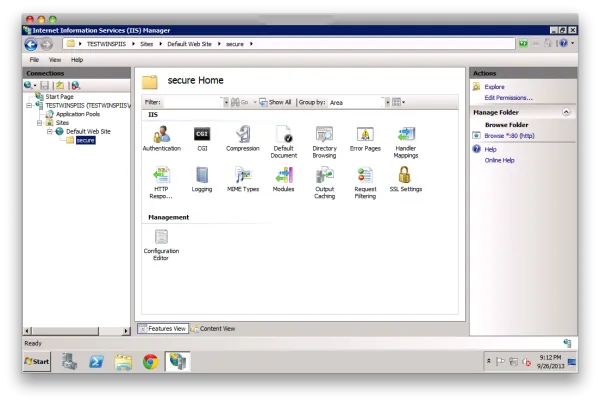
#SSO Testing
Place the following URL in the web browser: "https://SP_Name/secure"
It will redirect the user to the IdP for authentication.
After the authentication is complete, the user will be shown the protected page. For this case, the page is the IIS7 index page.
<OutOfProcess logger="shibd.logger"> `</OutOfProcess>`<InProcess logger="native.logger"> <ISAPI normalizeRequest="true" safeHeaderNames="true"> <Site id="1" name="SP_HOSTNAME_WITHOUT_HTTP_OR_HTTPS"/> `</ISAPI>` `</InProcess>`<TCPListener address="127.0.0.1" port="1600" acl="127.0.0.1"/> <!-- <UnixListener address="shibd.sock"/> --><StorageService type="Memory" id="mem" cleanupInterval="900"/> <SessionCache type="StorageService" StorageService="mem" cacheTimeout="3600" inprocTimeout="900" cleanupInterval="900"/> <ReplayCache StorageService="mem"/> <ArtifactMap artifactTTL="180"/><RequestMapper type="Native"> <RequestMap applicationId="default"> <Host name="SP_HOSTNAME_WITHOUT_HTTP_OR_HTTPS"> <Path name="secure" authType="shibboleth" requireSession="true"/> `</Host>` `</RequestMap>` `</RequestMapper>`</SessionInitiator><md:AssertionConsumerService Location="/SAML2/POST" index="1" Binding="urn:oasis:names:tc:SAML:2.0:bindings:HTTP-POST"/> <md:AssertionConsumerService Location="/SAML2/POST-SimpleSign" index="2" Binding="urn:oasis:names:tc:SAML:2.0:bindings:HTTP-POST-SimpleSign"/> <md:AssertionConsumerService Location="/SAML2/Artifact" index="3" Binding="urn:oasis:names:tc:SAML:2.0:bindings:HTTP-Artifact"/> <md:AssertionConsumerService Location="/SAML2/ECP" index="4" Binding="urn:oasis:names:tc:SAML:2.0:bindings:PAOS"/> <md:AssertionConsumerService Location="/SAML/POST" index="5" Binding="urn:oasis:names:tc:SAML:1.0:profiles:browser-post"/> <md:AssertionConsumerService Location="/SAML/Artifact" index="6" Binding="urn:oasis:names:tc:SAML:1.0:profiles:artifact-01"/></LogoutInitiator><md:SingleLogoutService Location="/SLO/SOAP" Binding="urn:oasis:names:tc:SAML:2.0:bindings:SOAP"/> <md:SingleLogoutService Location="/SLO/Redirect" conf:template="bindingTemplate.html" Binding="urn:oasis:names:tc:SAML:2.0:bindings:HTTP-Redirect"/> <md:SingleLogoutService Location="/SLO/POST" conf:template="bindingTemplate.html" Binding="urn:oasis:names:tc:SAML:2.0:bindings:HTTP-POST"/> <md:SingleLogoutService Location="/SLO/Artifact" conf:template="bindingTemplate.html" Binding="urn:oasis:names:tc:SAML:2.0:bindings:HTTP-Artifact"/> <md:ManageNameIDService Location="/NIM/SOAP" Binding="urn:oasis:names:tc:SAML:2.0:bindings:SOAP"/> <md:ManageNameIDService Location="/NIM/Redirect" conf:template="bindingTemplate.html" Binding="urn:oasis:names:tc:SAML:2.0:bindings:HTTP-Redirect"/> <md:ManageNameIDService Location="/NIM/POST" conf:template="bindingTemplate.html" Binding="urn:oasis:names:tc:SAML:2.0:bindings:HTTP-POST"/> <md:ManageNameIDService Location="/NIM/Artifact" conf:template="bindingTemplate.html" Binding="urn:oasis:names:tc:SAML:2.0:bindings:HTTP-Artifact"/> <md:ArtifactResolutionService Location="/Artifact/SOAP" index="1" Binding="urn:oasis:names:tc:SAML:2.0:bindings:SOAP"/></Sessions></MetadataProvider></TrustEngine></ApplicationDefaults><SecurityPolicies></PolicyRule></Policy></SecurityPolicies></SPConfig>
#Configuring Apache Shibboleth SP in Windows
#Shibboleth SP Installation
Download the MSI of Shibboleth-SP from shibboleth Repository
Start the installation
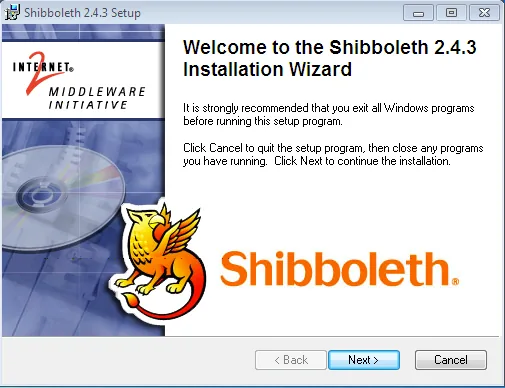
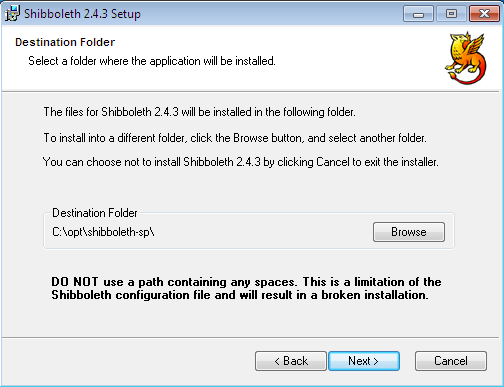
Define the destination folder (by default it is: C:\opt\shibboleth-sp).
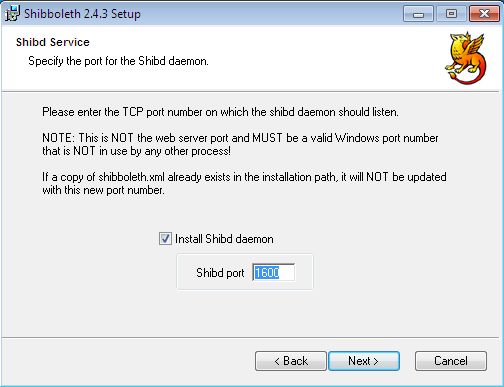
Select the Shibboleth Daemon port. By default it is 1600, and you may keep it for testing it, locally.
Now, there are two options. According to your target you will have to choose one.
Option 1: If you install Shibboleth for the Apache Web Server
Option 2: If you install Shibboleth for Microsoft IIS Web Server
a. For the Microsoft IIS Web Server, CHECK “Install ISAPI filter and configure IIS”. Remember to put the file Extension ”.sso” -- this is necessary.
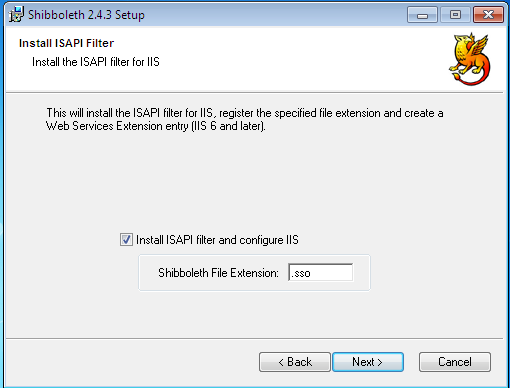
 b. For the Apache Web Server, UNCHECK "Install ISAPI filter and
 configure IIS".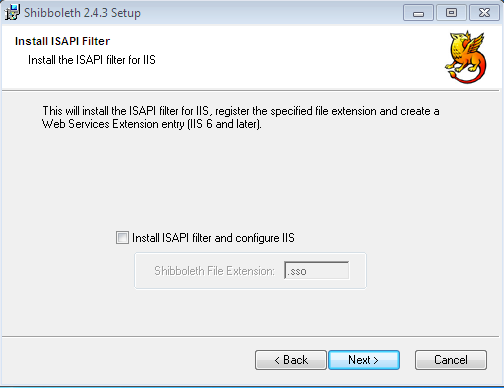
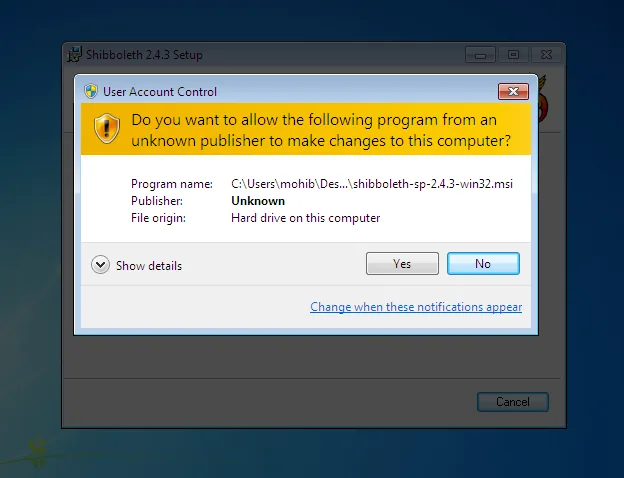
- UAC of Windows 7 may block this program, so allow it.
#Apache Configuration
Download the Apache HTTP server MSI Installer with OpenSSL: http://httpd.apache.org/download.cgi#apache22 .
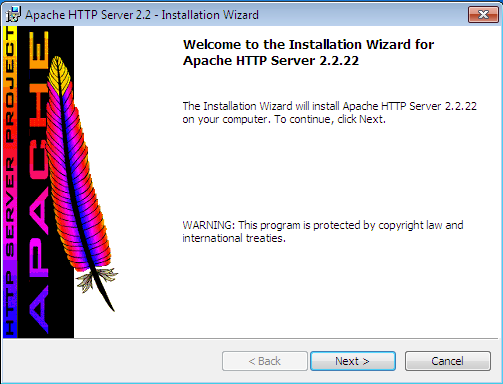
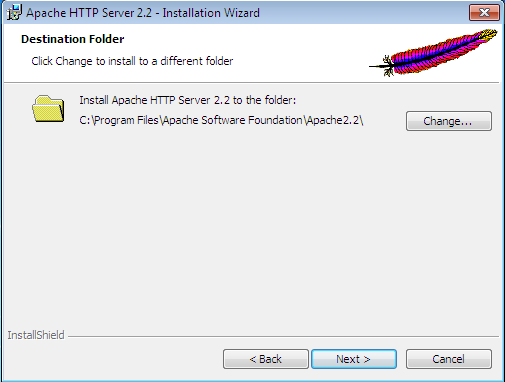
Select the destination. You can keep the default destination for your local testing. But, make sure that there is no other “Apache Software Foundation” directory in your current “C:\Program Files\” location.
Provide the Server Information. For local testing you can use
localdomain/localhost.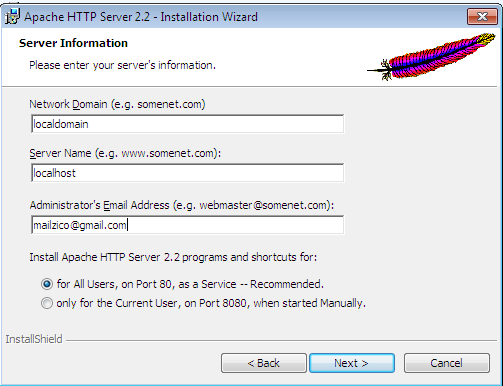
Test whether the Apache web server is installed or not. Open your web browser and use
localhost. If you see something like the image shown below--you are done!
#Shibboleth and Apache Configuration
Change the permission of the Apache installation directory, and provide “write” access.
httpd.confconfigurationChange “ServerName localhost:80” (for your local testing)
Copy
apache22.conffrom the Shibboleth directory to~/apache/conf/extra/
Shibboleth2.xmlconfigurationChange: Host name=“localhost” (for local testing)
Change: entityID=“https://localhost/shibboleth” (for local testing)
Change: ApplicationOverride id=“admin” entityID=“https://localhost/shibboleth/”
Reboot your windows machine.
#Test SP Installation with Windows and Apache
- Open the web browser, and provide the following address:
localhost/Shibboleth.sso/Status - If you can see some XML page like the one shown below--you are done with your SP installation in Windows through Apache2.