Using SAML To Get SSO With Google Apps#
Attention
The official support end-of-life (EOL) date for Gluu Server 2.4.4 is December 31, 2018. Starting January 1, 2019, no further security updates or bug-fixes will be provided for Gluu Server 2.X. We strongly recommend upgrading to the newest version.
Google Apps will work as a Service Provider (SP) and we need to "introduce" Gluu Server with Google Apps as Gluu Server so that it can work as an Identity Provider (IDP).
NOTE: It is highly recommended to use Google staging apps setup before Google production migration. If you have any question or confusion, please feel free to let us know.
We need to configure Google Apps and Gluu Server so that both parties can talk to each other.
Configuring Google Apps With Google Dashboard:#
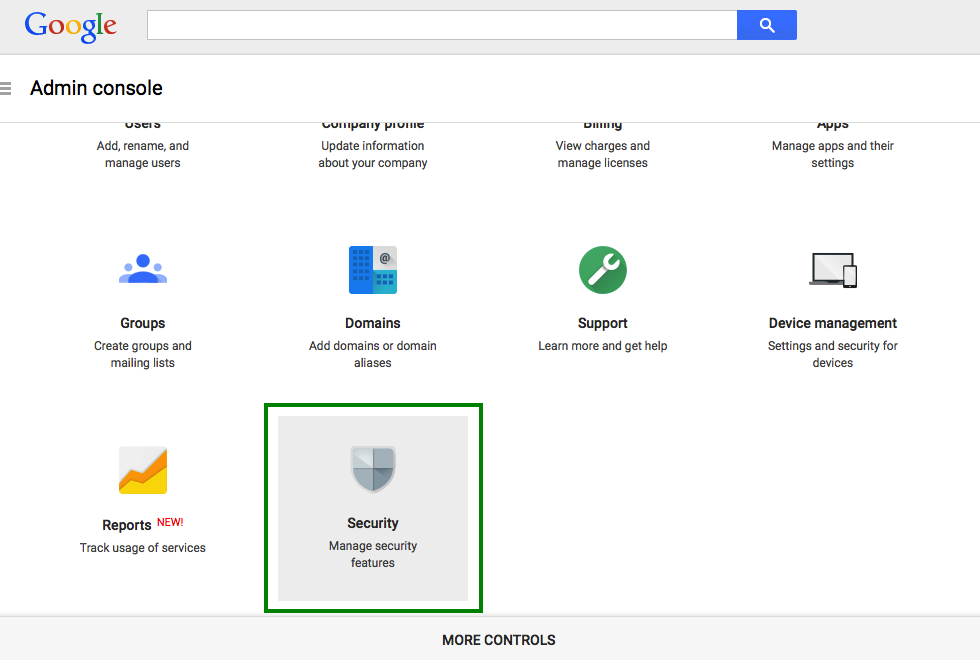
- Login to dashboard.
-
From the list of options choose the "Security" tab.
-
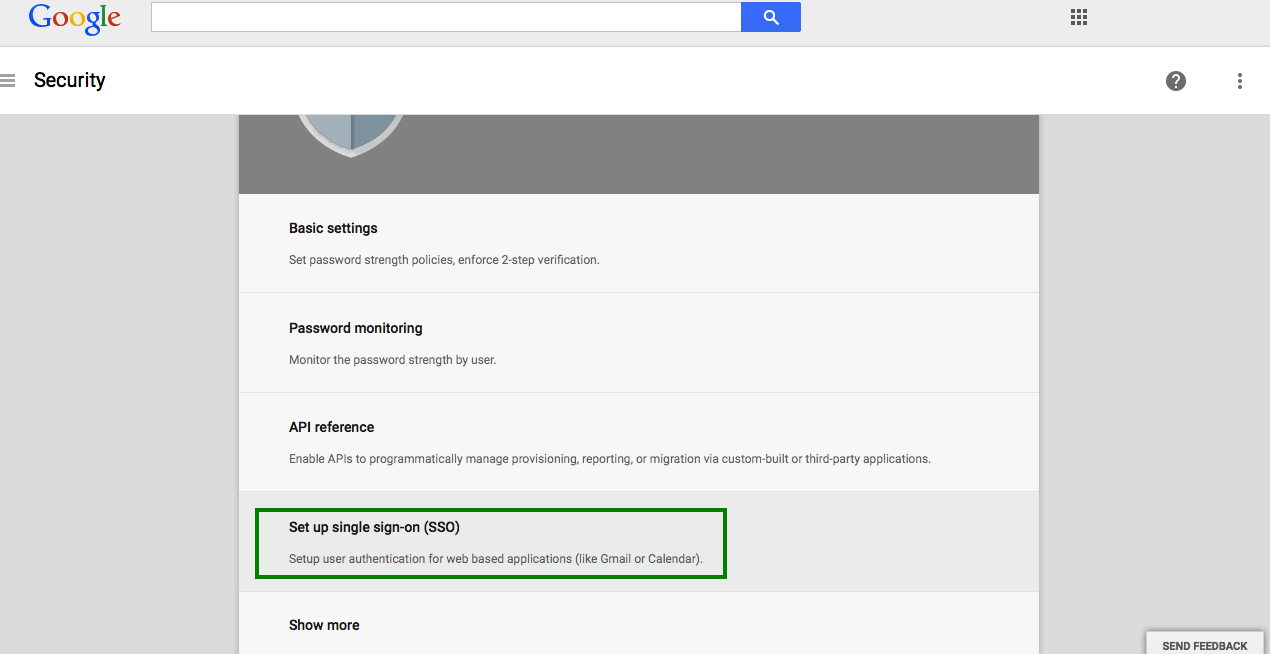
A new page will open. Select
Set up single sign-on(SSO)from the options.
- Finally, the Single Sign-On setting page will appear.
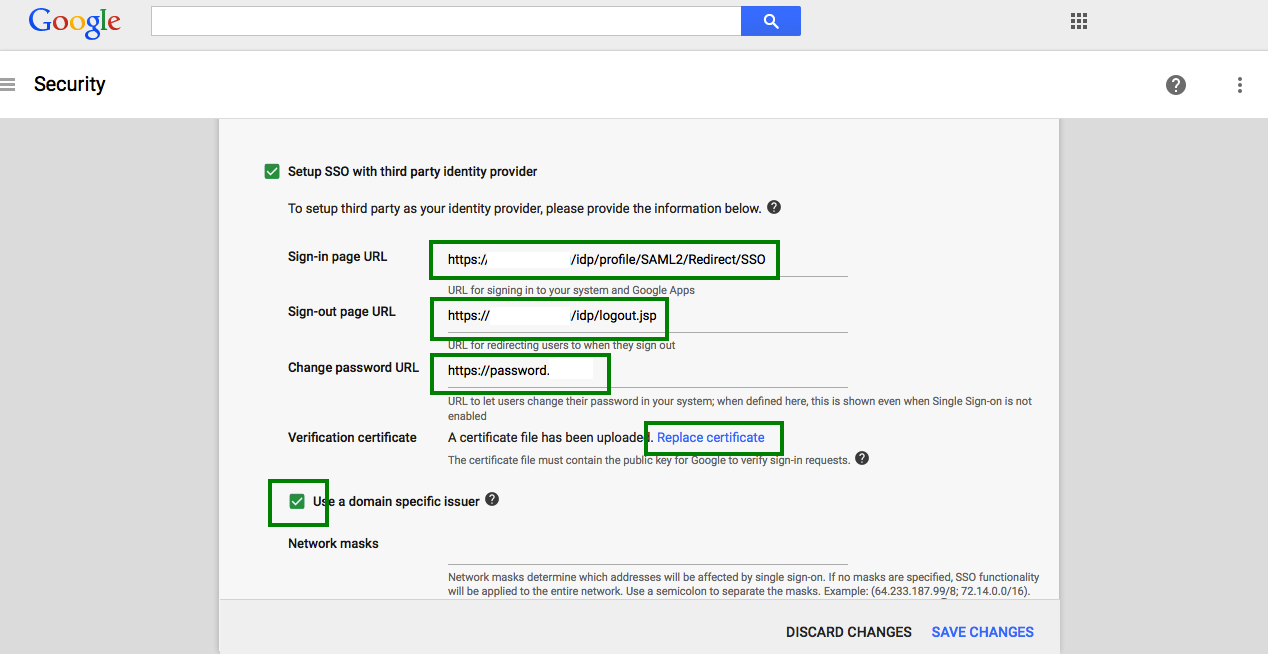
This page contains a number of selection, and entry fields.
-
Setup SSO with third party Identity Provider: This refers to your Gluu Server instance. Enable this box.
-
Sign-in Page URL: Enter the uri of the sign-in page, for example
https://idp_hostname/idp/profile/SAML2/Redirect/SSO. -
Sign-out Page URL: Enter the uri of the logout page, for example
https://idp_hostname/idp/logout.jsp. -
Change Password URL: The uri an user is redirected if he wants to change his password. It is recommended that an organization provides such a link for its end users.
-
Verification certificate: Upload the SAML certificate of your Gluu Server. The SAML certificates are available in the
/etc/certsfolder inside the Gluu Serverchrootenvironment. -
Use a domain specific issuer: Enable this box to use a domain-specific issuer.
-
Save your data using the
Save changesbutton on the lower right of the page.
If you want to know more about Google SSO, this helps you.
Configuration In Gluu Server:#
Now we need to create a Trust Relationship in Gluu Server. Trust Relationships are created so that the IdP can authorize/authenticate the user to the service provider (SP). In this specific case, the SP is Google Apps, and the protocol used is SAML.
In order to create a Trust Relationship, we need to grab the metadata of Google Apps. This metadata can be collected from Google. It's generally specific to an organization account. The following is a template of the Google metadata.
<EntityDescriptor entityID="google.com/a/domain.com" xmlns="urn:oasis:names:tc:SAML:2.0:metadata">
        <SPSSODescriptor protocolSupportEnumeration="urn:oasis:names:tc:SAML:2.0:protocol">
            <NameIDFormat>urn:oasis:names:tc:SAML:1.1:nameid-format:unspecified</NameIDFormat>
               <AssertionConsumerService index="1" Binding="urn:oasis:names:tc:SAML:2.0:bindings:HTTP-POST Location="https://www.google.com/a/domain.com/acs" ></AssertionConsumerService>
        </SPSSODescriptor>
</EntityDescriptor>
Got the metadata? Great, we are ready to move forward.
-
Create Trust Relationship for Google Apps:
-
How to create a trust relationship can be found here. We need to follow the "File" method for Google Apps trust relationship.
- Required attributes: Generally a nameID attributes is required. Here is how you can create custom nameID in Gluu Server.
- Relying Party Configuration: Yes, SAML2SSO should be configured.
- includeAttributeStatement: check
- assertionLifetime: default
- assertionProxyCount: default
- signResponses: conditional
- signAssertions: never
- signRequests: conditional
- encryptAssertions: never
- encryptNameIds: never