SSO to Google Apps#
Google Apps supports SAML. This document will explain how to configure Google Apps and the Gluu Server for single sign-on (SSO).
Note
It is highly recommended to use Google's staging apps environment before migrating to production.
Configuring Google Apps#
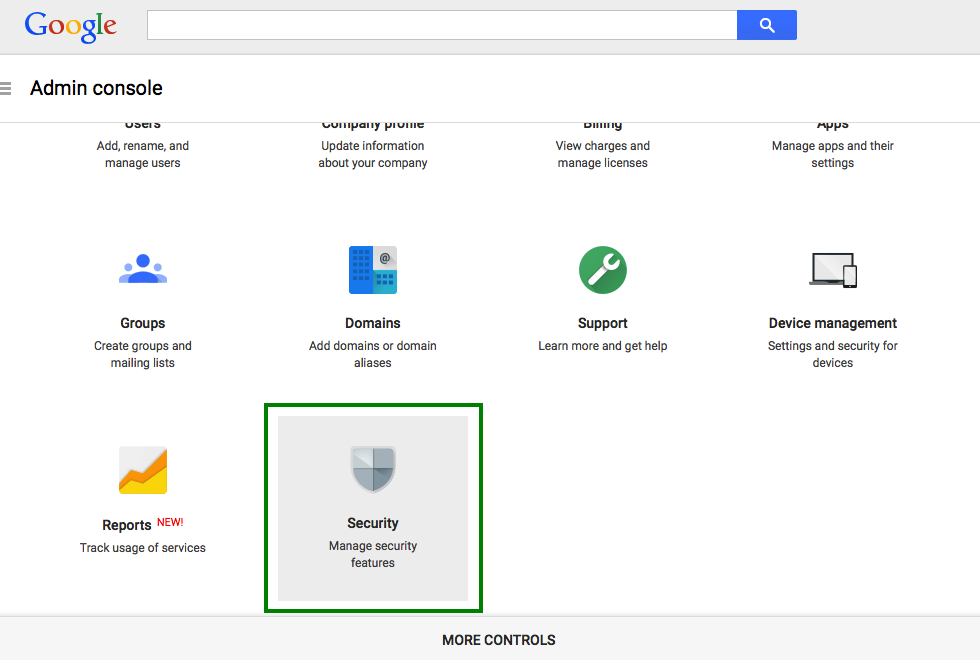
- Login to dashboard.
-
From the list of options choose the
Securitytab. -
A new page will open. Select
Set up single sign-on(SSO)from the options.
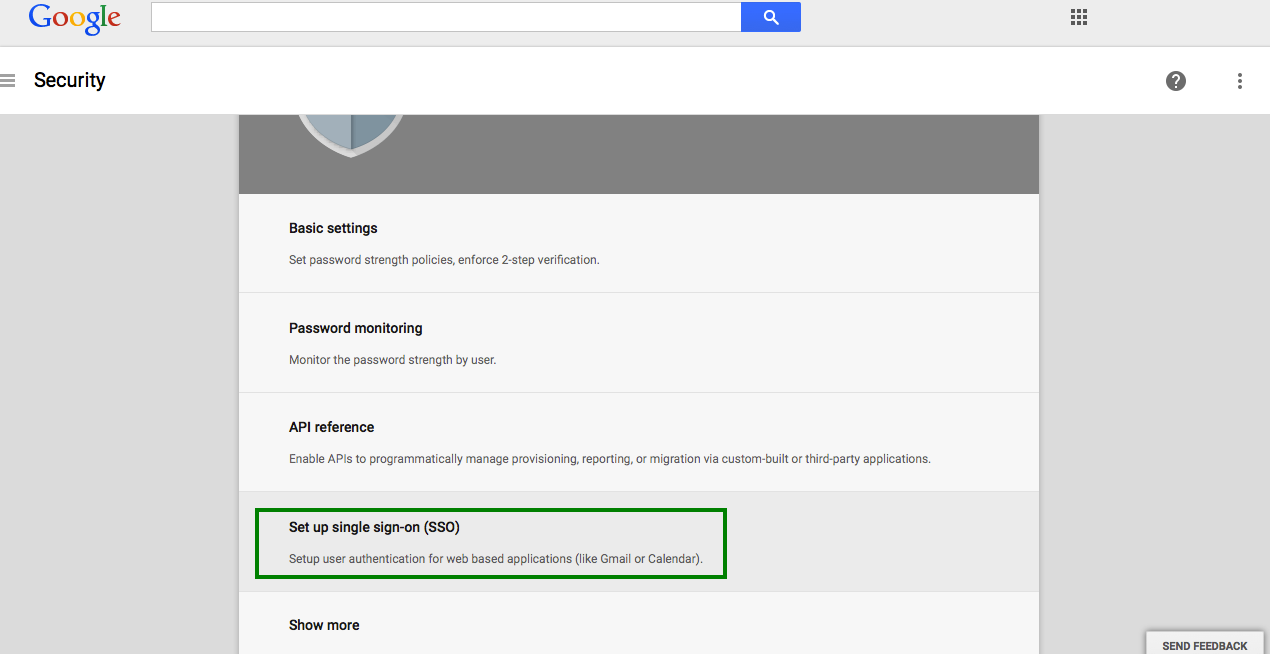
- Single Sign-On setting page will appear.
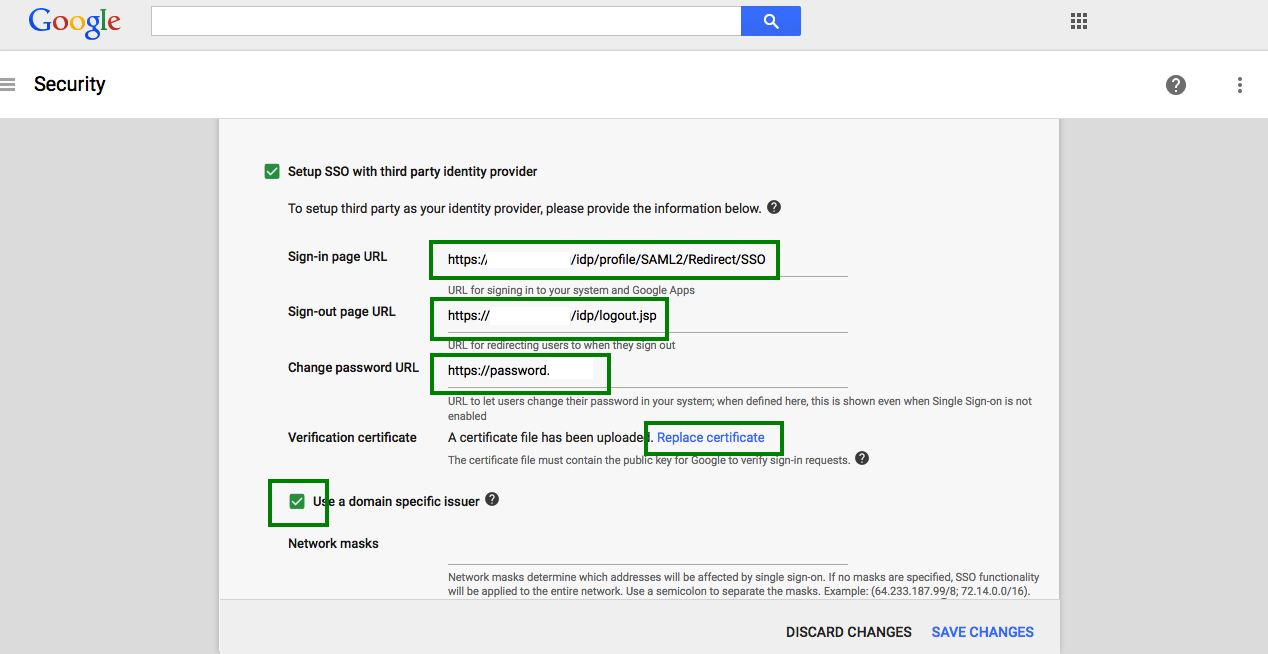
This page contains a number of selection, and entry fields.
-
Setup SSO with third party Identity Provider: This refers to your Gluu Server instance. Enable this box.
-
Sign-in Page URL: Enter the uri of the sign-in page, for example
https://idp_hostname/idp/profile/SAML2/Redirect/SSO. -
Sign-out Page URL: Enter the uri of the logout page, for example
https://idp_hostname/idp/logout.jsp. -
Change Password URL: The uri an user is redirected if he wants to change his password. It is recommended that an organization provides such a link for its end users.
-
Verification certificate: Upload the SAML certificate of your Gluu Server. The SAML certificates are available in the
/etc/certsfolder inside the Gluu Serverchrootenvironment. -
Use a domain specific issuer: Enable this box to use a domain-specific issuer.
-
Save your data using the
Save changesbutton on the lower right of the page.
Refer Google SSO to know more.
Configuring the Gluu Server#
Now we need to create a Trust Relationship in Gluu Server. Trust Relationships are created so that the IdP can authorize/authenticate the user to the service provider (SP). In this specific case, the SP is Google Apps, and the protocol used is SAML.
In order to create a Trust Relationship, we need to grab the metadata of Google Apps. This metadata can be collected from Google. It's generally specific to an organization account. The following is a template of the Google metadata.
<EntityDescriptor entityID="google.com/a/domain.com" xmlns="urn:oasis:names:tc:SAML:2.0:metadata">
<SPSSODescriptor protocolSupportEnumeration="urn:oasis:names:tc:SAML:2.0:protocol">
<NameIDFormat>urn:oasis:names:tc:SAML:1.1:nameid-format:unspecified</NameIDFormat>
<AssertionConsumerService index="1" Binding="urn:oasis:names:tc:SAML:2.0:bindings:HTTP-POST"
Location="https://www.google.com/a/domain.com/acs" ></AssertionConsumerService>
</SPSSODescriptor>
</EntityDescriptor>
Got the metadata? Great, we are ready to move forward.
-
Create Trust Relationship for Google Apps:
-
How to create a trust relationship can be found here. We need to follow the "File" method for Google Apps trust relationship.
- Required attributes: Generally a nameID attribute is required. Follow the custom nameID documentation.
- Relying Party Configuration: SAML2SSO should be configured.
- includeAttributeStatement: check
- assertionLifetime: default
- assertionProxyCount: default
- signResponses: conditional
- signAssertions: never
- signRequests: conditional
- encryptAssertions: never
- encryptNameIds: never