Quick start using Agama Lab
In this quick start guide, we will build, deploy and test a simple Agama project using the Agama Lab. This project will enable user authentication using password when deployed on an IDP.
Major Steps involved in this process are:
This guide covers steps above in the following sections.
Prerequisites
- We will use the Janssen Server to deploy the Agama project. Follow the instructions here to install the Janssen Server.
- You will need a GitHub account where Agama Lab GitHub app has been integrated. GitHub account can be a personal account or an organizational account. For this guide we will assume that a personal account is being used.
- Two new public GitHub repositories in your GitHub Account. These repositories will be used as development repository and release repository. Each repository should have at least one commit.
- Agama Lab should have permissions to access the development and the release repositories. This can be configured using the Agama Lab GitHub app in your user account.
Create a new Agama project
We will use Agama Lab to create a simple username-password based user authentication project. The authentication flow will be similar to the one shown below.

An Agama project may include multiple components. For example, an authentication flow, a user interface, assets like organization’s logo, external libraries, etc. In this project, we will see how to
- Define the authentication steps of a flow
- Design the user interface to capture user inputs
Let’s get started.
Log into the Agama Lab
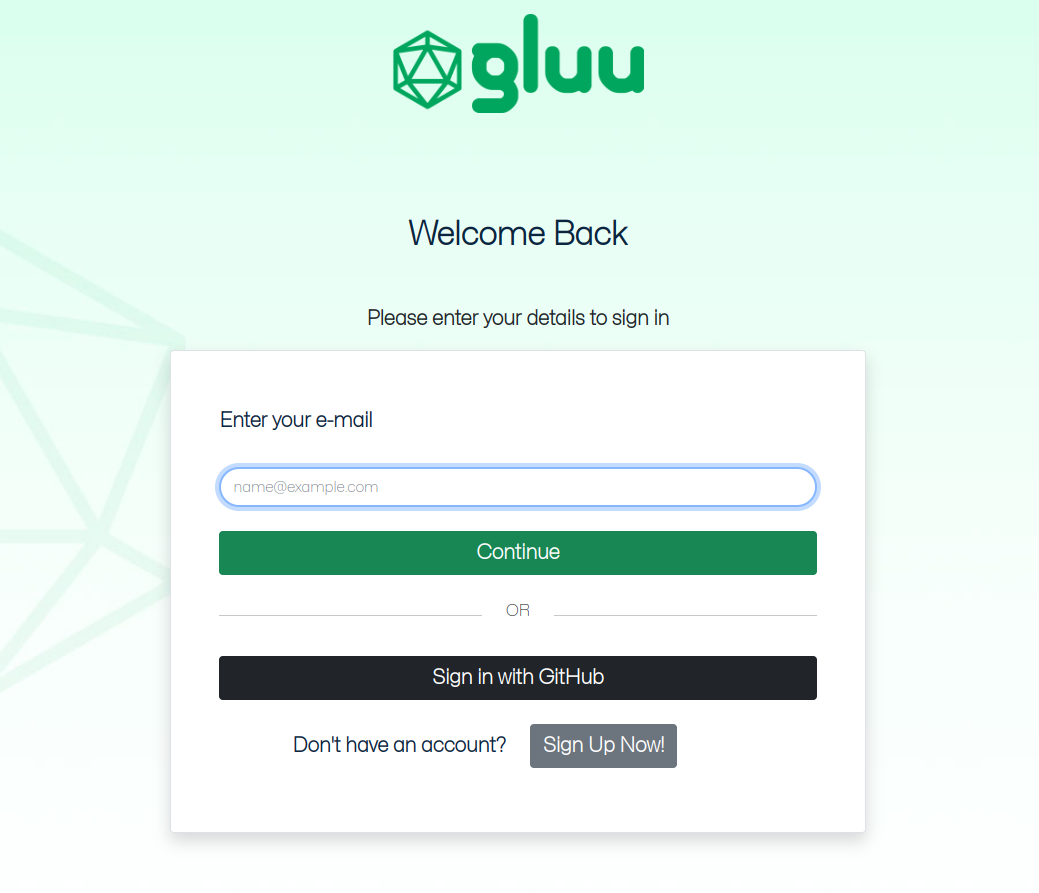
- Go to Agama Lab login page. Sign in using GitHub.
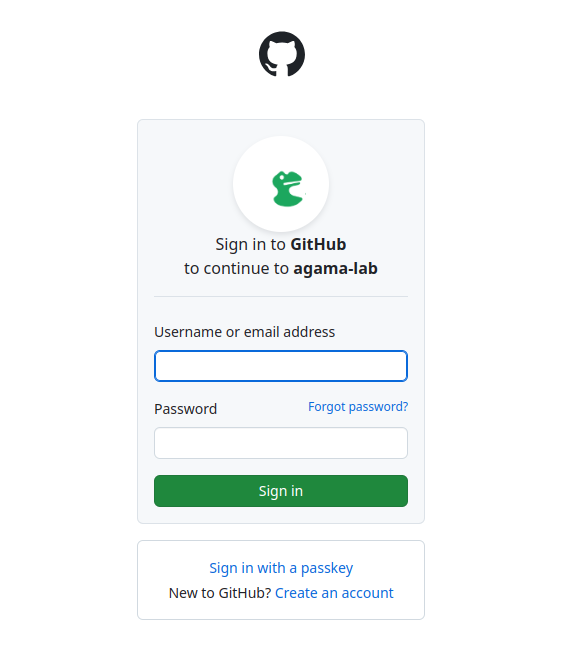
2. Authenticate on the GitHub authentication page.
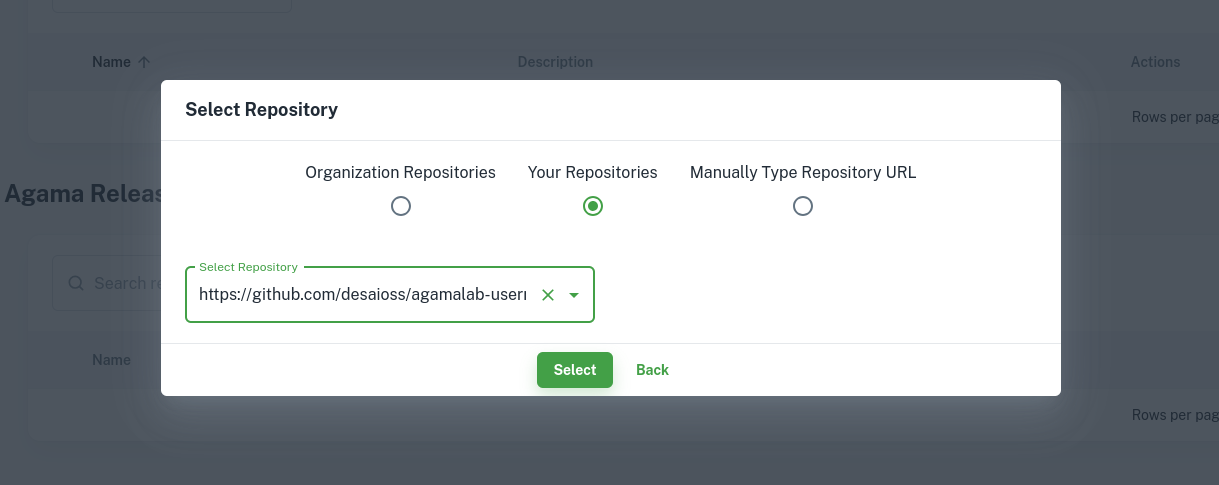
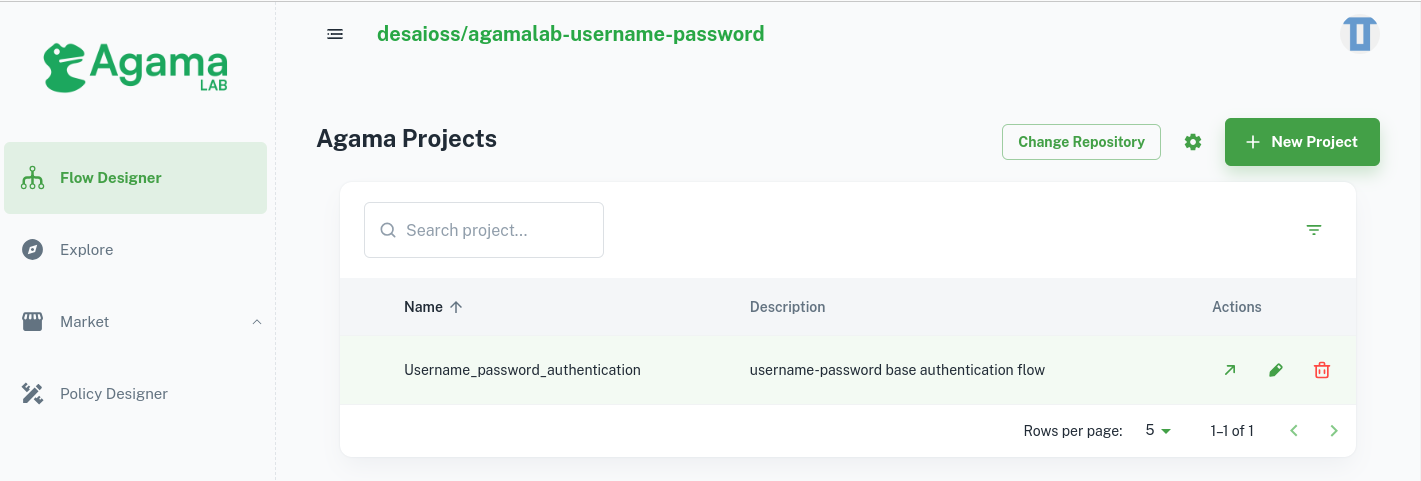
3. After successful sign in, the project dashboard will be shown. Next step is to select the repository where you want to create the project. Select the development repository by clicking on Change Repository -> Your Repositories -> select the repository -> Select.
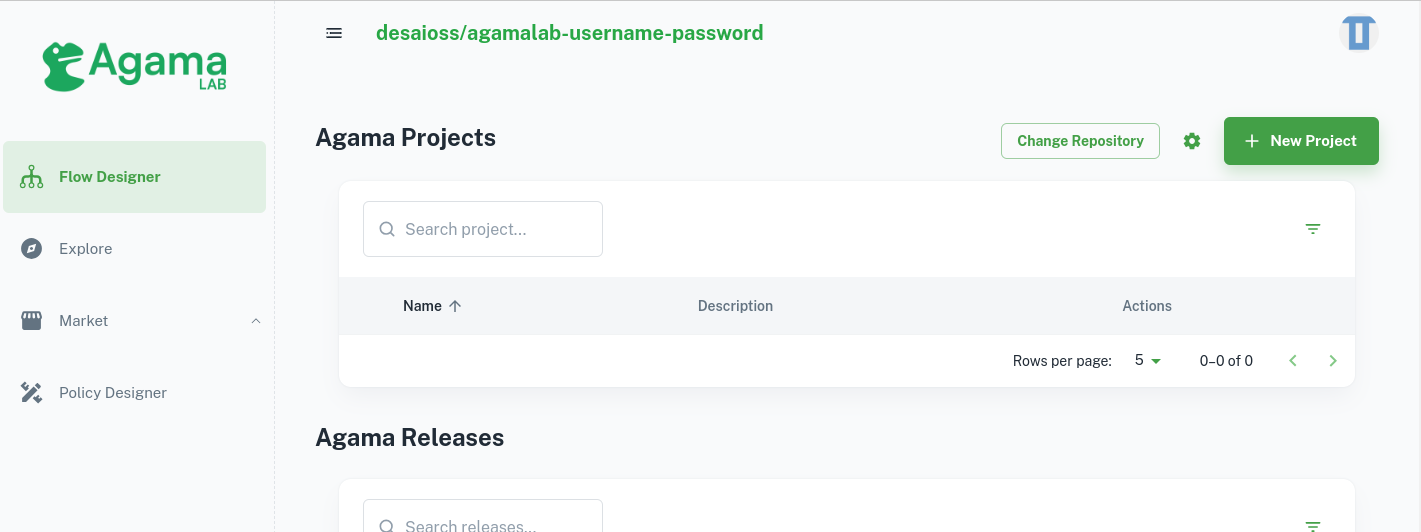
4. The project dashboard with all the existing projects (if any) from the GitHub repository will be shown. New projects can be created, edited, and deleted from this project listing page.
Create a new project
1. To create a new project, click on the New Project button. Enter the name and the description for the new project and click the Create button.
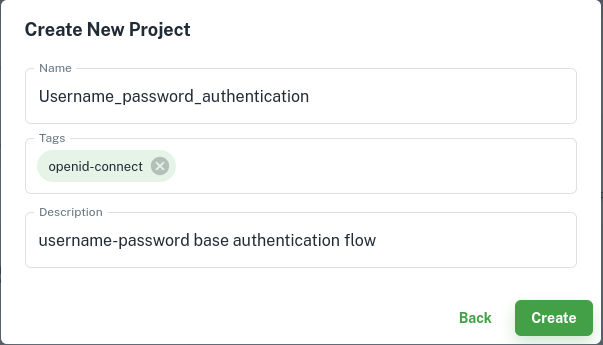
2. This will create a new project.
Defining the authentication flow
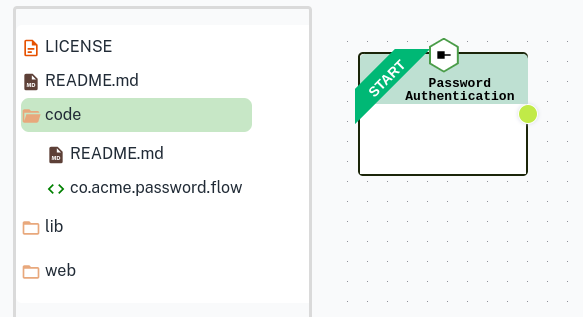
- Create a flow file
code directory > New > Flow File. 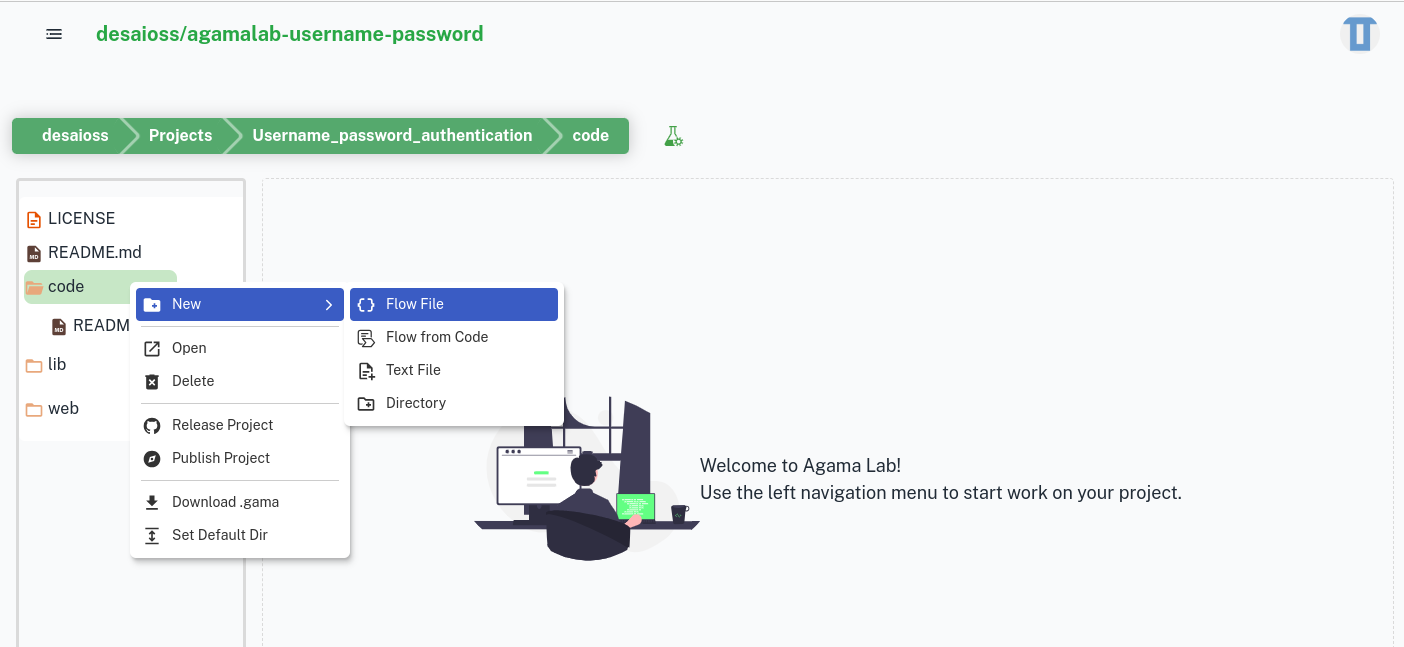
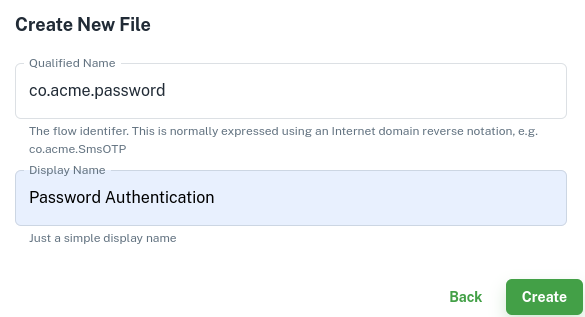
Give name and description for the flow file and then click Create.
A newly created flow file contains one start block.
In the subsequent steps, we are going to create nodes in the flow using the flow editor. Refer to this guide if you need to understand how to create, delete and configure nodes.
2. Create Get class reference Call block
To perform authentication we need to validate username and password provided by the user with the IDP. This operation is done using an instance reference of AuthenticationService class.
To get the instance reference from the IDP, we first need the class reference of the AuthenticationService class. That is what we will do in this step.
Drag the colored dot available on the right edge of the start node to create the next node in the flow. A list of available node types will be presented.
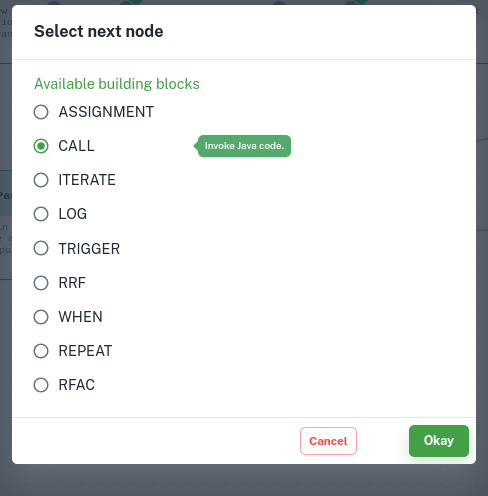
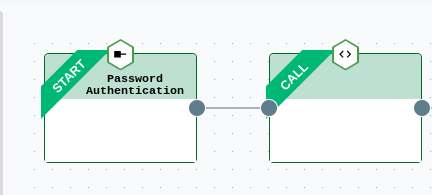
Select Call node. A new Call block should appear with a link to the Start block
Call block and then click to open the configuration screen. Add configuration values as shown below.
This configuration will fetch a class reference of the AuthenticationService class and store the reference in a variable called authServiceClass. This reference will be used to fetch an instance of this class from IDP in the subsequent steps.
Call type: Call static method
class name: io.jans.as.server.service.AuthenticationService
method name: class
assign result to: authServiceClass 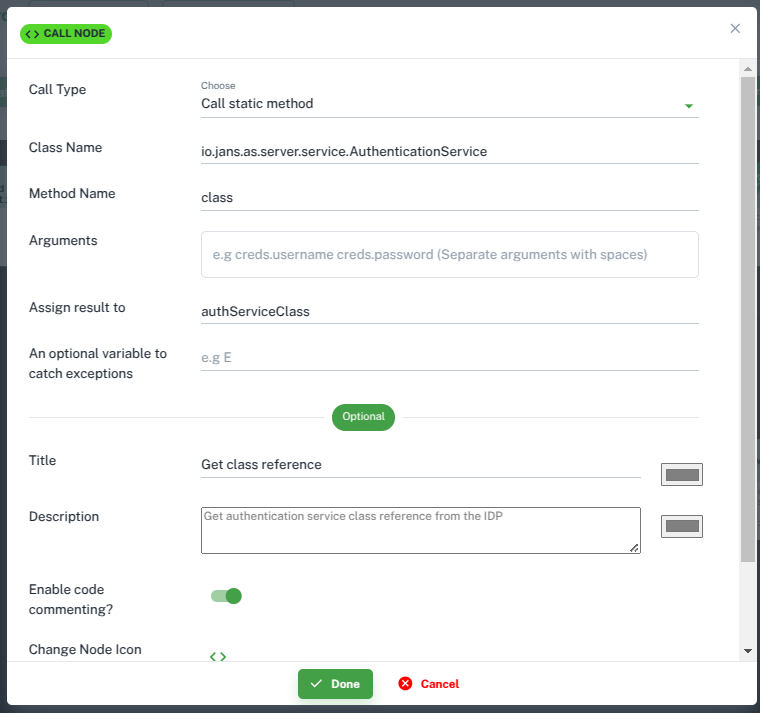
Get instance reference Call block
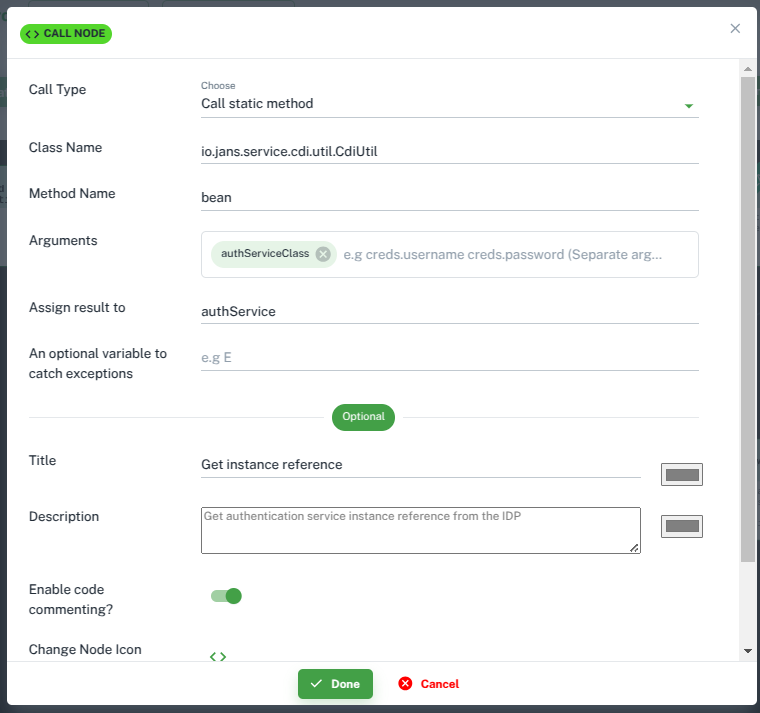
In this step, we will fetch the instance reference of the AuthenticationService using the class reference that we obtained in the previous step. To fetch this instance reference from the IDP, we will use CdiUtil class’s bean method and pass the class reference of the AuthenticationService
as an input to it. Use the steps and configuration below to do this.
After the Get class reference node, create a new Call node.
Click on the newly created Call block and by clicking
open the configuration page. Input values as shown below in the configuration screen.
Call type: Call static method
class name: io.jans.service.cdi.util.CdiUtil
method name: bean
arguments: authServiceClass
assign result to: authService
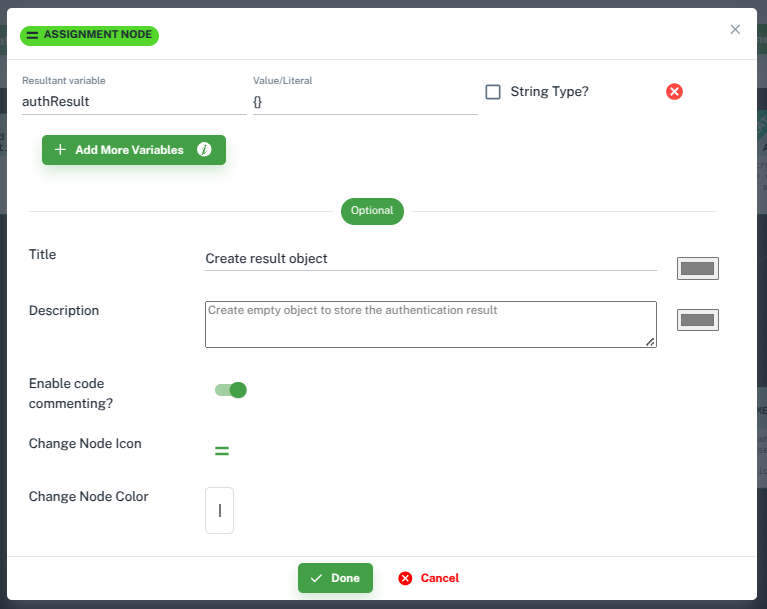
result object Assignment block
Next, we need to create an empty variable to store authentication results when we validate the credentials in subsequent steps.
Create a Assignment block after the Get instance reference call block and configure it as shown below.
Resultant variable: authResult
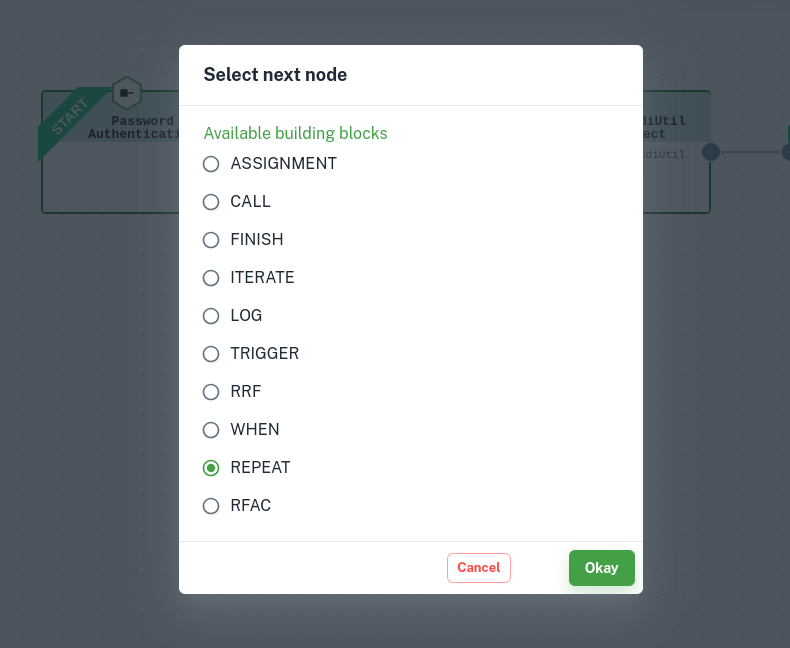
5. Create Repeat block
Repeat block represents the Repeat instruction of Agama DSL.
Repeat block creates a loop to iterate over certain steps(blocks). We will create a repeat loop that allows 3 retries if the authentication fails.
Create a Repeat block after the Create result object block
Repeat block. Click . Input values as shown below in the configuration screen 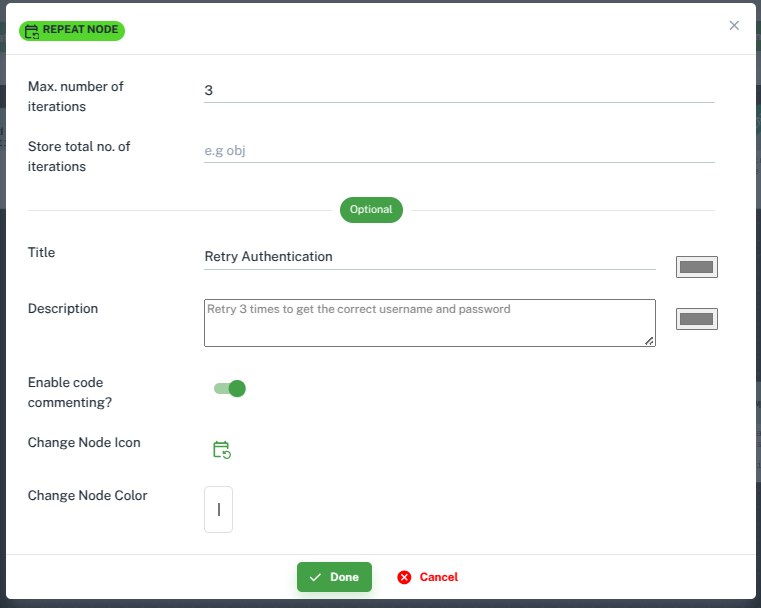
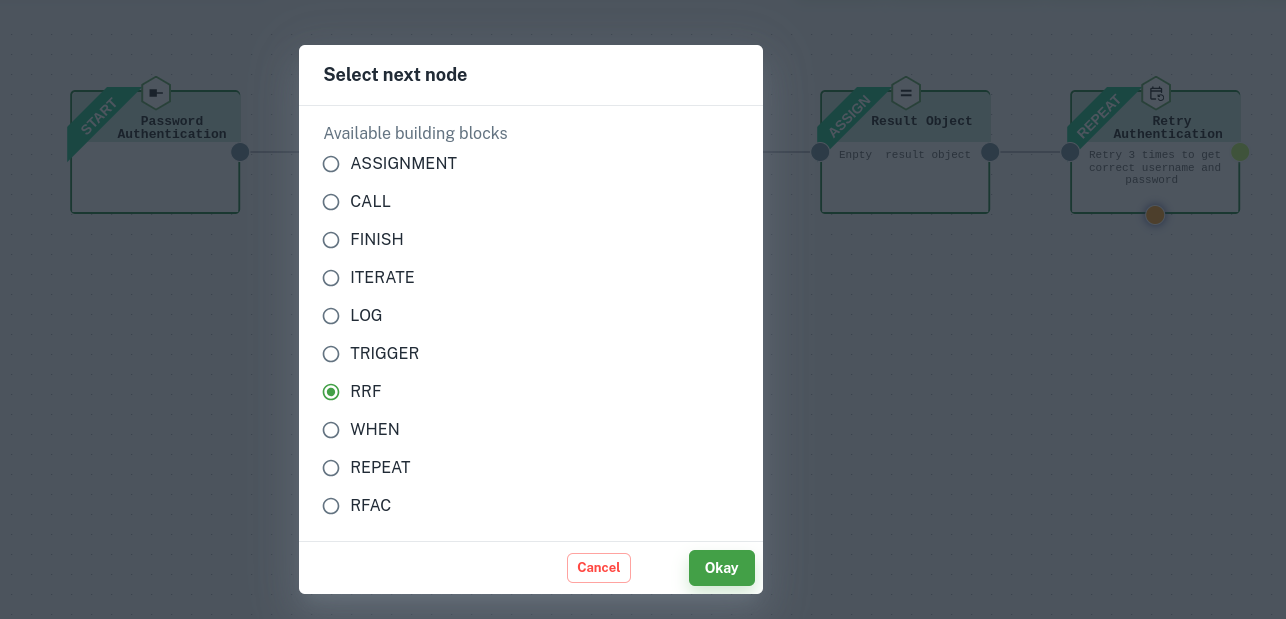
6. Create a Show login form RRF block
RRF block represents the RRF instruction of Agama DSL. We will present the login form to the user using this node.
Create an RRF block after the Retry Authentication block.
Remember that the Retry Authentication is a Repeat type of block. It has two possible paths.
- One that originates from the colored dot on the bottom edge will be labeled as
repeat. Execution of the blocks along this path will be repeated as configured in theRepeatblock. - Second path originates from the colored dot on the right edge of the
Repeatblock. This path is labeled asContinue. These blocks will be executed afterrepeatpath completes the execution.
The new RRF block should be created on the Repeat path.
RRF block. Click
. Input values as shown below in the configuration screen.
Template path: login.ftlh
Data variable to inject: authResult
Assign result to: creds
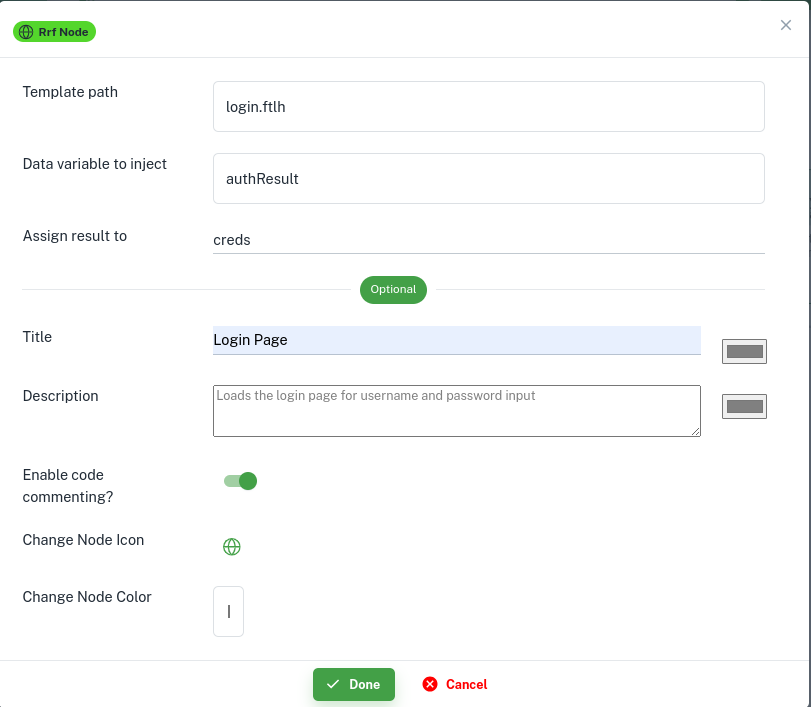
- Present an input form to the user. We will build the
login.ftlhin a later section - Capture and store user inputs like the user-name and password into the
credsvariable
Save button. This creates a new commit in your GitHub repository.
7. Create validate credentials call block
Call block to process the username and password received from the user (in RRF) and validate them. The result of the validation is stored in a variable.
Create a new call block after the Show login page block. 
Call block. Click
. Configure it as shown below.
Call type: Call method on instance
Variable name: authService
Method name: authenticate
Arguments: creds.username and creds.password
Assign result to: authResult.success

When block represents the When instruction of Agama DSL.
Create a conditional check using the When block to check if the user credentials were successfully validated.
Create a new When block after the Validate credentials block. 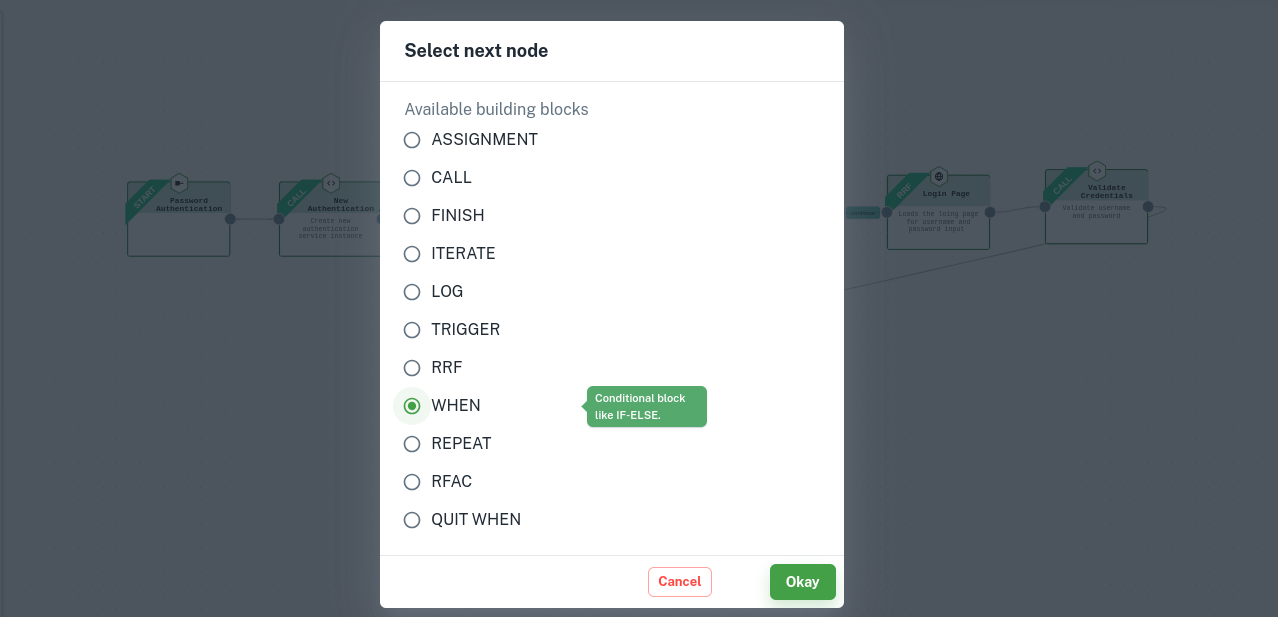
When block. Click . Input values as shown below in the configuration screen 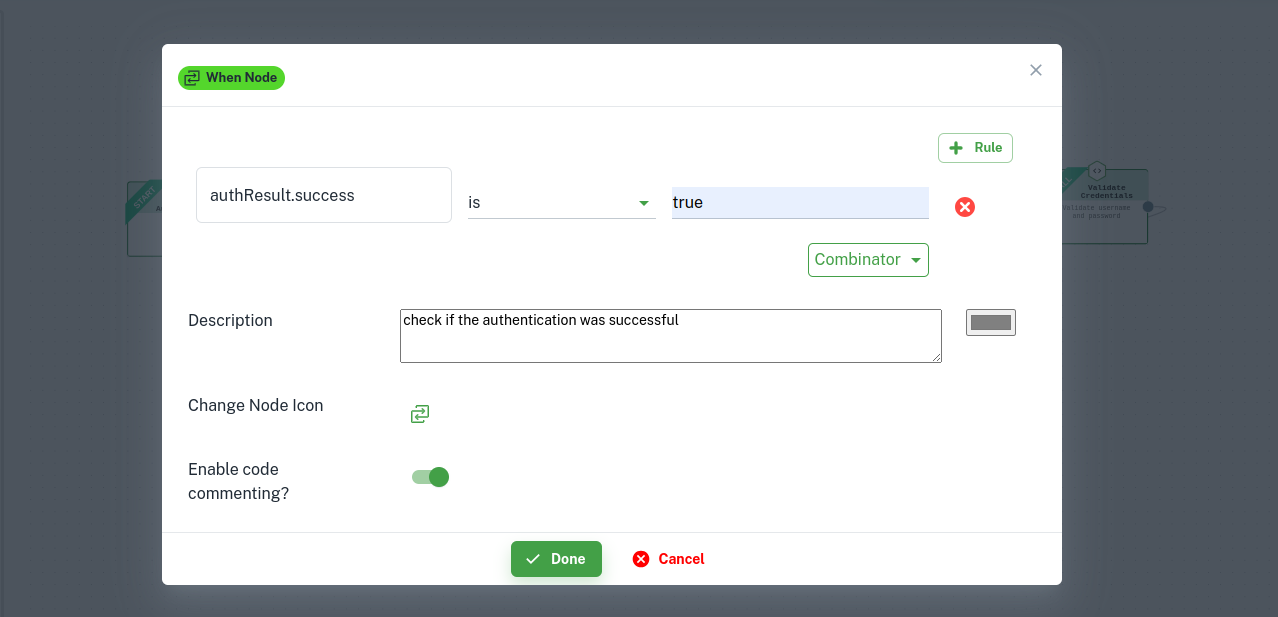
9. Create Finish blocks
The Finish block represents the Flow finish instruction of Agama DSL.
We will need to create two finish blocks.
- One finish block to terminate the flow when the authentication is successful.
- Second finish block to terminate the flow when the authentication is still not successful after 3 repeated attempts.
If the authentication was successful then the flow should finish and return the username. This will be achieved by adding a Finish block to the Condition met branch of the When block. And if authentication fails after 3 attempts, we need another Finish block following the Repeat block.
Drag and drop the colored dot on the lower vertex of the When block to create a Condition met branch. Create a Finish block on this branch.
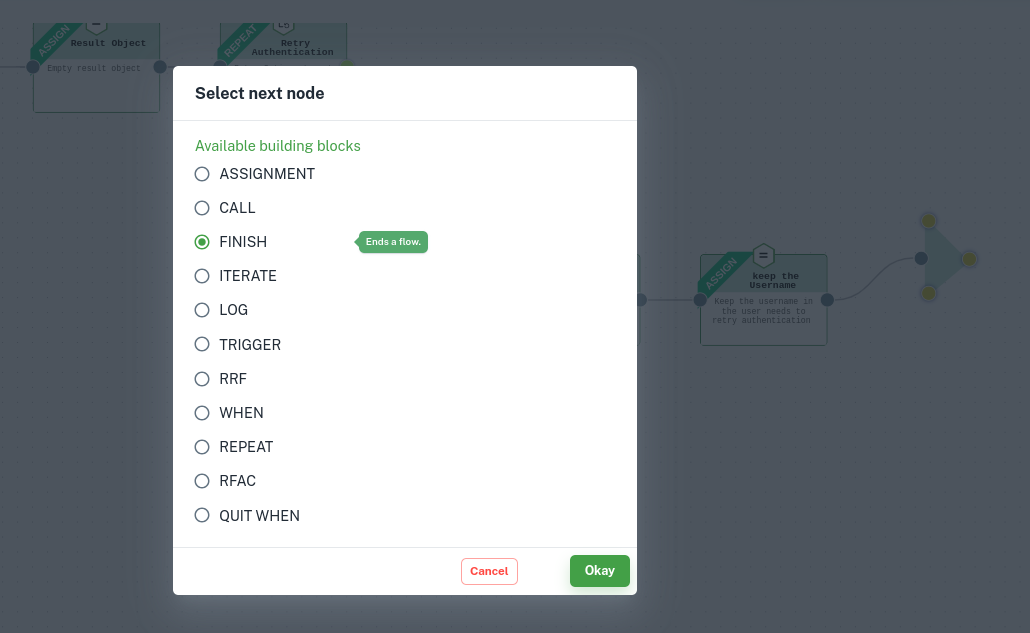
Finish block. Click . Input values as shown below in the configuration screen 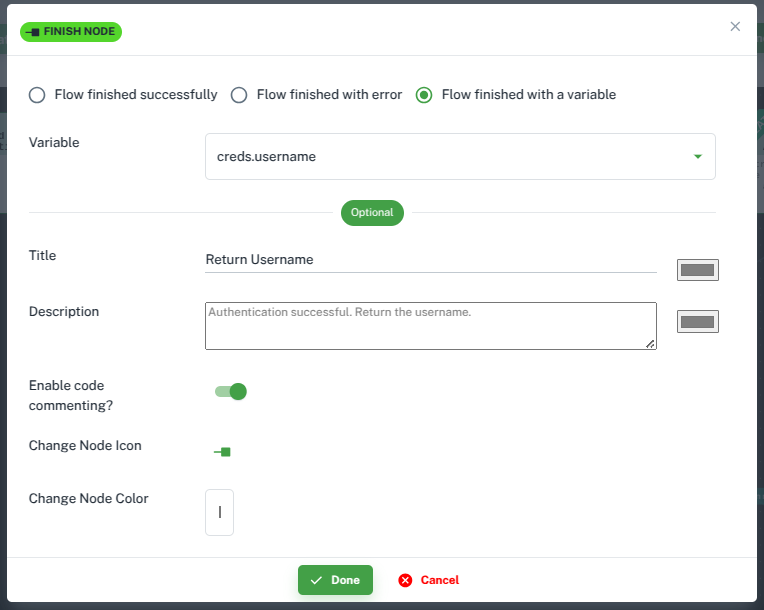
Let’s create a second finish block that will terminate the flow when all 3 authentication attempts have failed.
Create a Finish block on the Continue branch of the Repeat block.
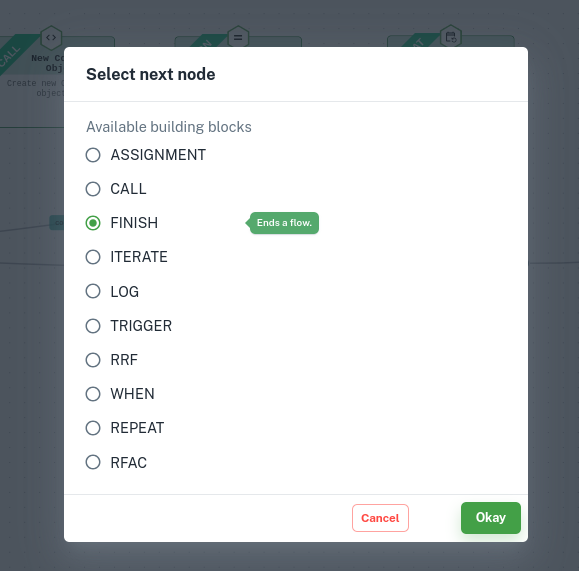
Finish block. Click . Input values as shown below in the configuration screen and click Save. 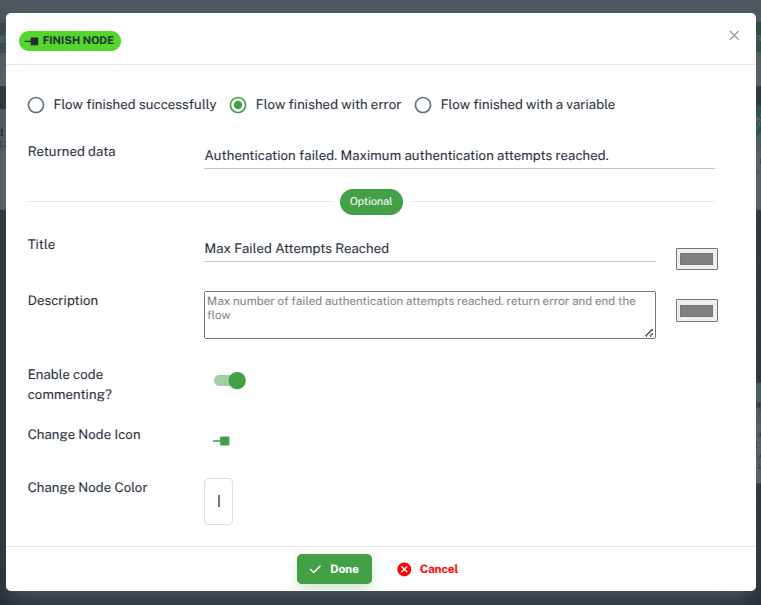
Save the flow using the Save button on flow canvas.
The completed flow looks like below:

10. Check generated code
The flow is translated into Agama DSL. Click the Code button to see the generated code.
// Get authentication service class reference from the IDP
authServiceClass = Call io.jans.as.server.service.AuthenticationService#class
// Get authentication service instance reference from the IDP
authService = Call io.jans.service.cdi.util.CdiUtil#bean authServiceClass
// Create empty object to store the authentication result
authResult = {}
// Retry 3 times to get the correct username and password
Repeat 3 times max
    // Load login page for username and password input
    creds = RRF "login.ftlh" authResult
    // Validate username and password with IDP
    authResult.success = Call authService authenticate creds.username creds.password
    // Check if the authentication was successful
    When authResult.success is true
          // Authentication successful. Return the username.
          Finish creds.username
// Max number of failed authentication attempts reached. return error and end the flow
it_yrwmc = {success:false, error: "Maximum authentication attempts reached. Authentication failed."}
Finish it_yrwmc
Design user interface
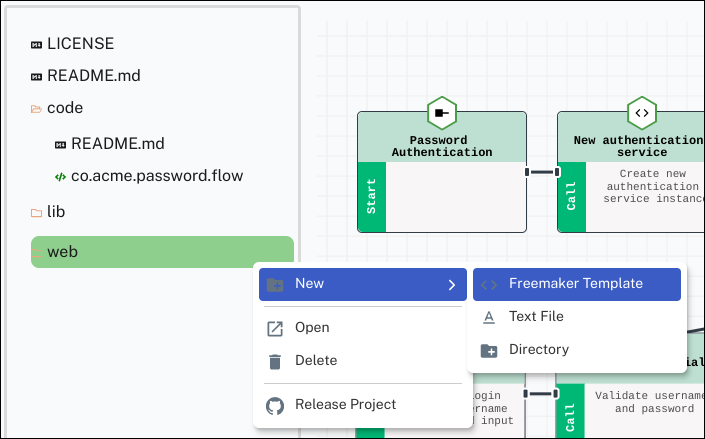
login.ftlh to render the login page elements. We need to add login.ftlh to the Agama project so that the flow can use it during the execution. Use the steps below to create the page. - Create a template file
On the left project explorer menu, click on web > New > Freemarker Template
+ Create under the New Blank Template 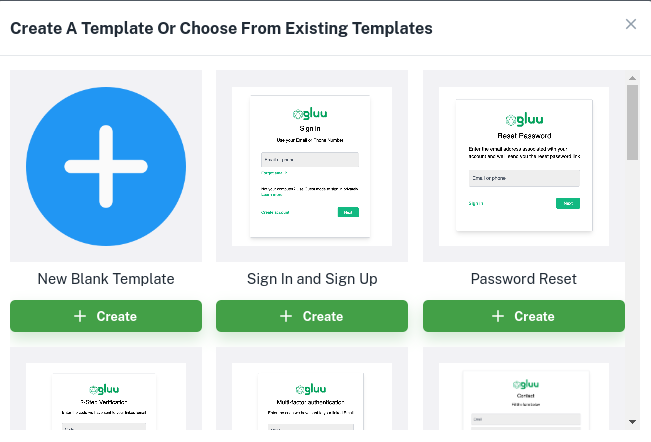
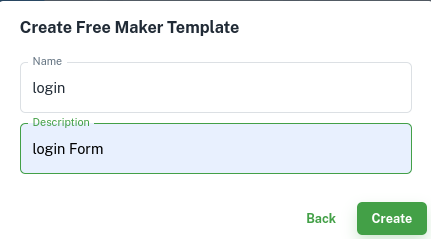
Give Name and Description as shown below and click Create
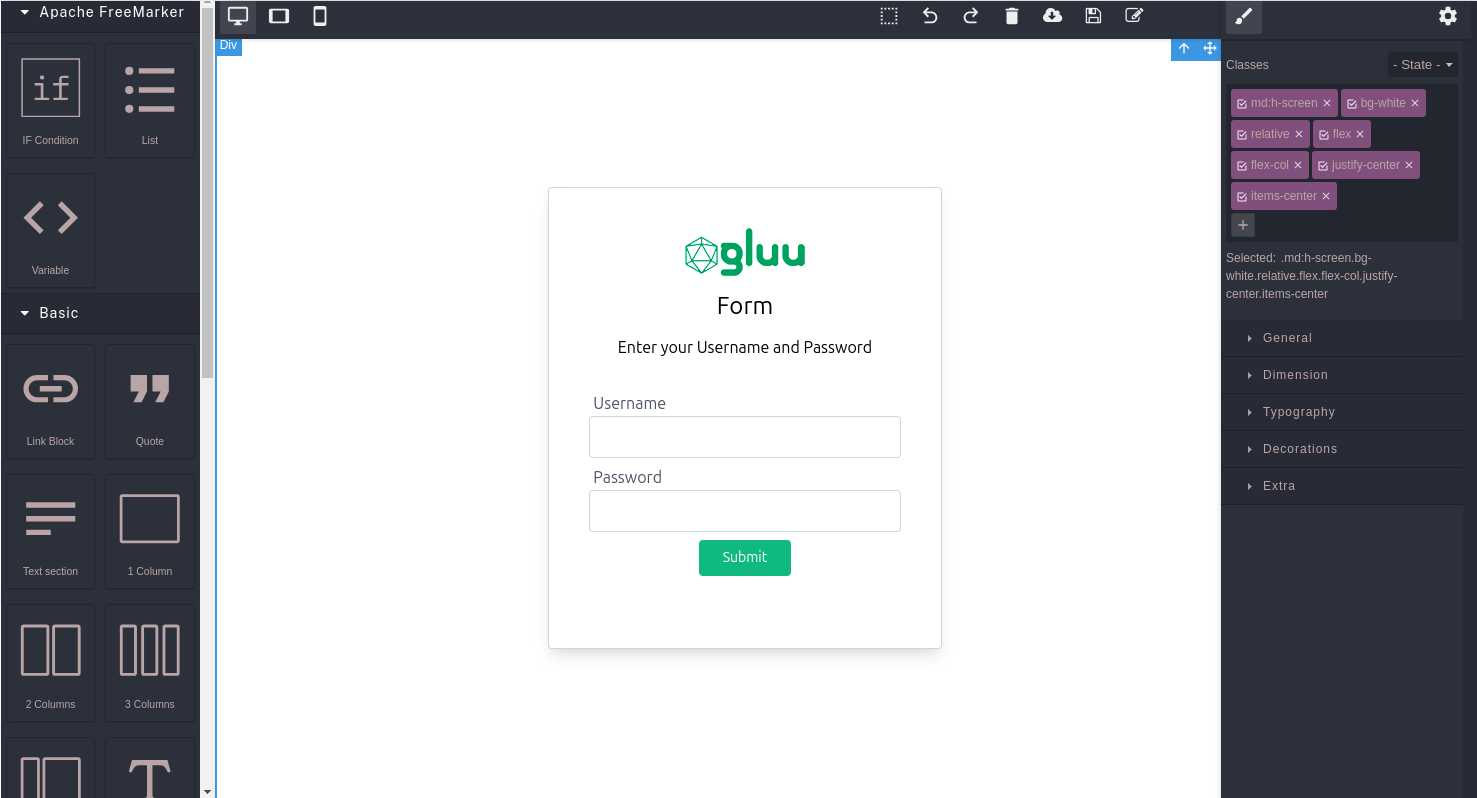
2.Use the visual editor
This opens a visual editor to create an Apache FreeMarker template. Use this visual editor to create a template as per the need. For this article, we will use the code below.

Edit HTML. This opens a text editor. Remove existing code in the editor and paste the code shown below.
					<!DOCTYPE html>
<html lang="en">
    <head>
        <meta charset="UTF-8">
        <meta http-equiv="X-UA-Compatible" content="IE=edge">
        <meta name="viewport" content="width=device-width, initial-scale=1.0">
        <title>Username_Password_Form
        </title>
        <link rel="stylesheet" href="https://cdn.jsdelivr.net/npm/tailwindcss@2.2/dist/tailwind.min.css" type="text/css">
    </head>
    <body>
        <div class="md:h-screen bg-white relative flex flex-col justify-center items-center">
            <div class="md:border md:border-gray-300 bg-white md:shadow-lg shadow-none rounded p-10 align-middle">
                <div class="flex flex-col items-center space-y-3">
                    <div class="flex">
                        <img decoding="async" src="https://gluu.org/wp-content/uploads/2020/12/logo.png" id="i4xwu">
                    </div>
                    <span class="text-2xl font-semi-bold leading-normal">Form</span>
                    <p class="leading-normal">Enter your Username and Password
                    </p>
                </div>
                <form method="post" class="my-8">
                    <div class="relative mb-2">
                        <label for="username" class="label mt-2 ml-1 leading-tighter text-gray-600 text-base cursor-text">
                            Username
                        </label>
                        <input type="text" id="username" name="username" autofocus="" required="" class="w-full rounded px-3 border border-gray-300 pt-2 pb-2 focus:border-green-700">
                    </div>
                    <div class="relative mb-2">
                        <label for="password" class="label mt-2 ml-1 leading-tighter text-gray-600 text-base cursor-text">
                            Password
                        </label>
                        <input type="password" id="password" name="password" autofocus="" required="" class="w-full rounded px-3 border border-gray-300 pt-2 pb-2 focus:border-green-700">
                    </div>
                    <div class="space-y-9">
                        <div class="text-sm flex justify-center items-center">
                            <button type="submit" class="py-2 px-6 rounded text-white btn bg-green-500 hover:bg-green-600">
                                Submit
                            </button>
                        </div>
                    </div>
                </form>
            </div>
        </div>
    </body>
</html>
Save changes 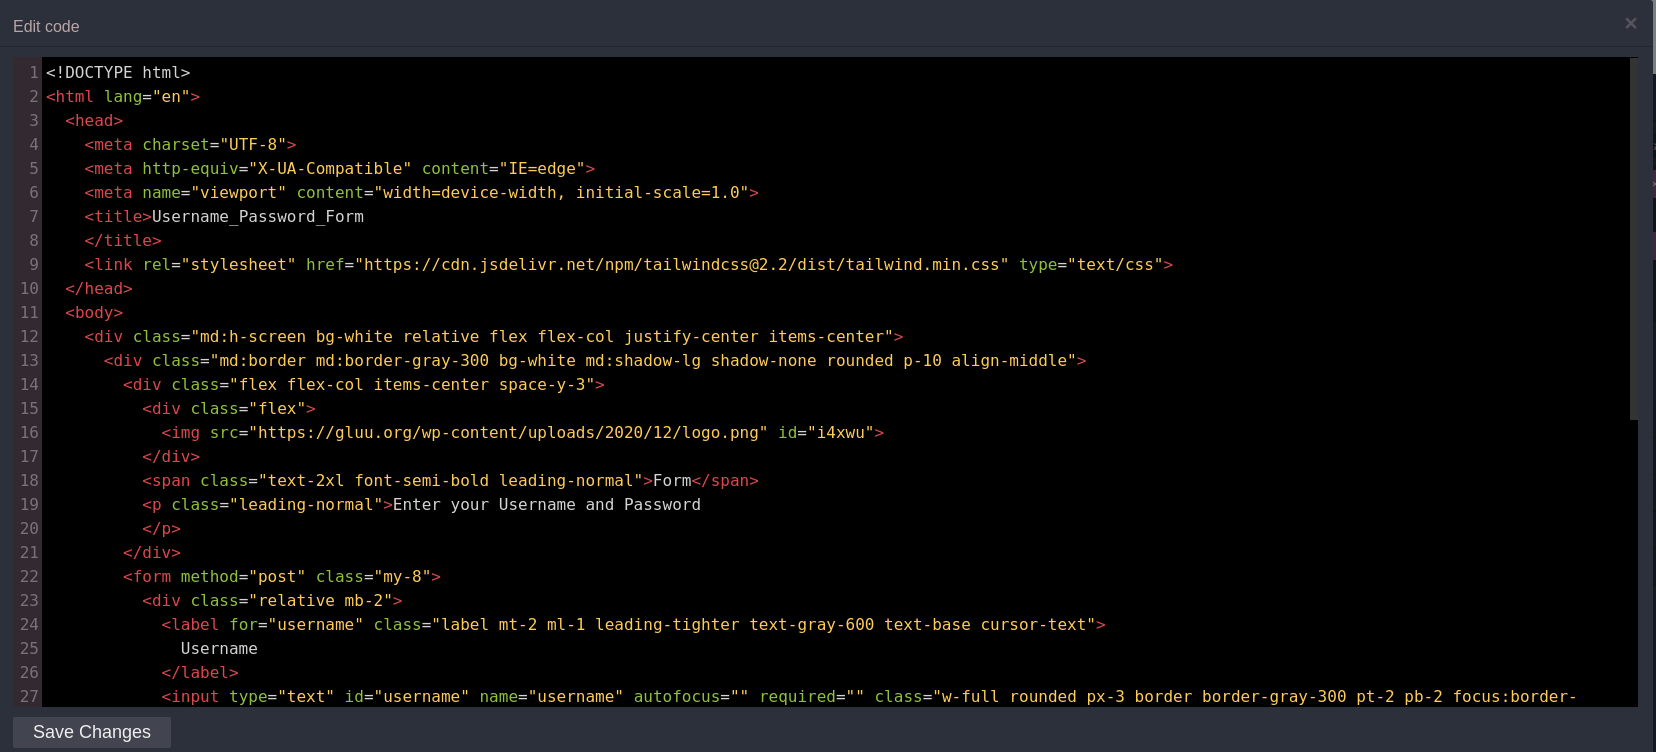
This will render the page in the visual editor.
Publish the project
At this point we have all the components of an Agama project ready, and they are stored in the development repository. Next step is to publish the project into the release repository. Publishing will create the first release of this project in the release repository. Artifacts linked to the release in the release repository contain the .gama package. This .gama package is used to deploy the project in the IDP.
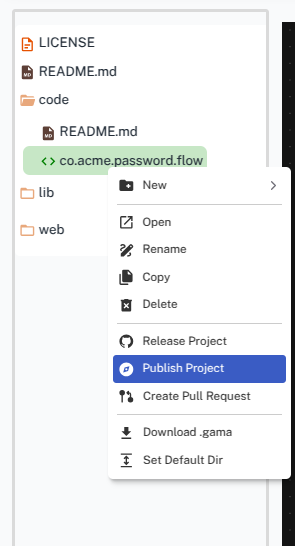
To publish the project, click on any of the files in the left project explorer, and click Publish Project.
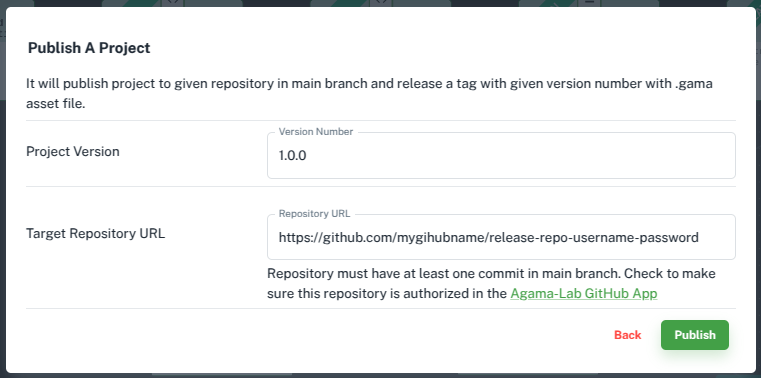
Enter a desired version number for the first release and the web link to the GitHub release repository. Click Publish
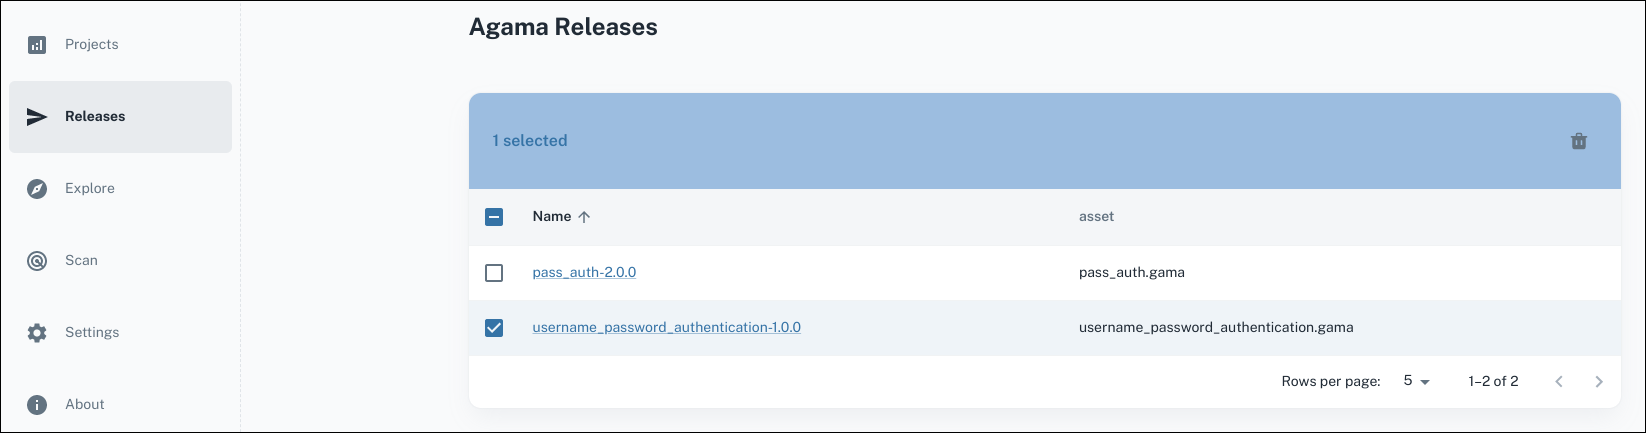
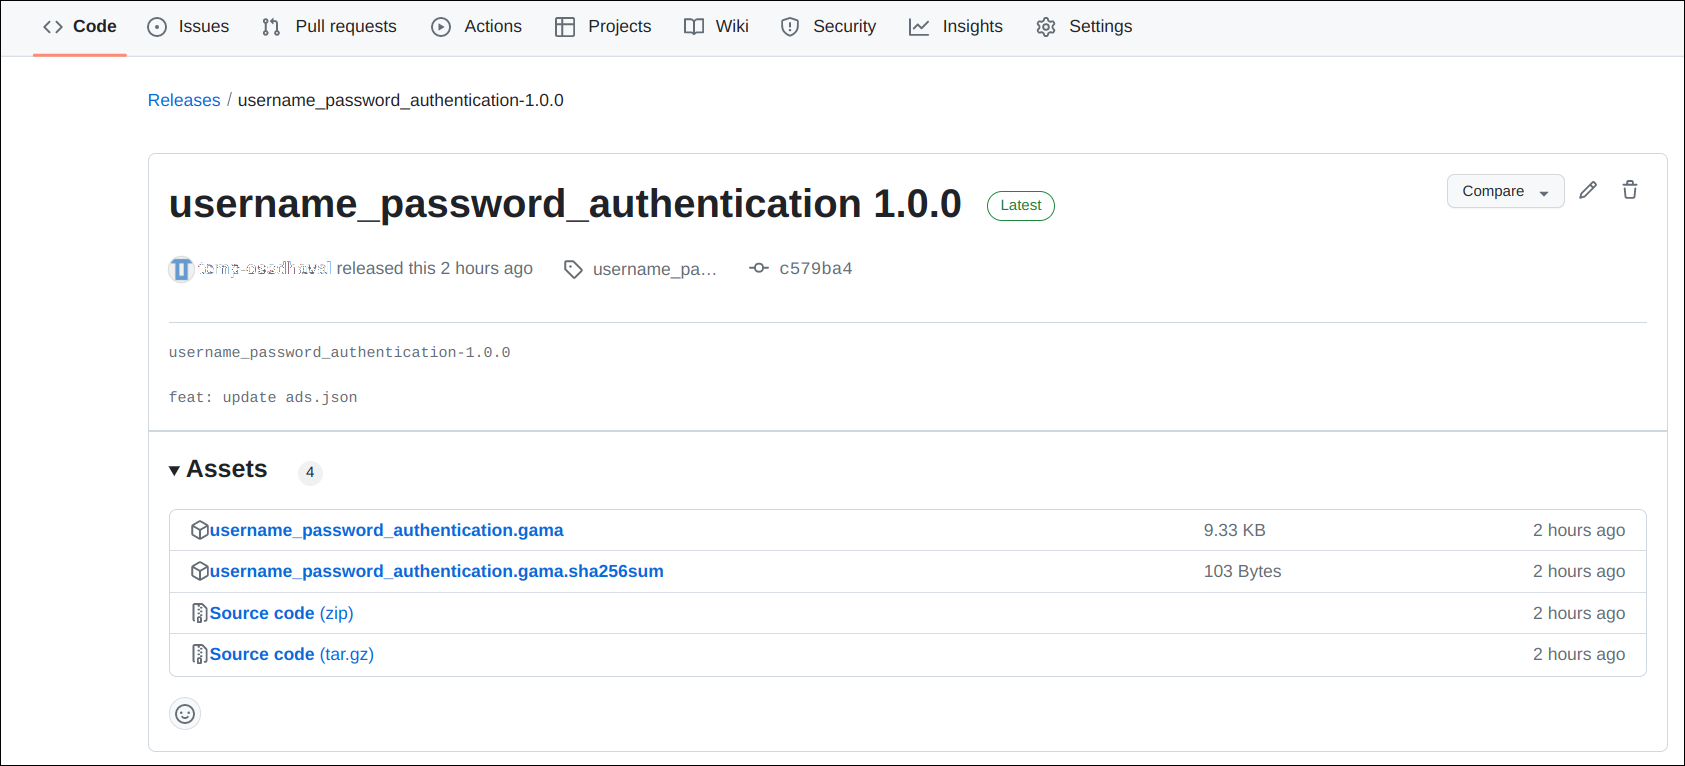
Upon successful publishing, the Agama Lab’s Releases dashboard is shown. It lists the project that we released.
Click on the project name to go to the GitHub repository release page where .gama file has been released
Download the .gama file from here to deploy on to the Janssen Server.
Deploy Agama project
Download the
.gamafile on the Janssen Server.Open Janssen Server TUI and upload the
.gamapackage using these instructionsEnsure that the project has been uploaded without any errors by refreshing the project listing after the upload.
Testing using Janssen Tarp
We will use the Jans Tarp, a browser extension based tool from the Janssen Project, to test this Agama project.
- Install Jans Tarp browser plug-in
- Follow these instructions to test using Jans Tarp. Remember that the
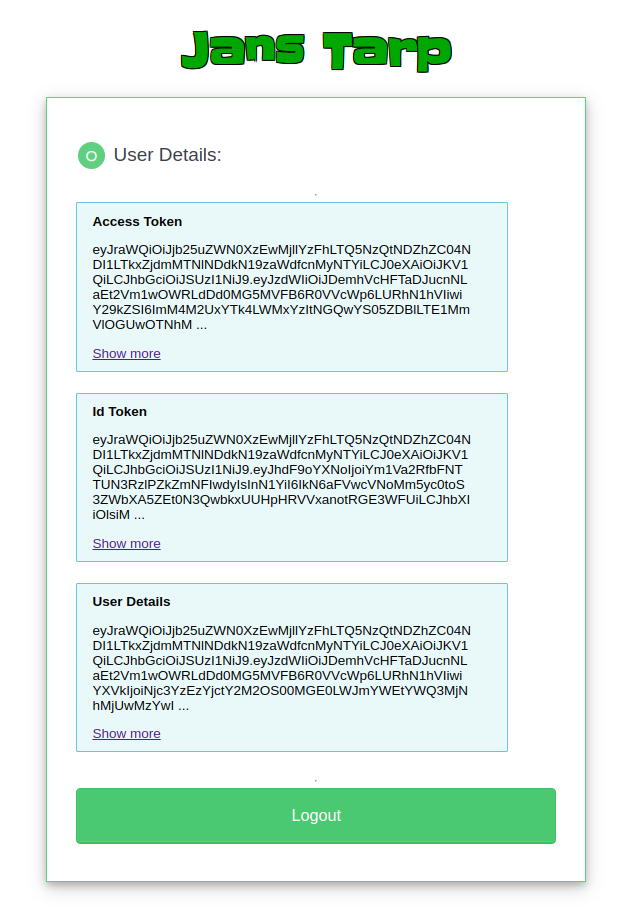
ACR valueis the composed of fully qualified name of your flow (in our caseco.acme.password) preceded byagama_. That isagama_co.acme.password. - In a successful test run, the browser should prompt user for the user-name and password using the same user-interface that we built in the previous steps.

Upon entering a valid user-name and password, the tarp should present a page with access token.
Get Ready to Design
Create a custom login flow that integrates with your existing systems and meets your specific security requirements.
Implement multi-factor authentication for your users to enhance security.
Create a seamless single sign-on experience for your customers across multiple applications.