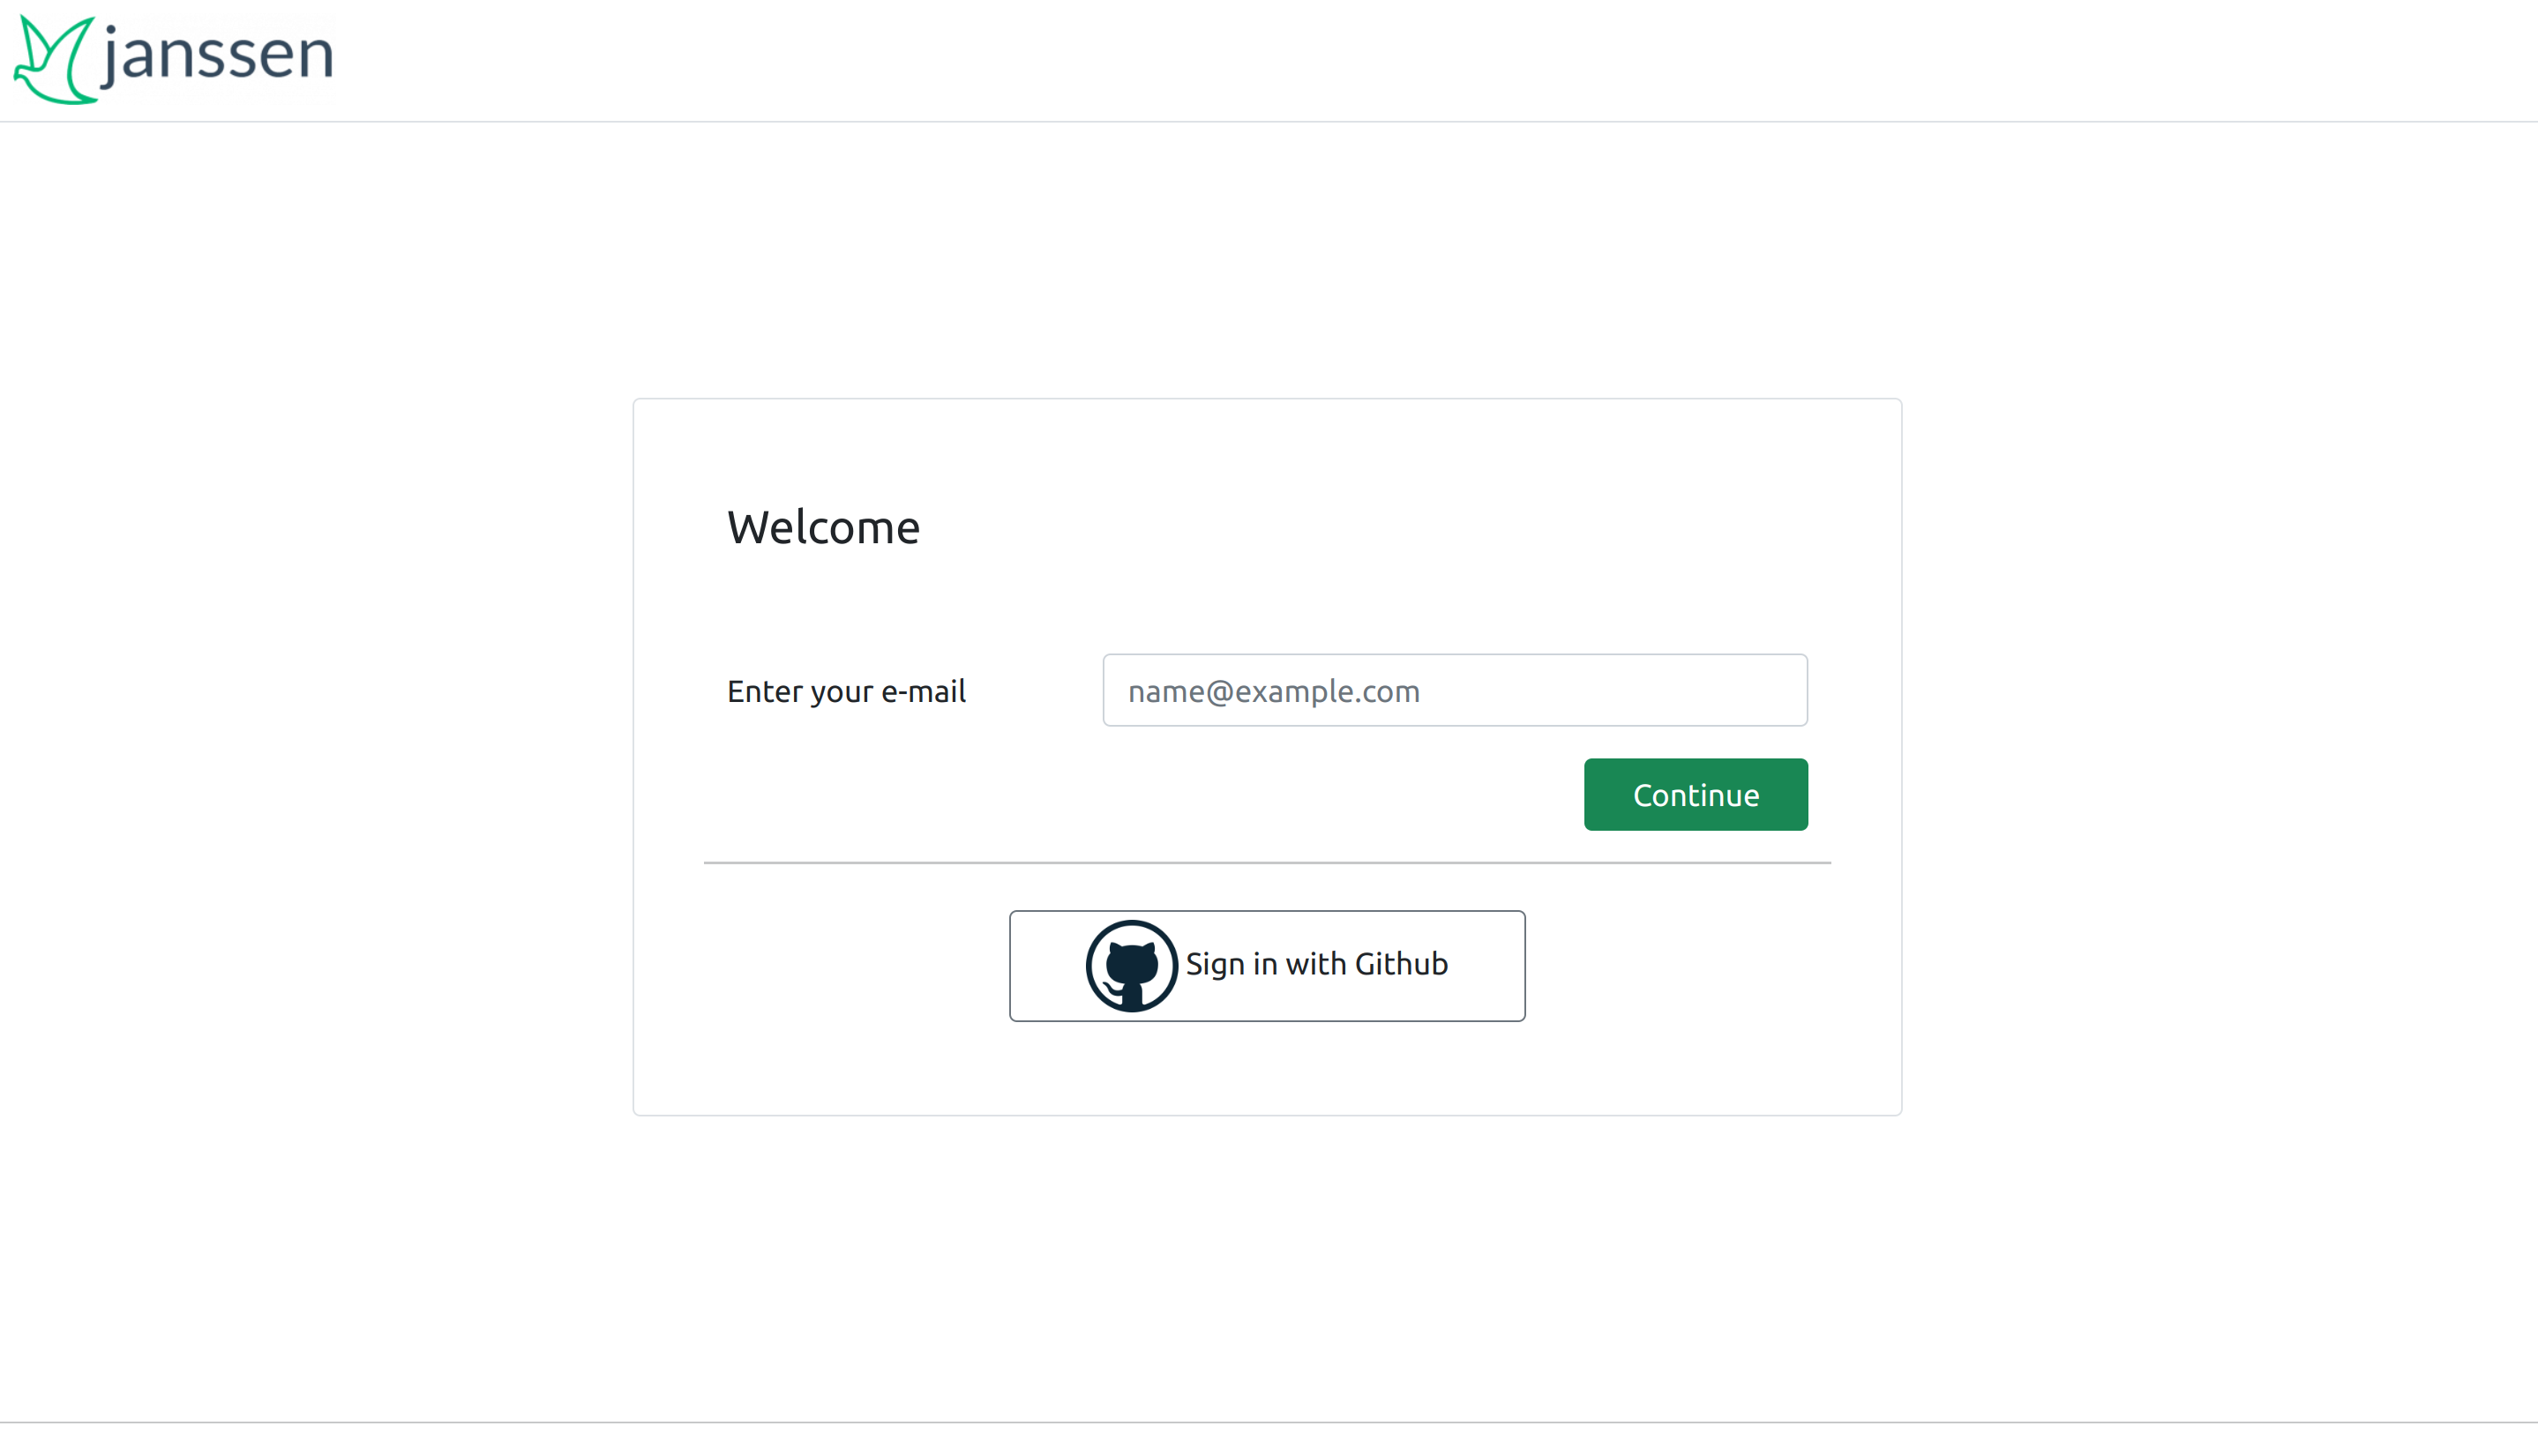
Use https://cloud.gluu.org/agama-lab online tool to make an agama flow.
Hit the above URL and you will see a page with Login with GitHub button. Click on it and give access to agama-lab.
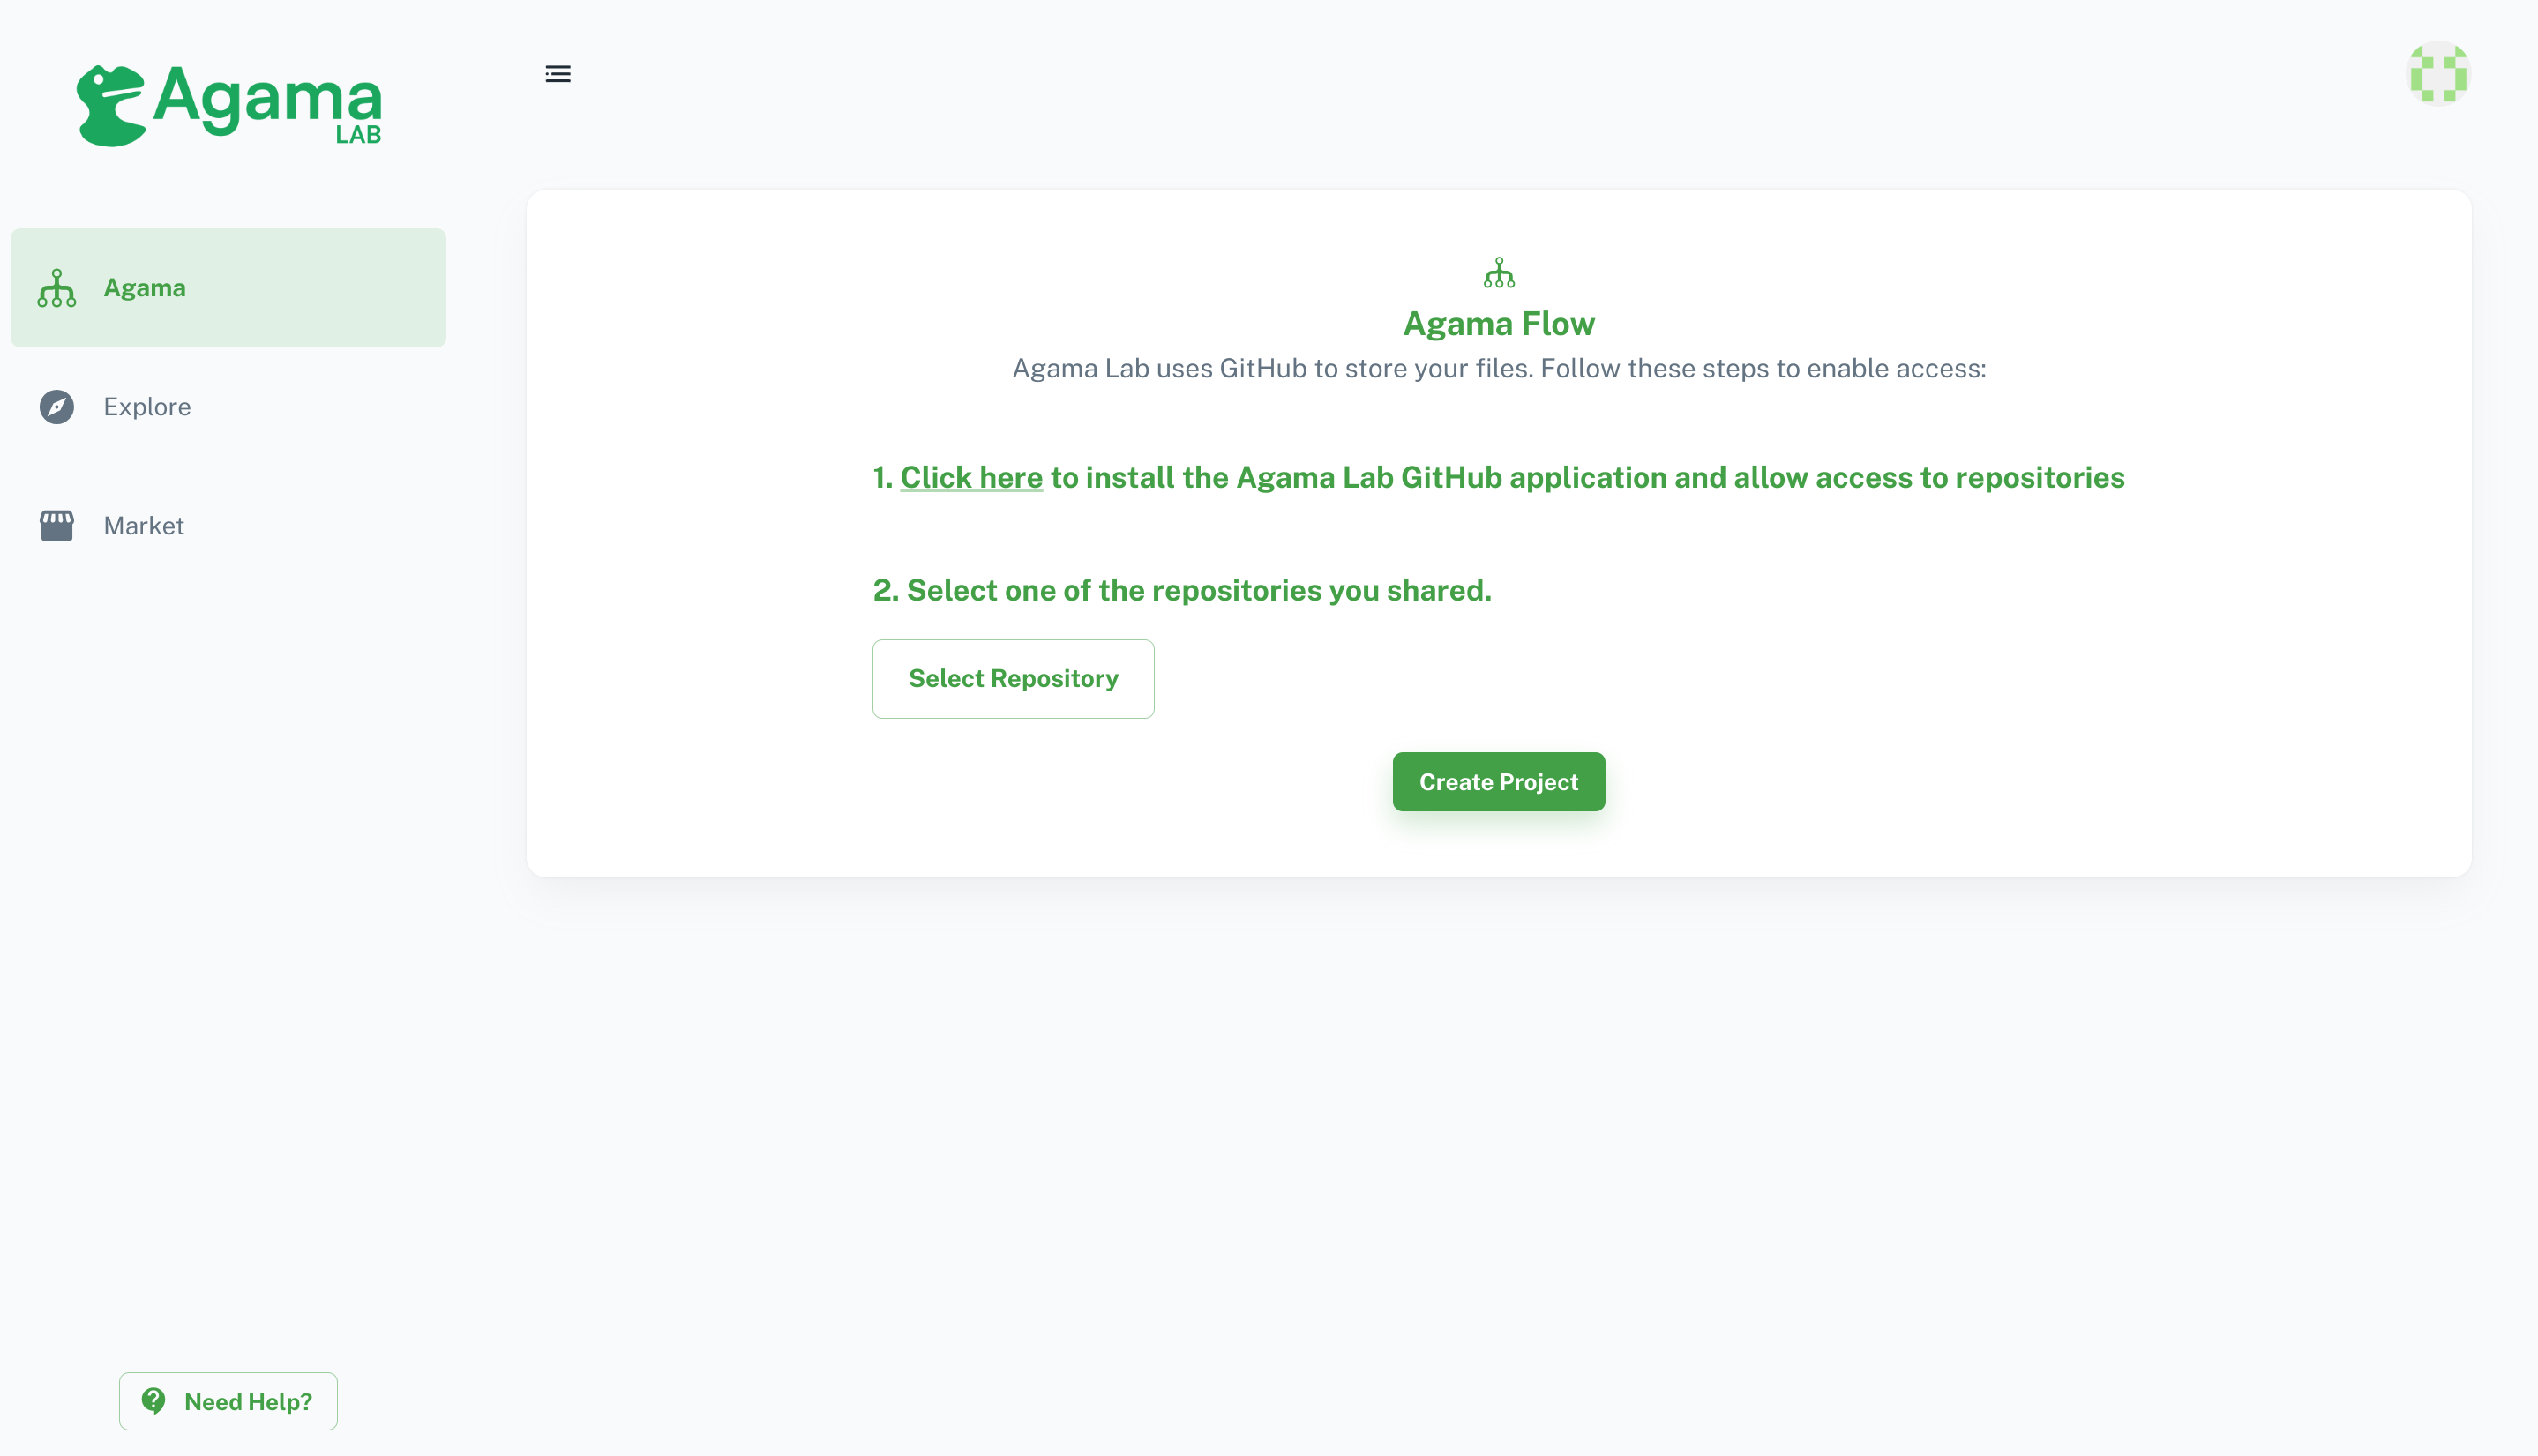
Install GitHub-App and select Repository
In the next step, You need to install a GitHub App which will allow Agama-Lab to commit and push changes to your repository. Agama-Lab uses your repository to store the whole project’s data and flow files.
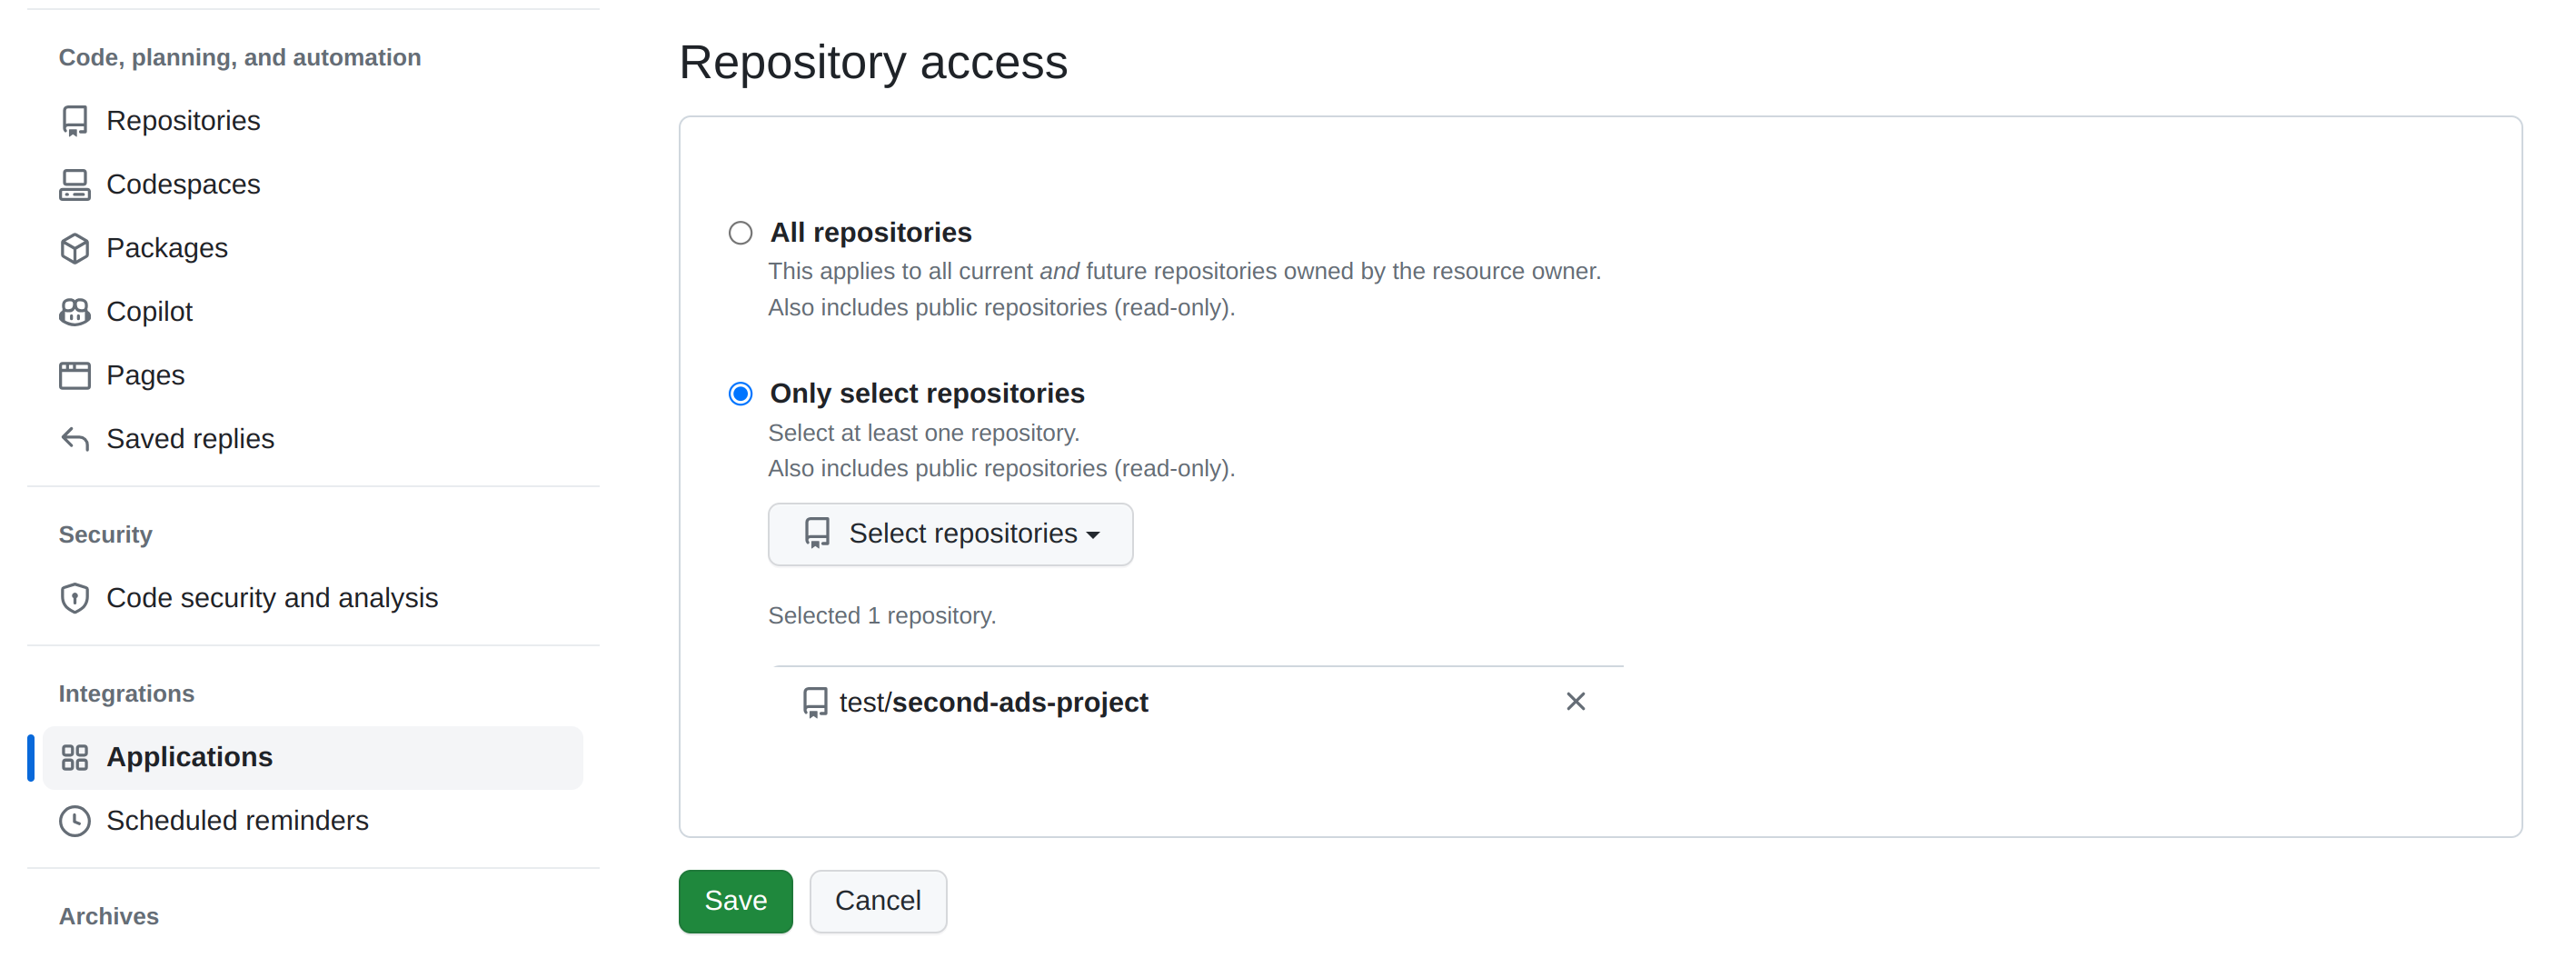
While GitHub-App installation it will ask you to choose a repository. If you missed it, add a repository using GitHub settings GitHub Settings > Integrations > Applications > agama-lab > Repository Access.
Use the Select Repository button to choose a repository. Your repository must have at least one Git Commit to proceed. Just making a fresh new repo with README.md will be good. Click on the Create Project button to proceed next.
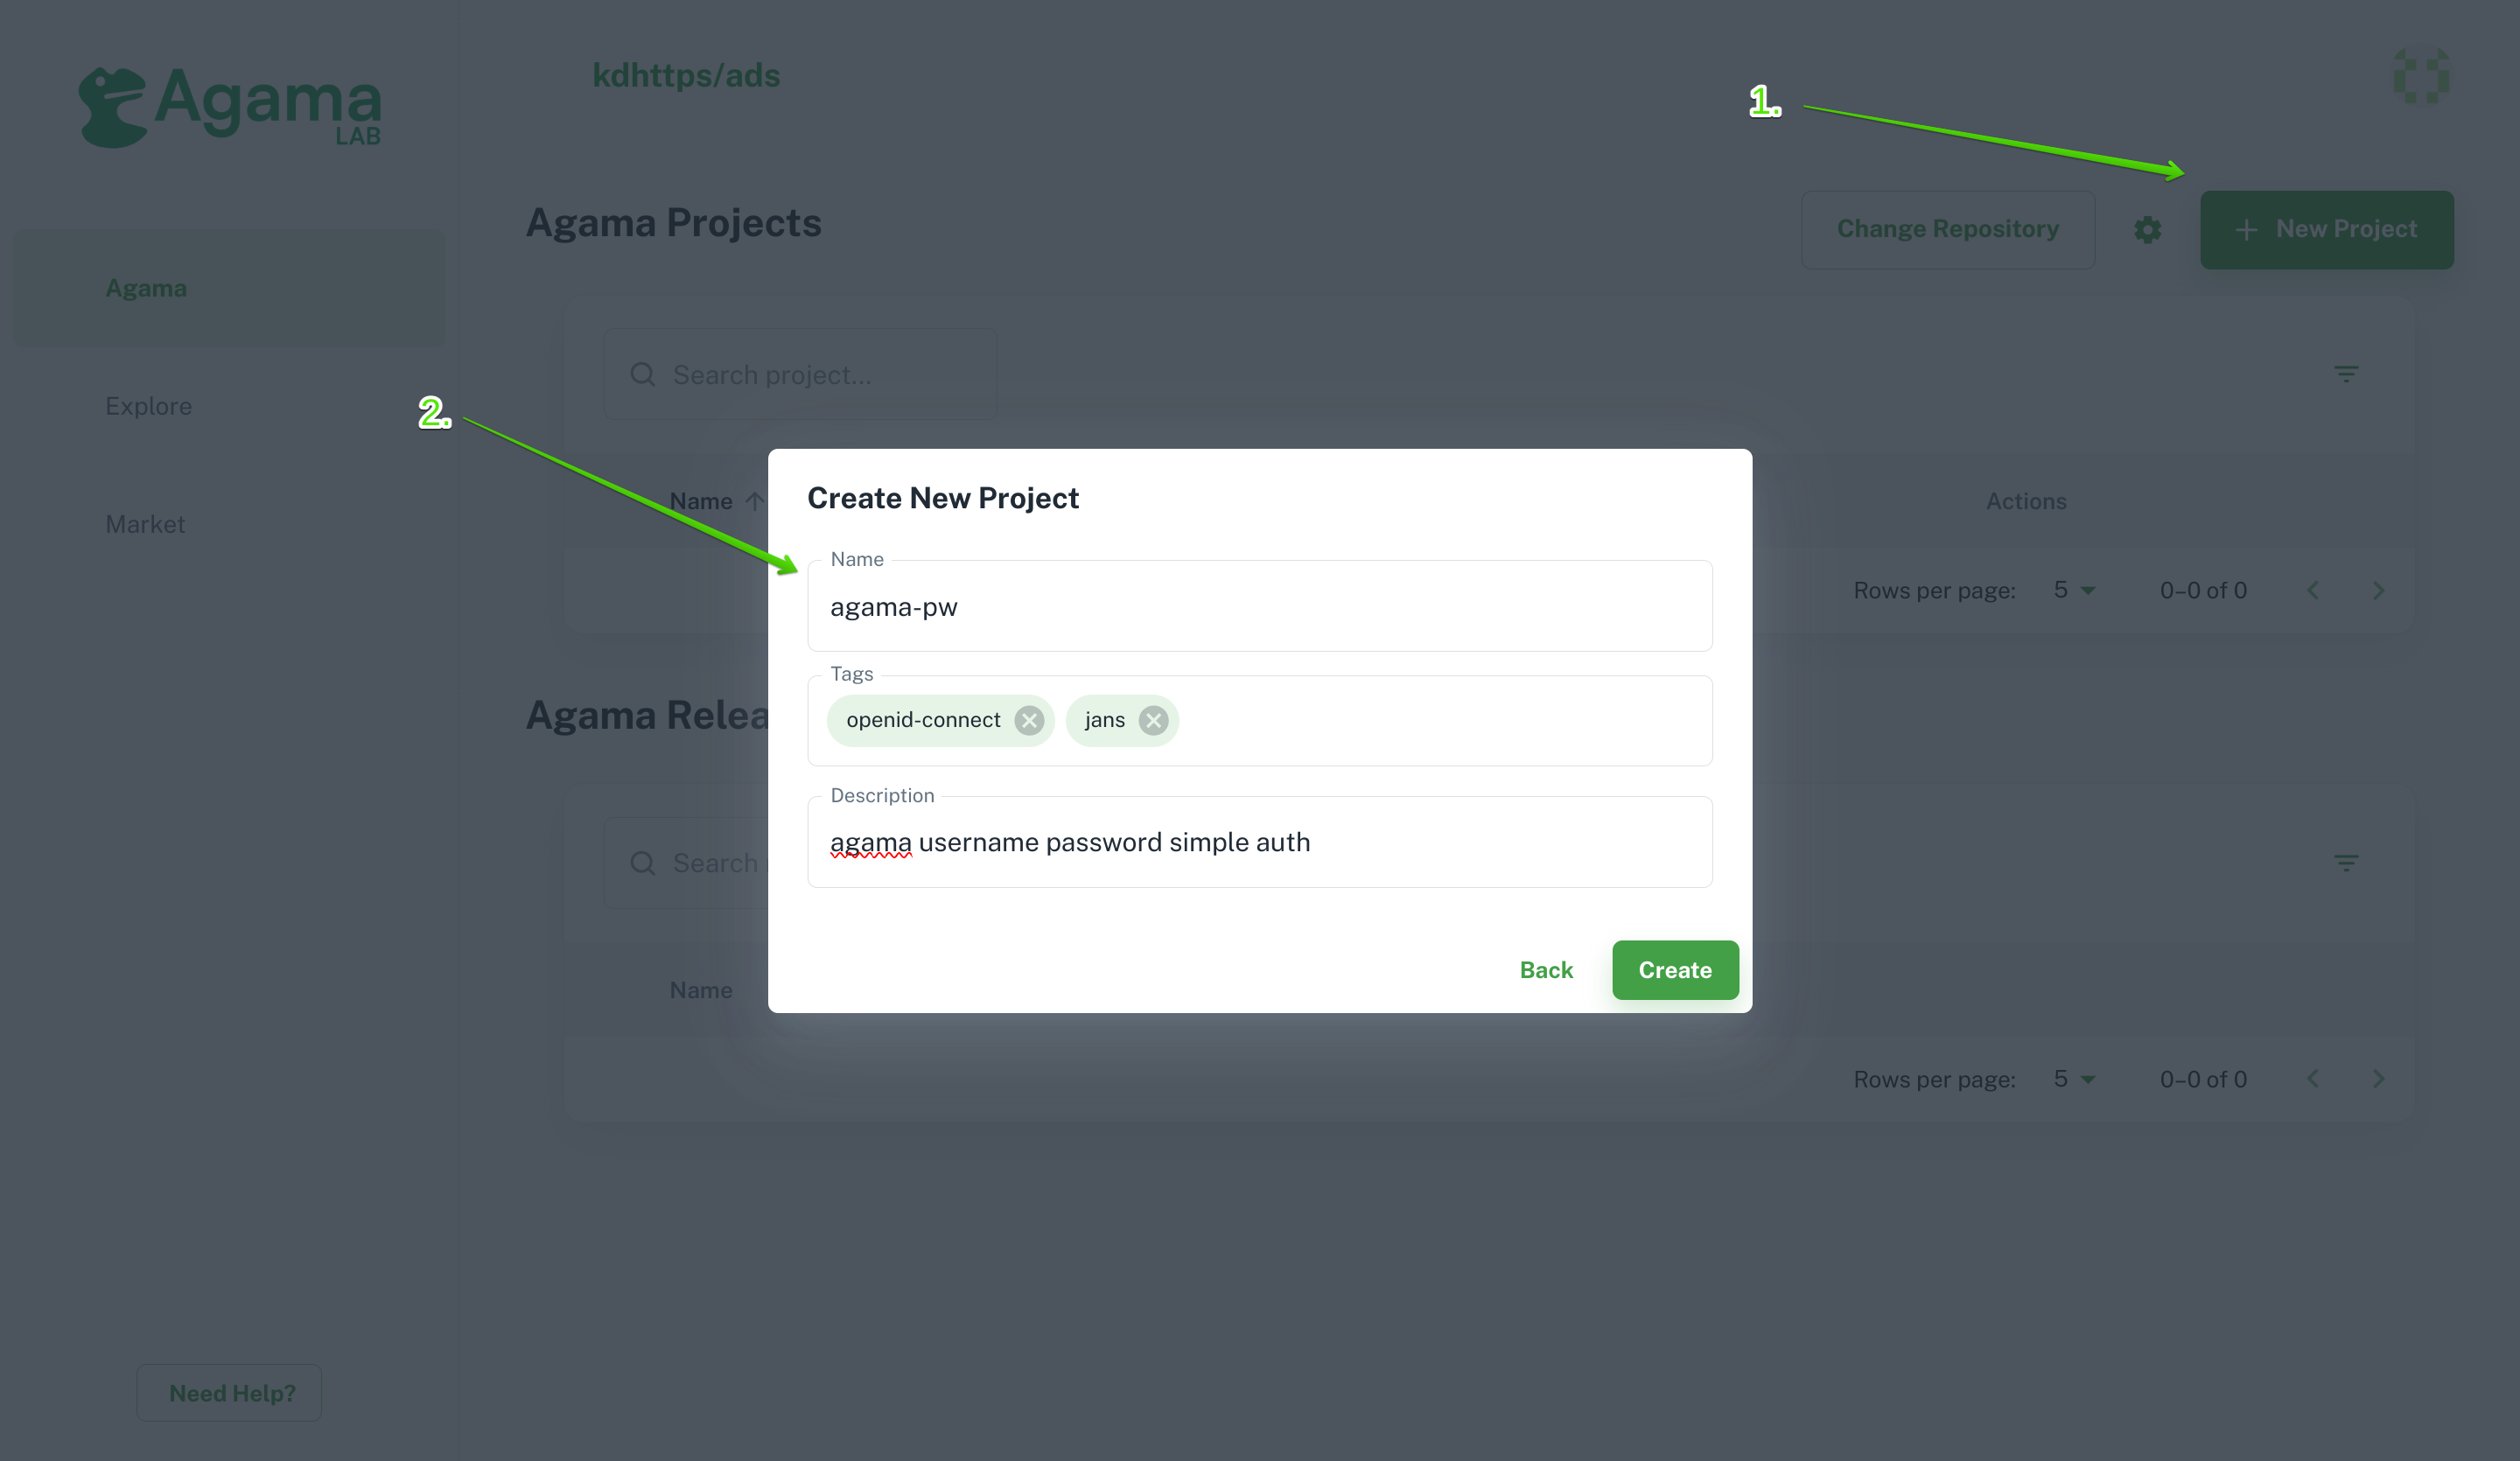
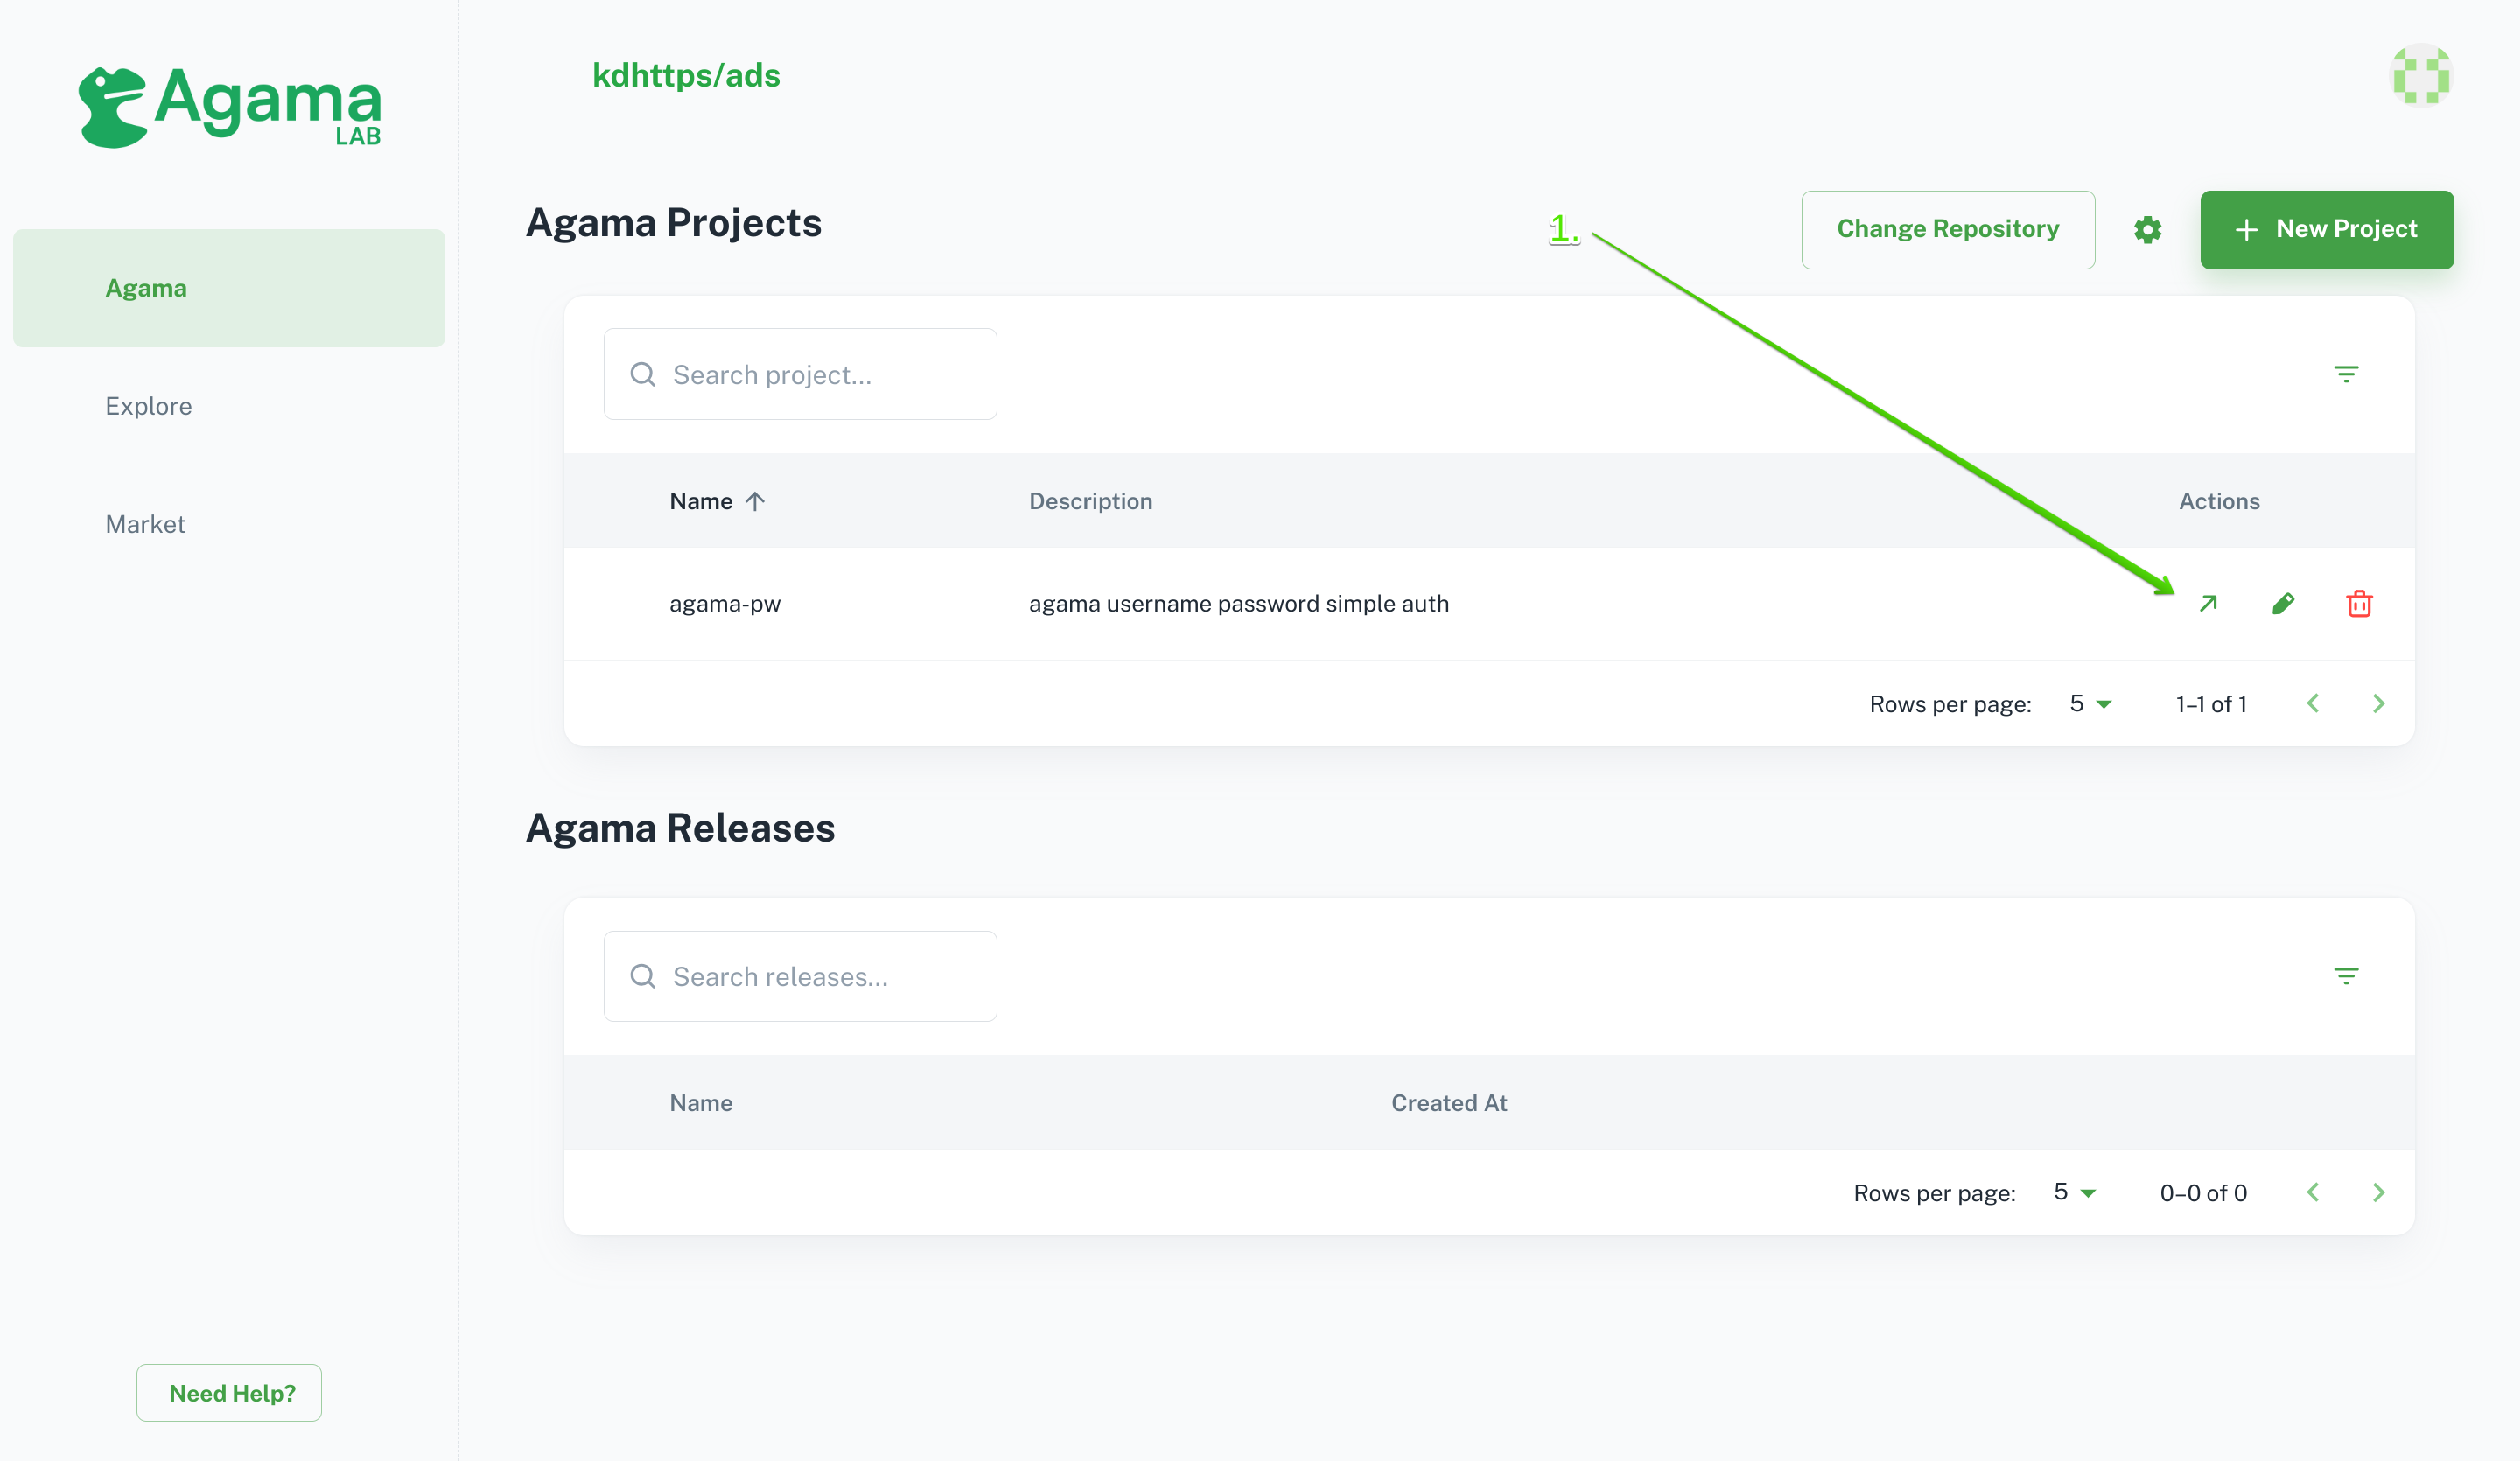
Make a Project
The first step is to make a Project.
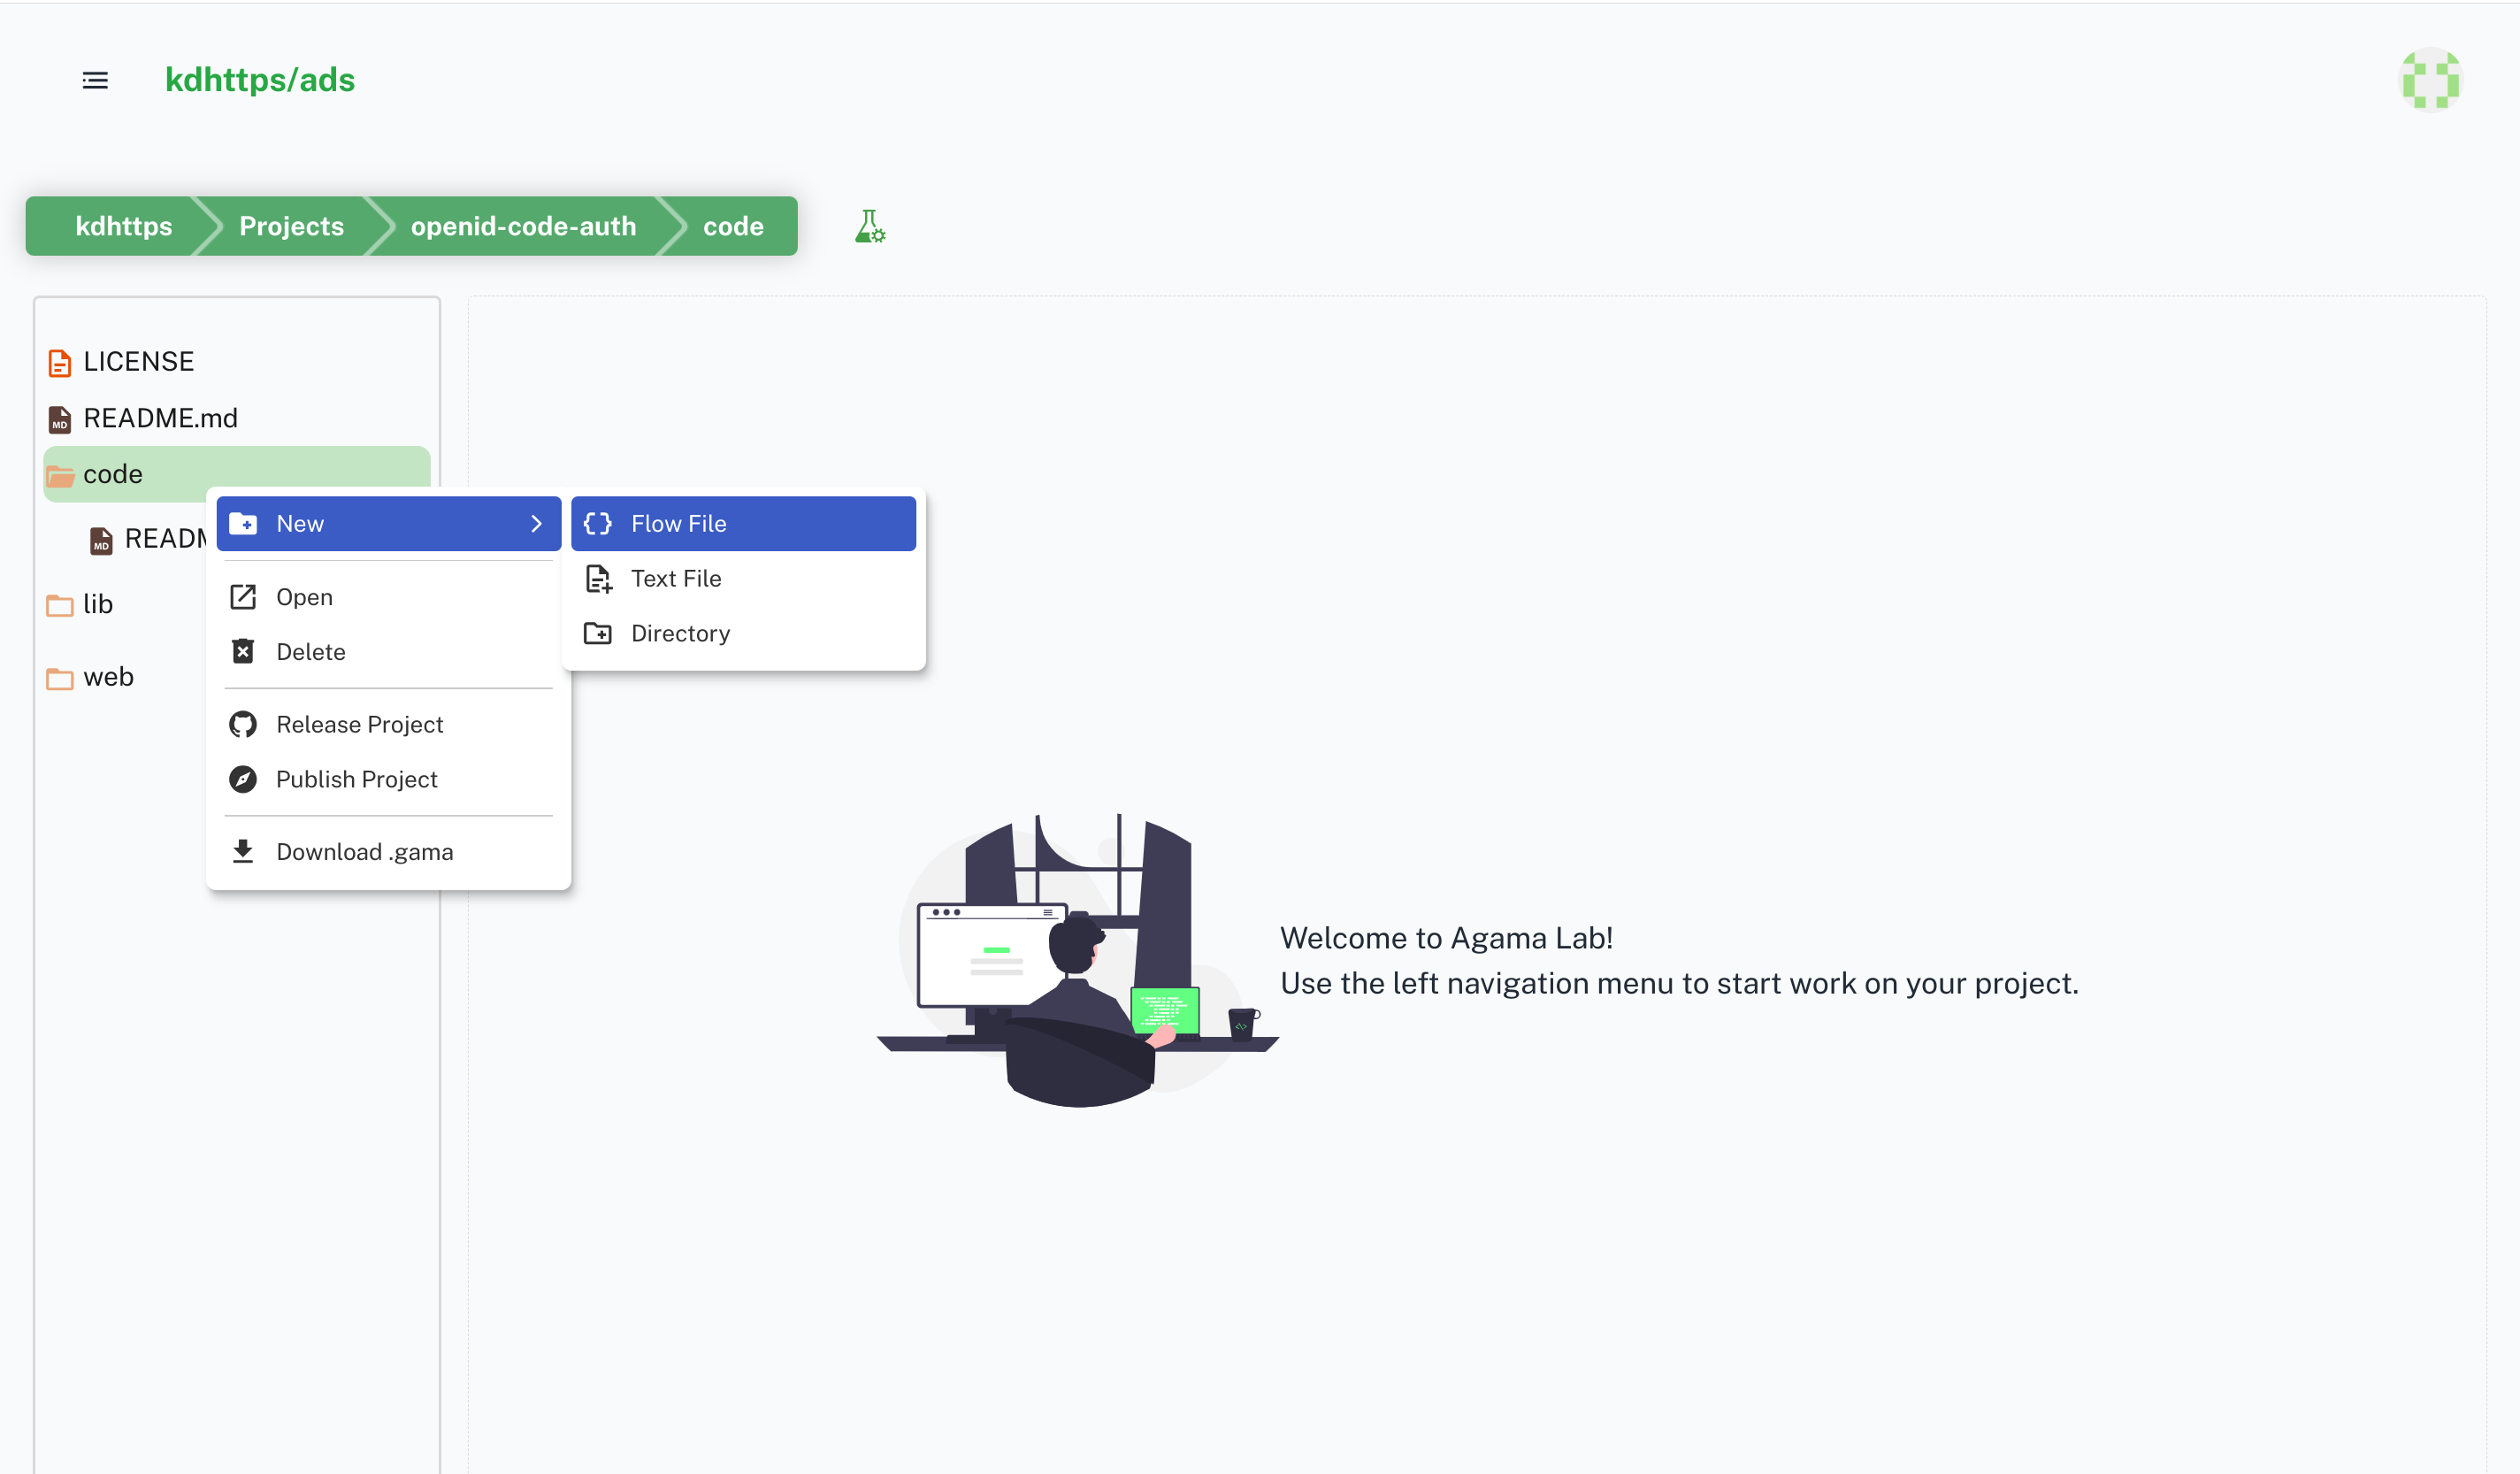
Navigate to the Project Tree File view to make Agama Flows and .gama files.
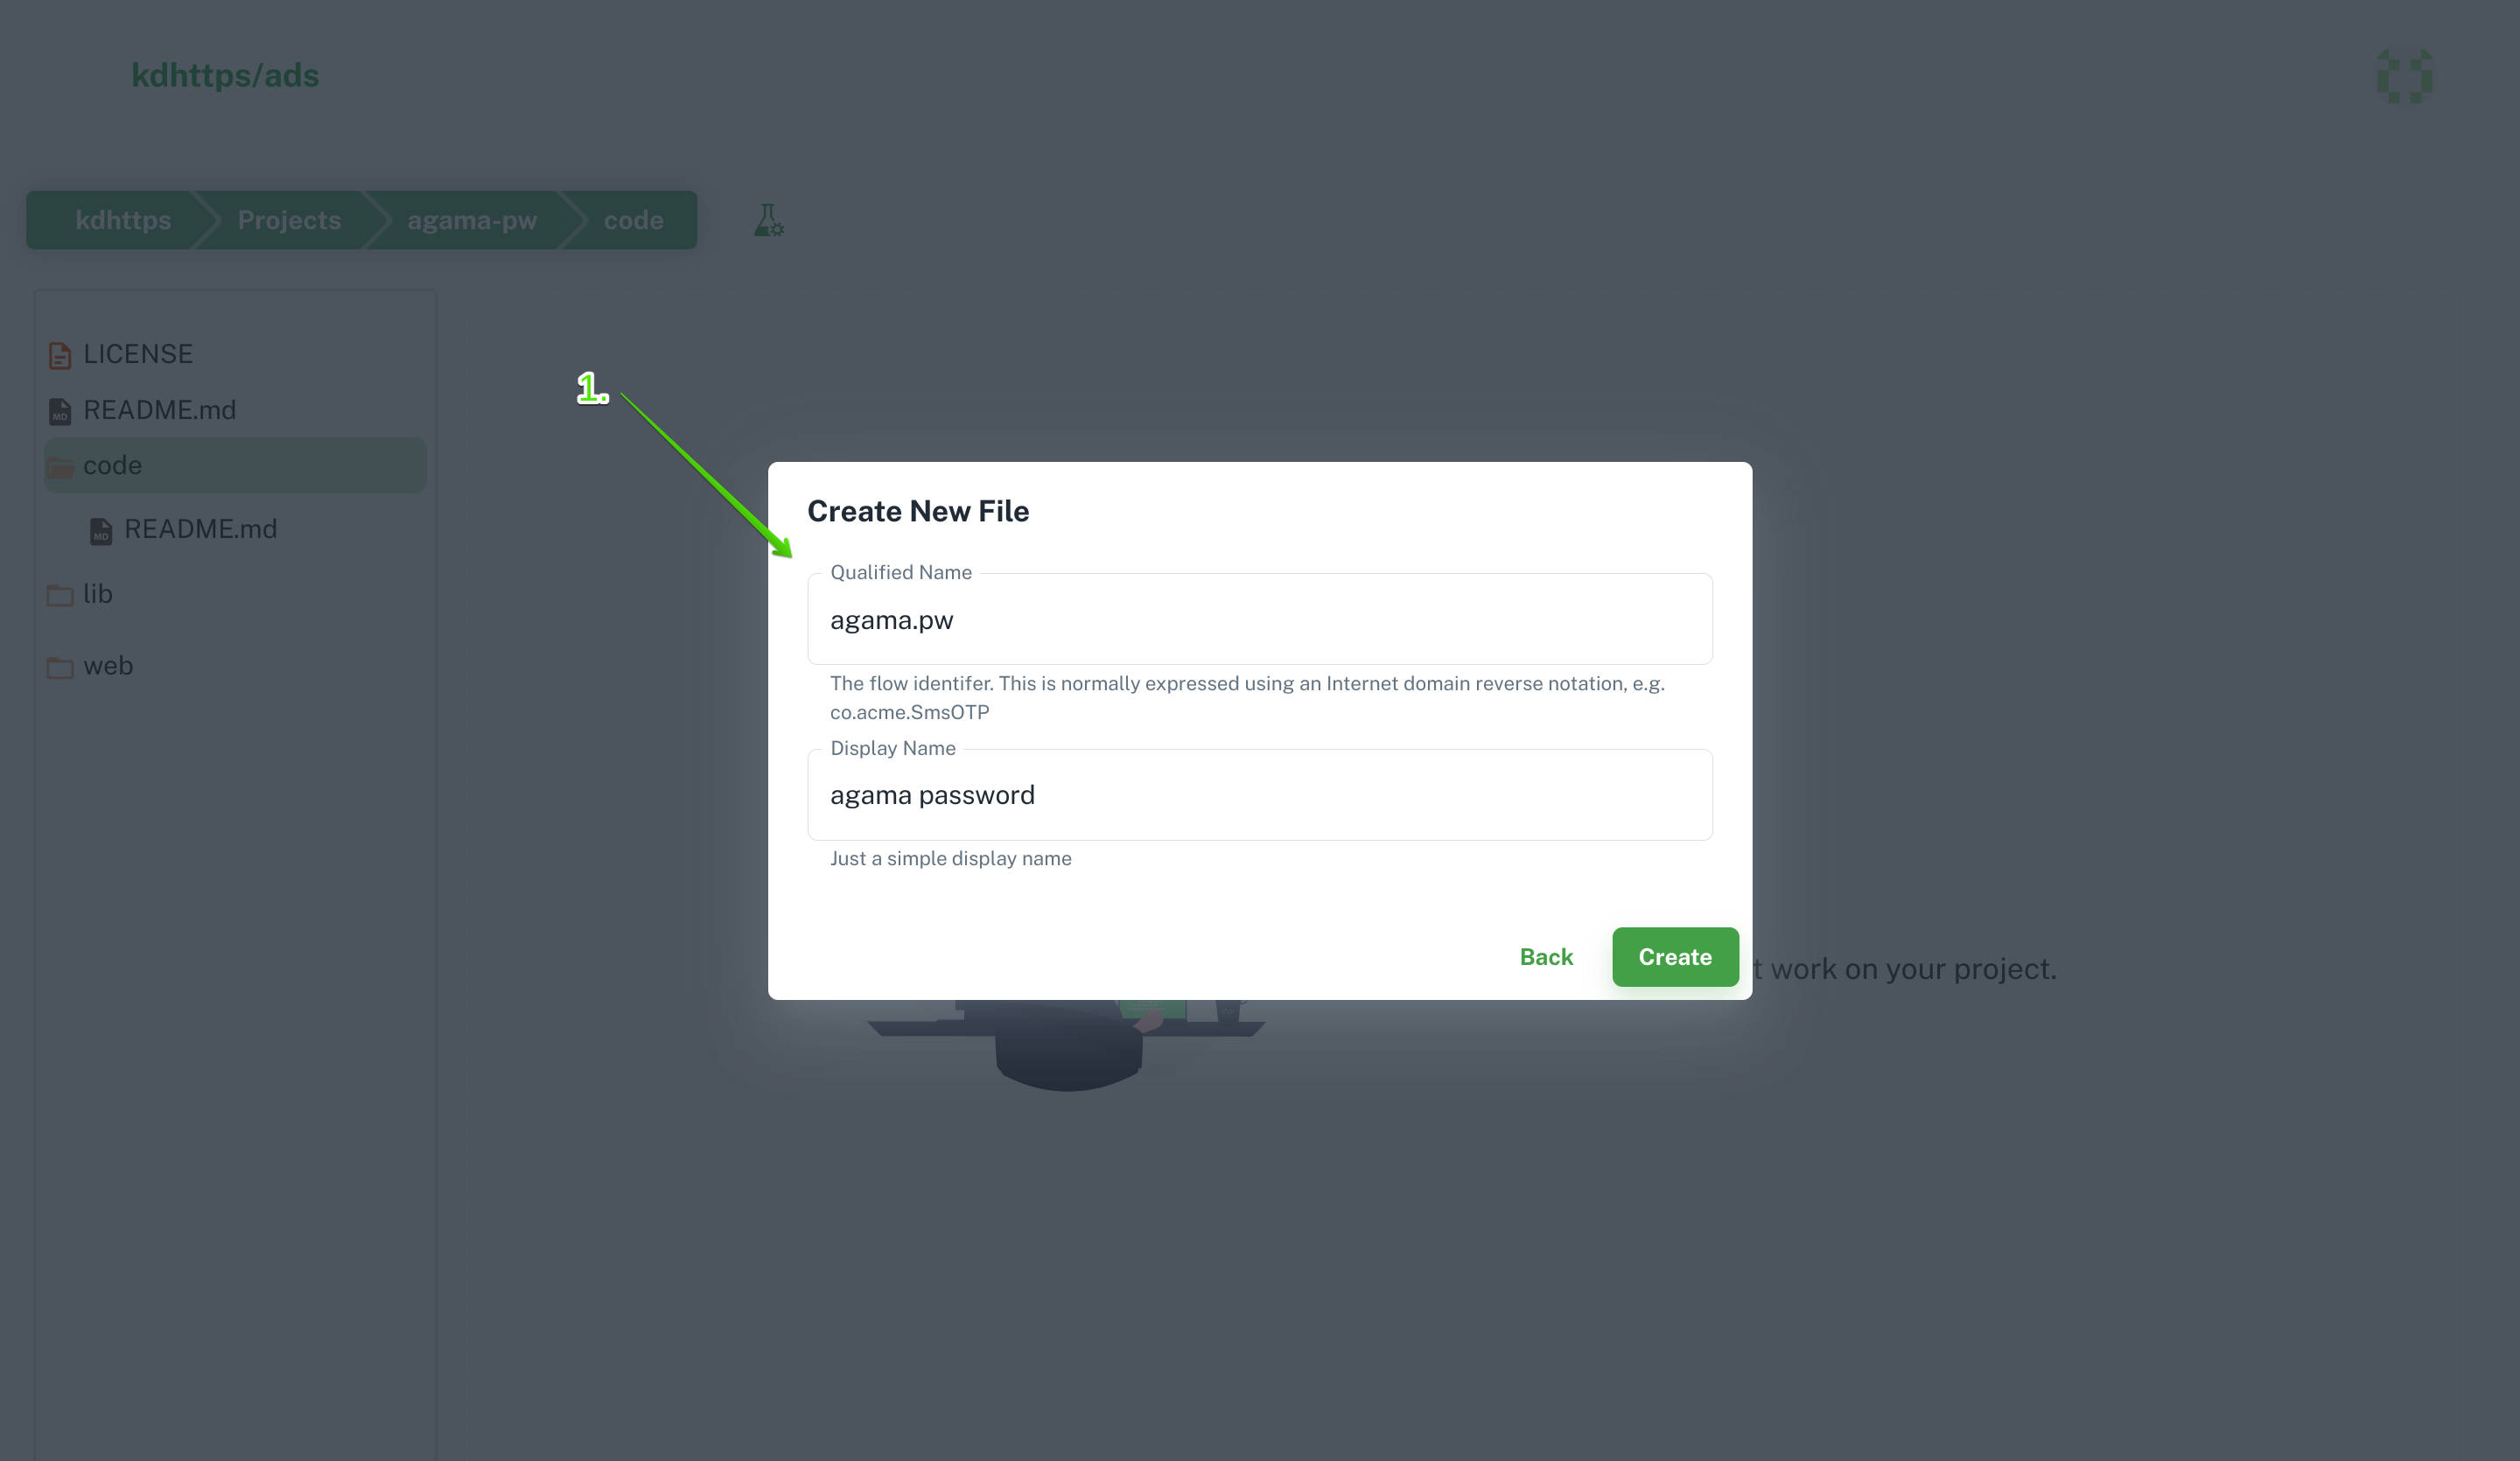
Make a Flow File
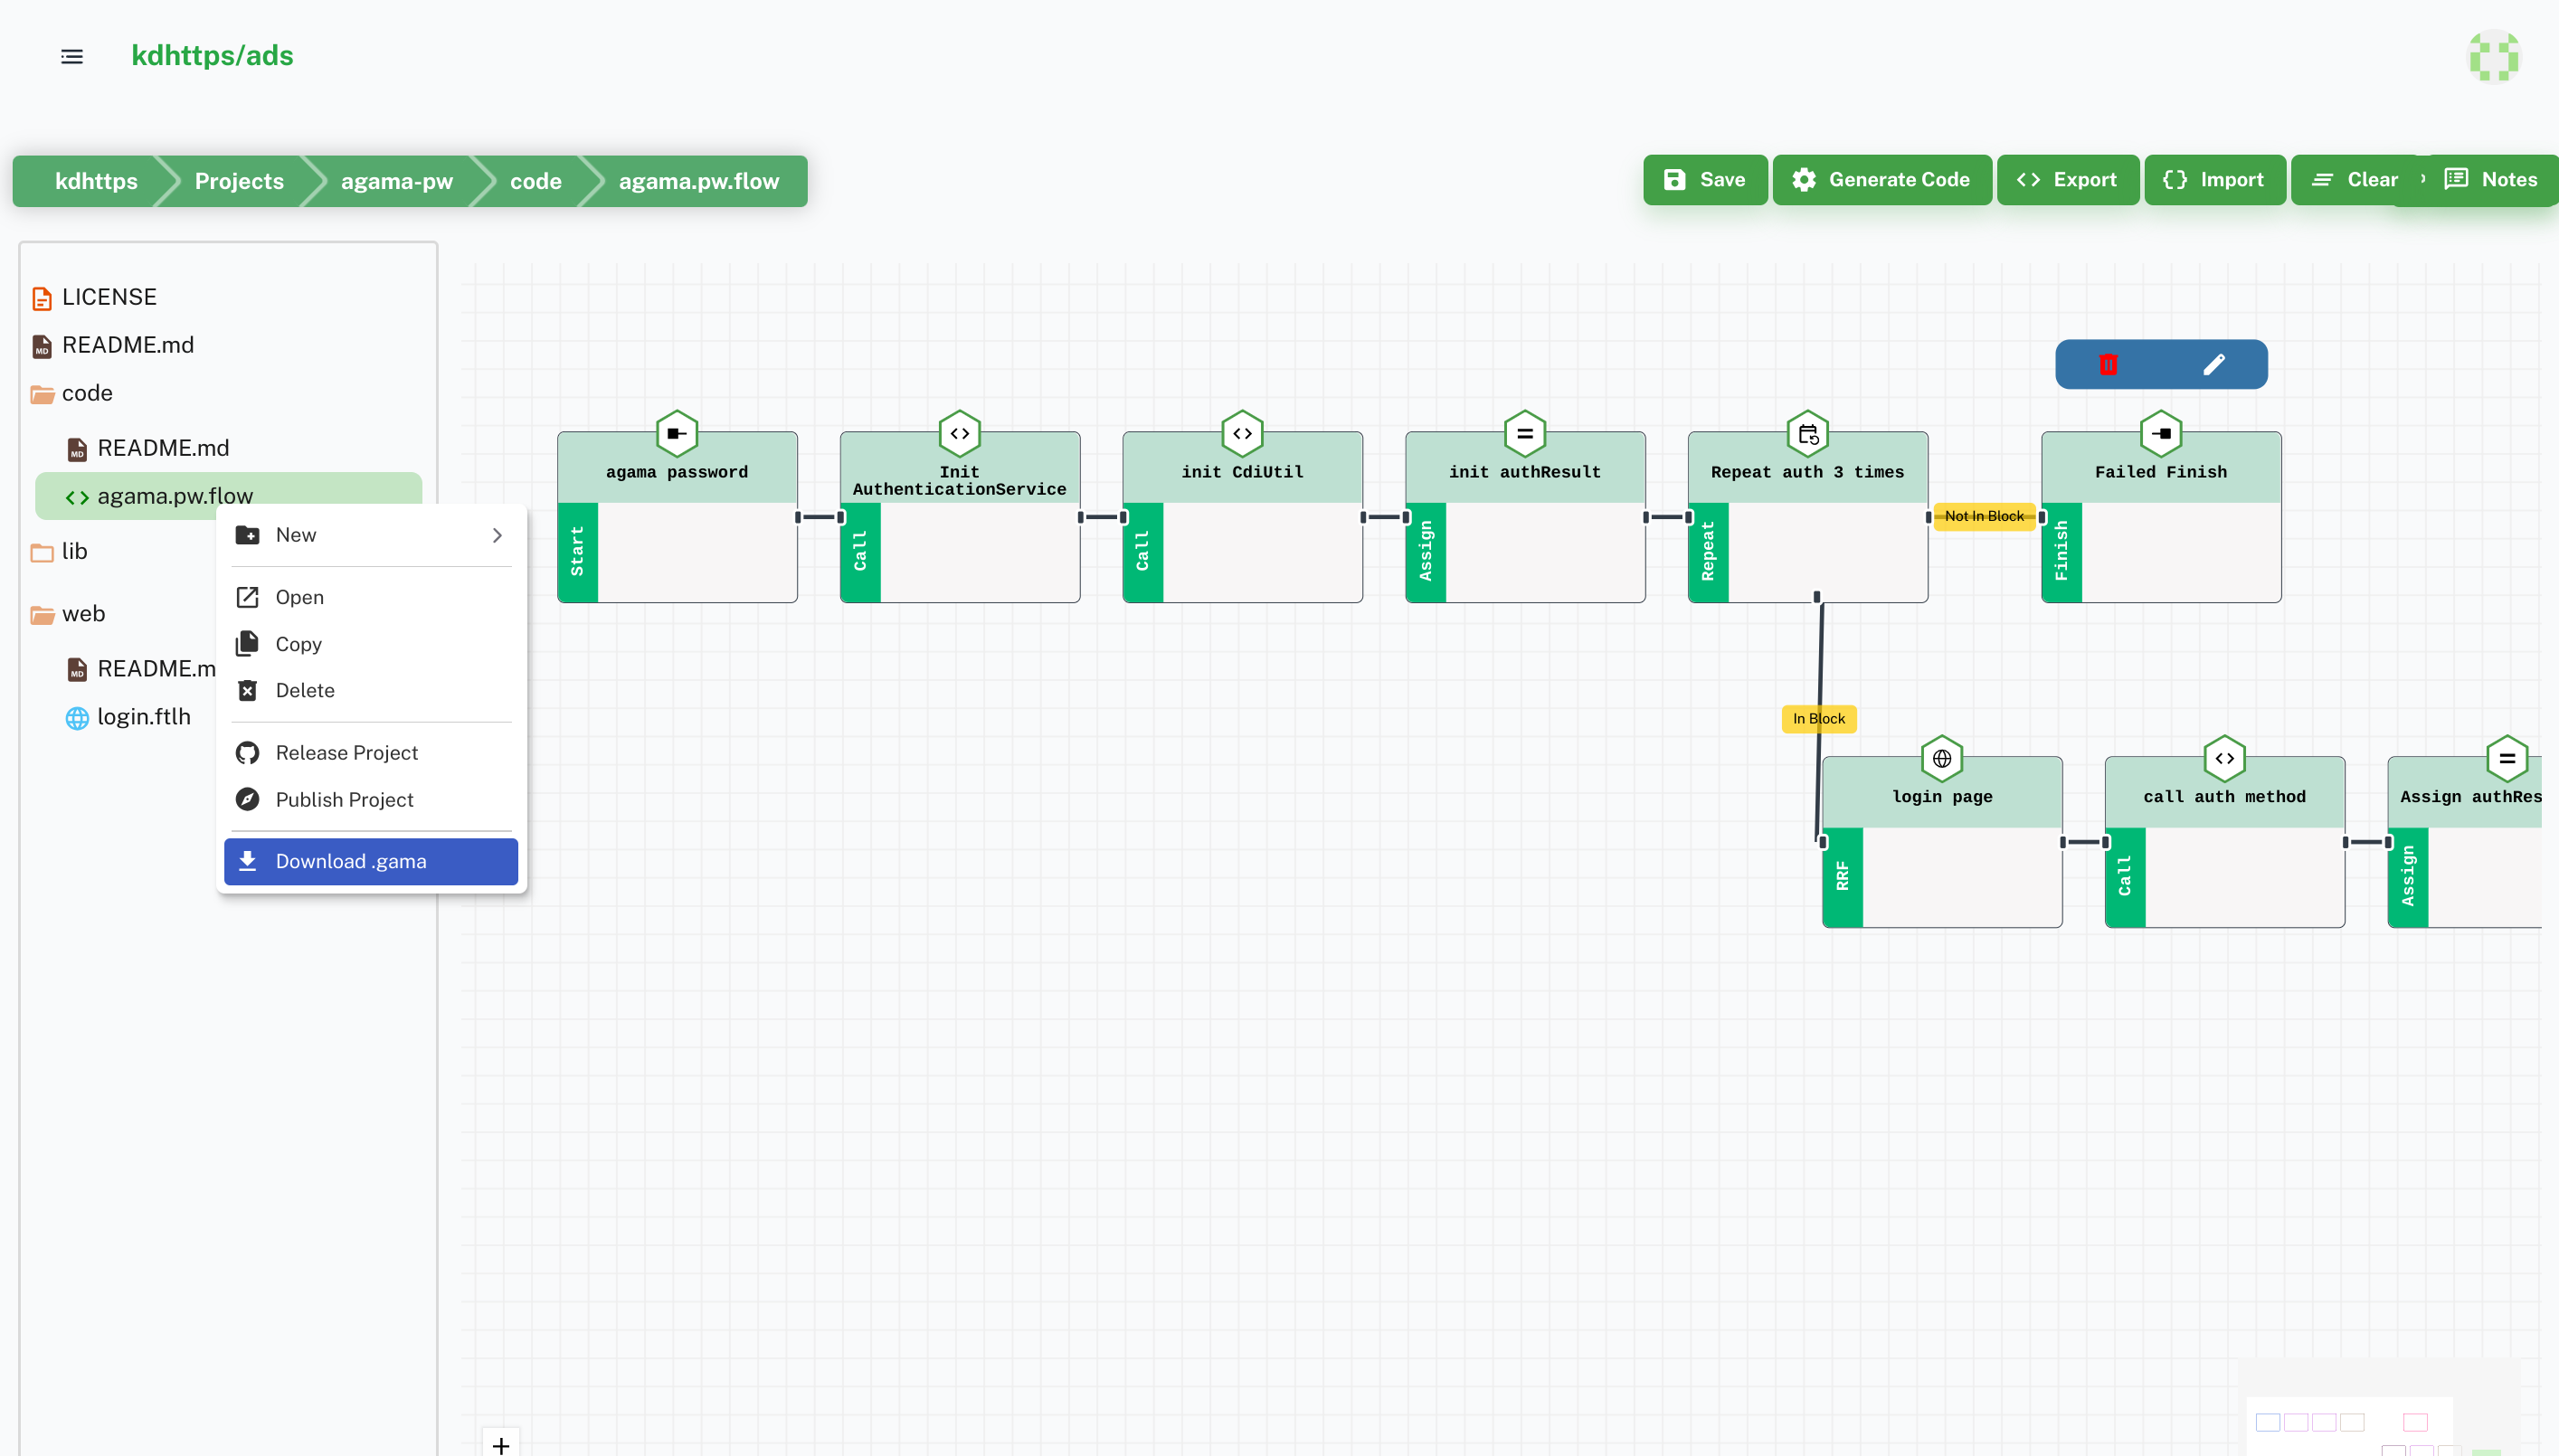
Right-click on the Code folder and select New Flow file. You can double-click on files to open it.
Enter Details in Form and click on the Create button.
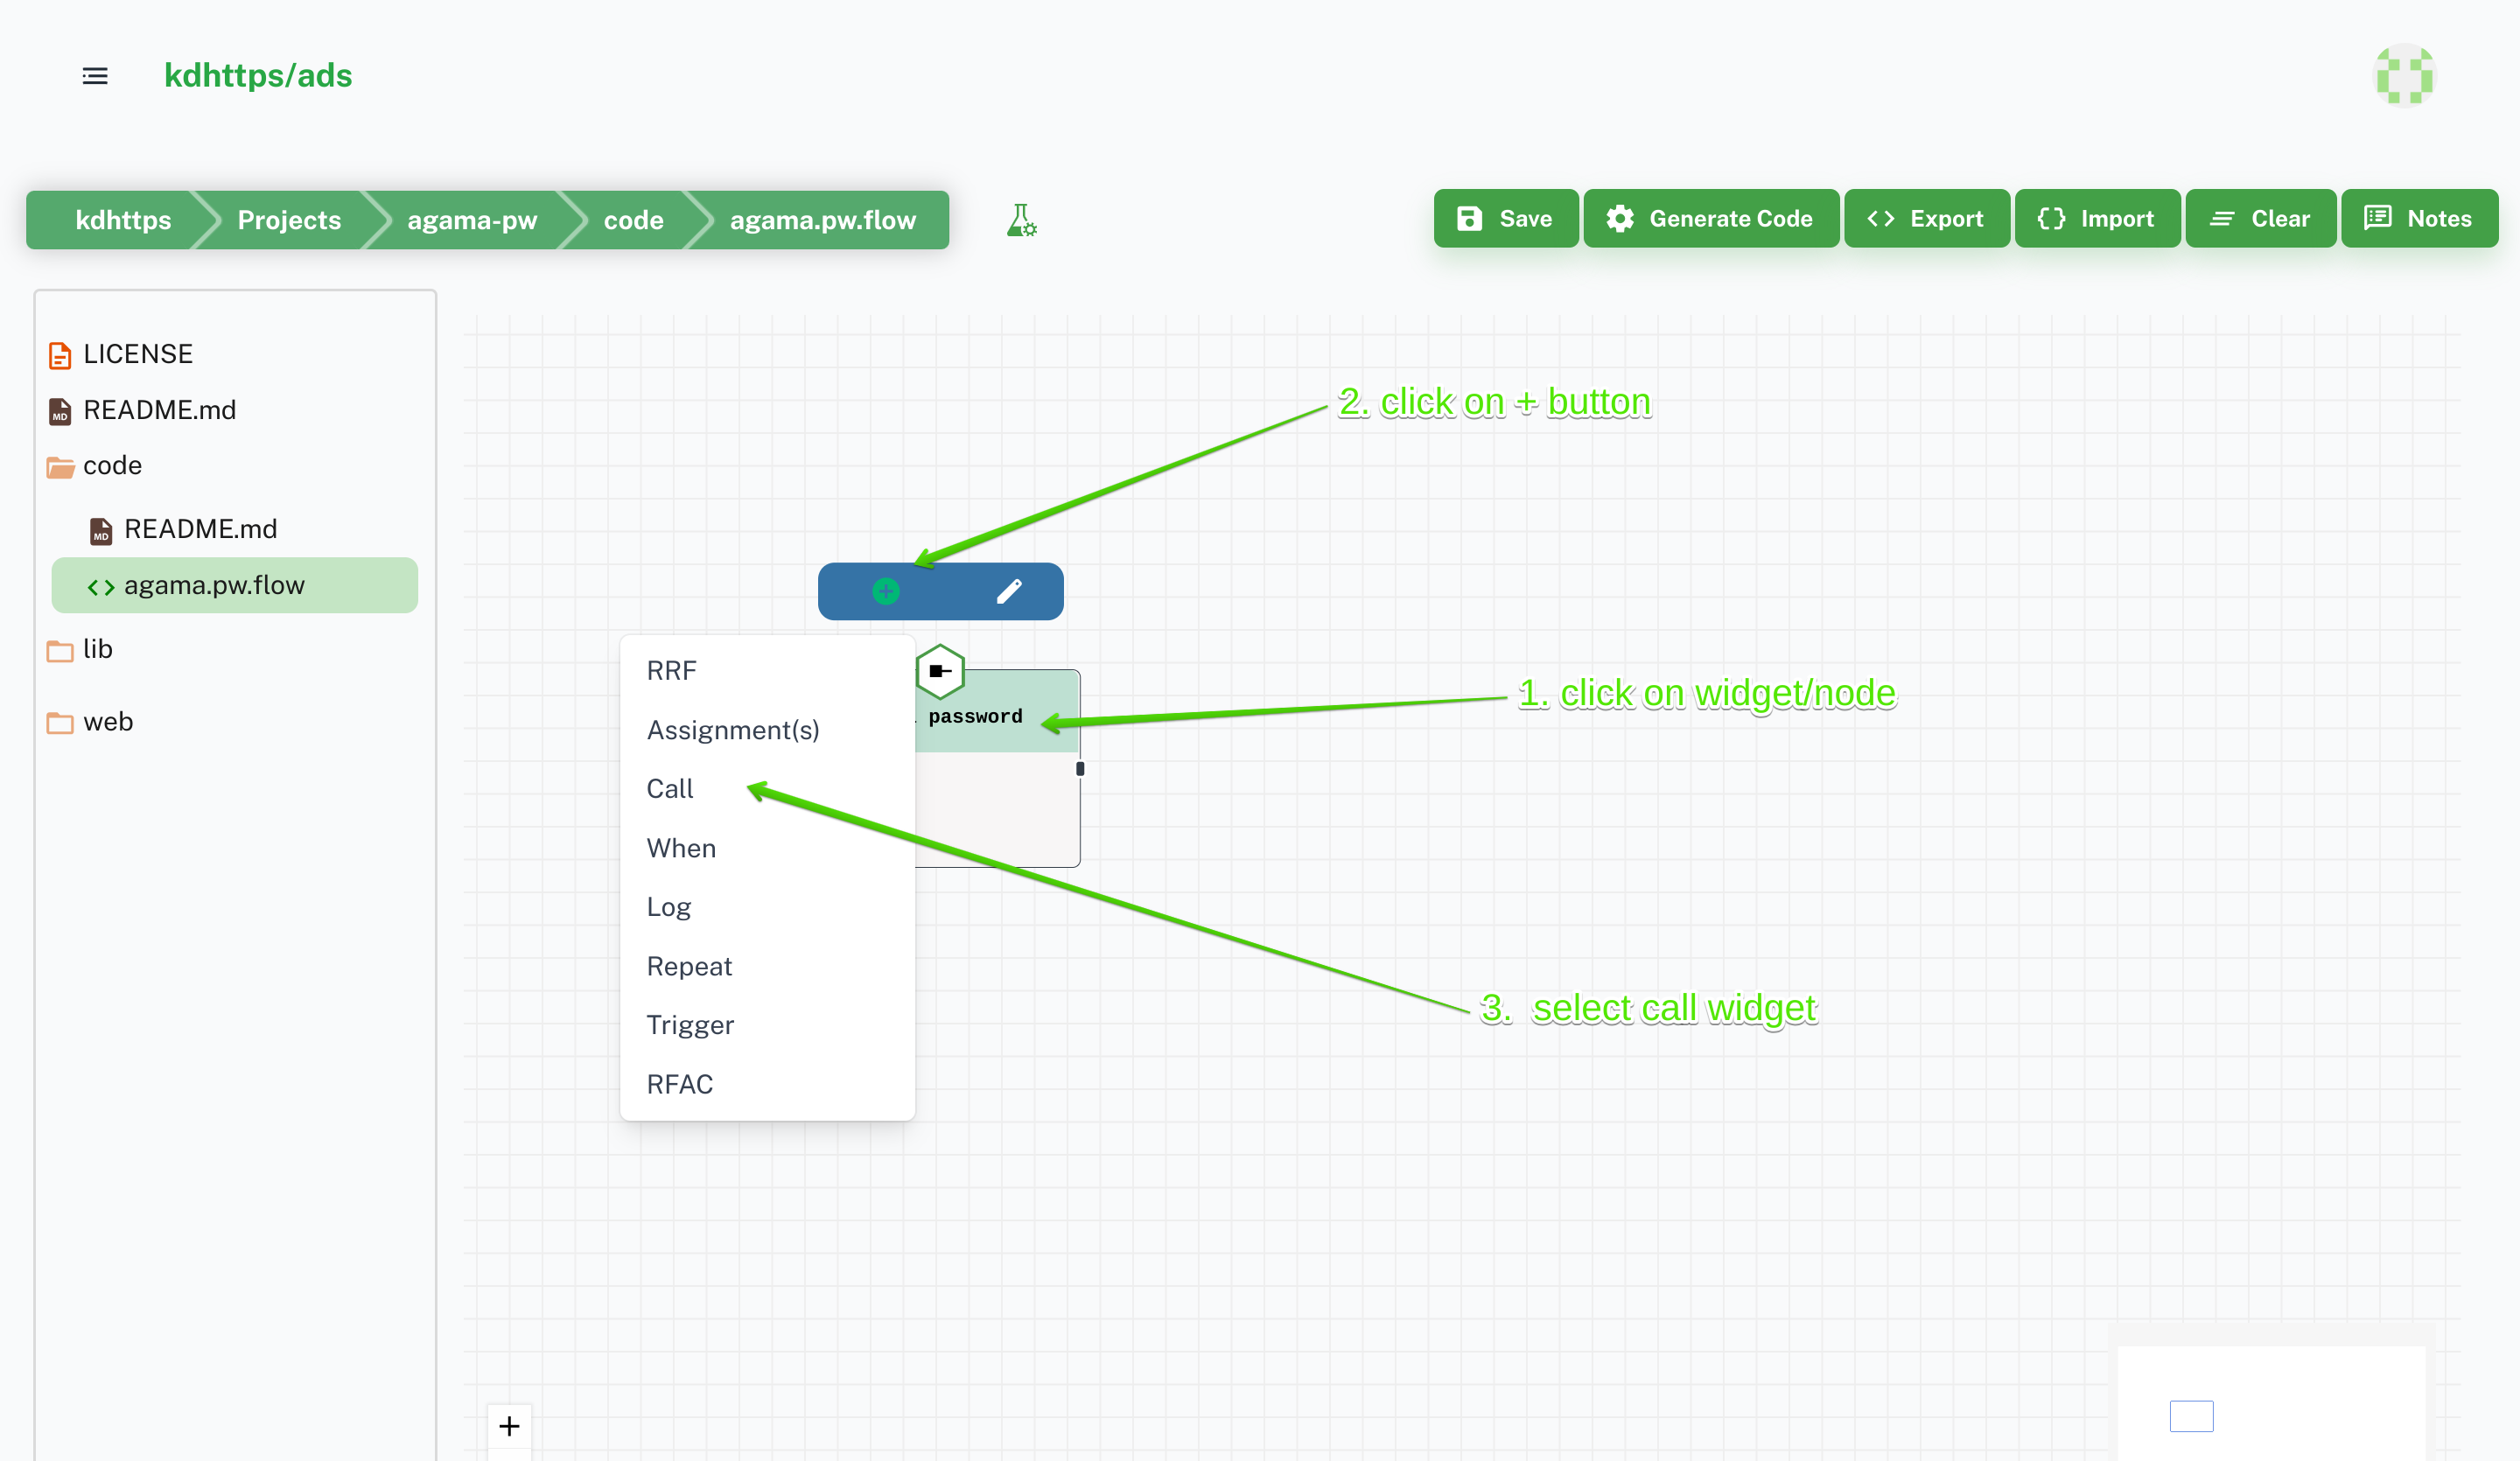
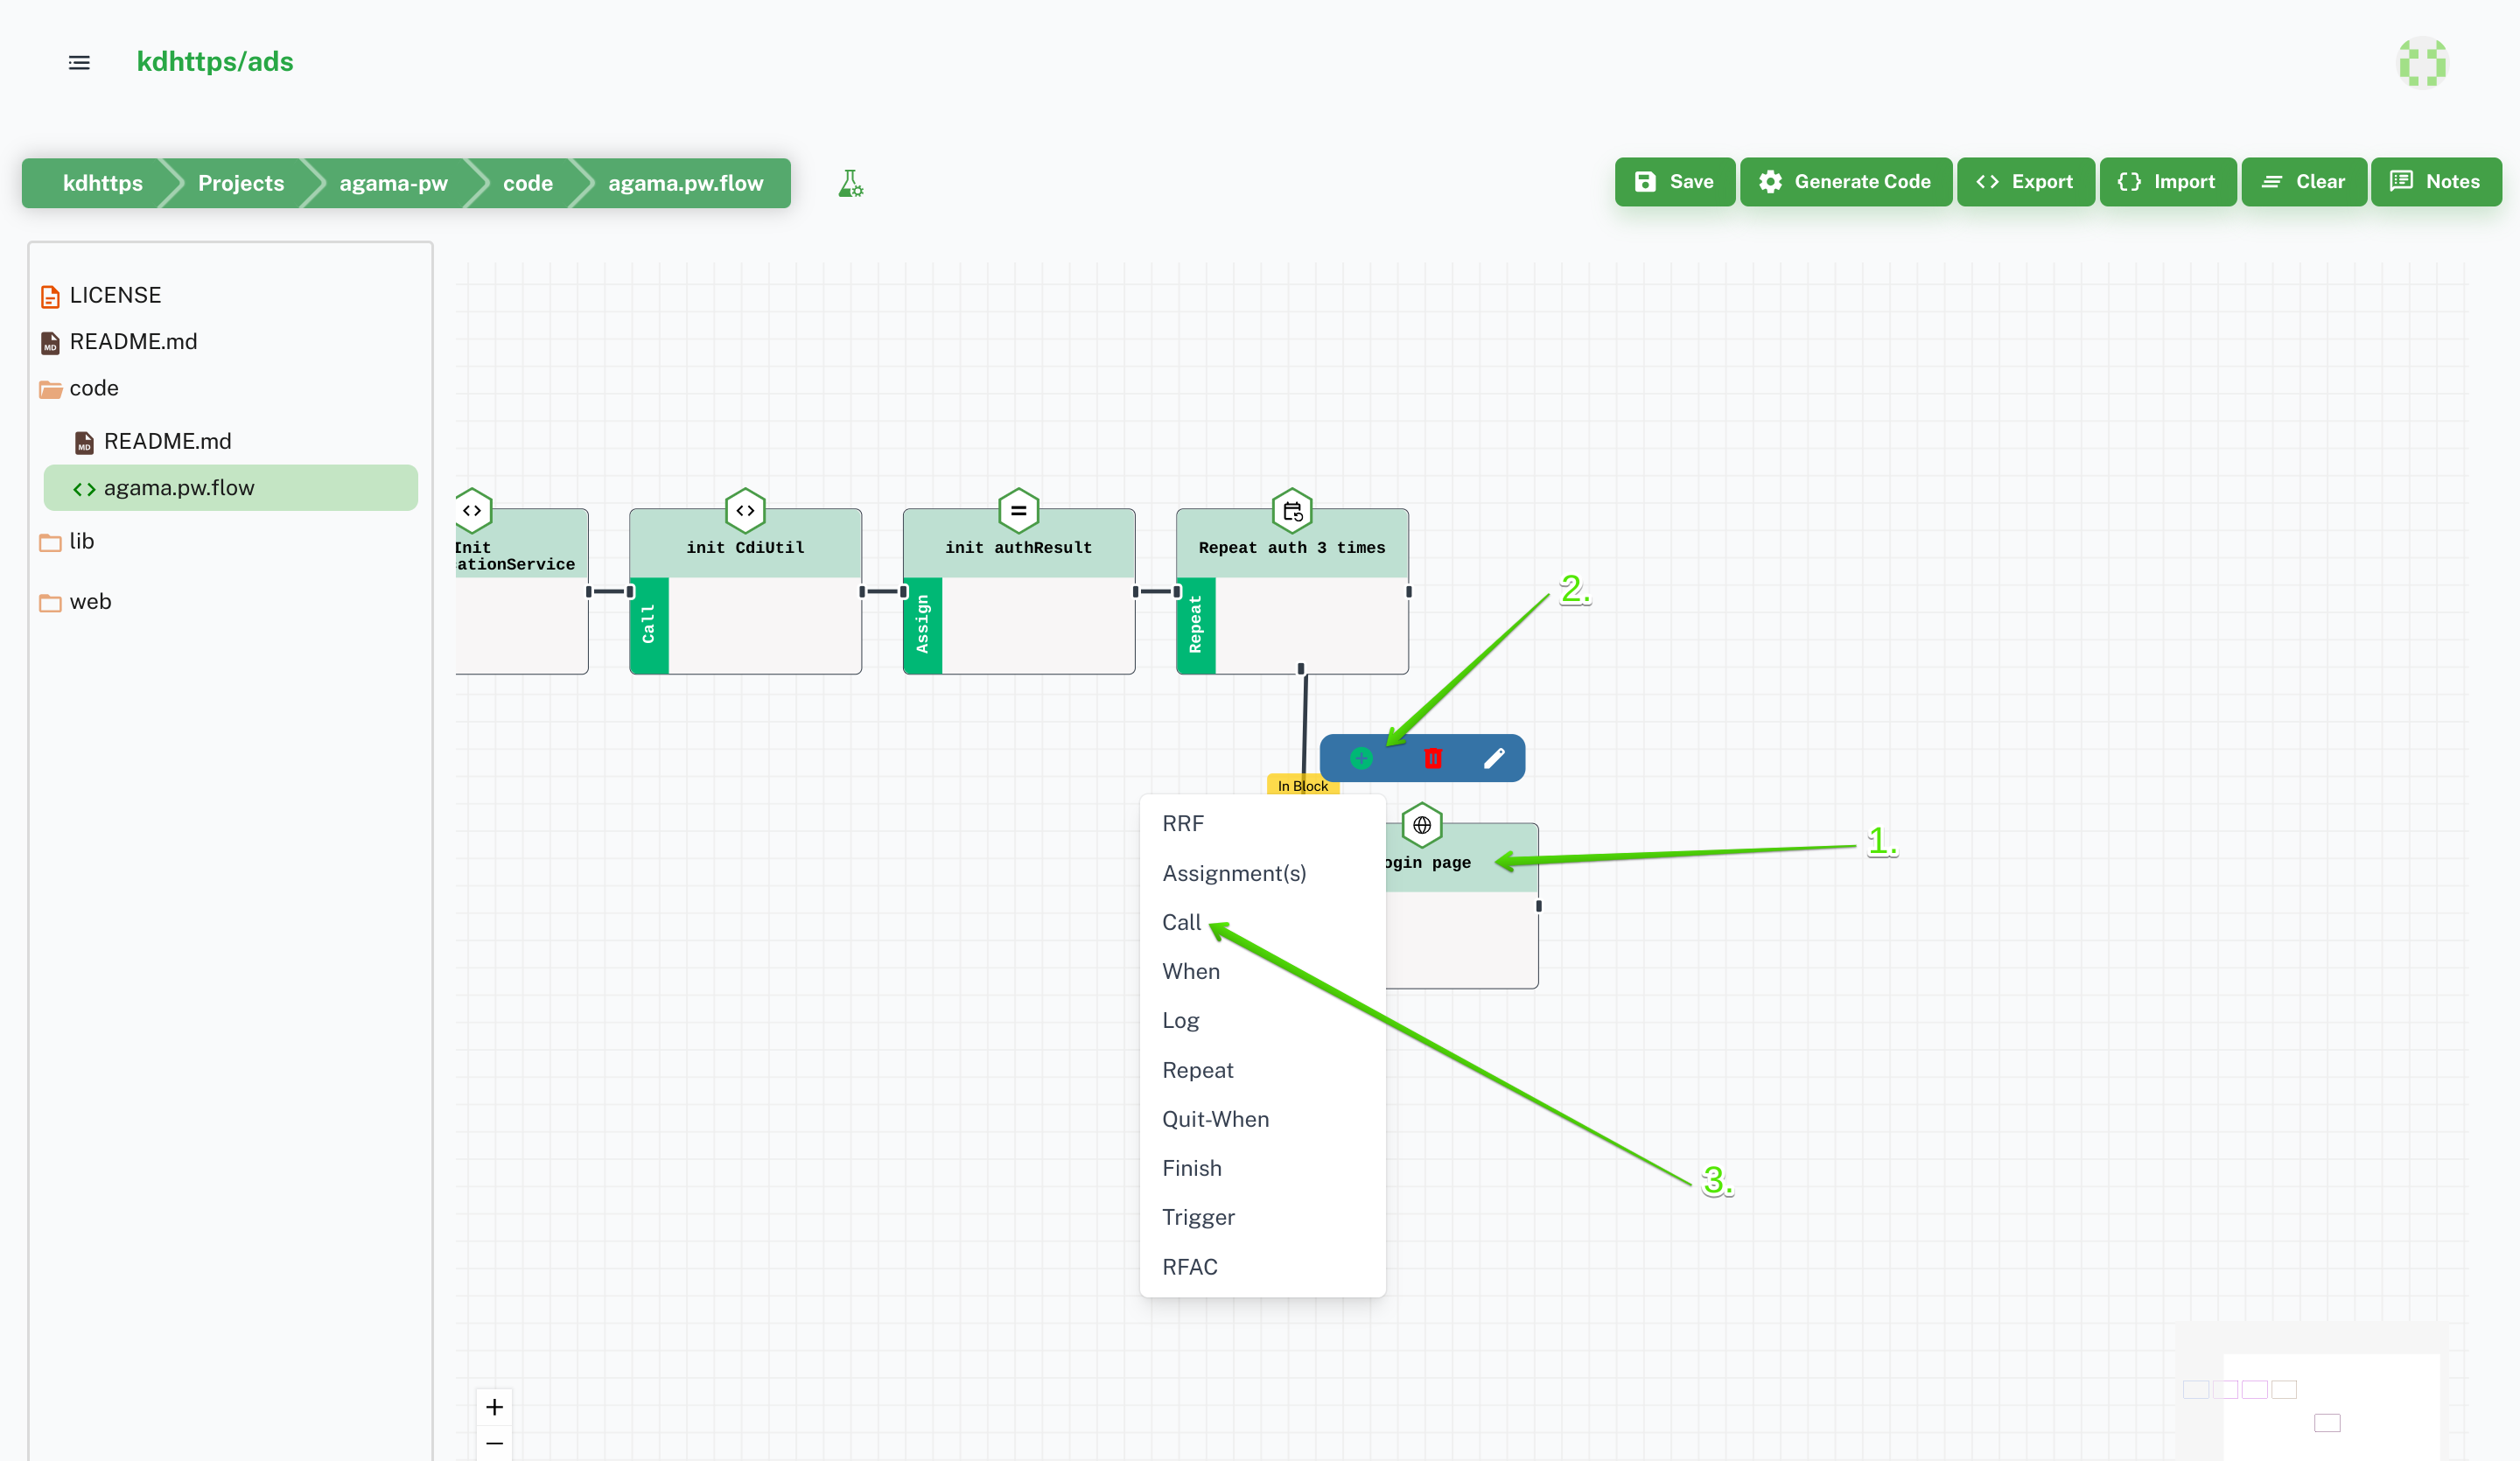
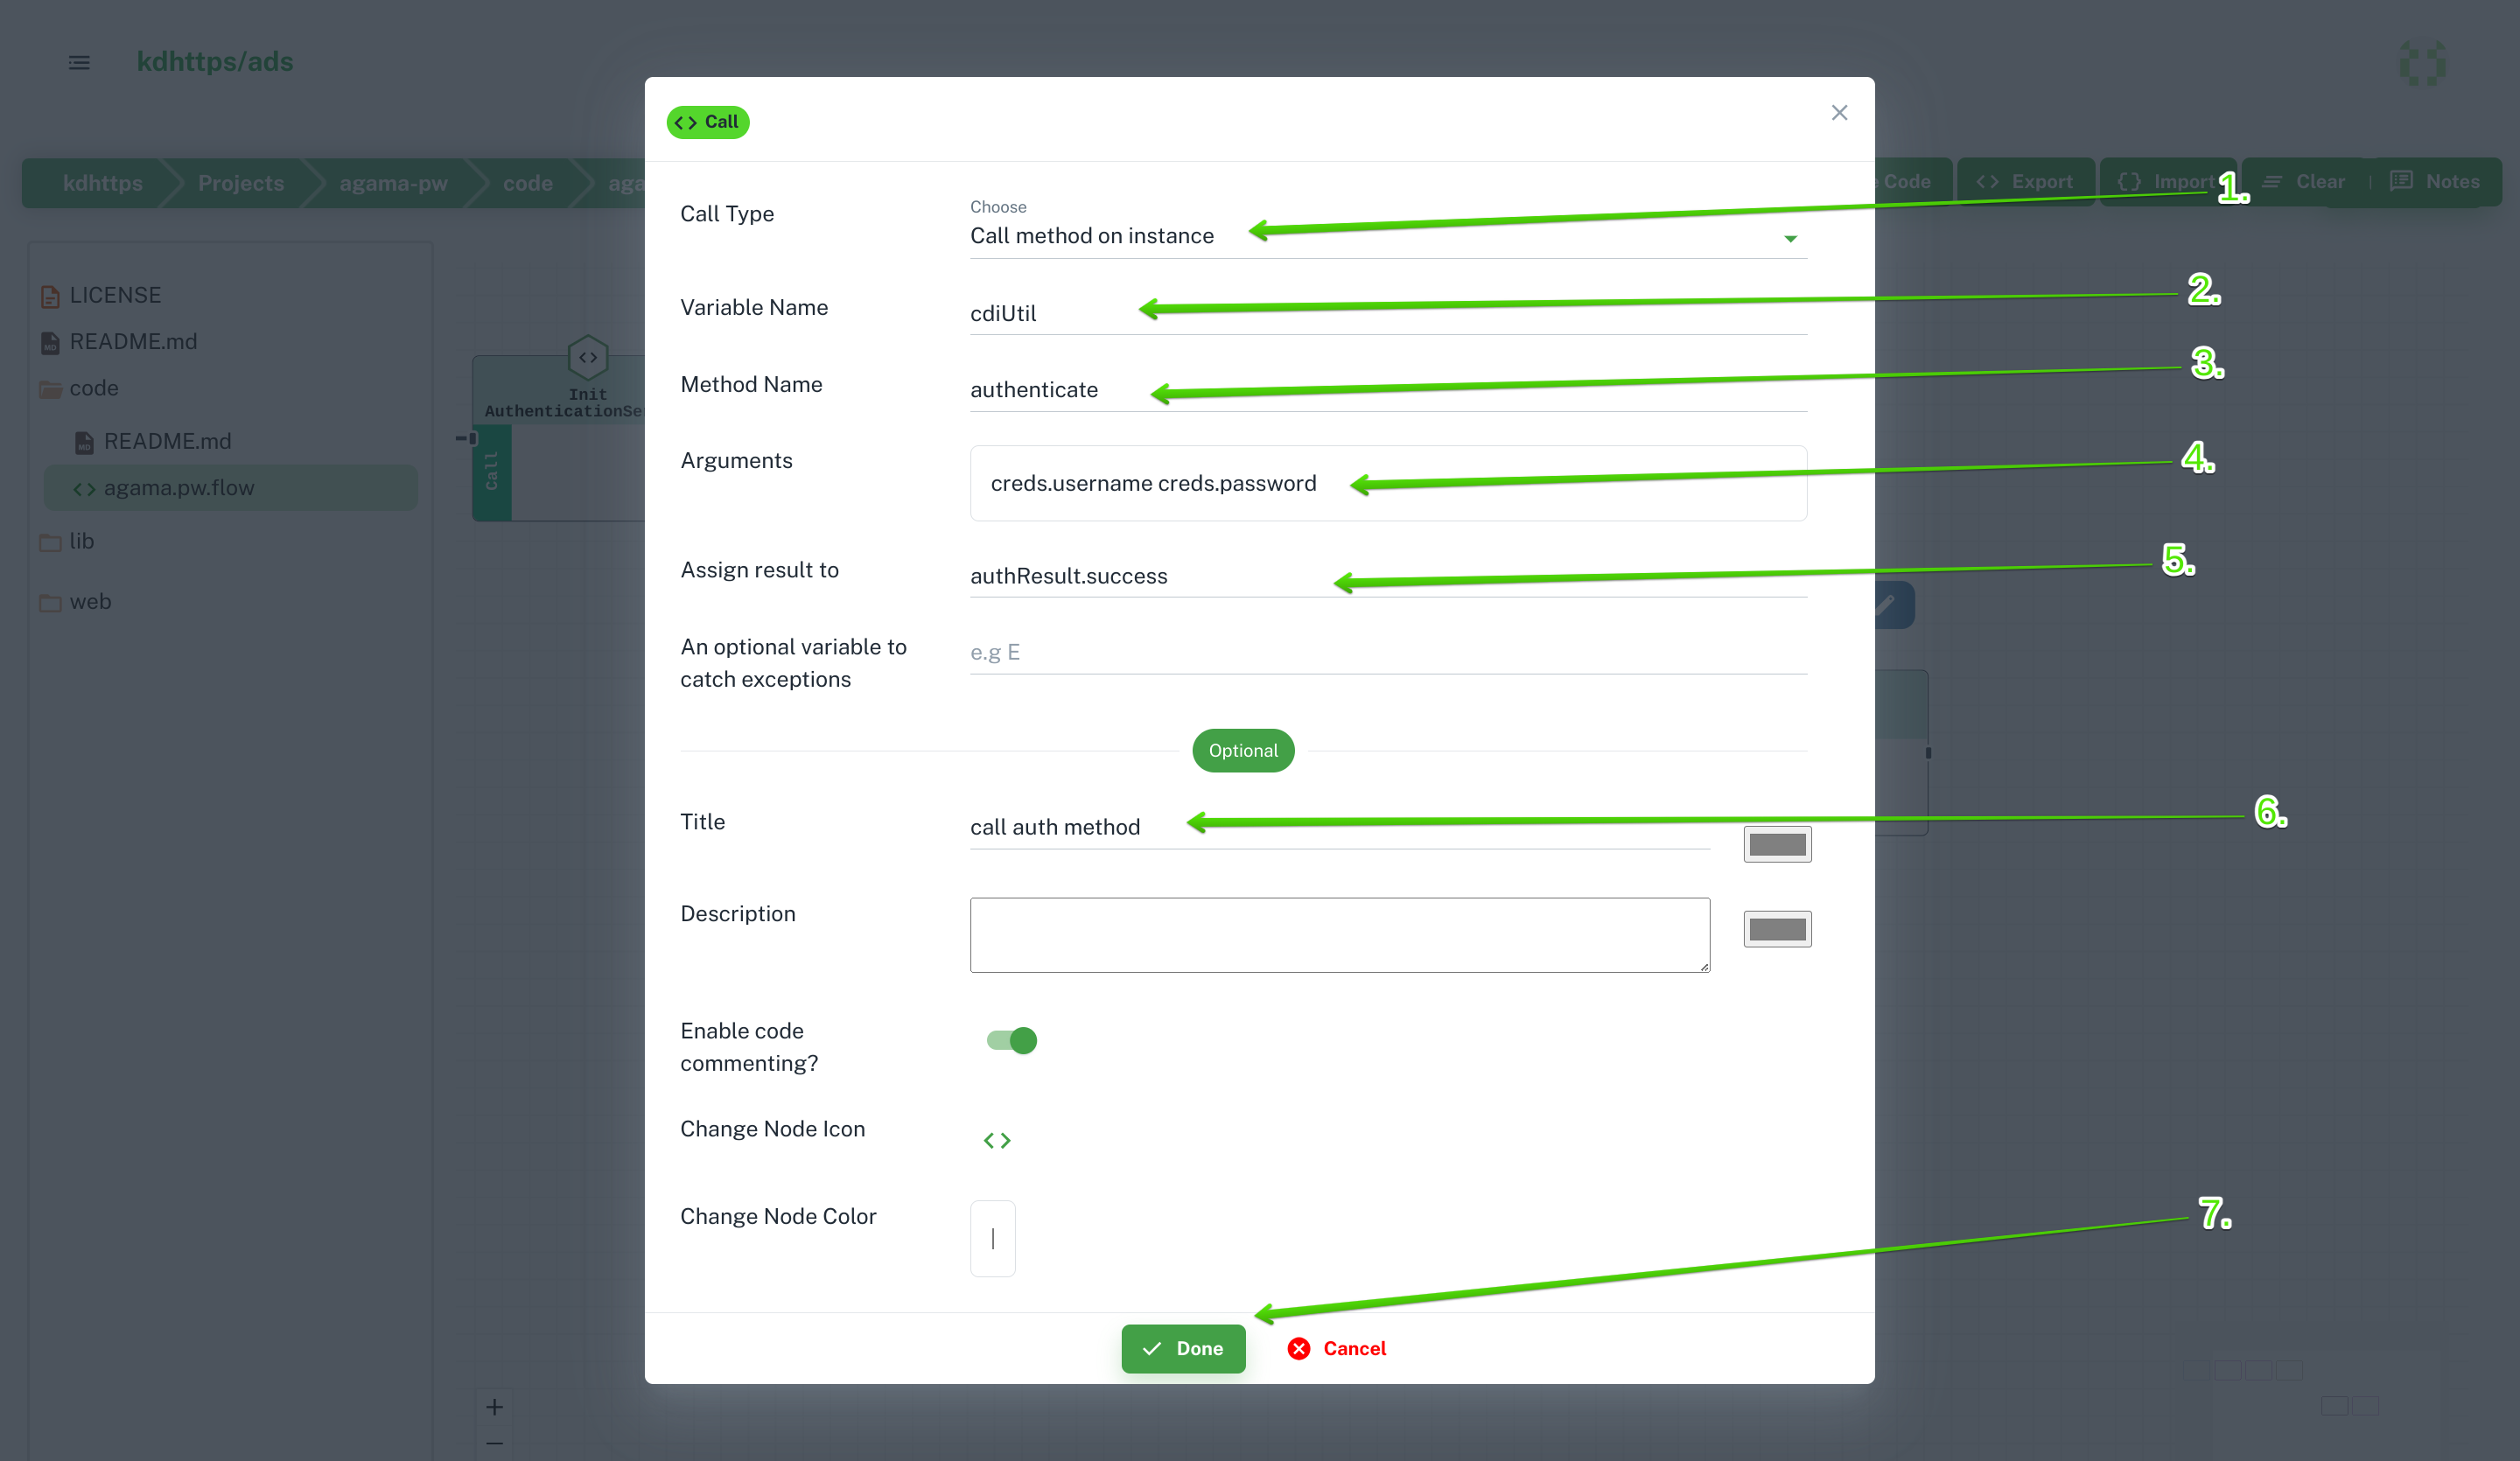
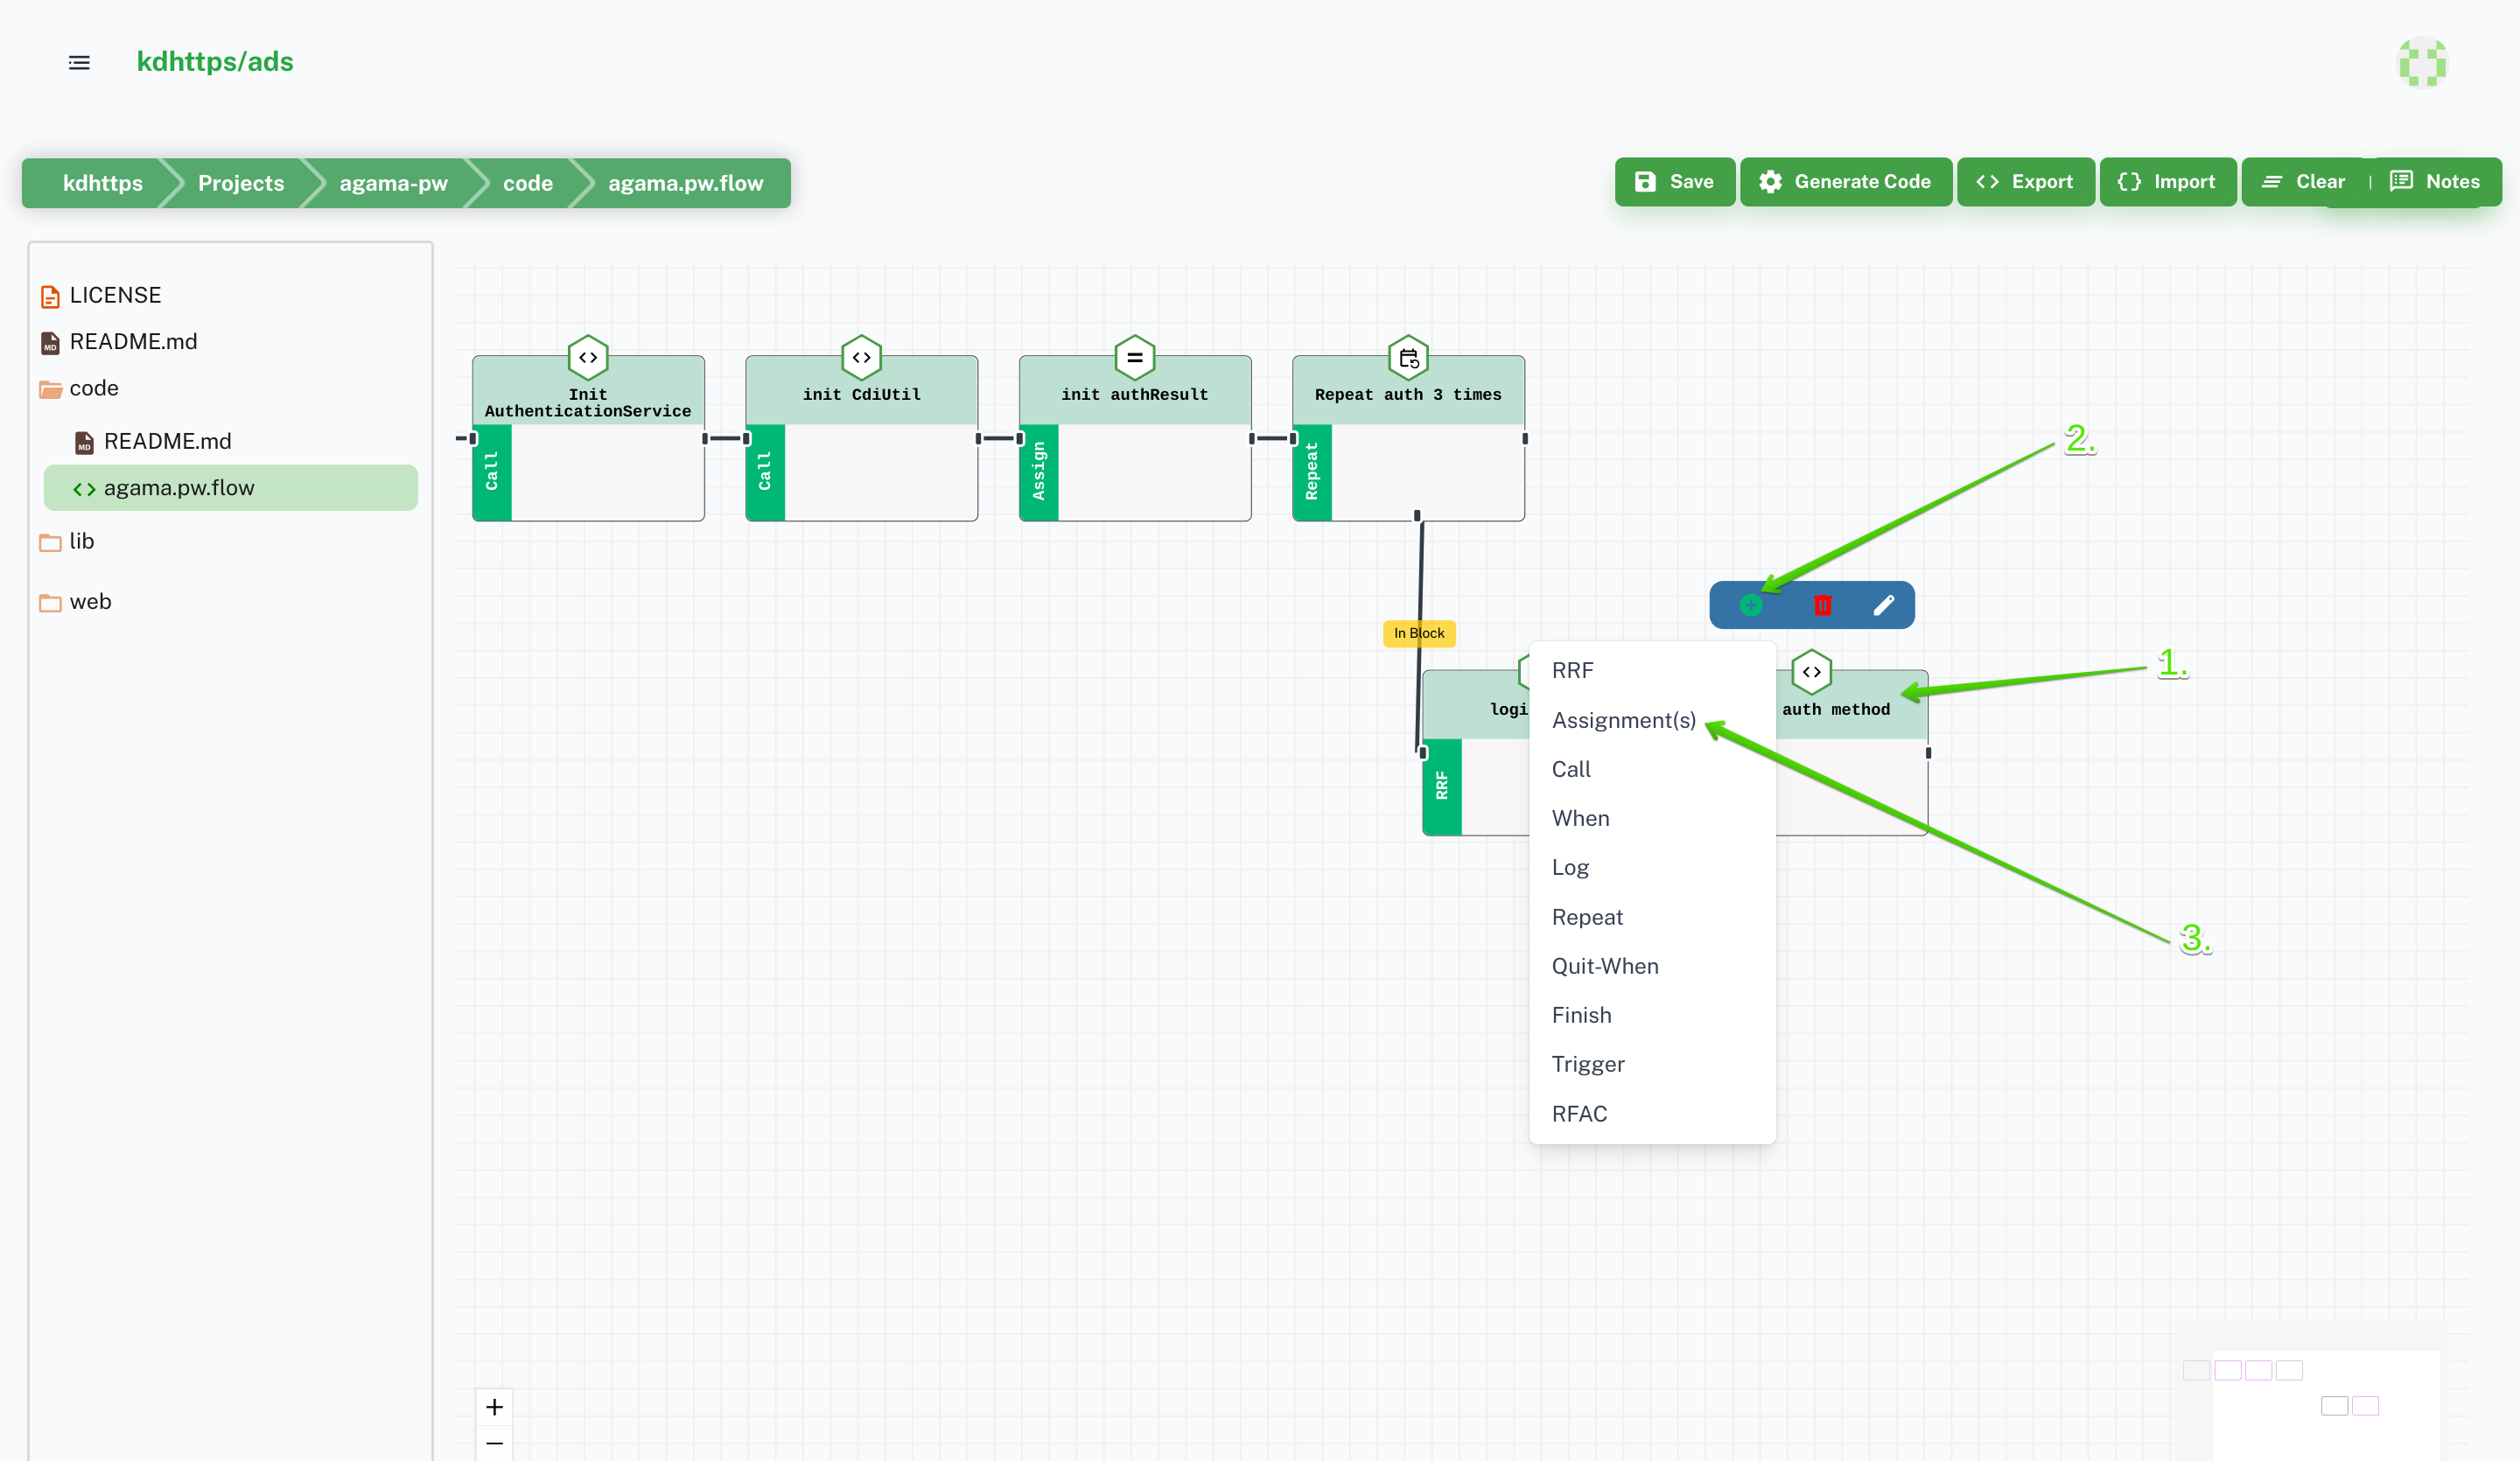
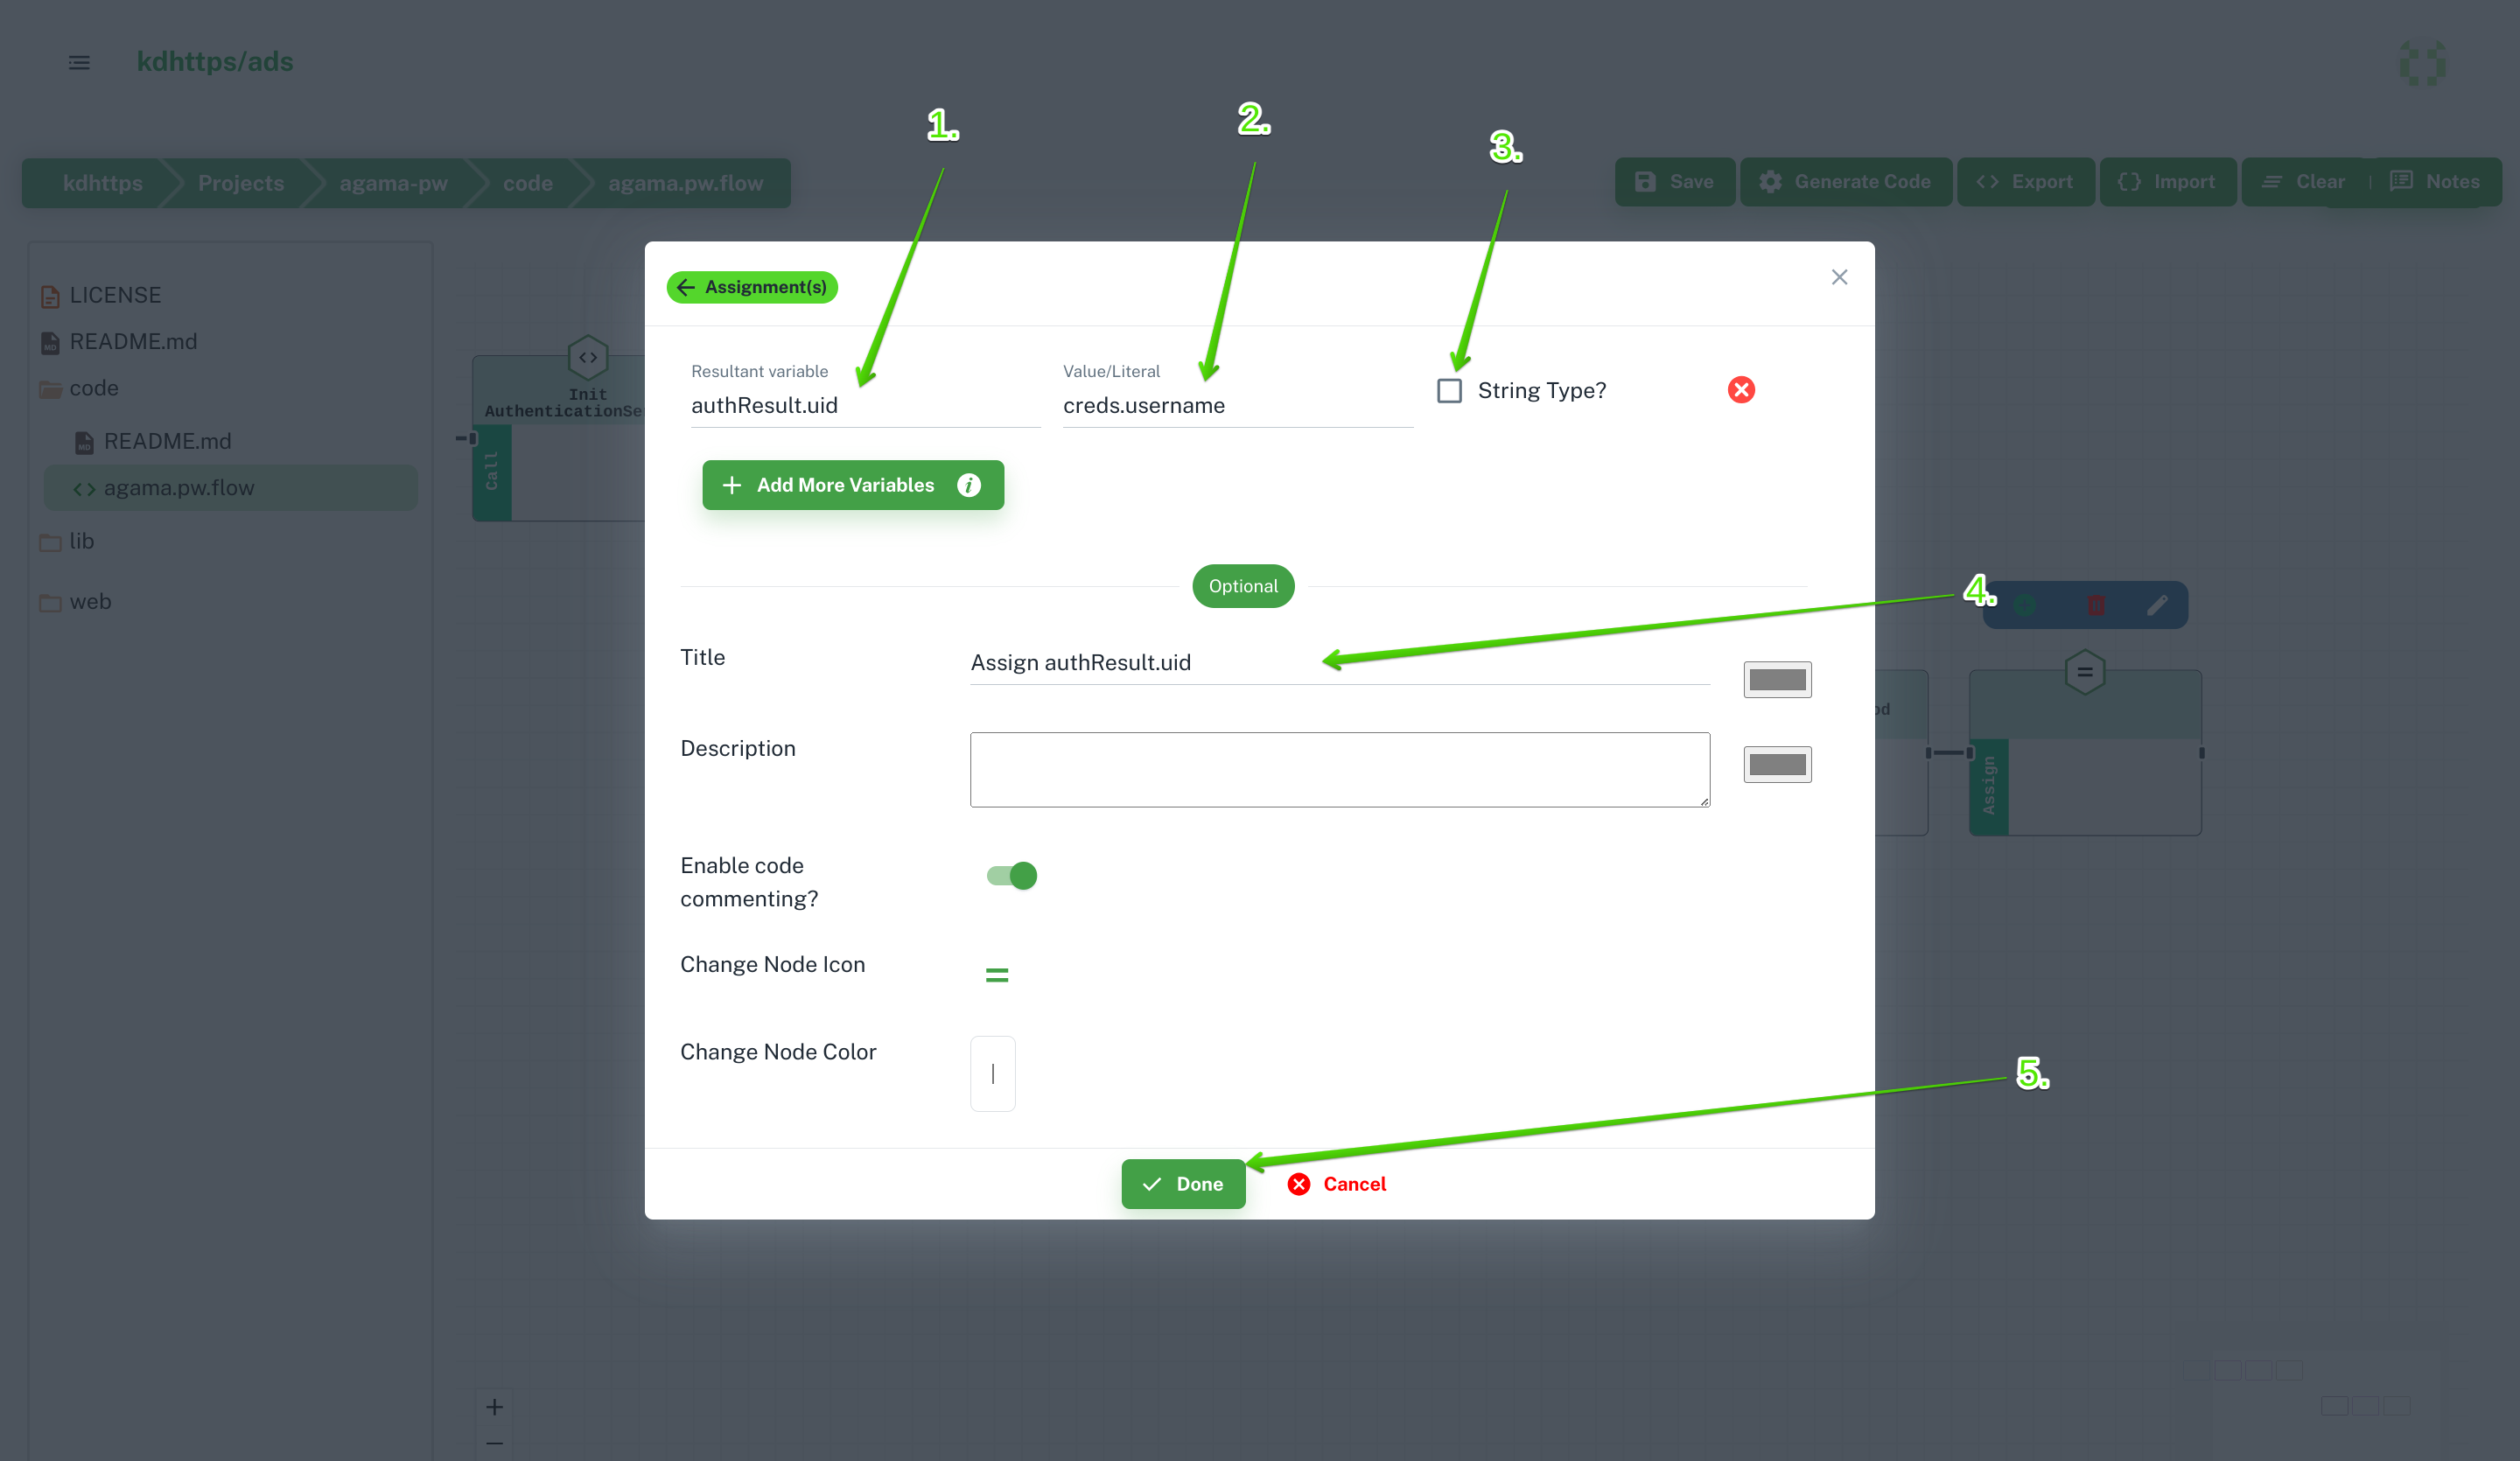
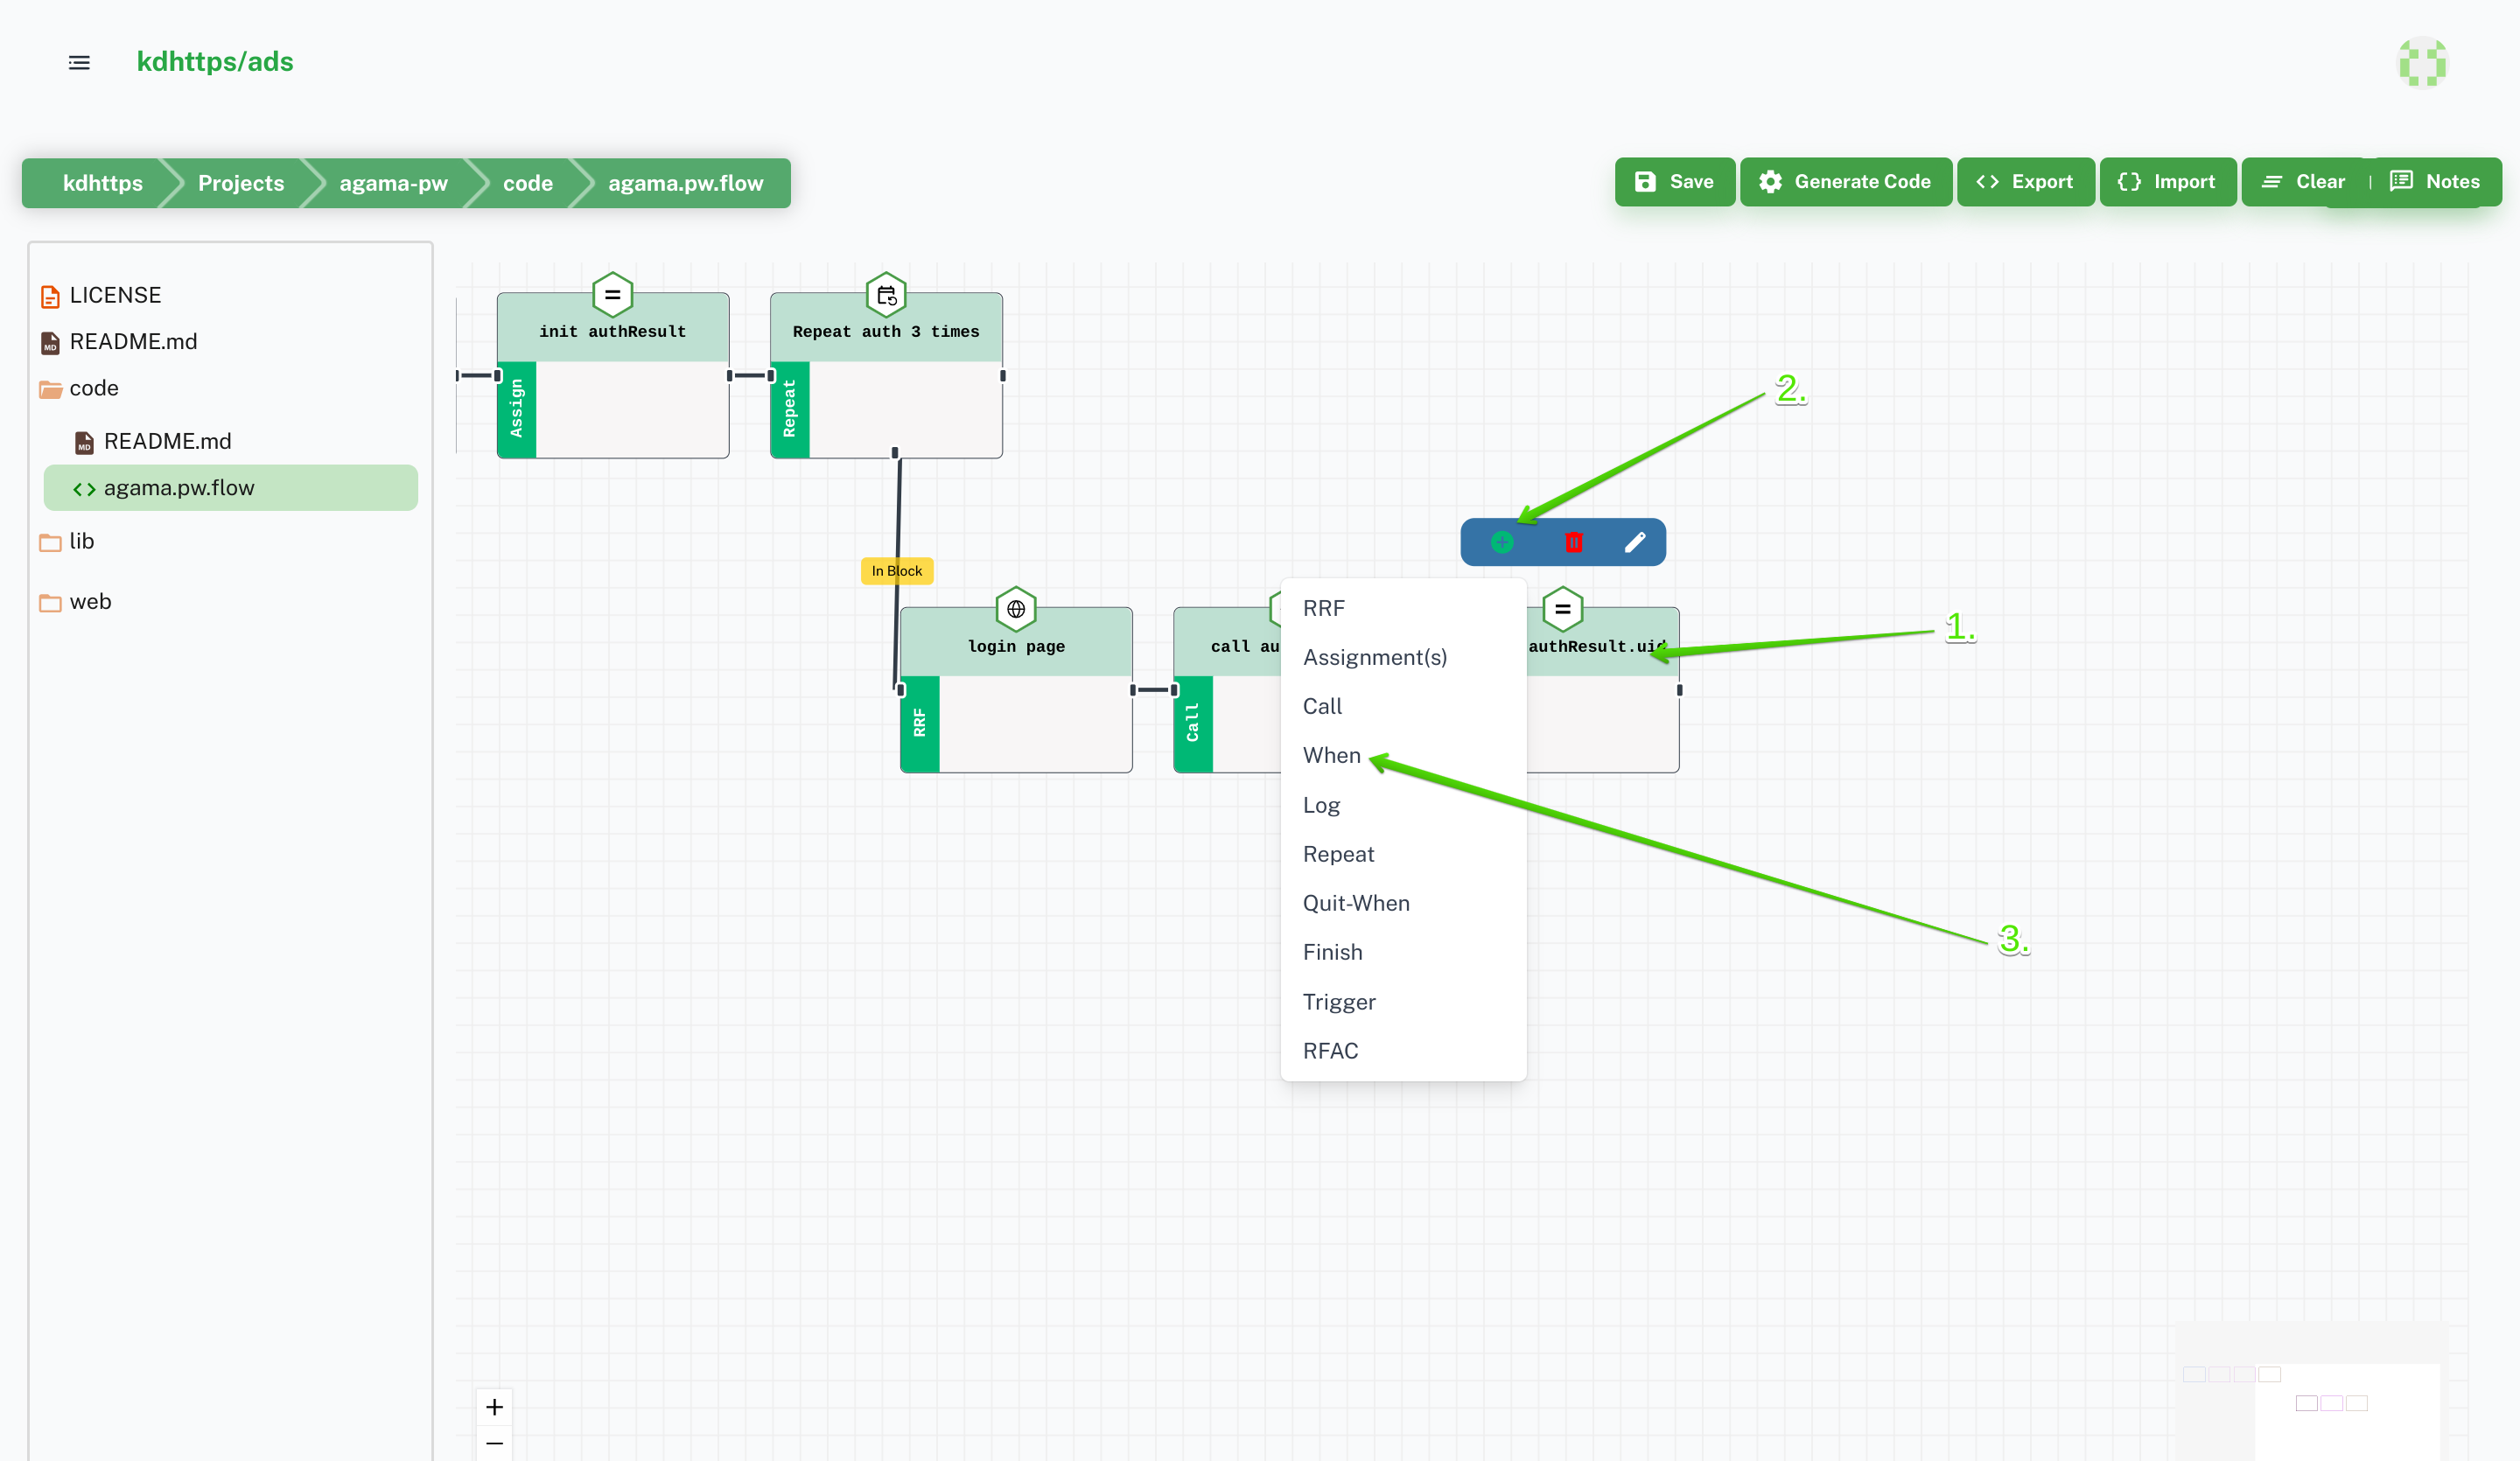
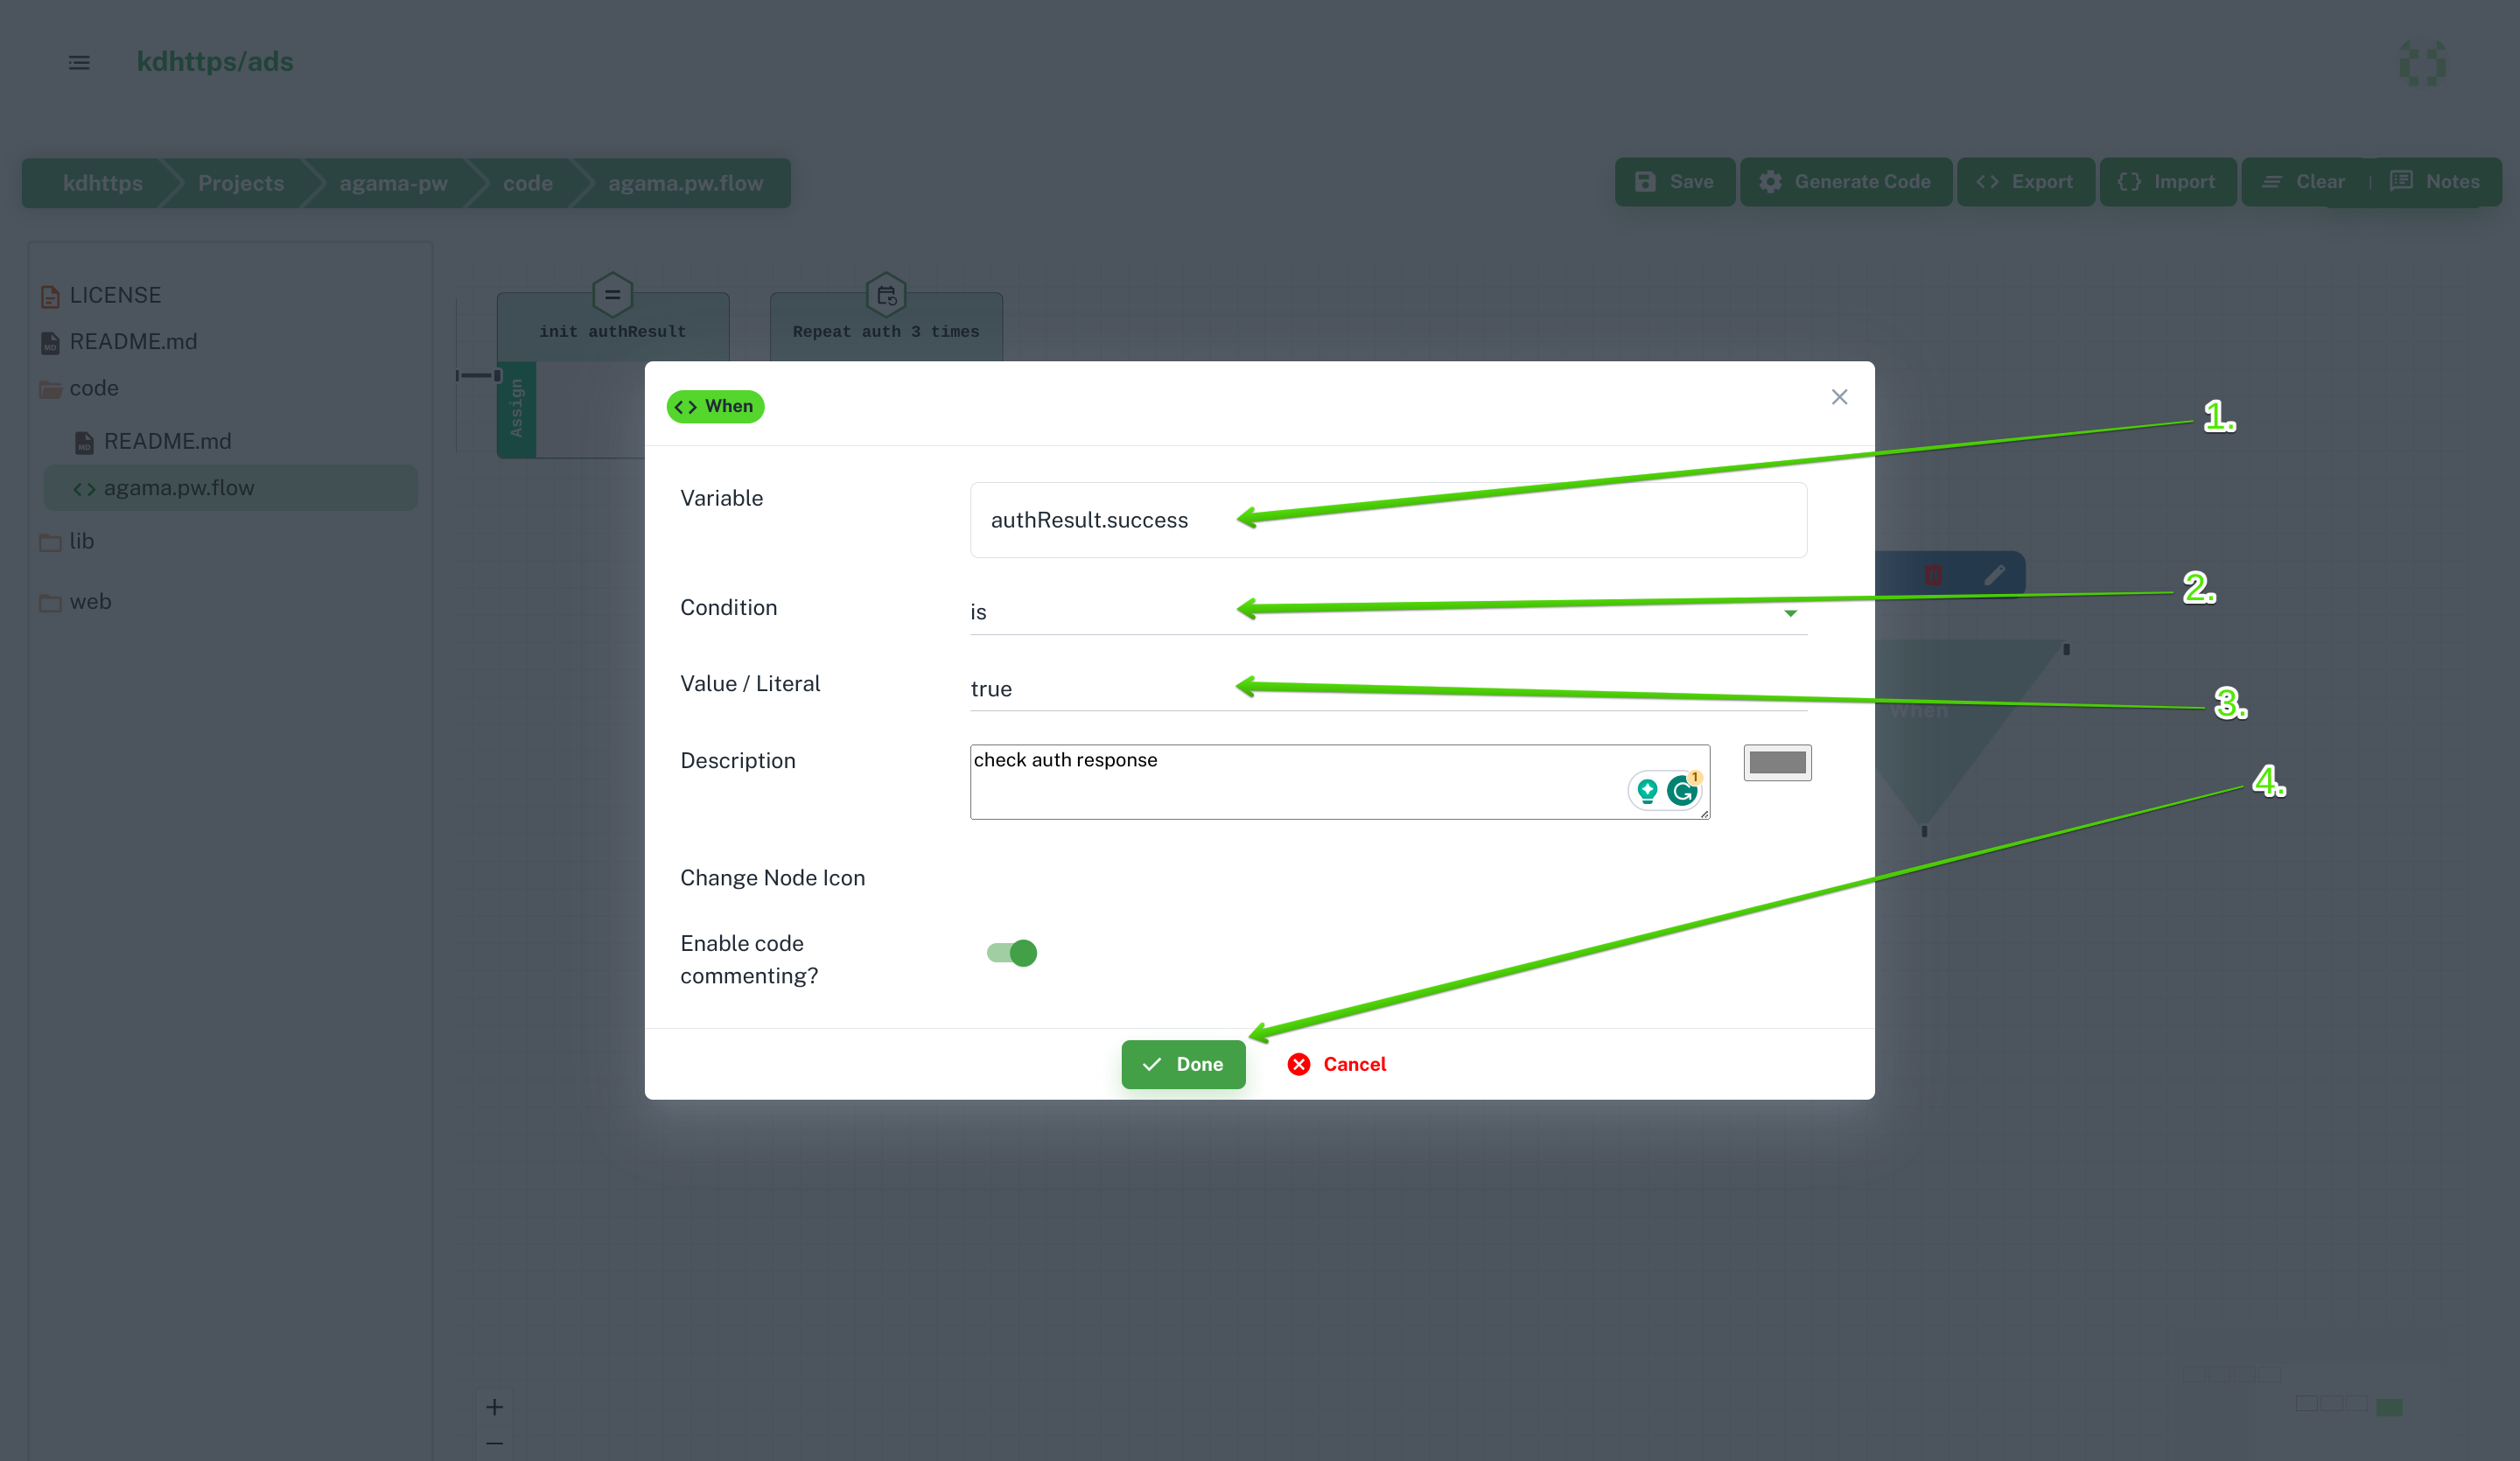
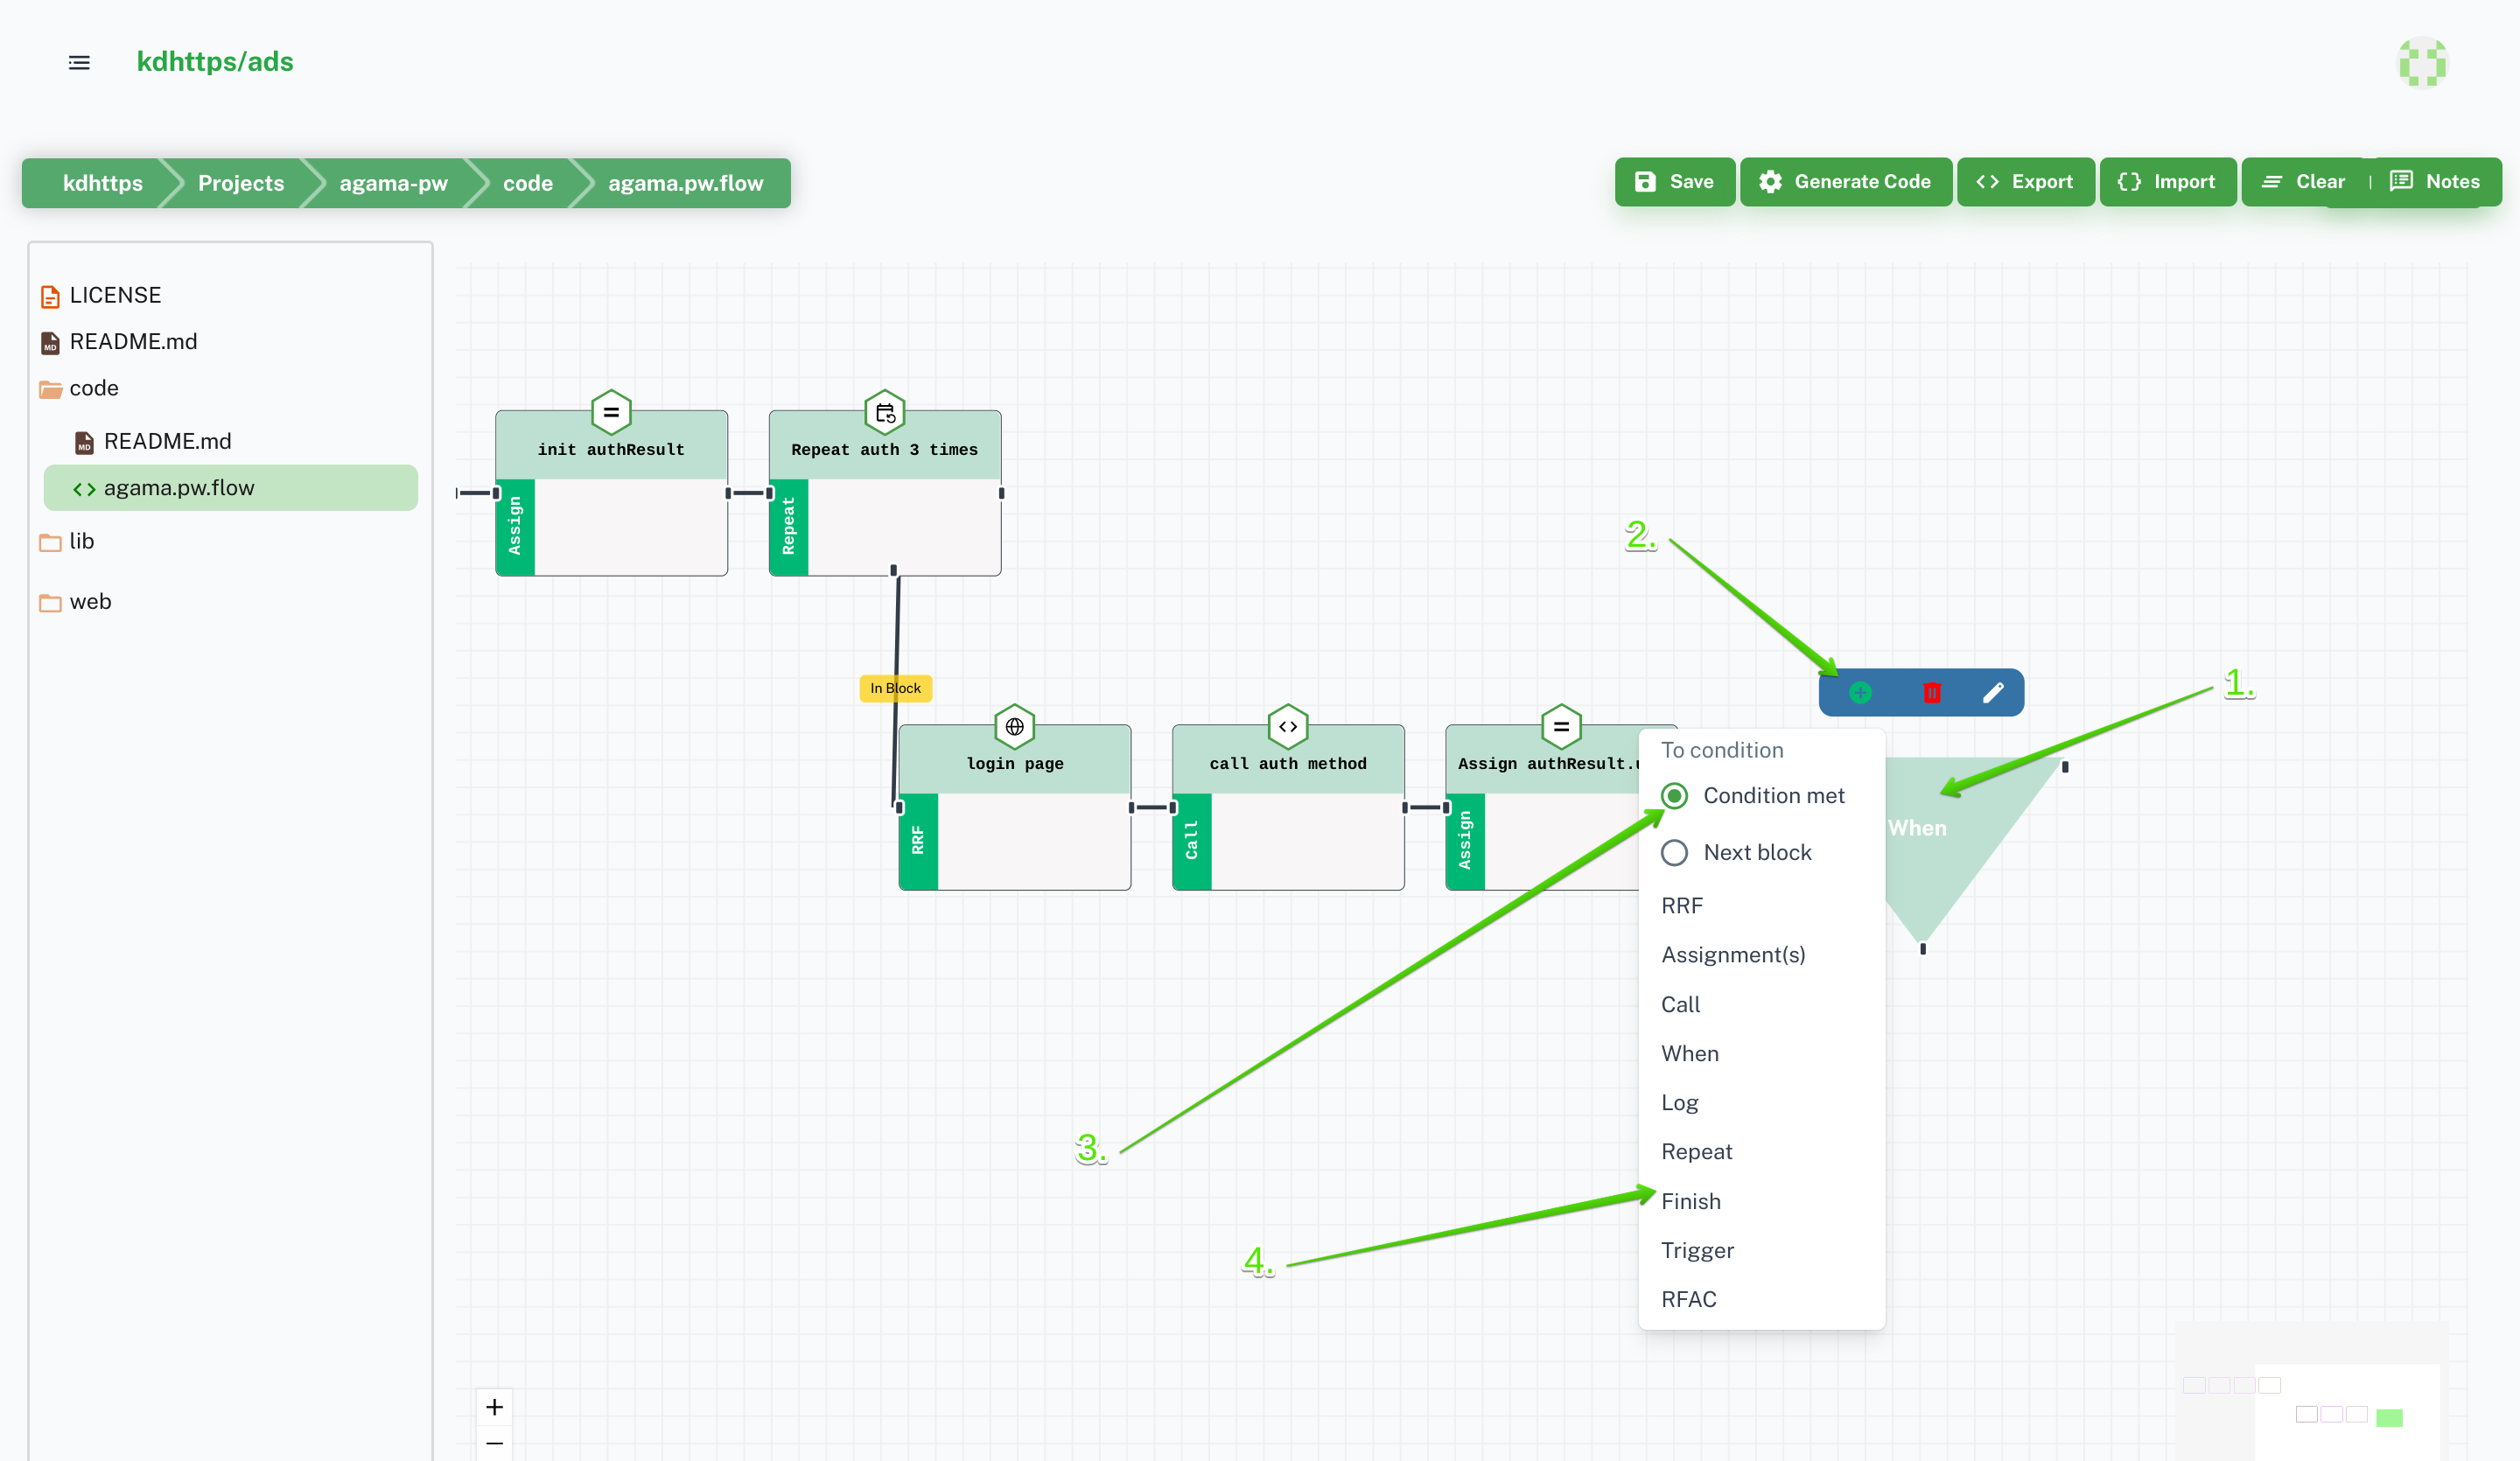
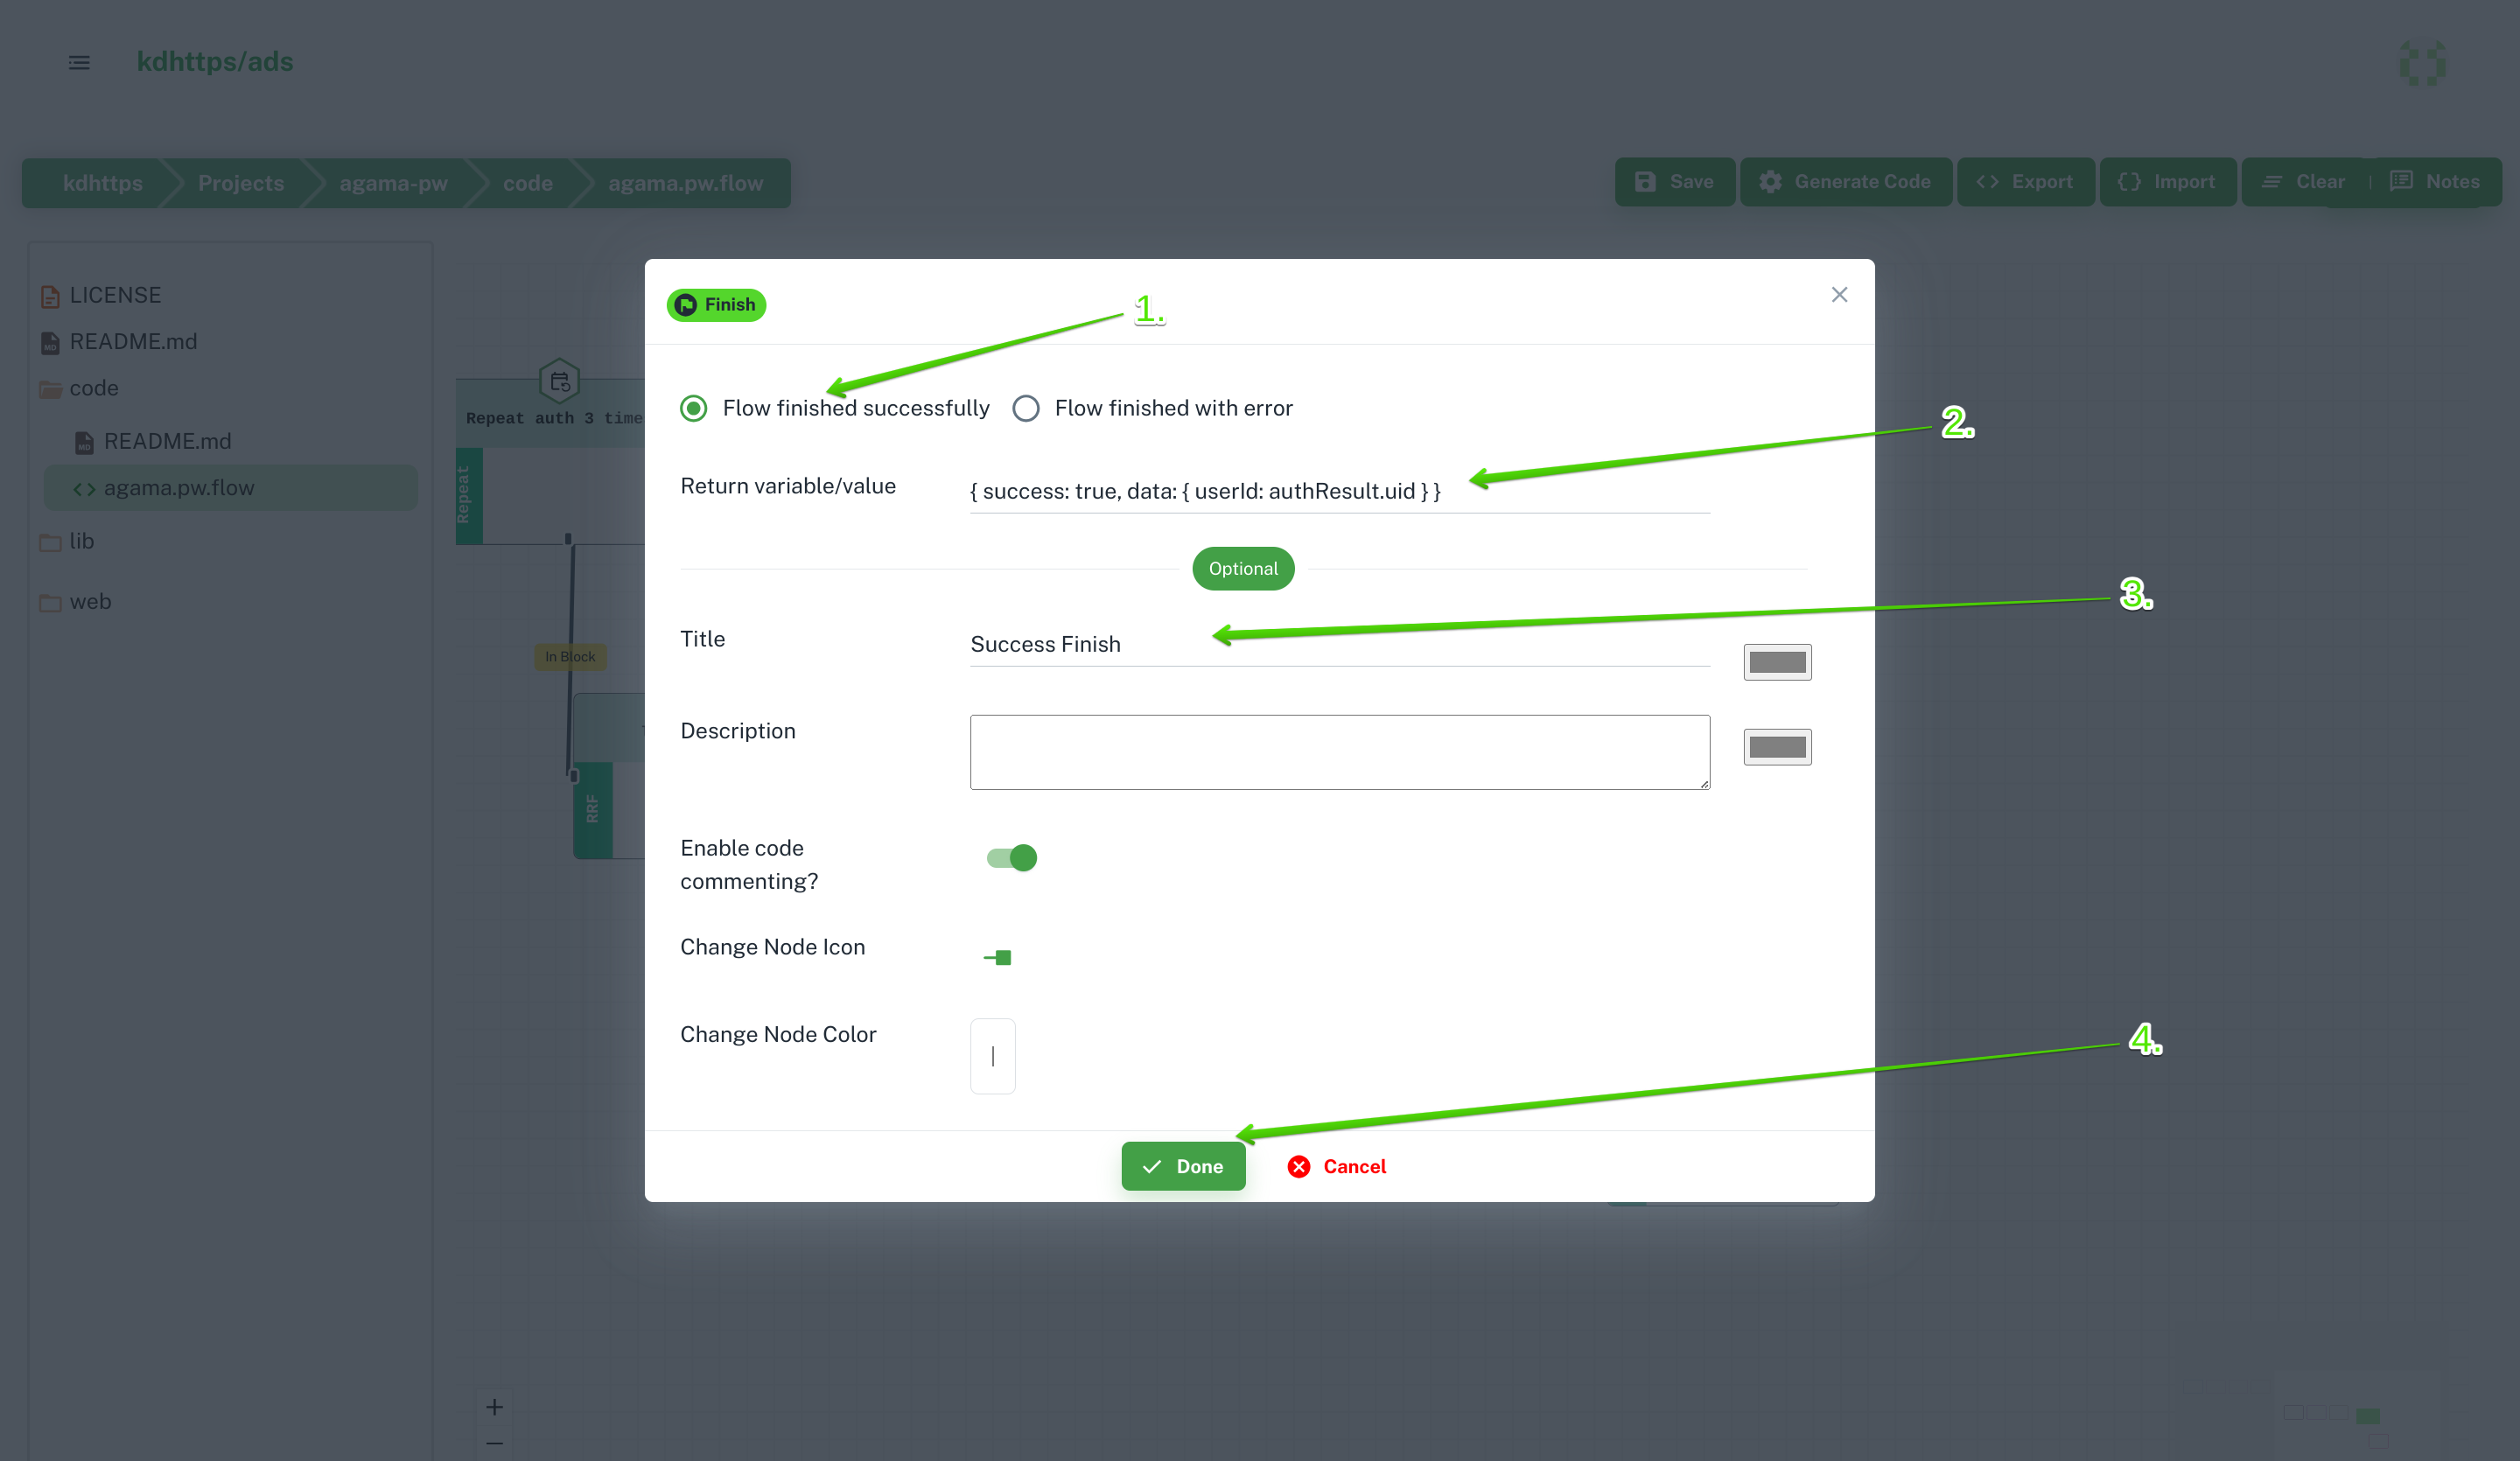
Make a Simple Basic Auth Flow
1
2
3
4
5
6
7
8
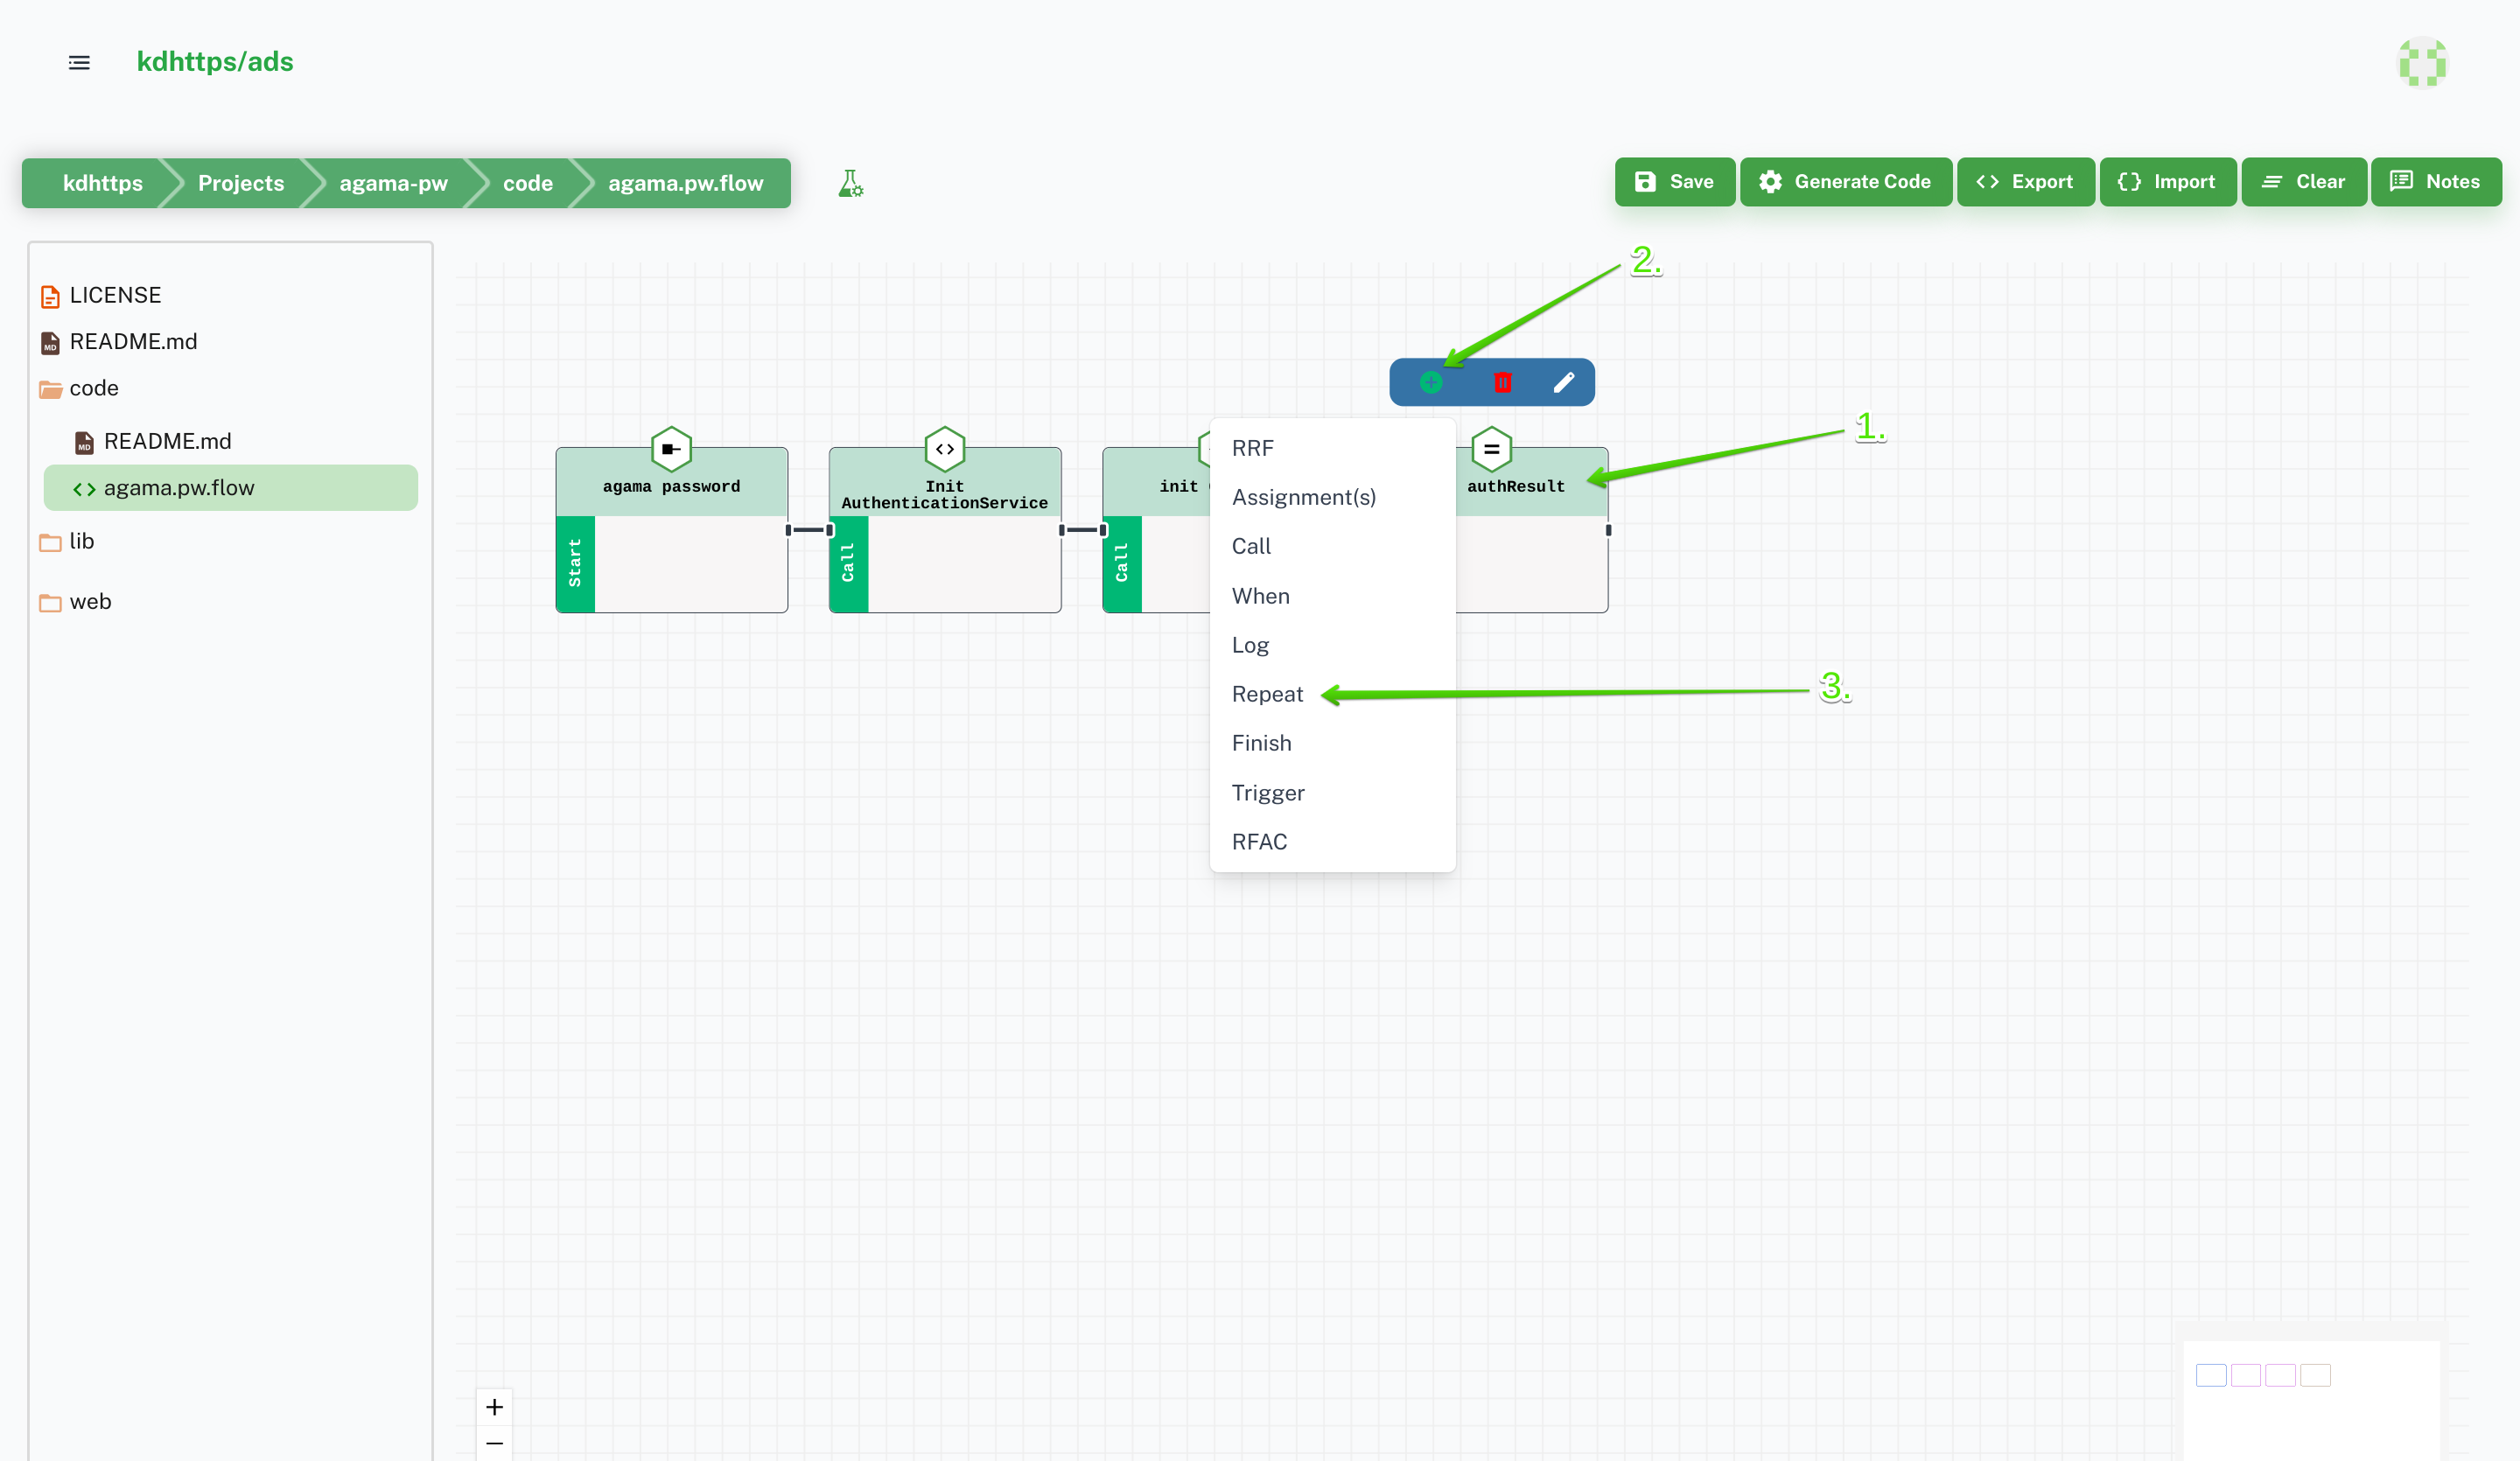
9
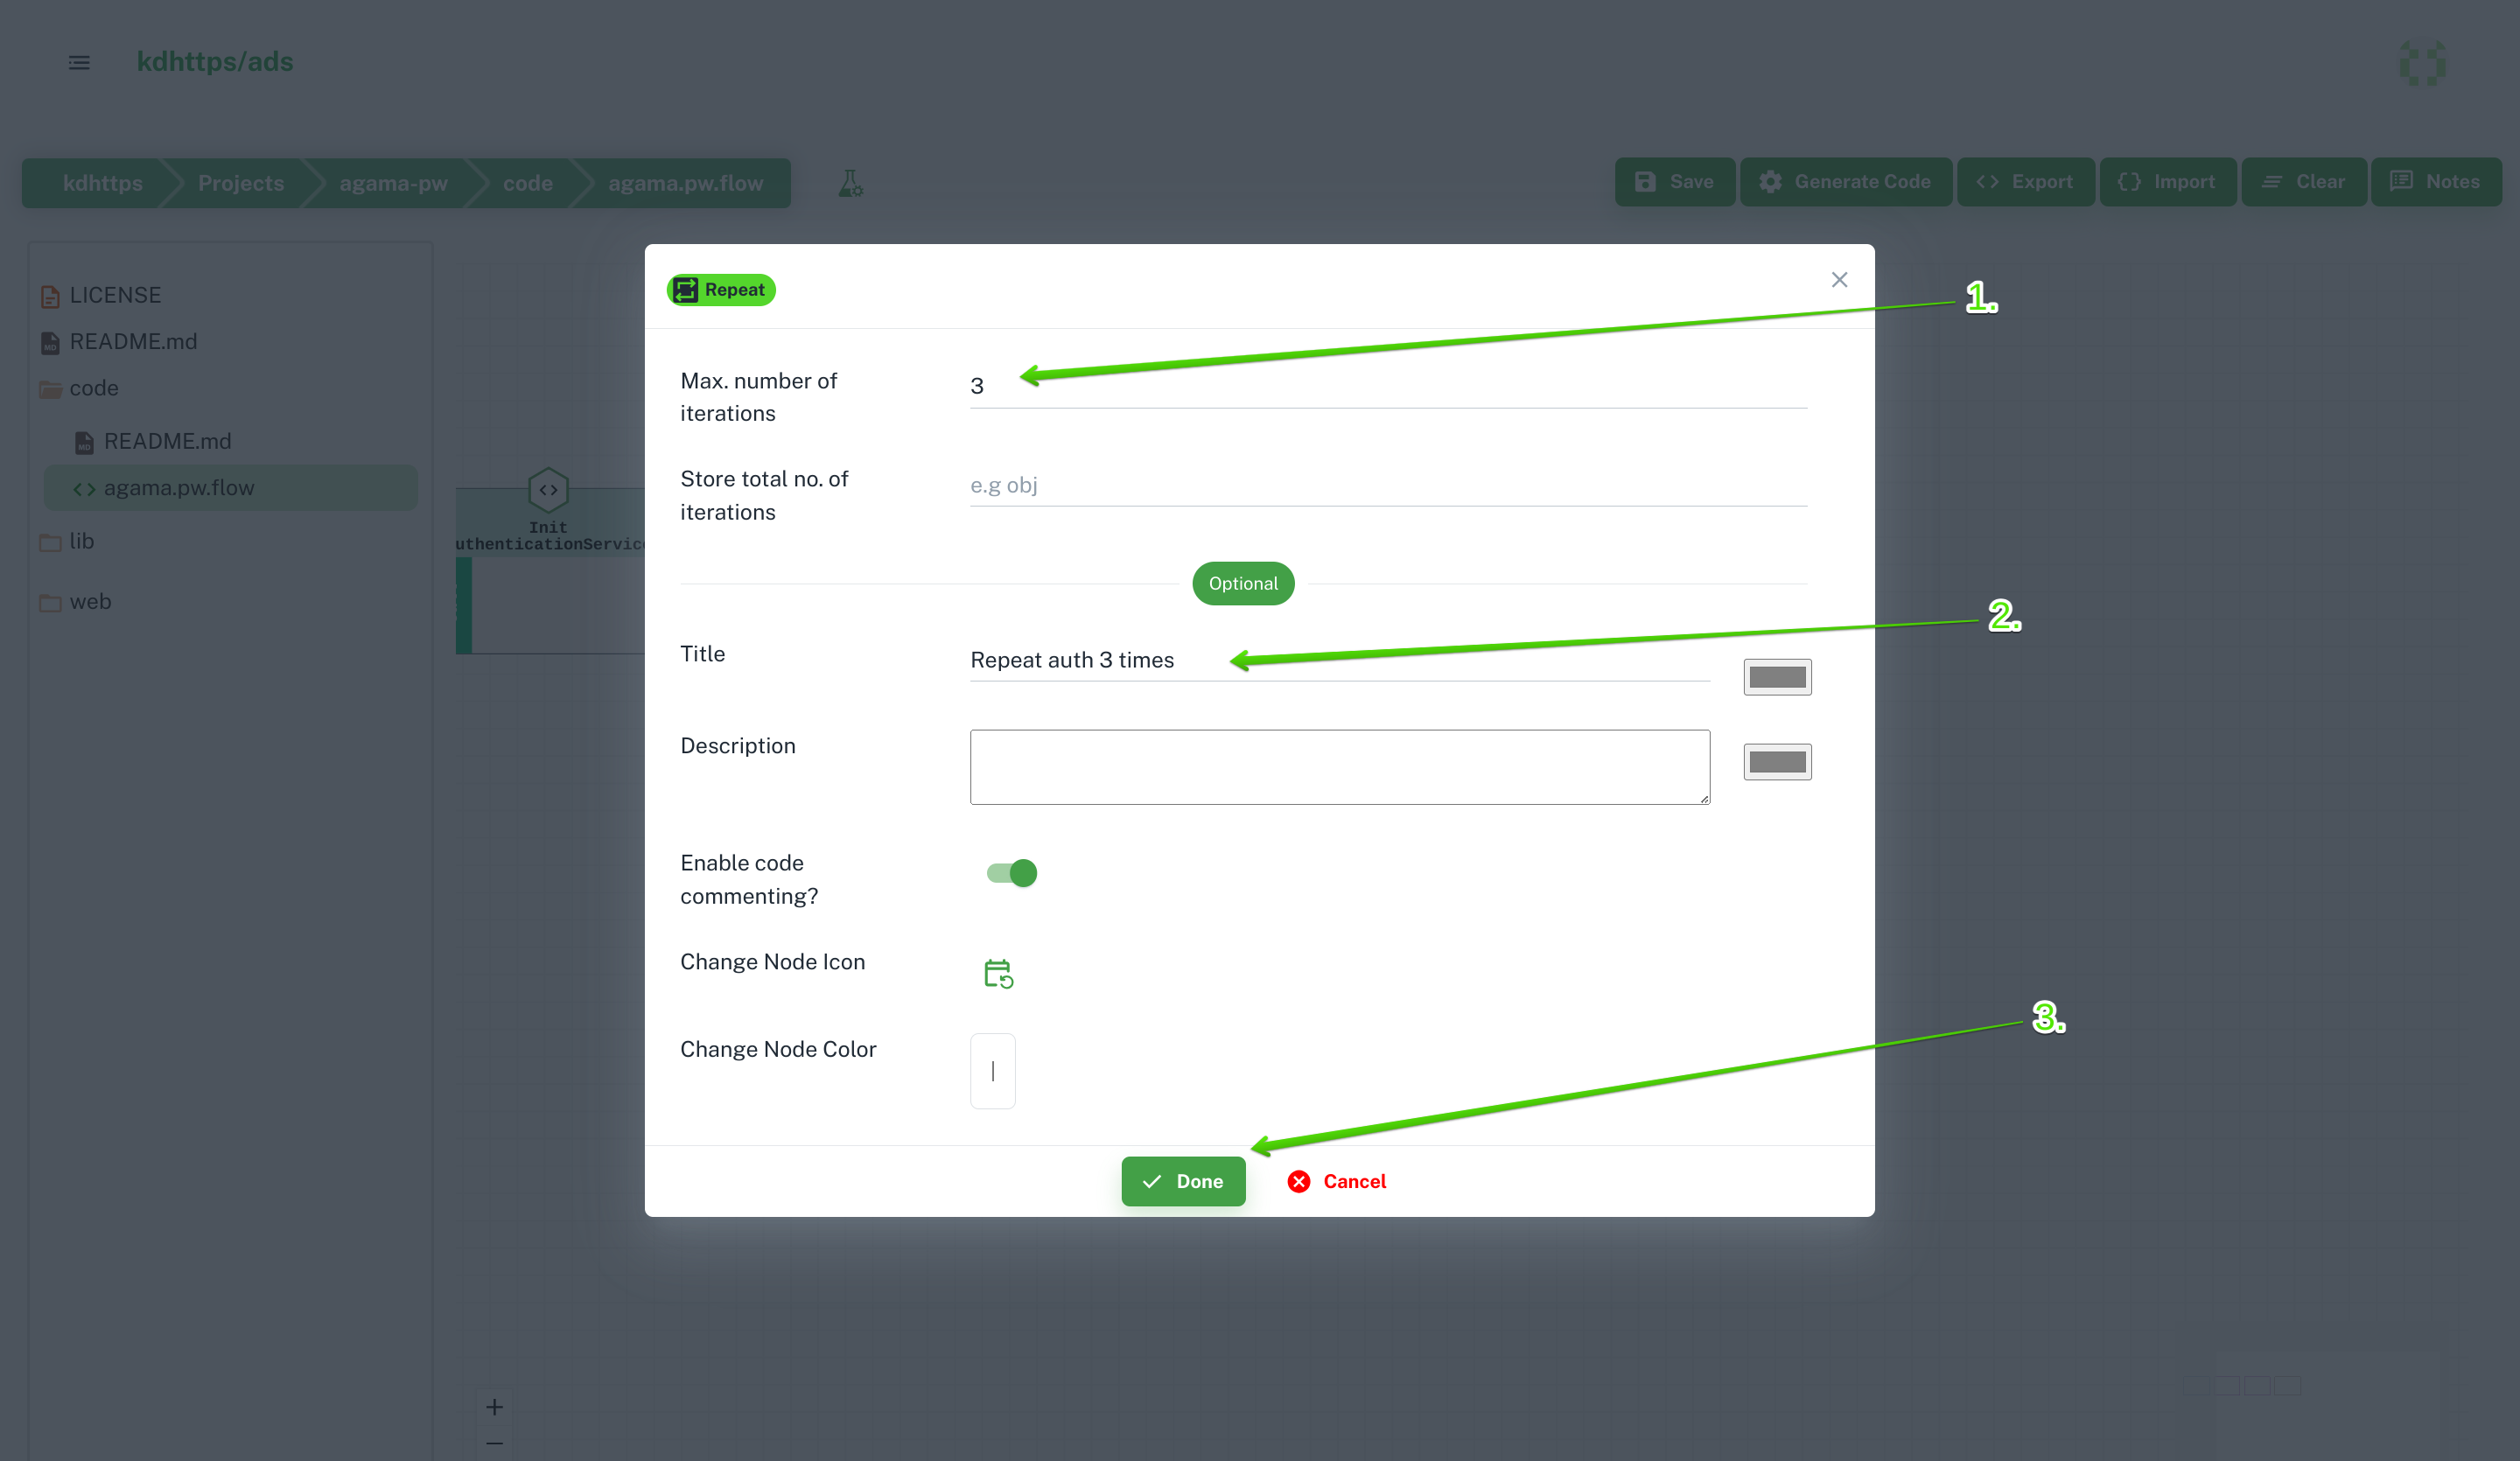
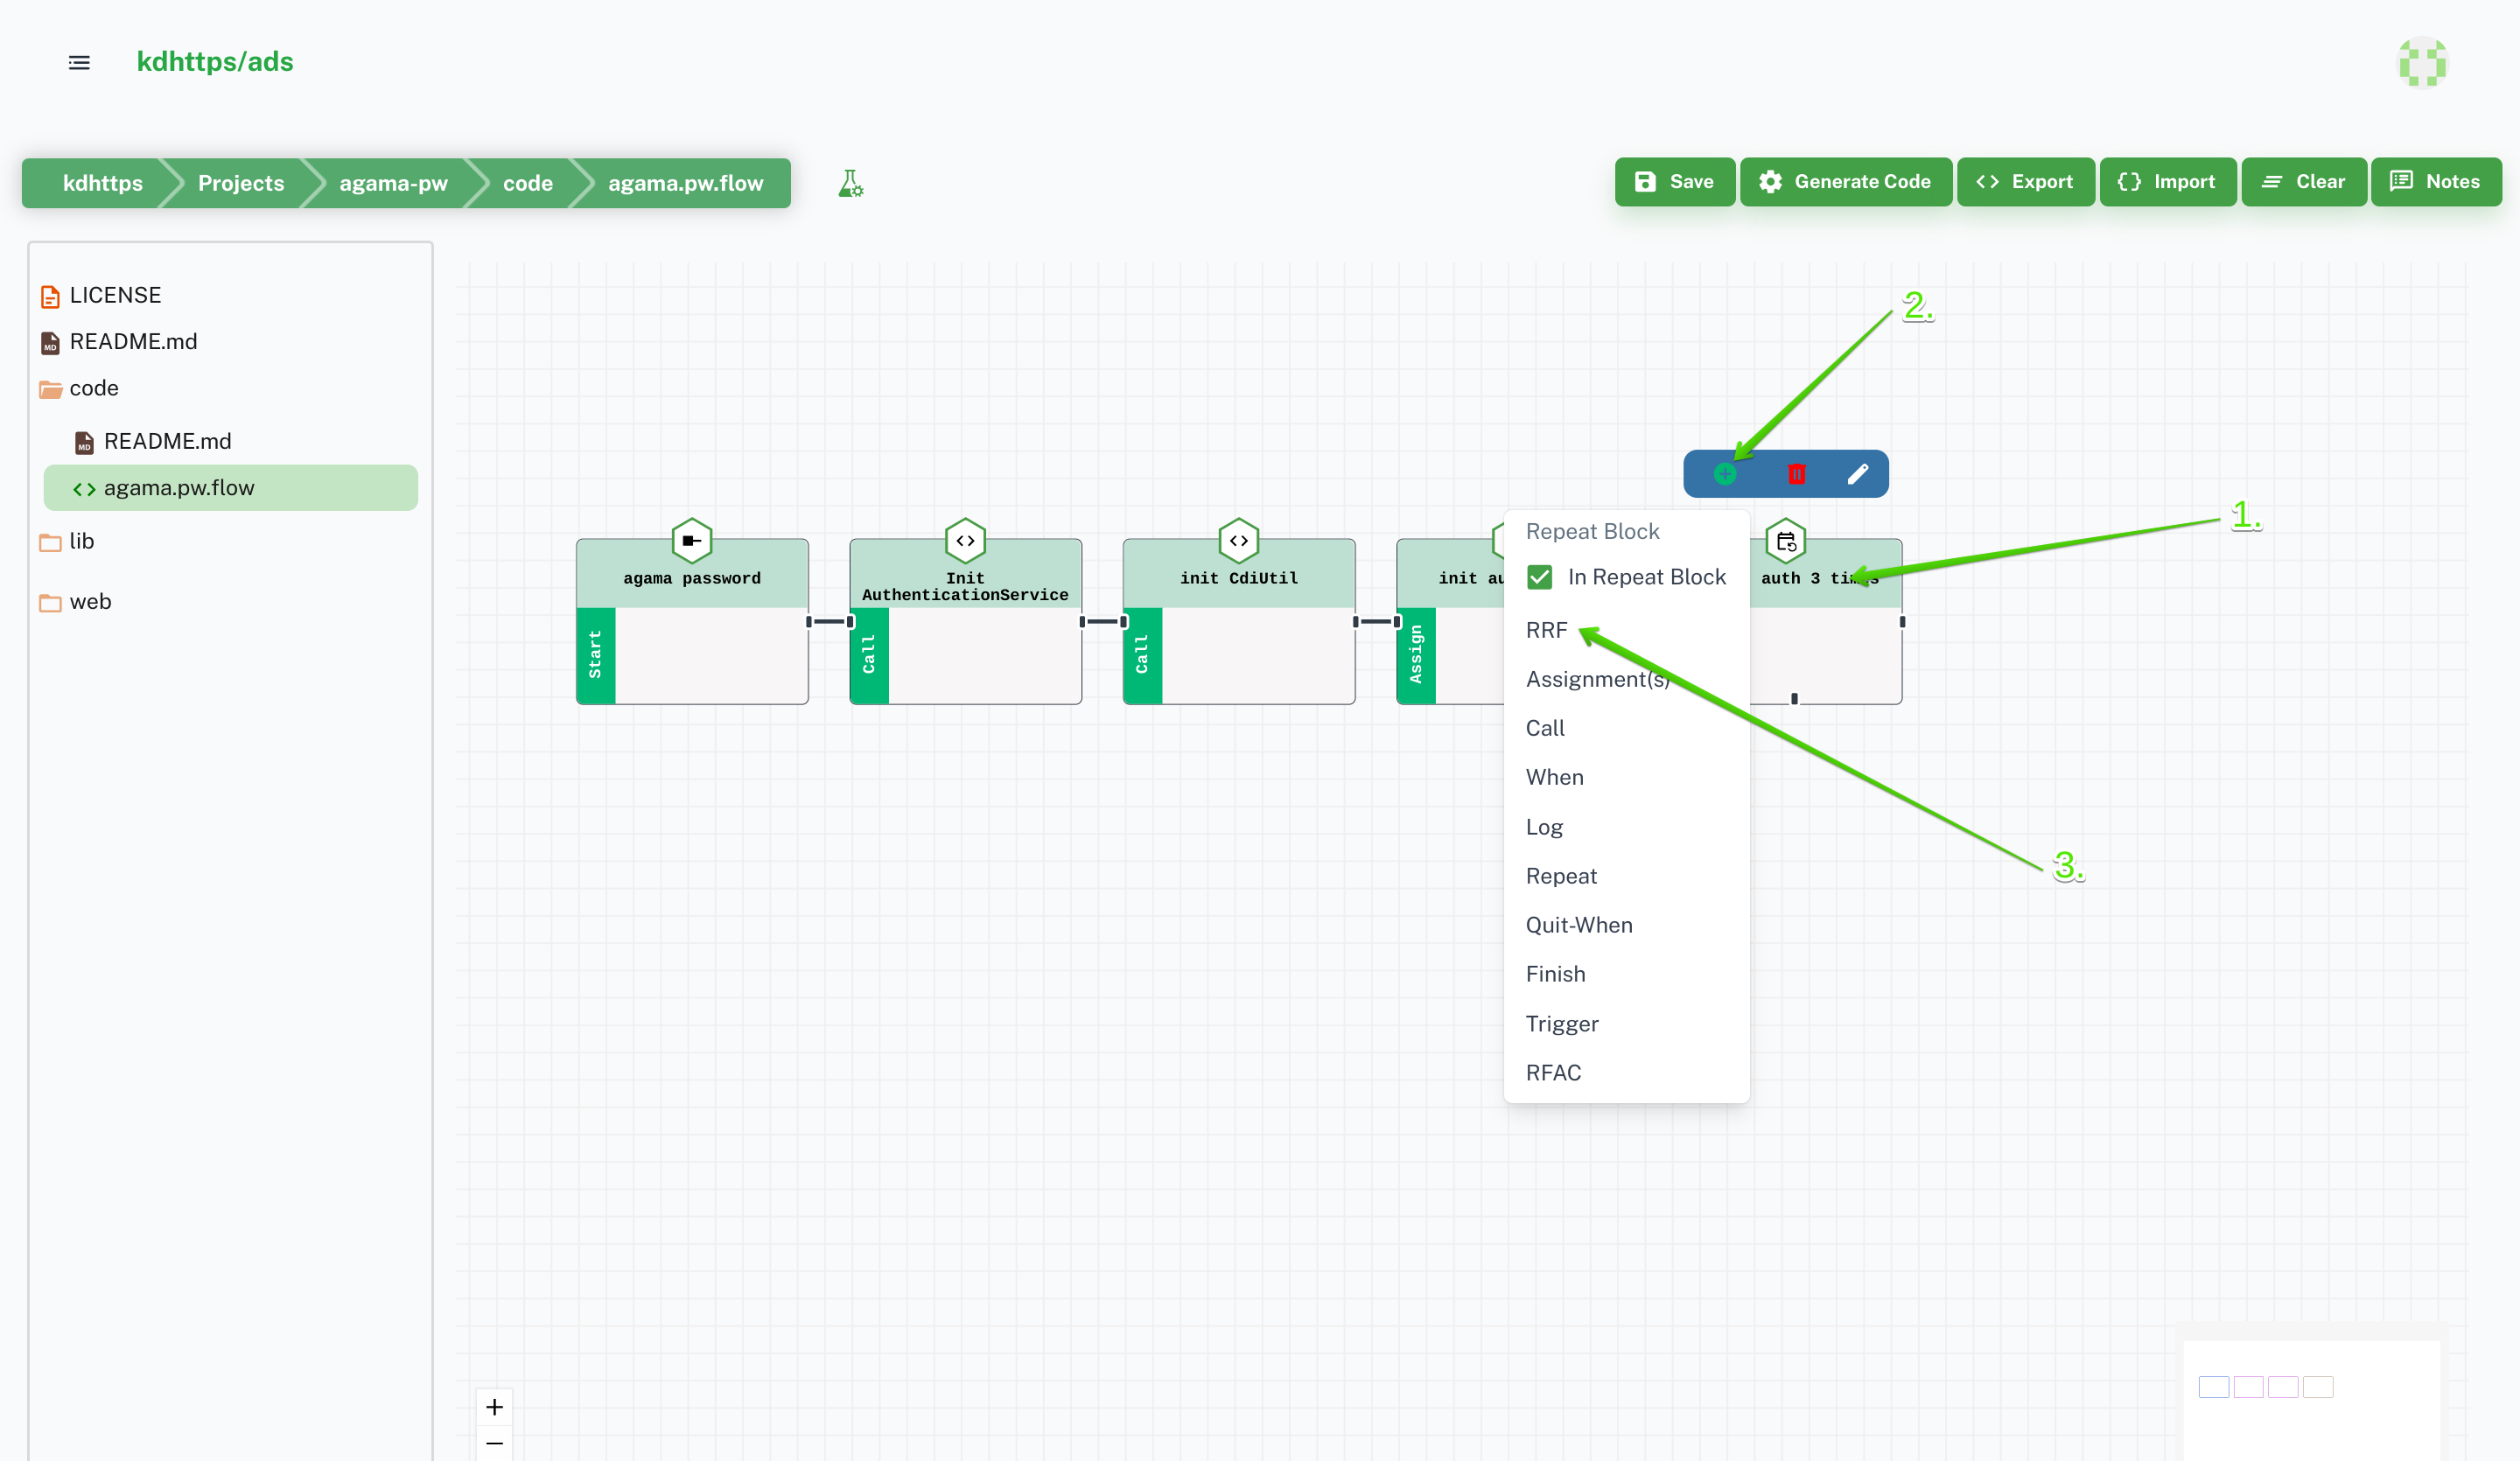
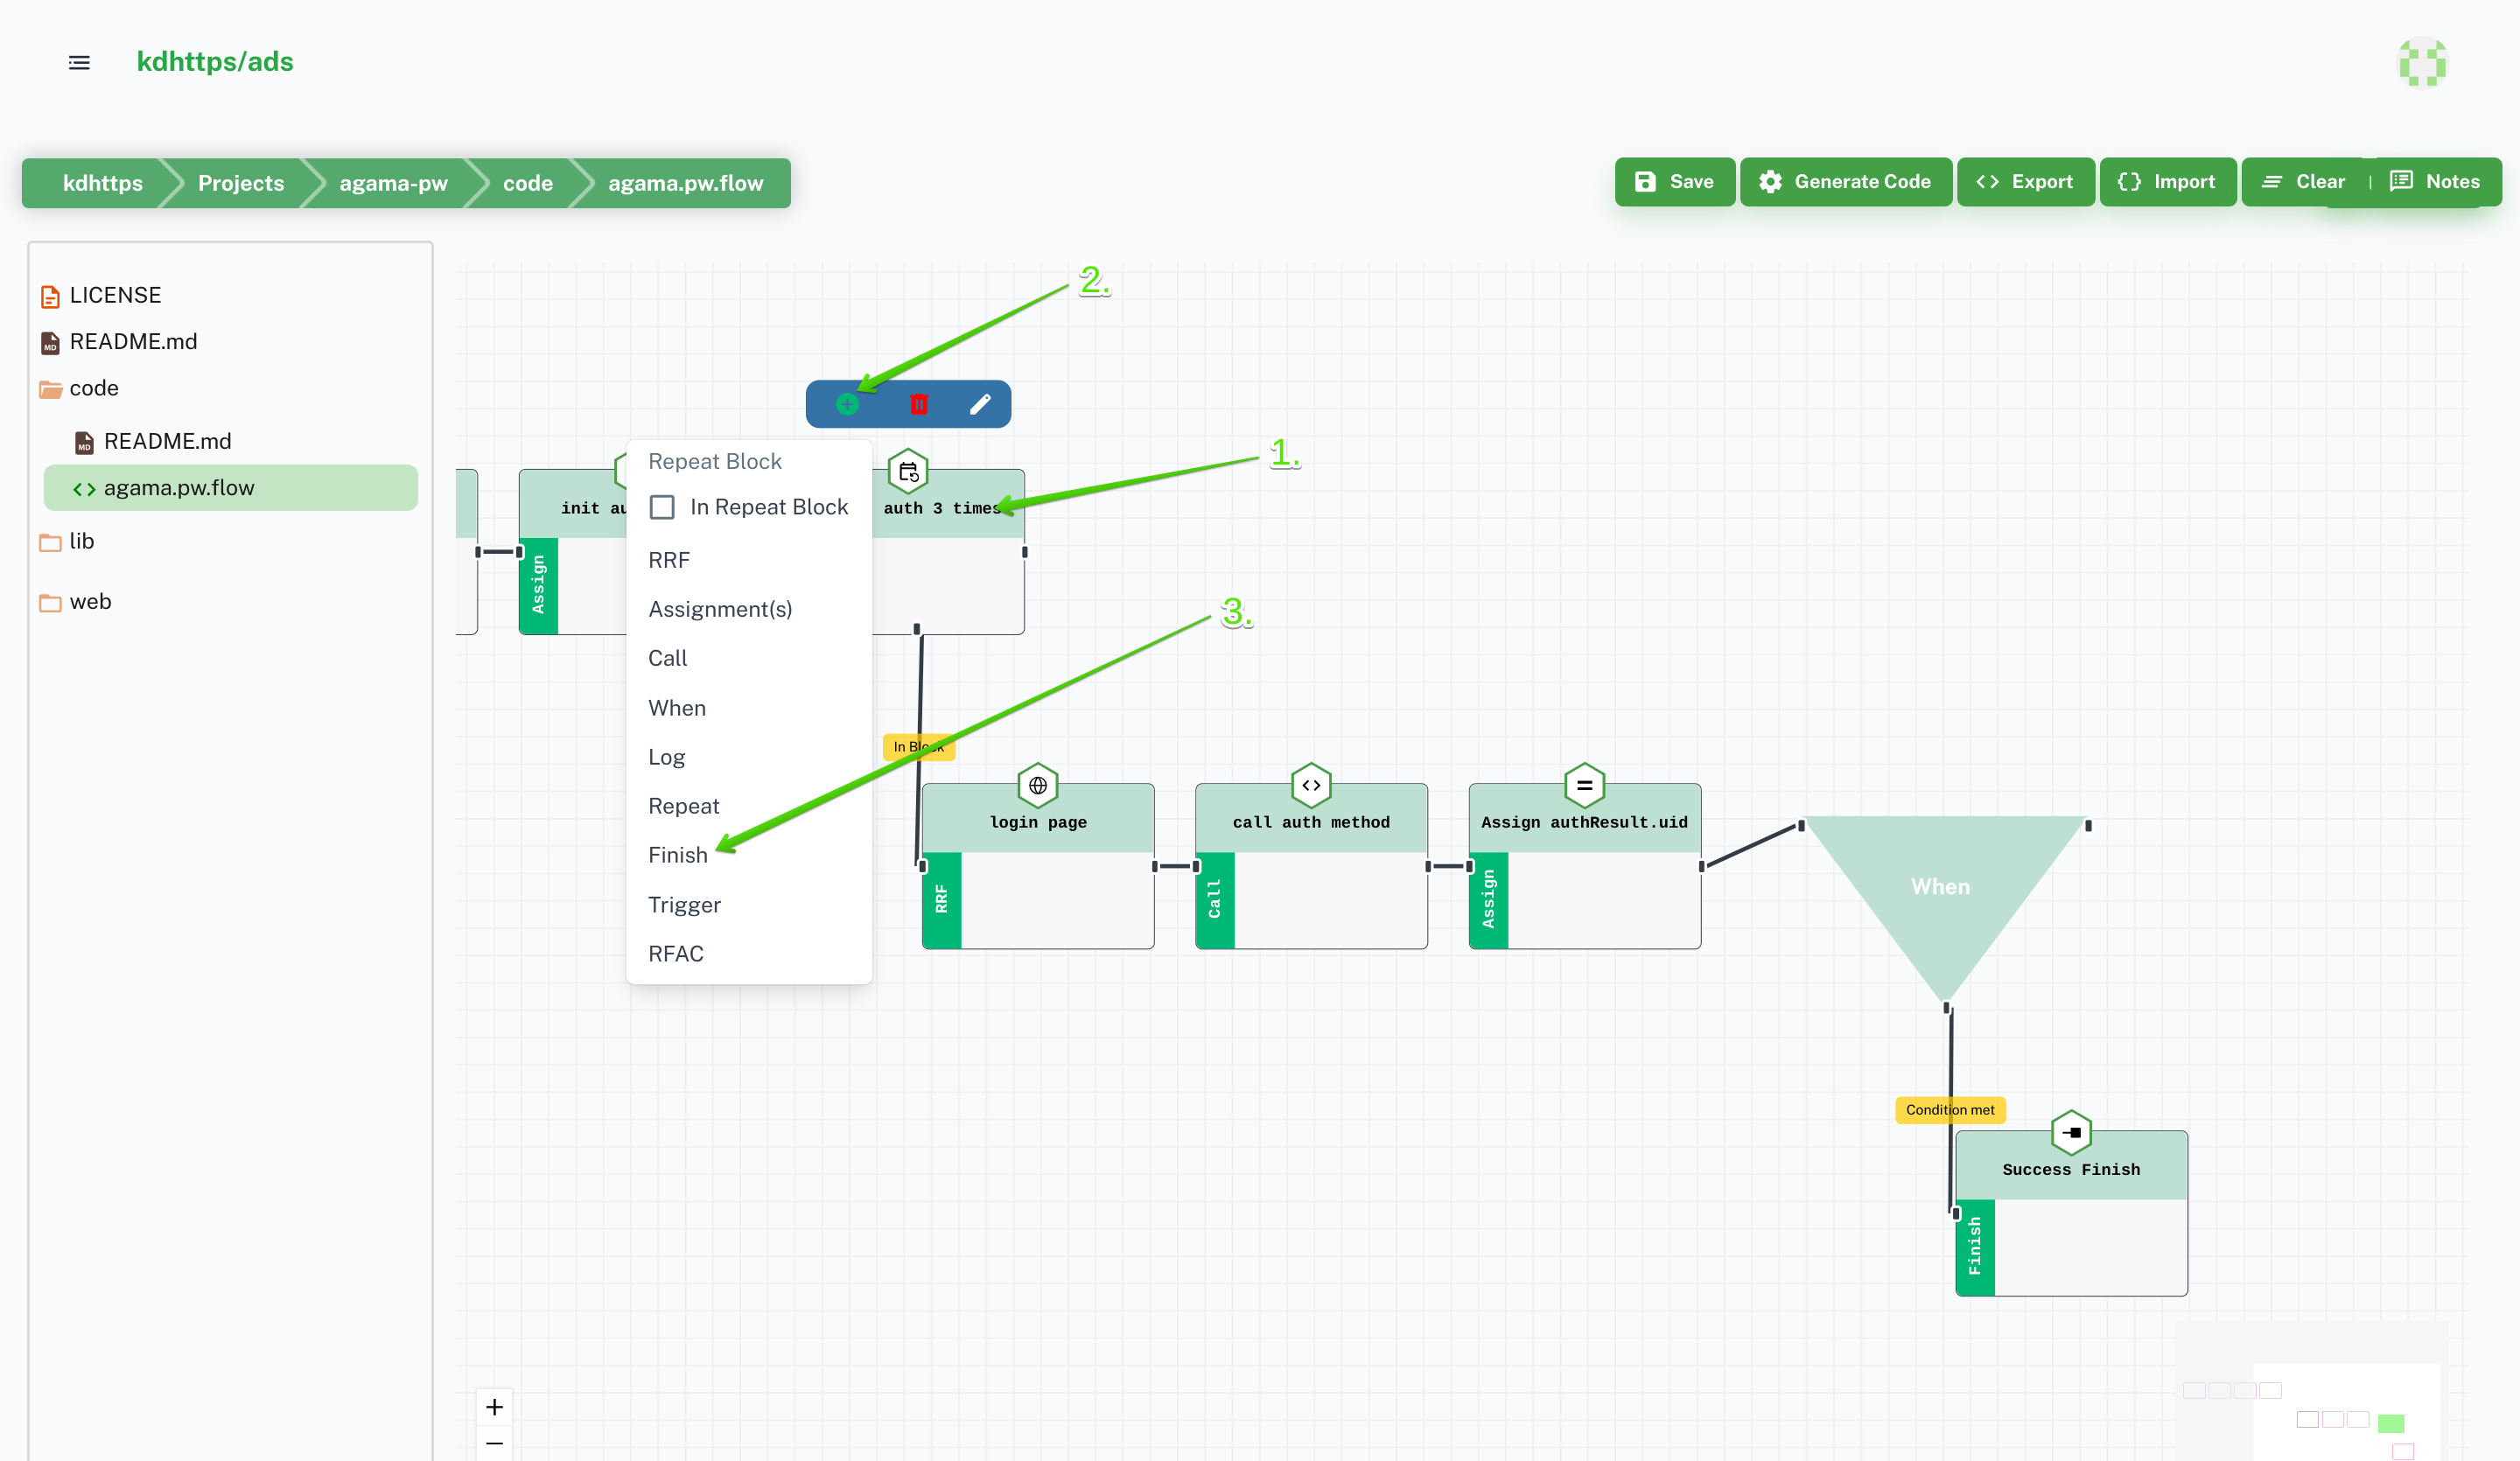
Make sure to check In Repeat Block checkbox.
10
11
12
13
14
15
16
17
18
19
20
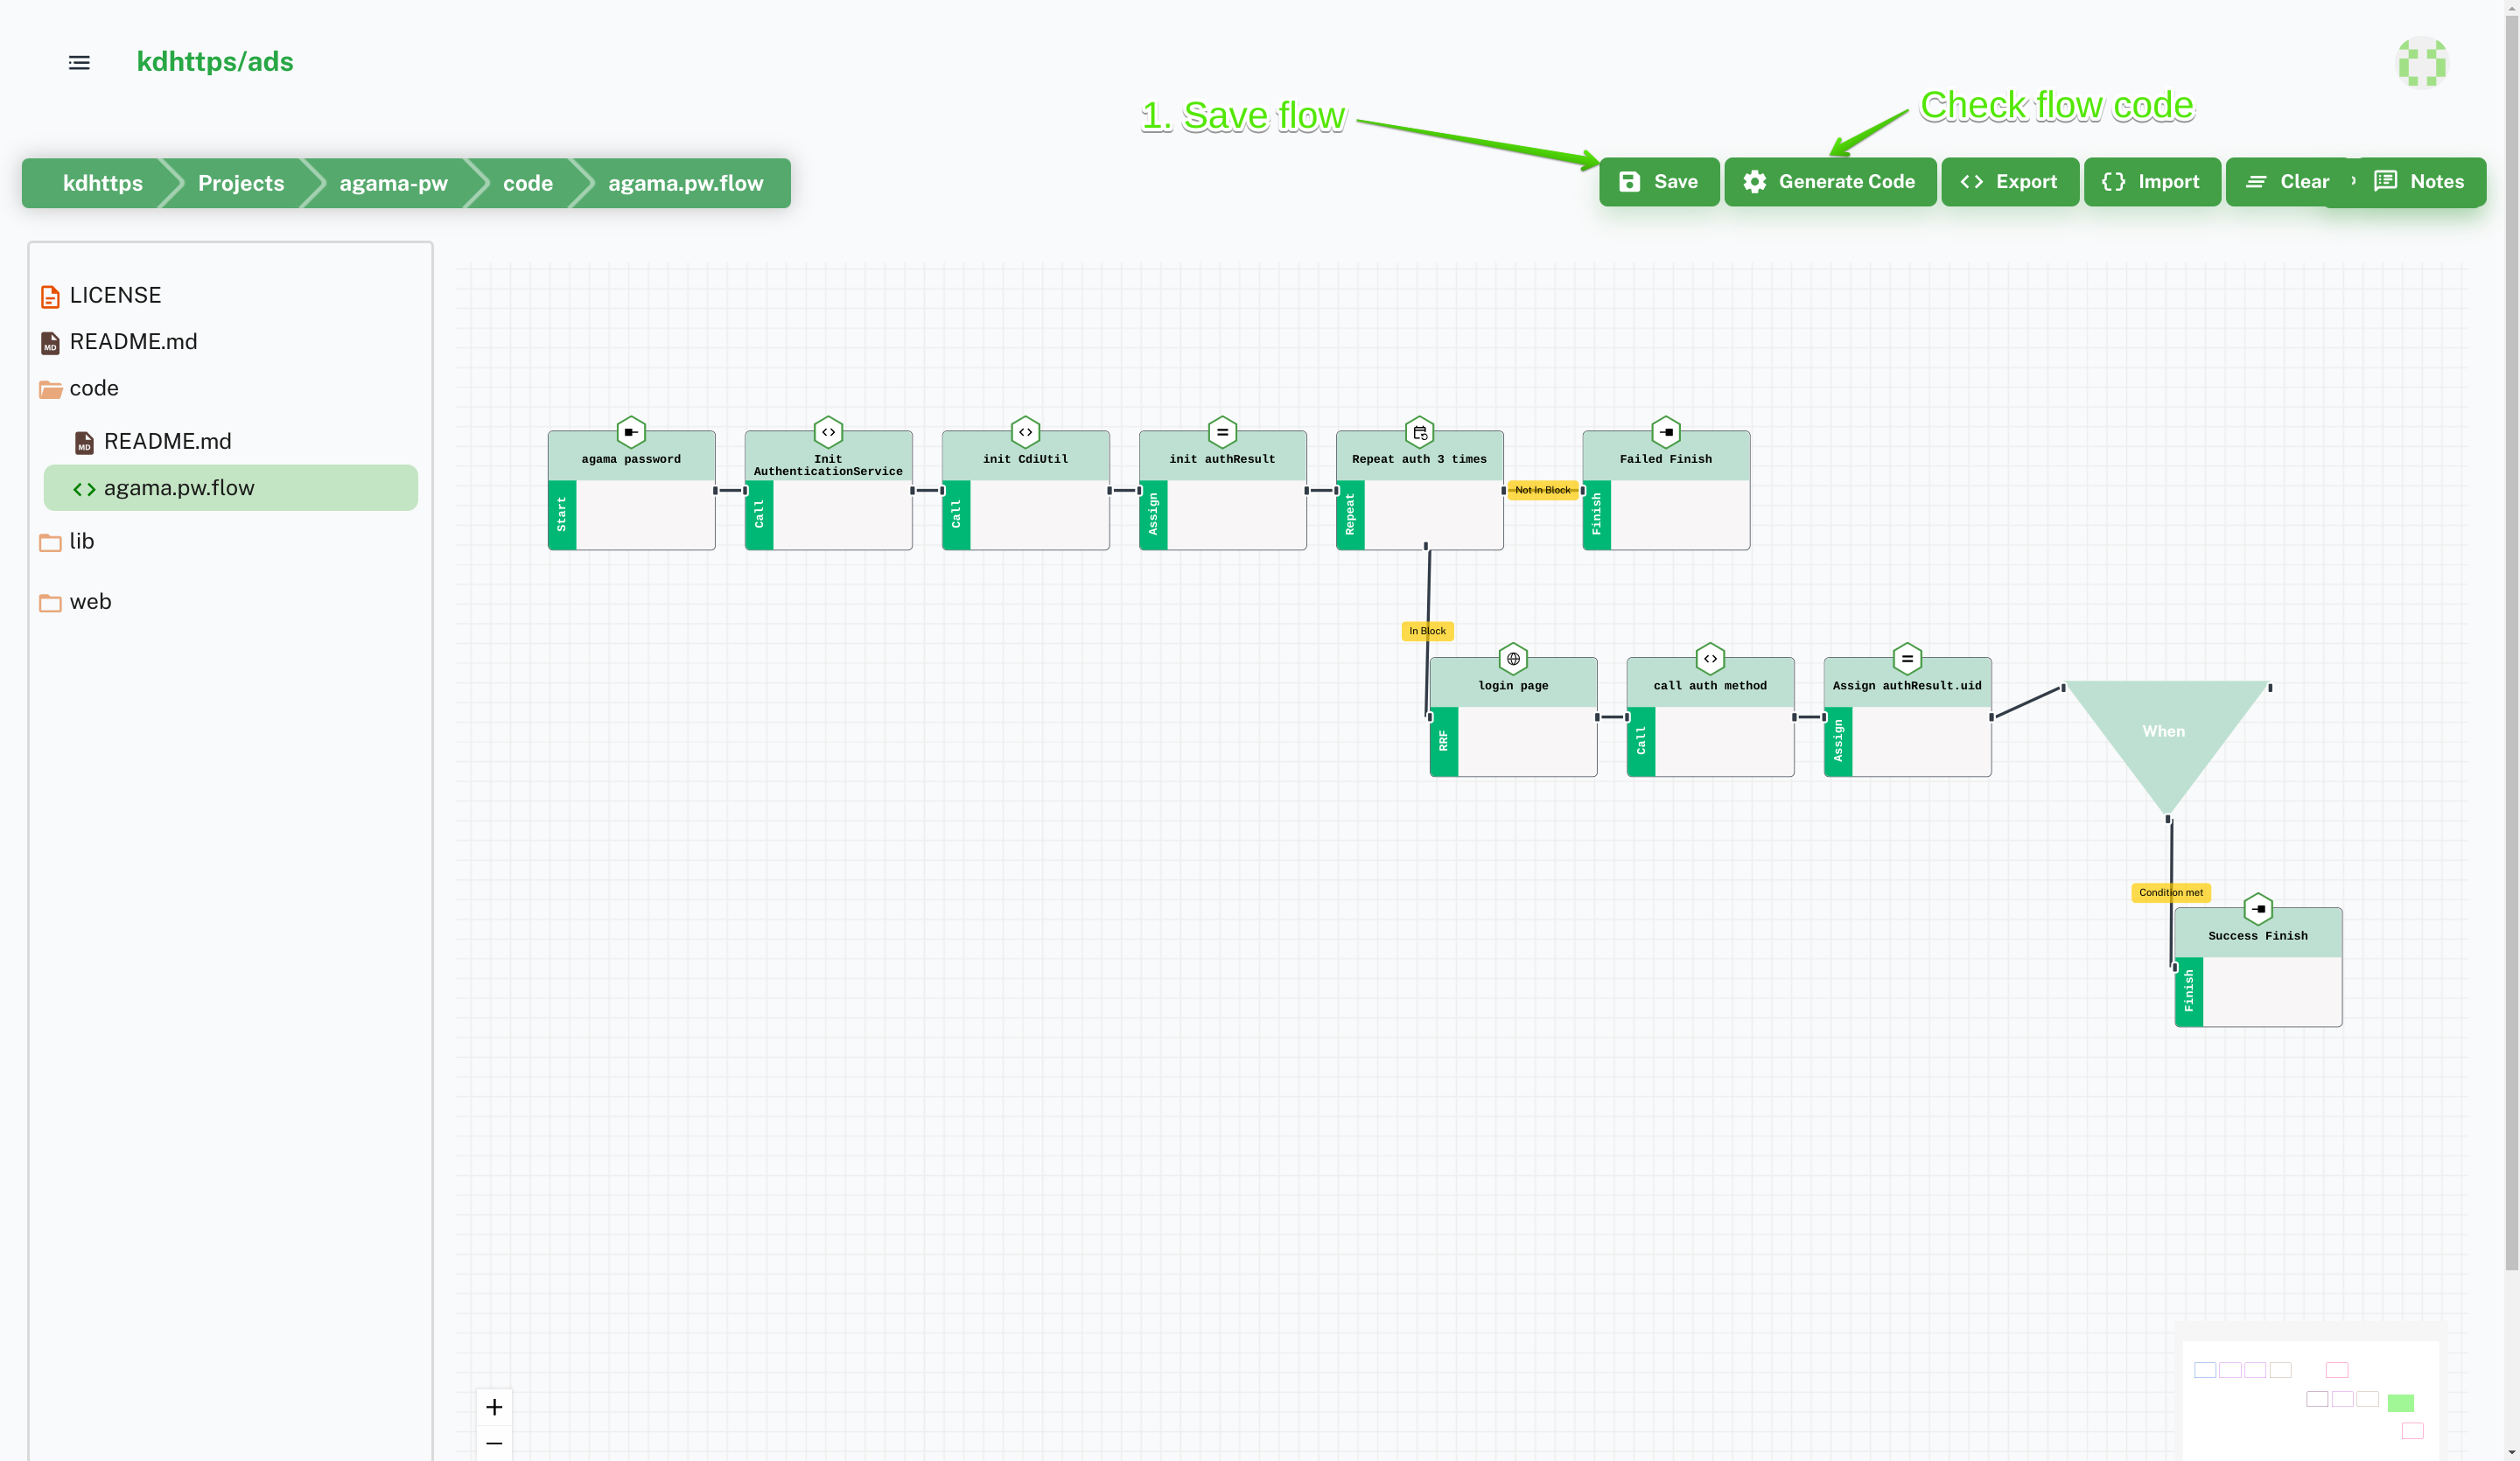
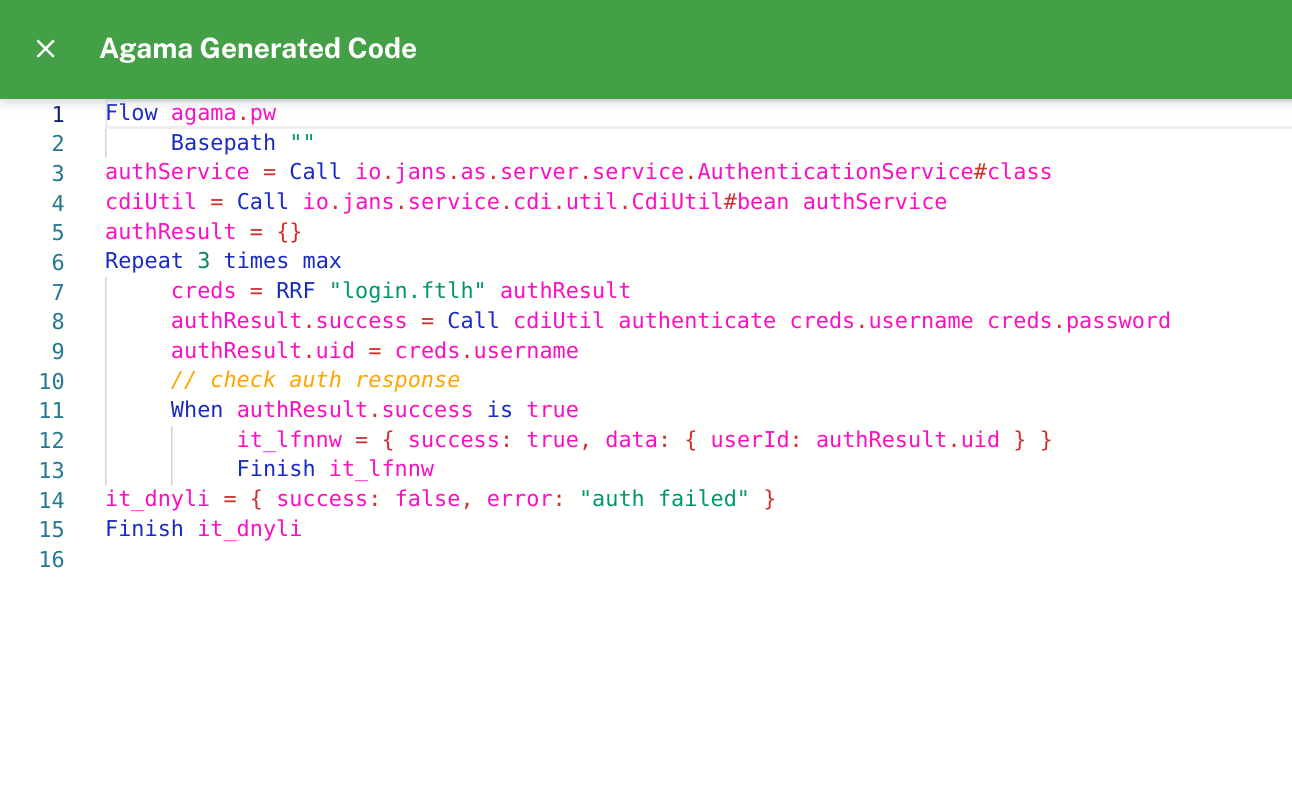
Save it and you can click on the Code button to see the actual flow
If you created the above flow successfully then skip this part. There is an import facility. If you have any existing flow’s JSON file then you can directly import and make a flow quickly.
co.basic.zip
Download the above zip, extract it, and import the JSON file:
Make a template file
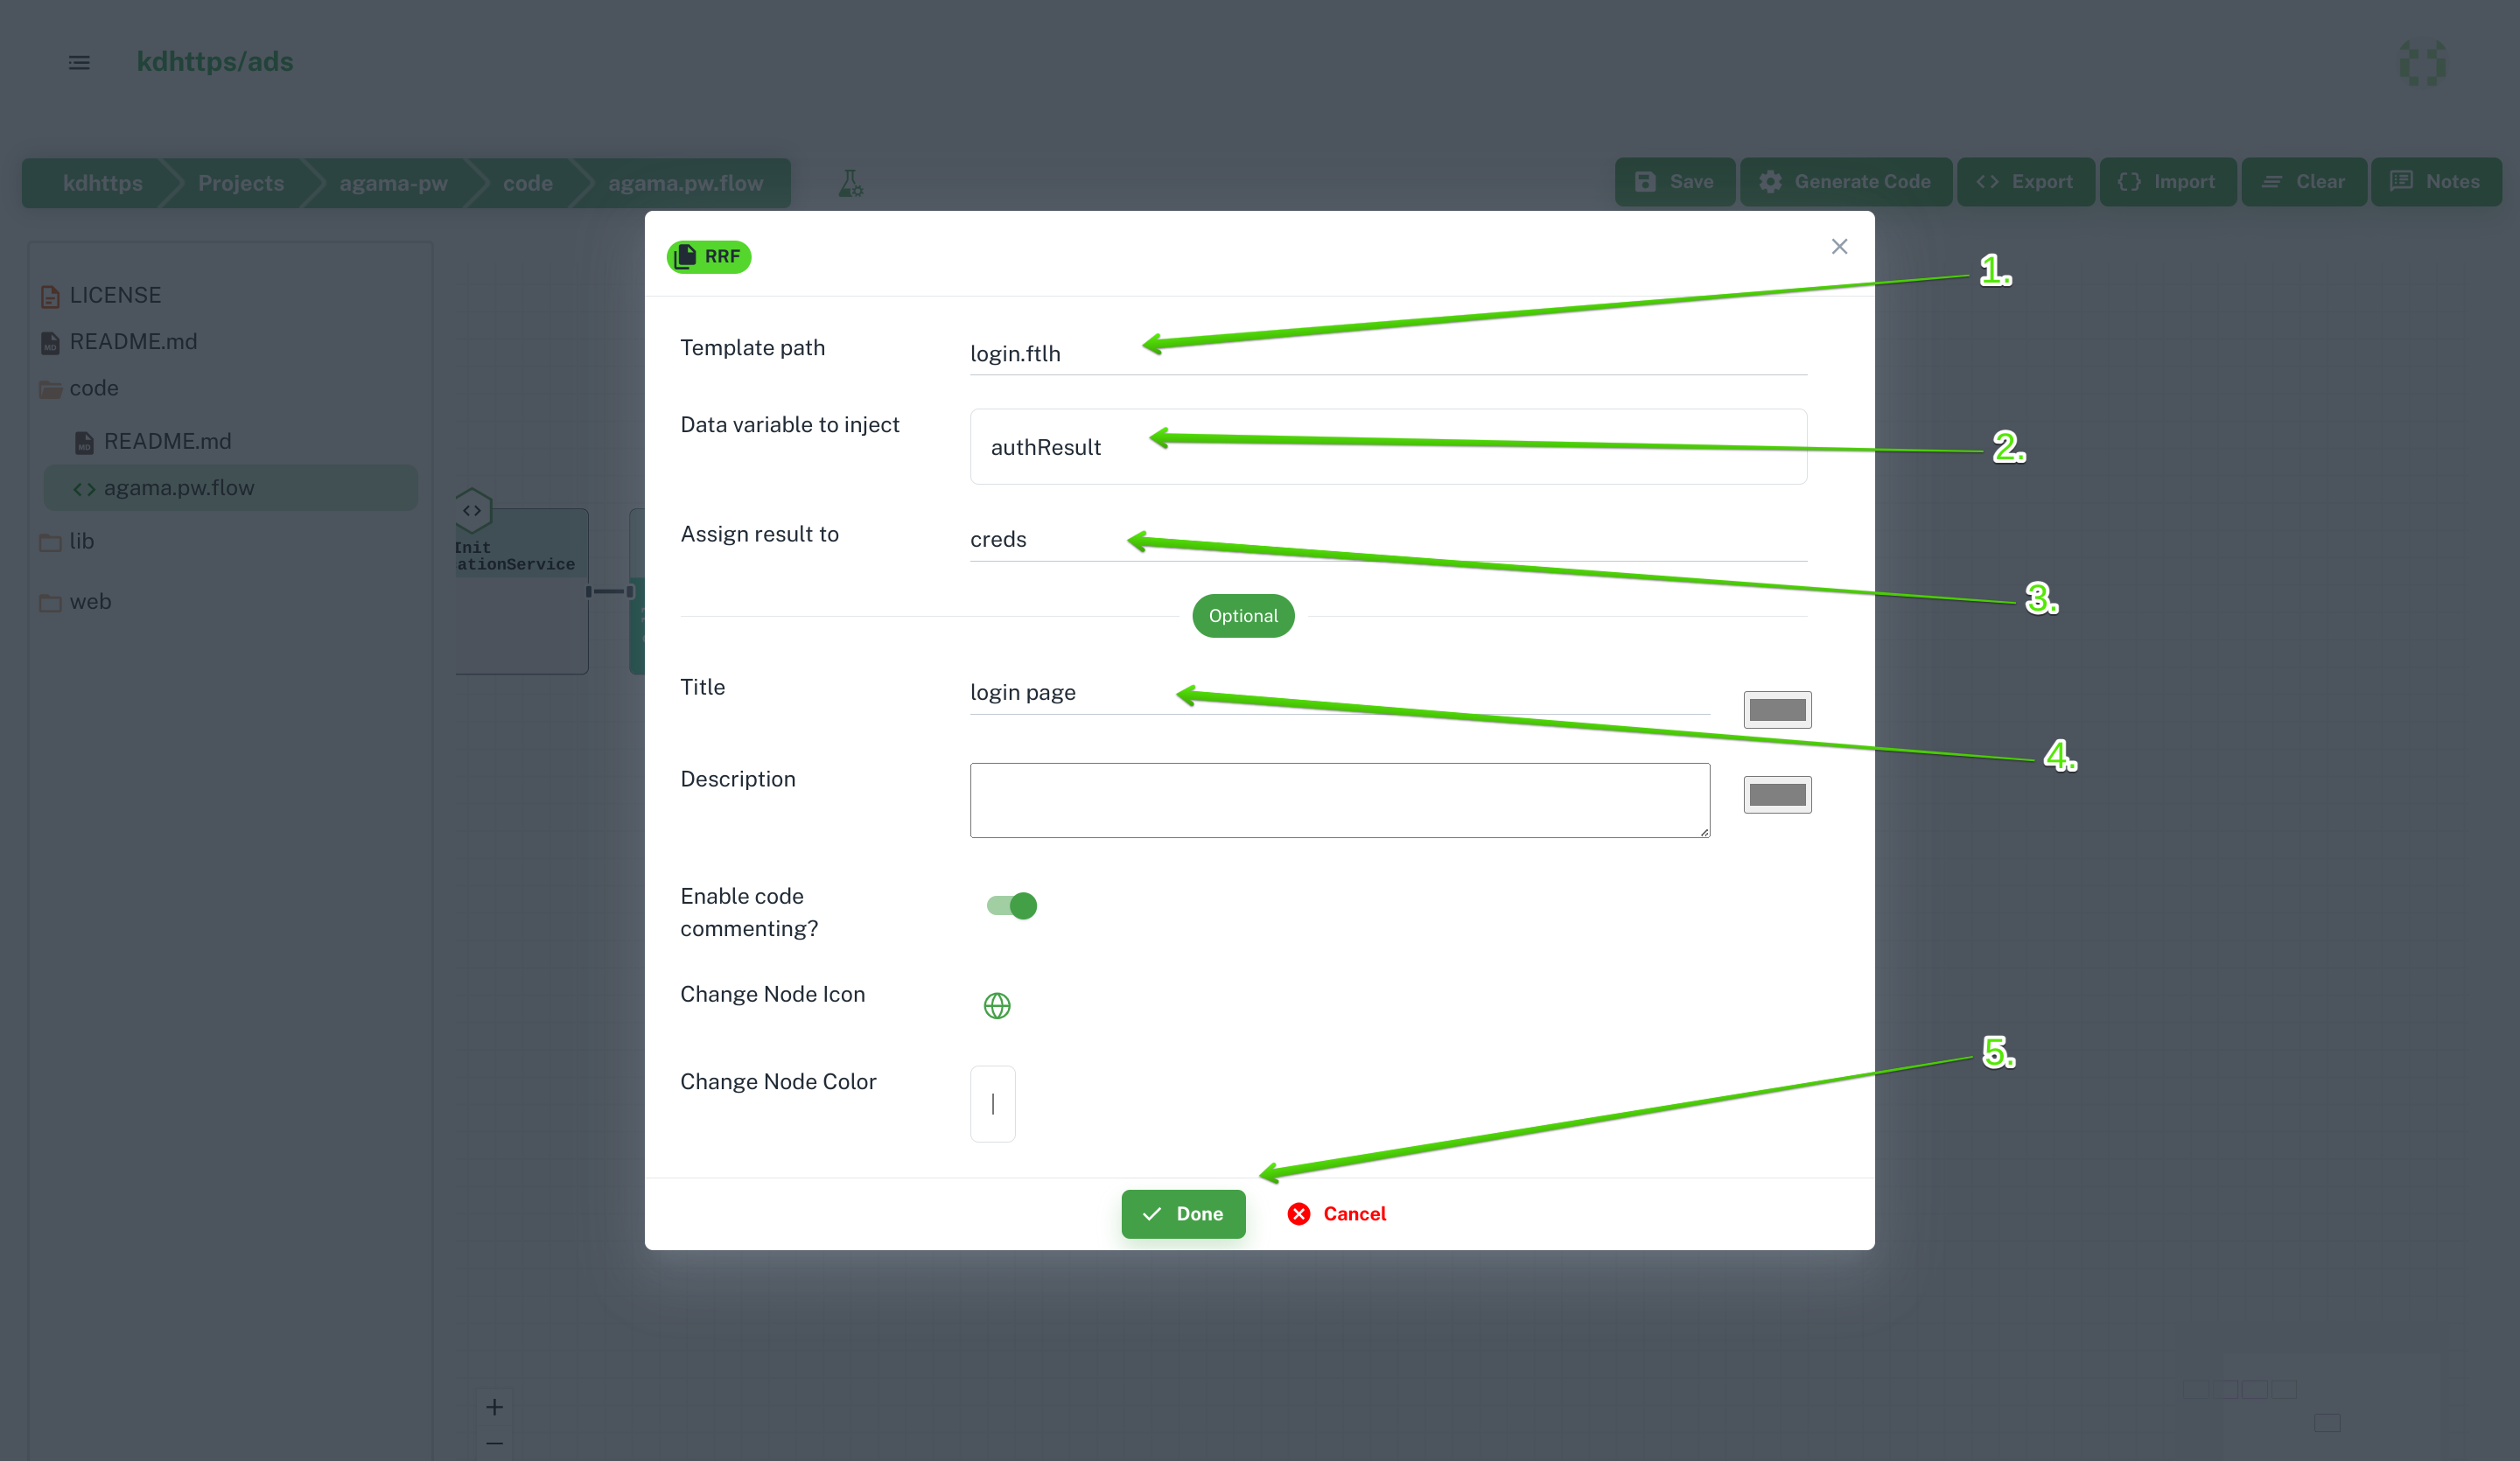
The above flow is using login.ftlh template file. Let’s create it.
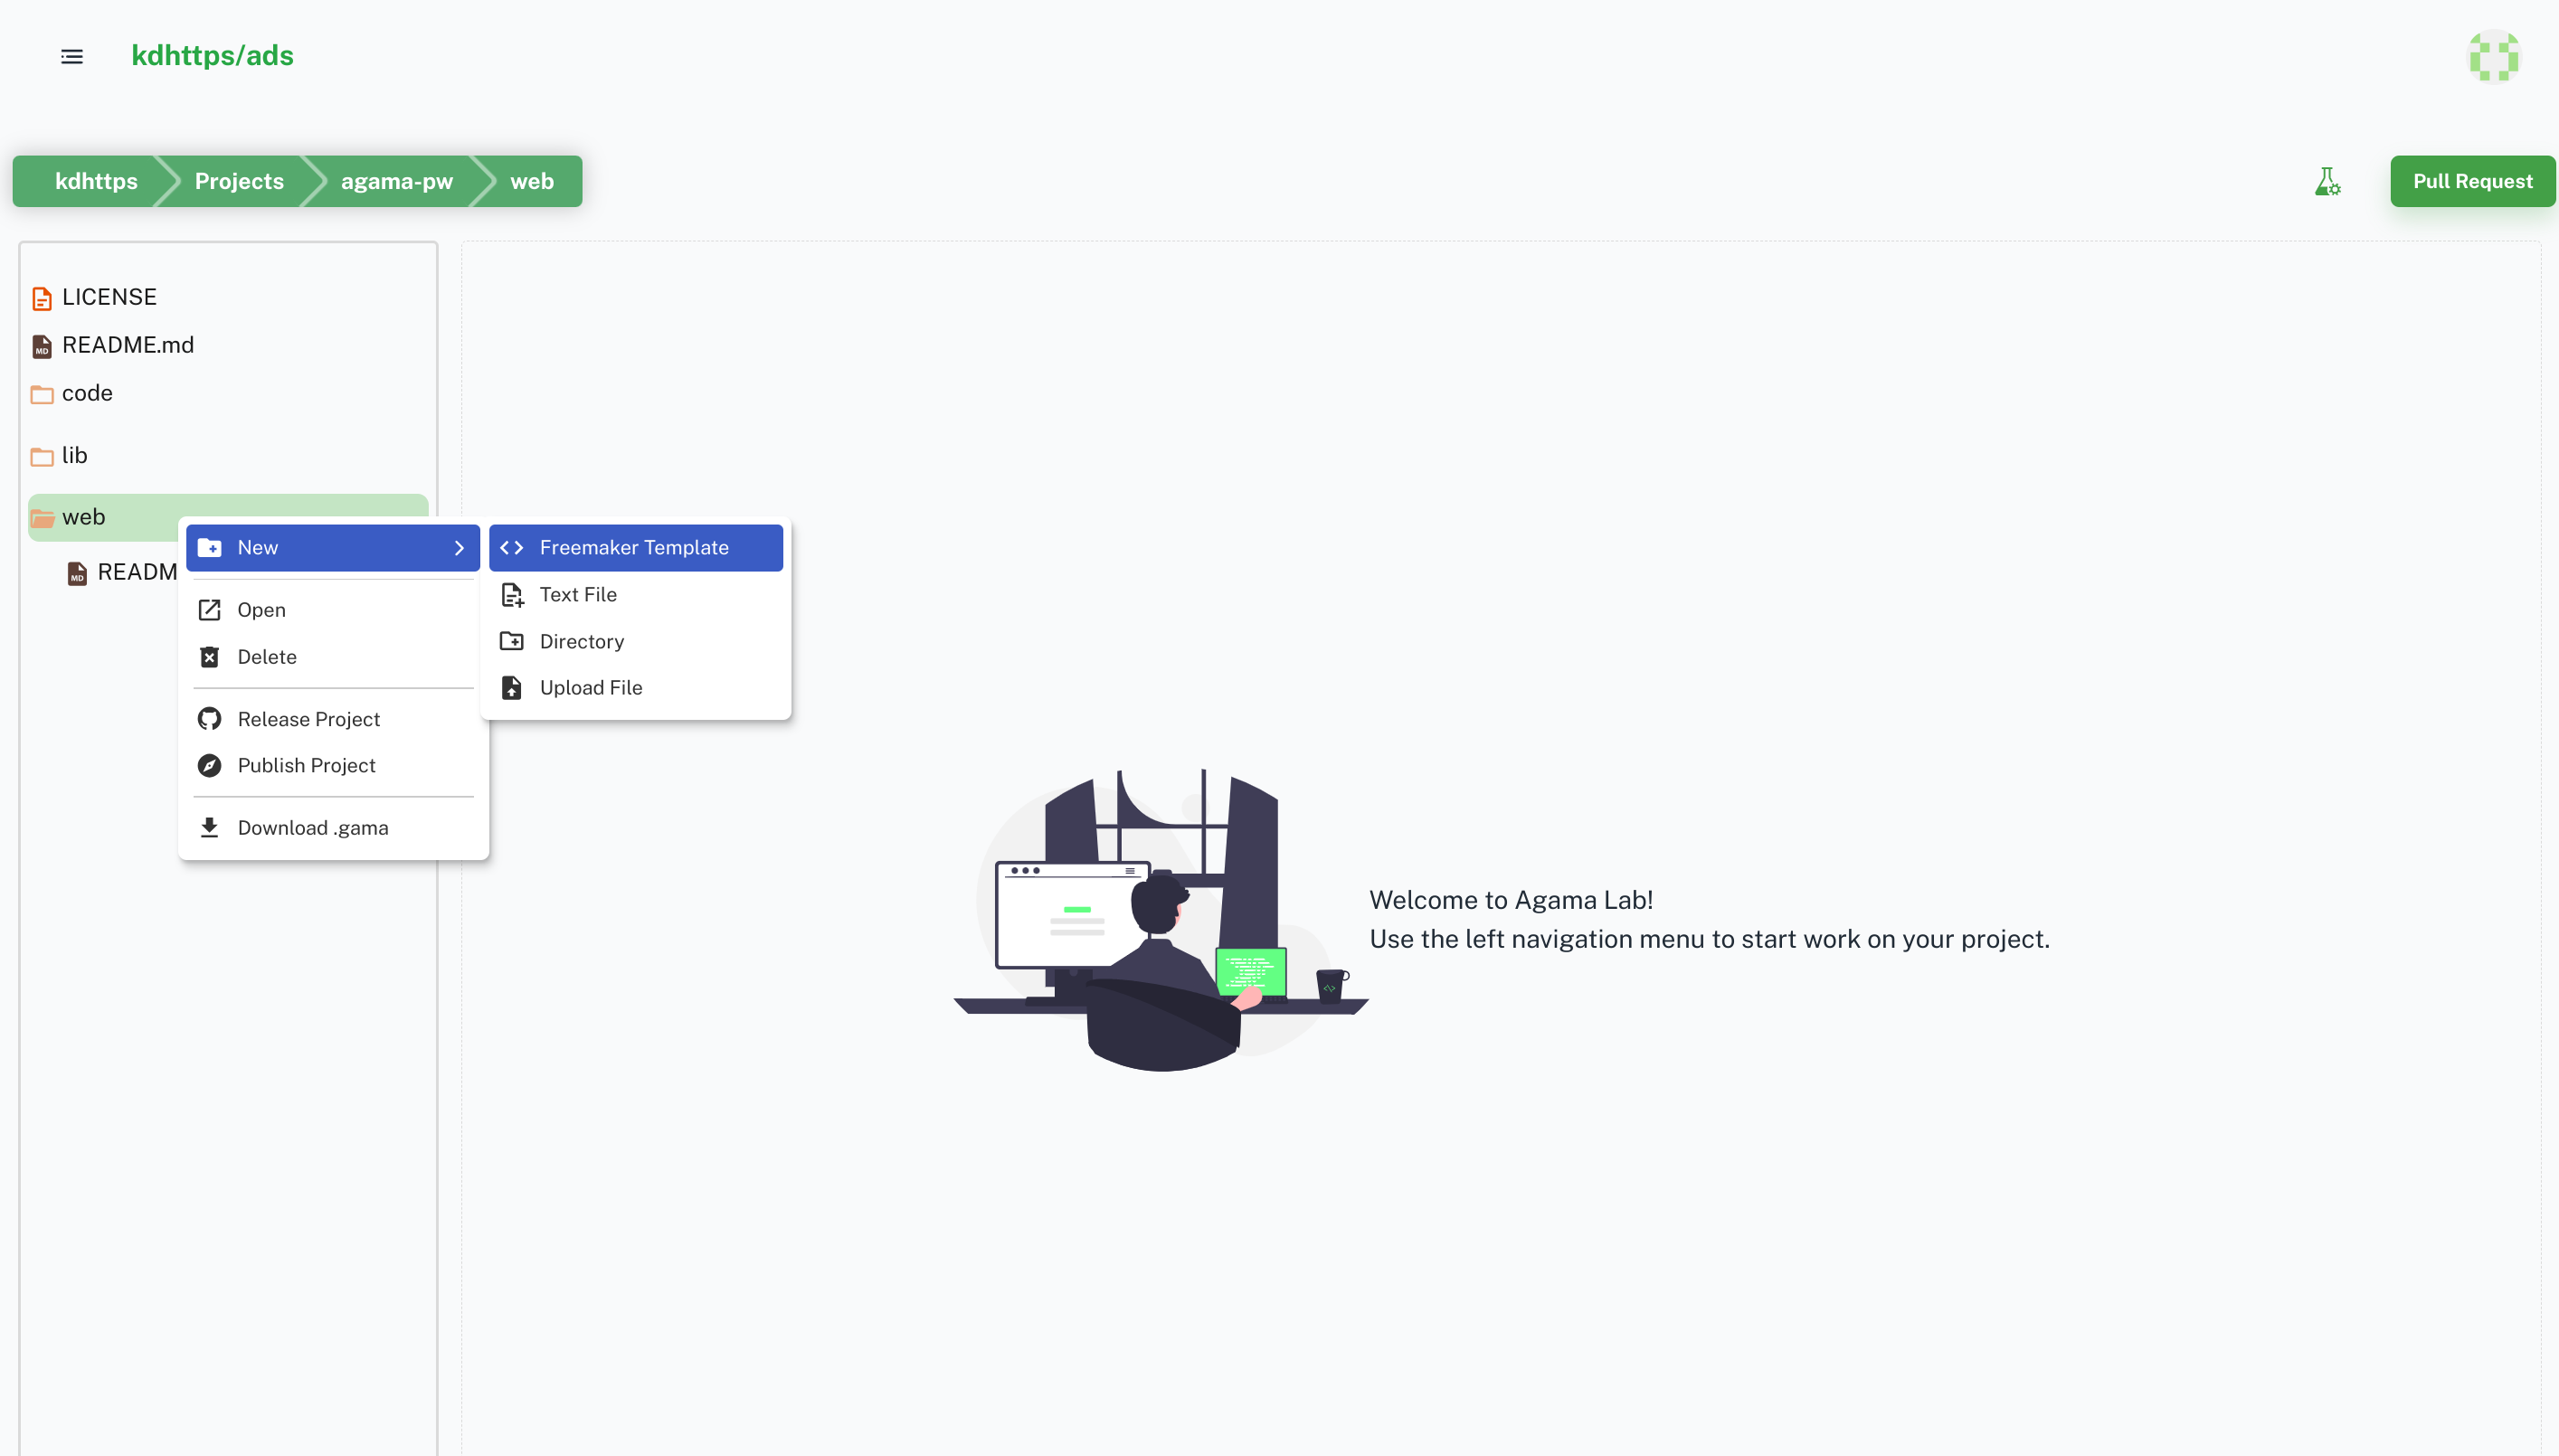
Right-click on the web folder and select the new free maker template
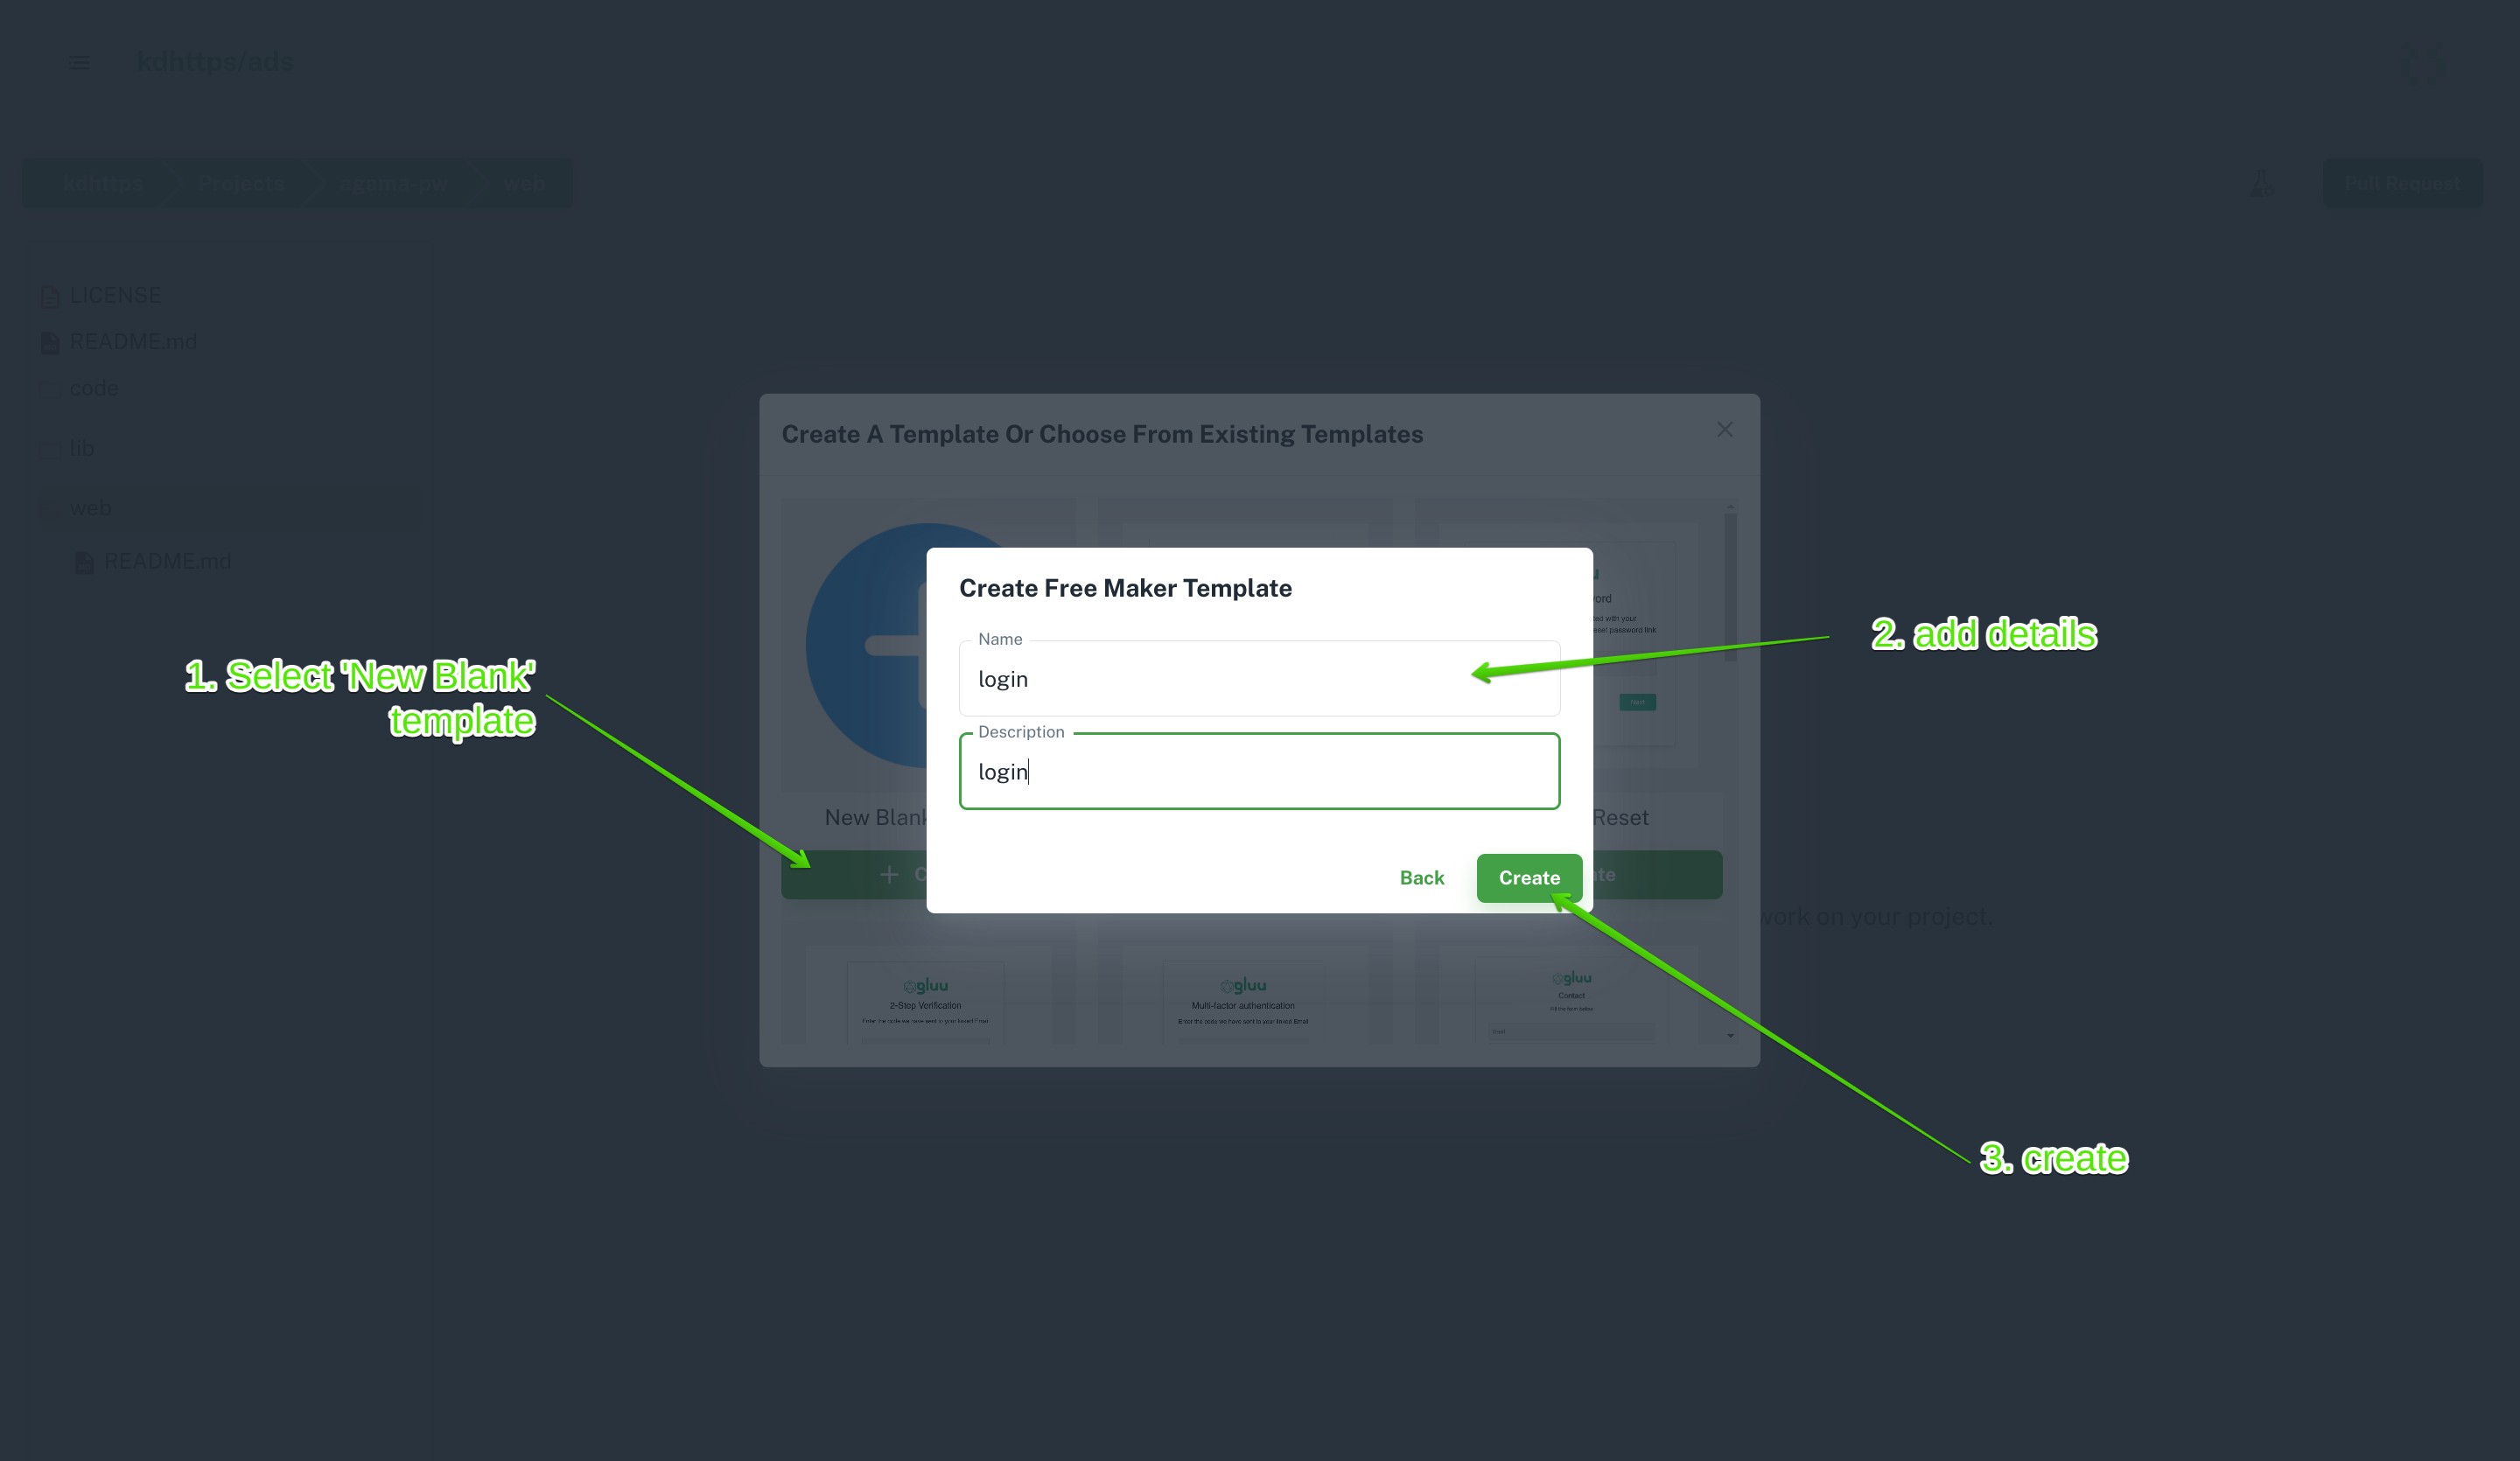
Select Template and add details. It is up to you to make a beautiful design using UI-Editor.
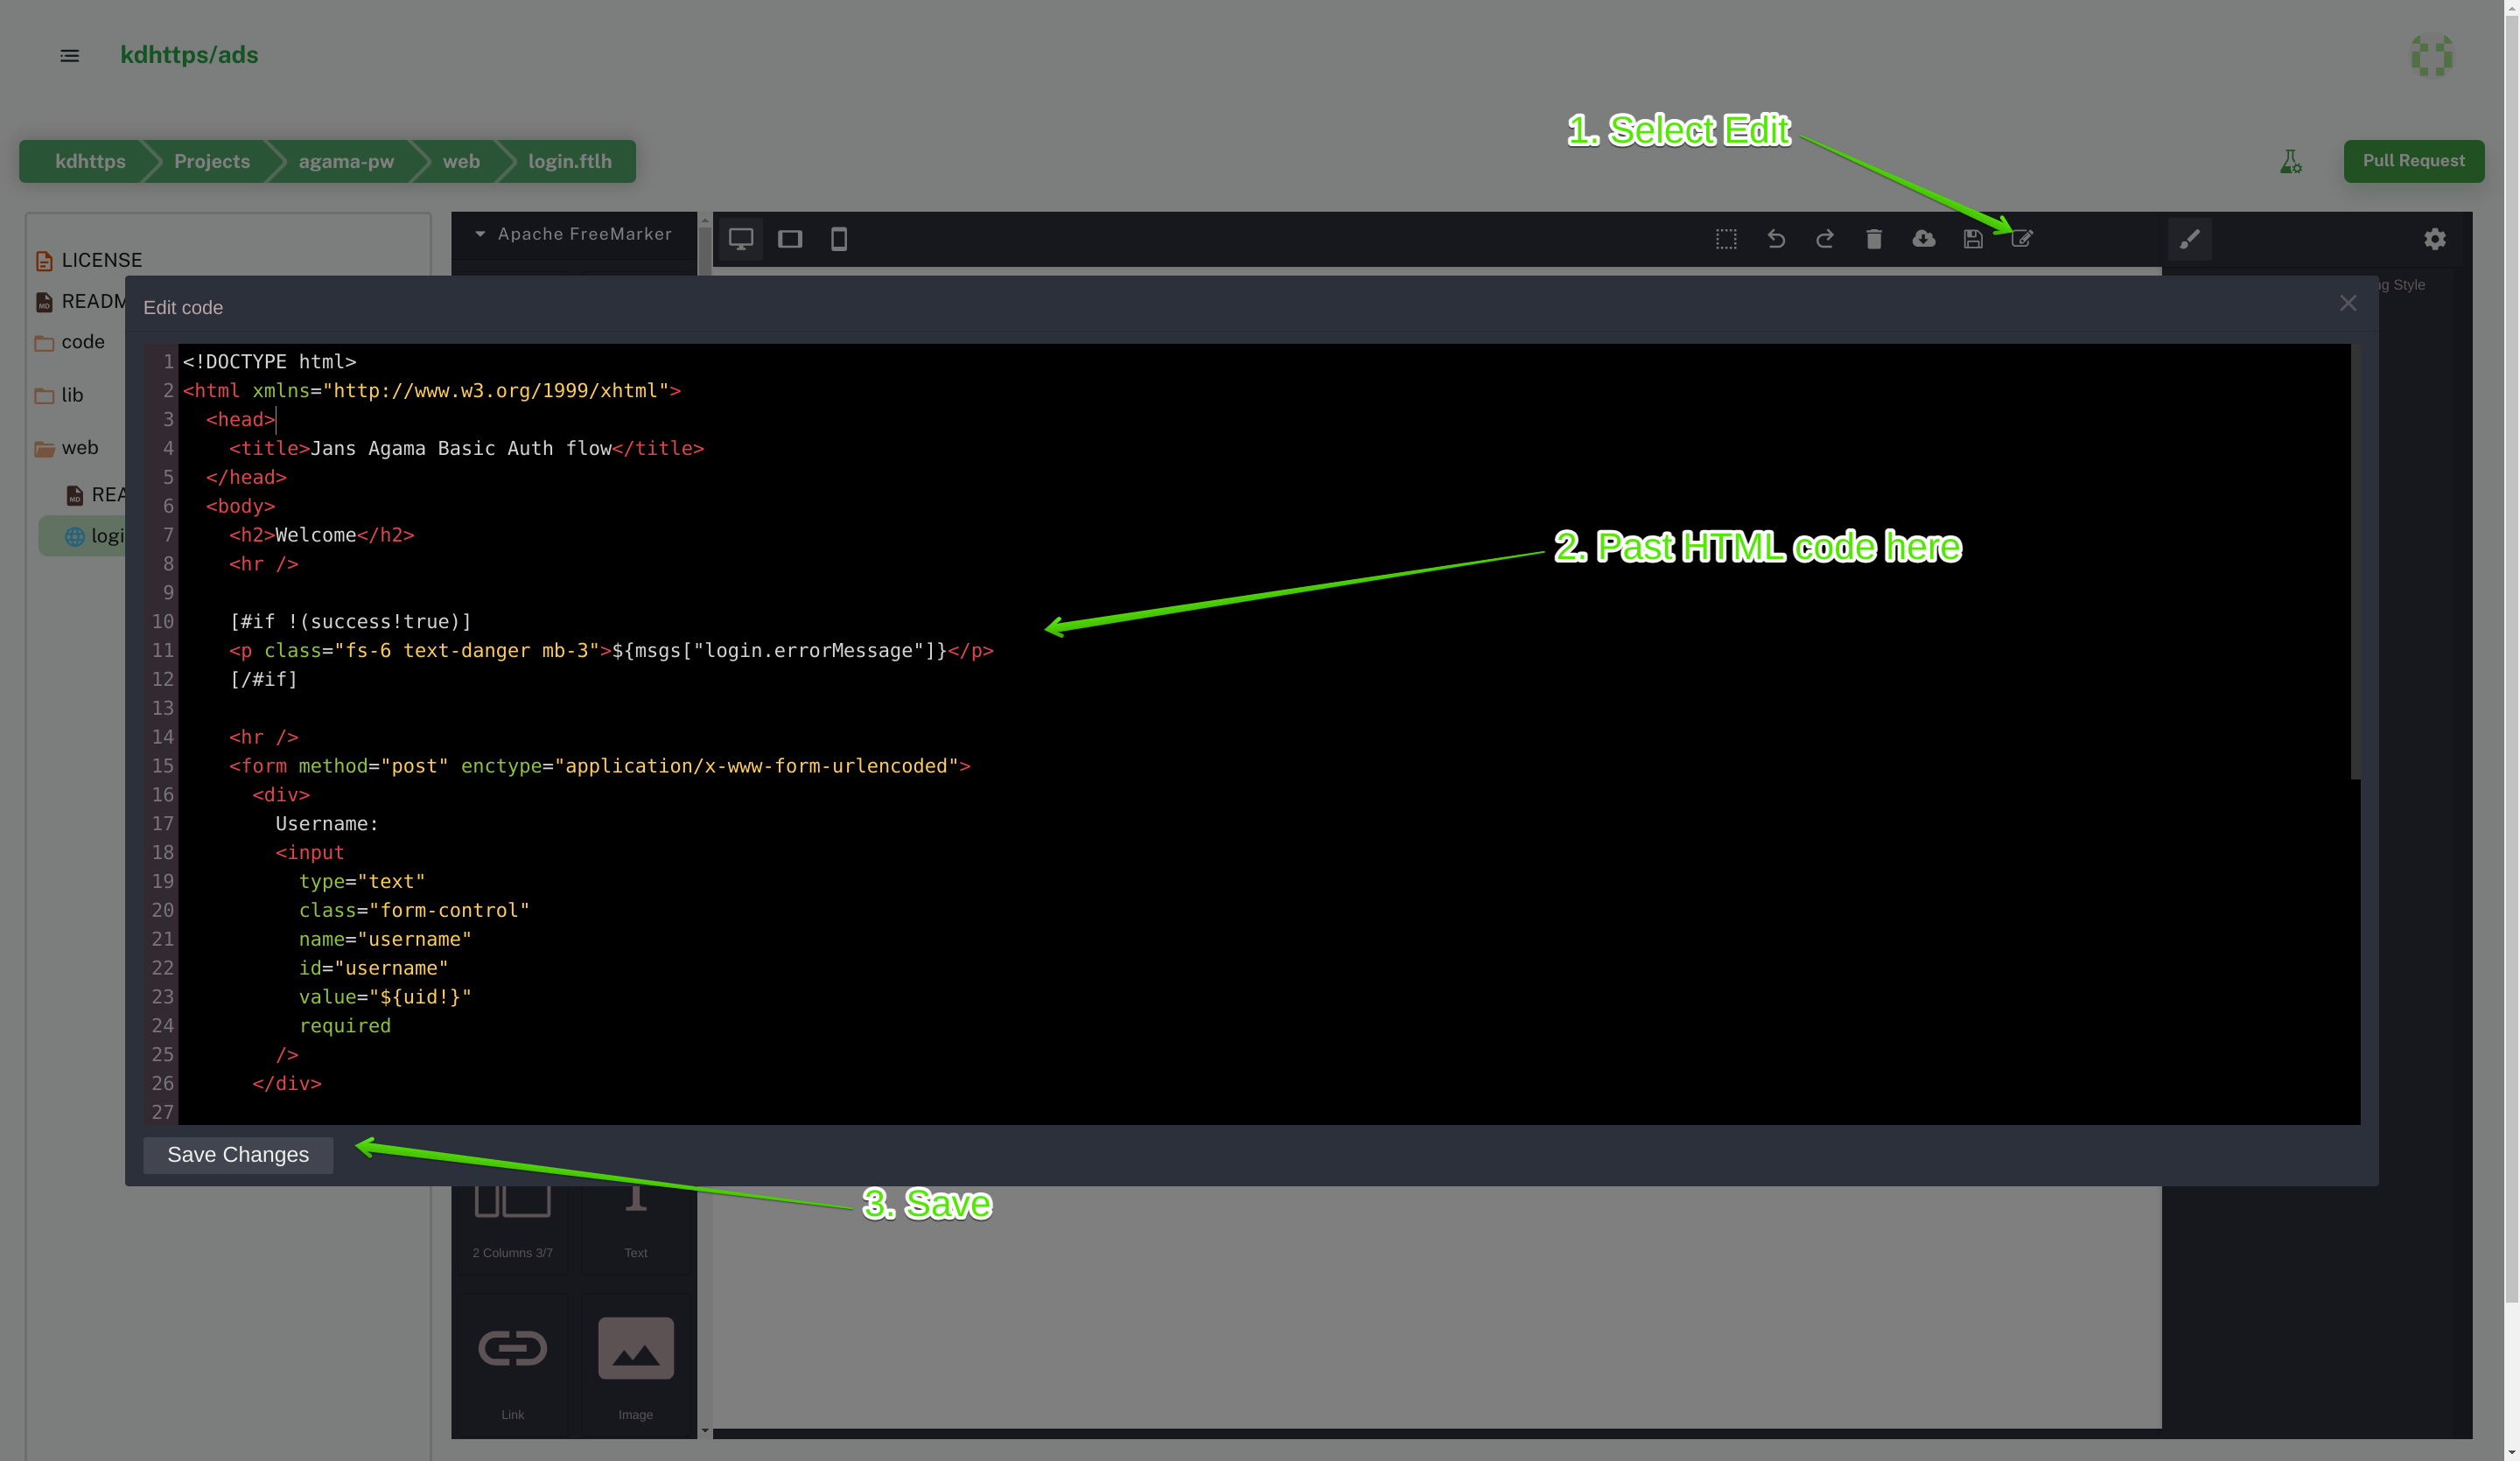
Edit HTML to add existing code. You can make your own.
Once you save the file. It will add [#ftl output_format="HTML"] which is needed because we are using [#if... instead of <#if....
Notice If you want to add code like <inputtype="submit" class="btn btn-success px-4" value="${msgs["login.login"]}"> then it will not work instead of add <inputtype="submit" class="btn btn-success px-4" value="${msgs['login.login']}">.You need to use a single quote inside a double quote.
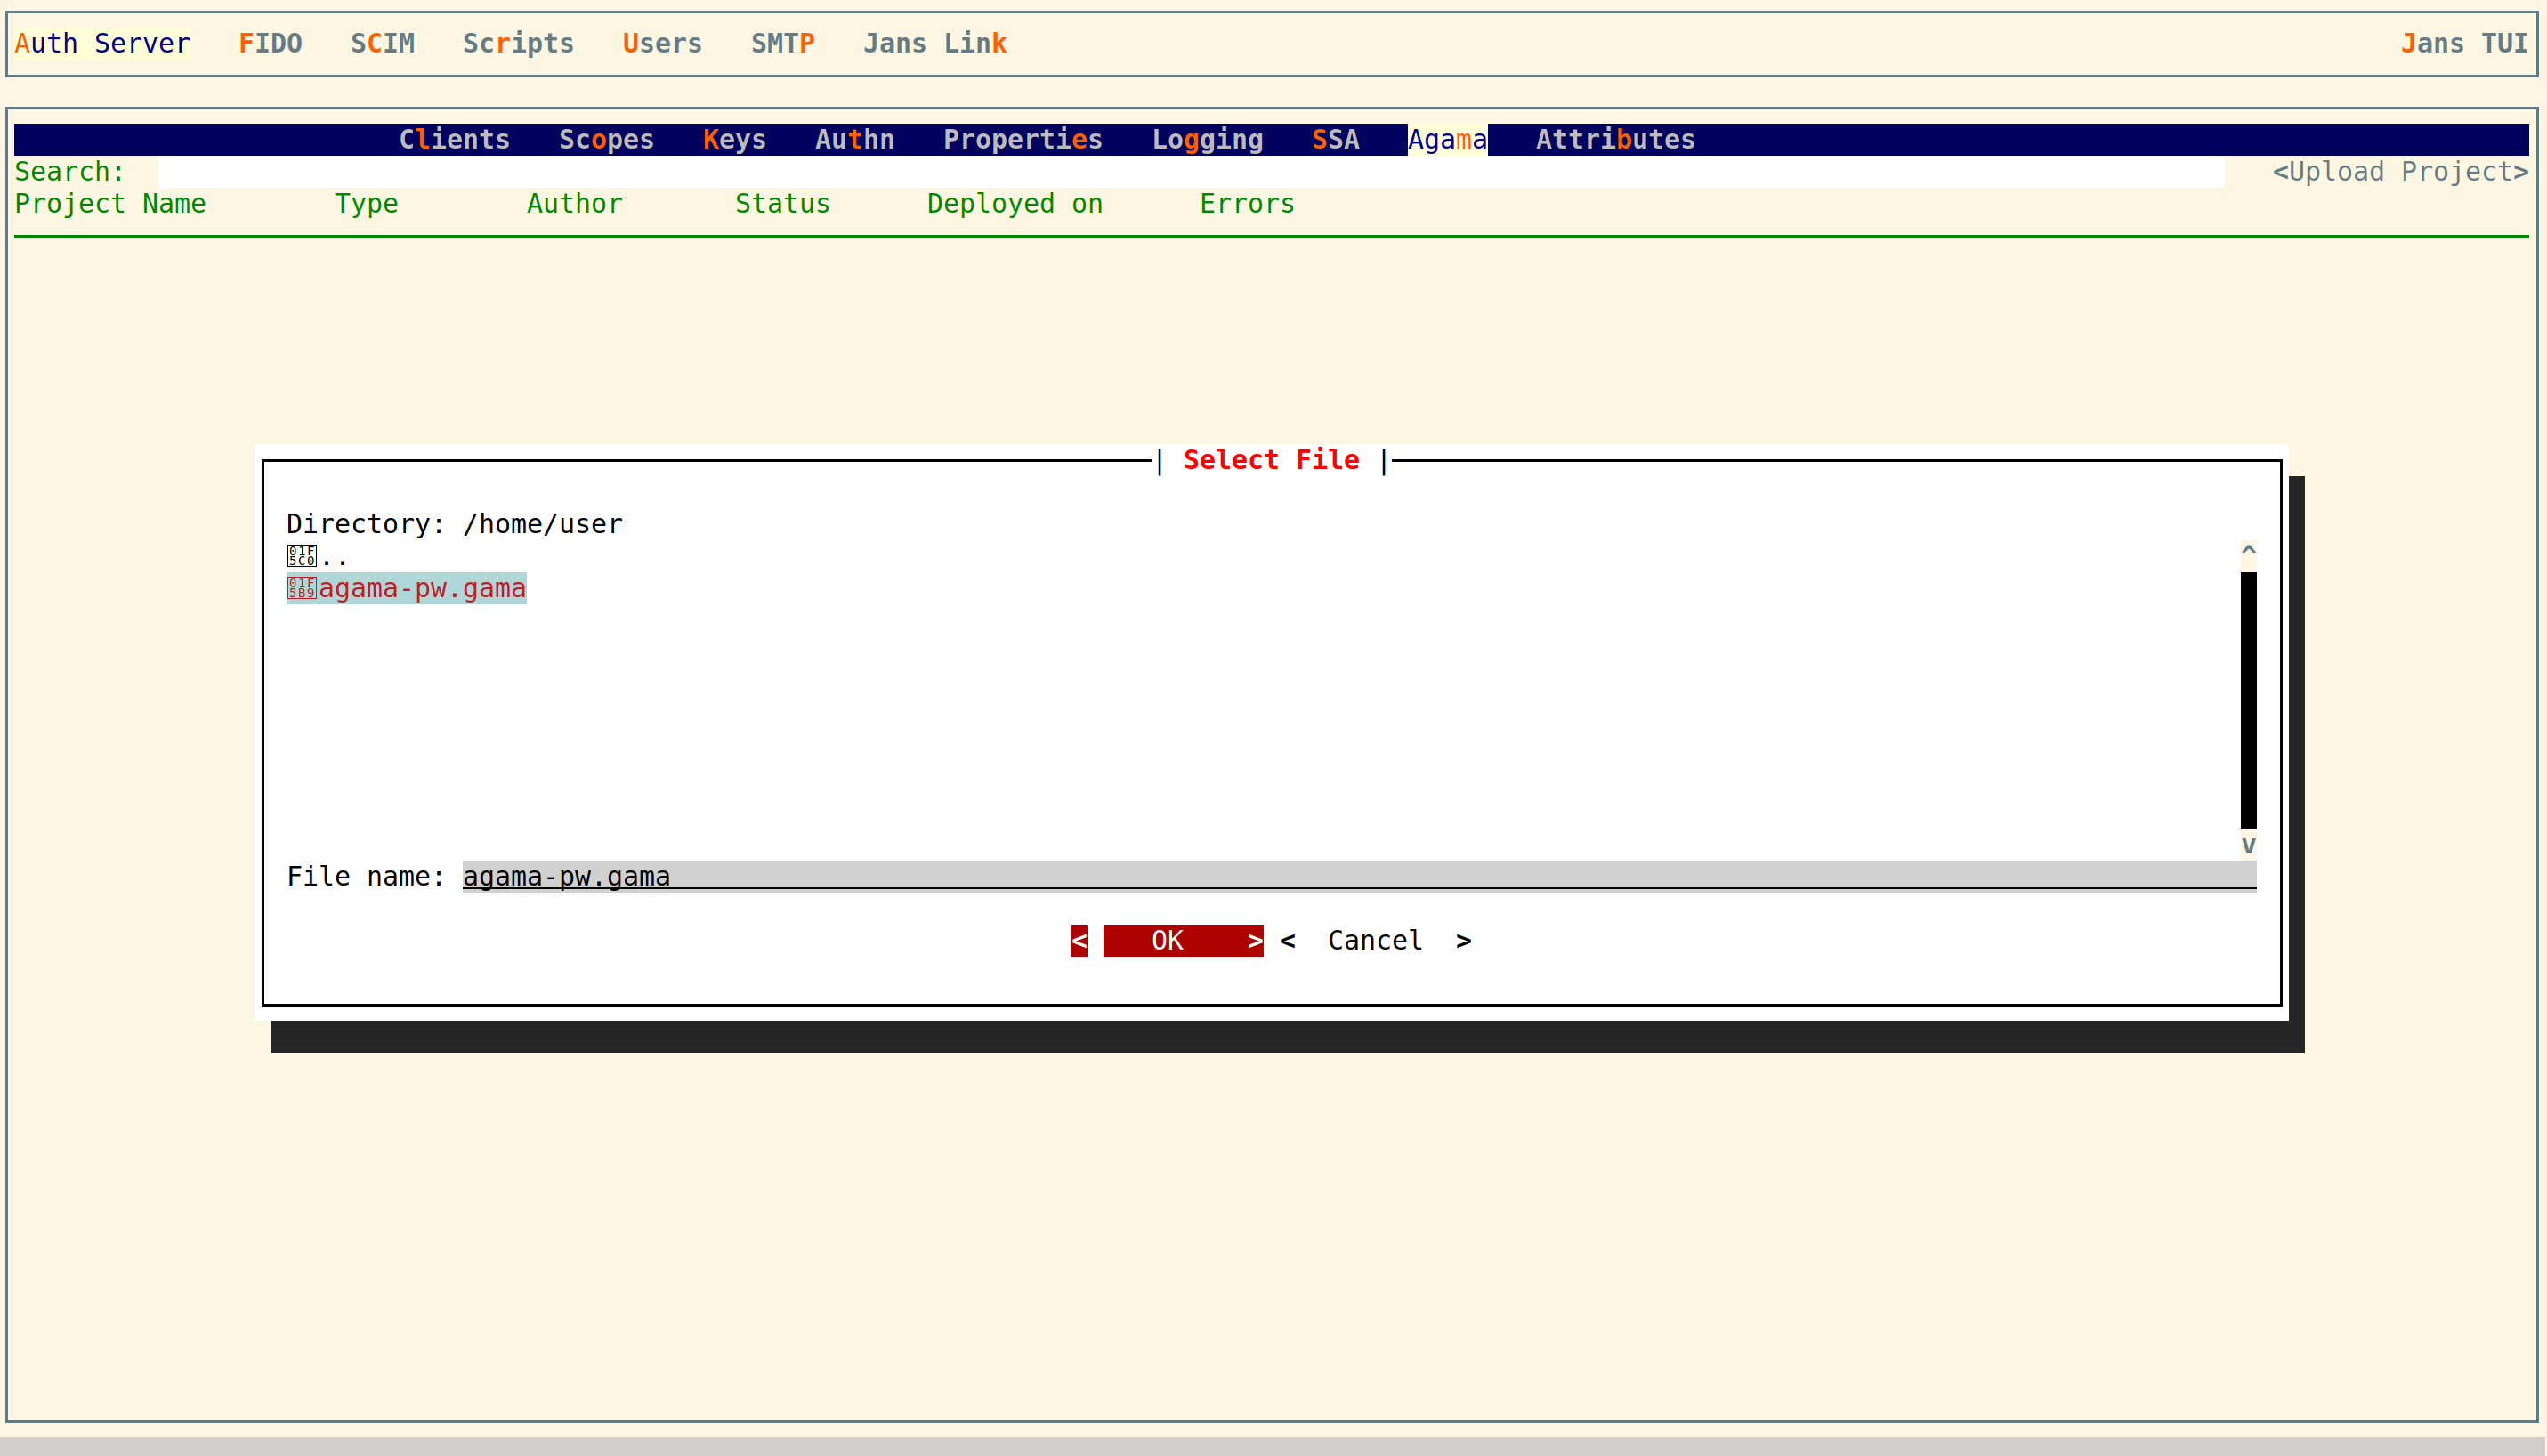
Download a gama file
Right-click on anything in File Tree and select Download .gama