Agama Flow
Agama is a framework that consists of:
- A DSL (domain-specific language) purposely designed for writing web flows
- A set of rules that drive the behavior of such flows when they are executed
- The specification of a file format – known as .gama – is useful for sharing Agama flows. Flows have the .flow file extension.
Here, a web flow is understood as a process composed of one or more stages, where at each stage an actor – normally a person – provides some kind of data or response by using a web browser or similar client. Throughout the process, only a single actor is involved.
Check Agama Doc for more details.
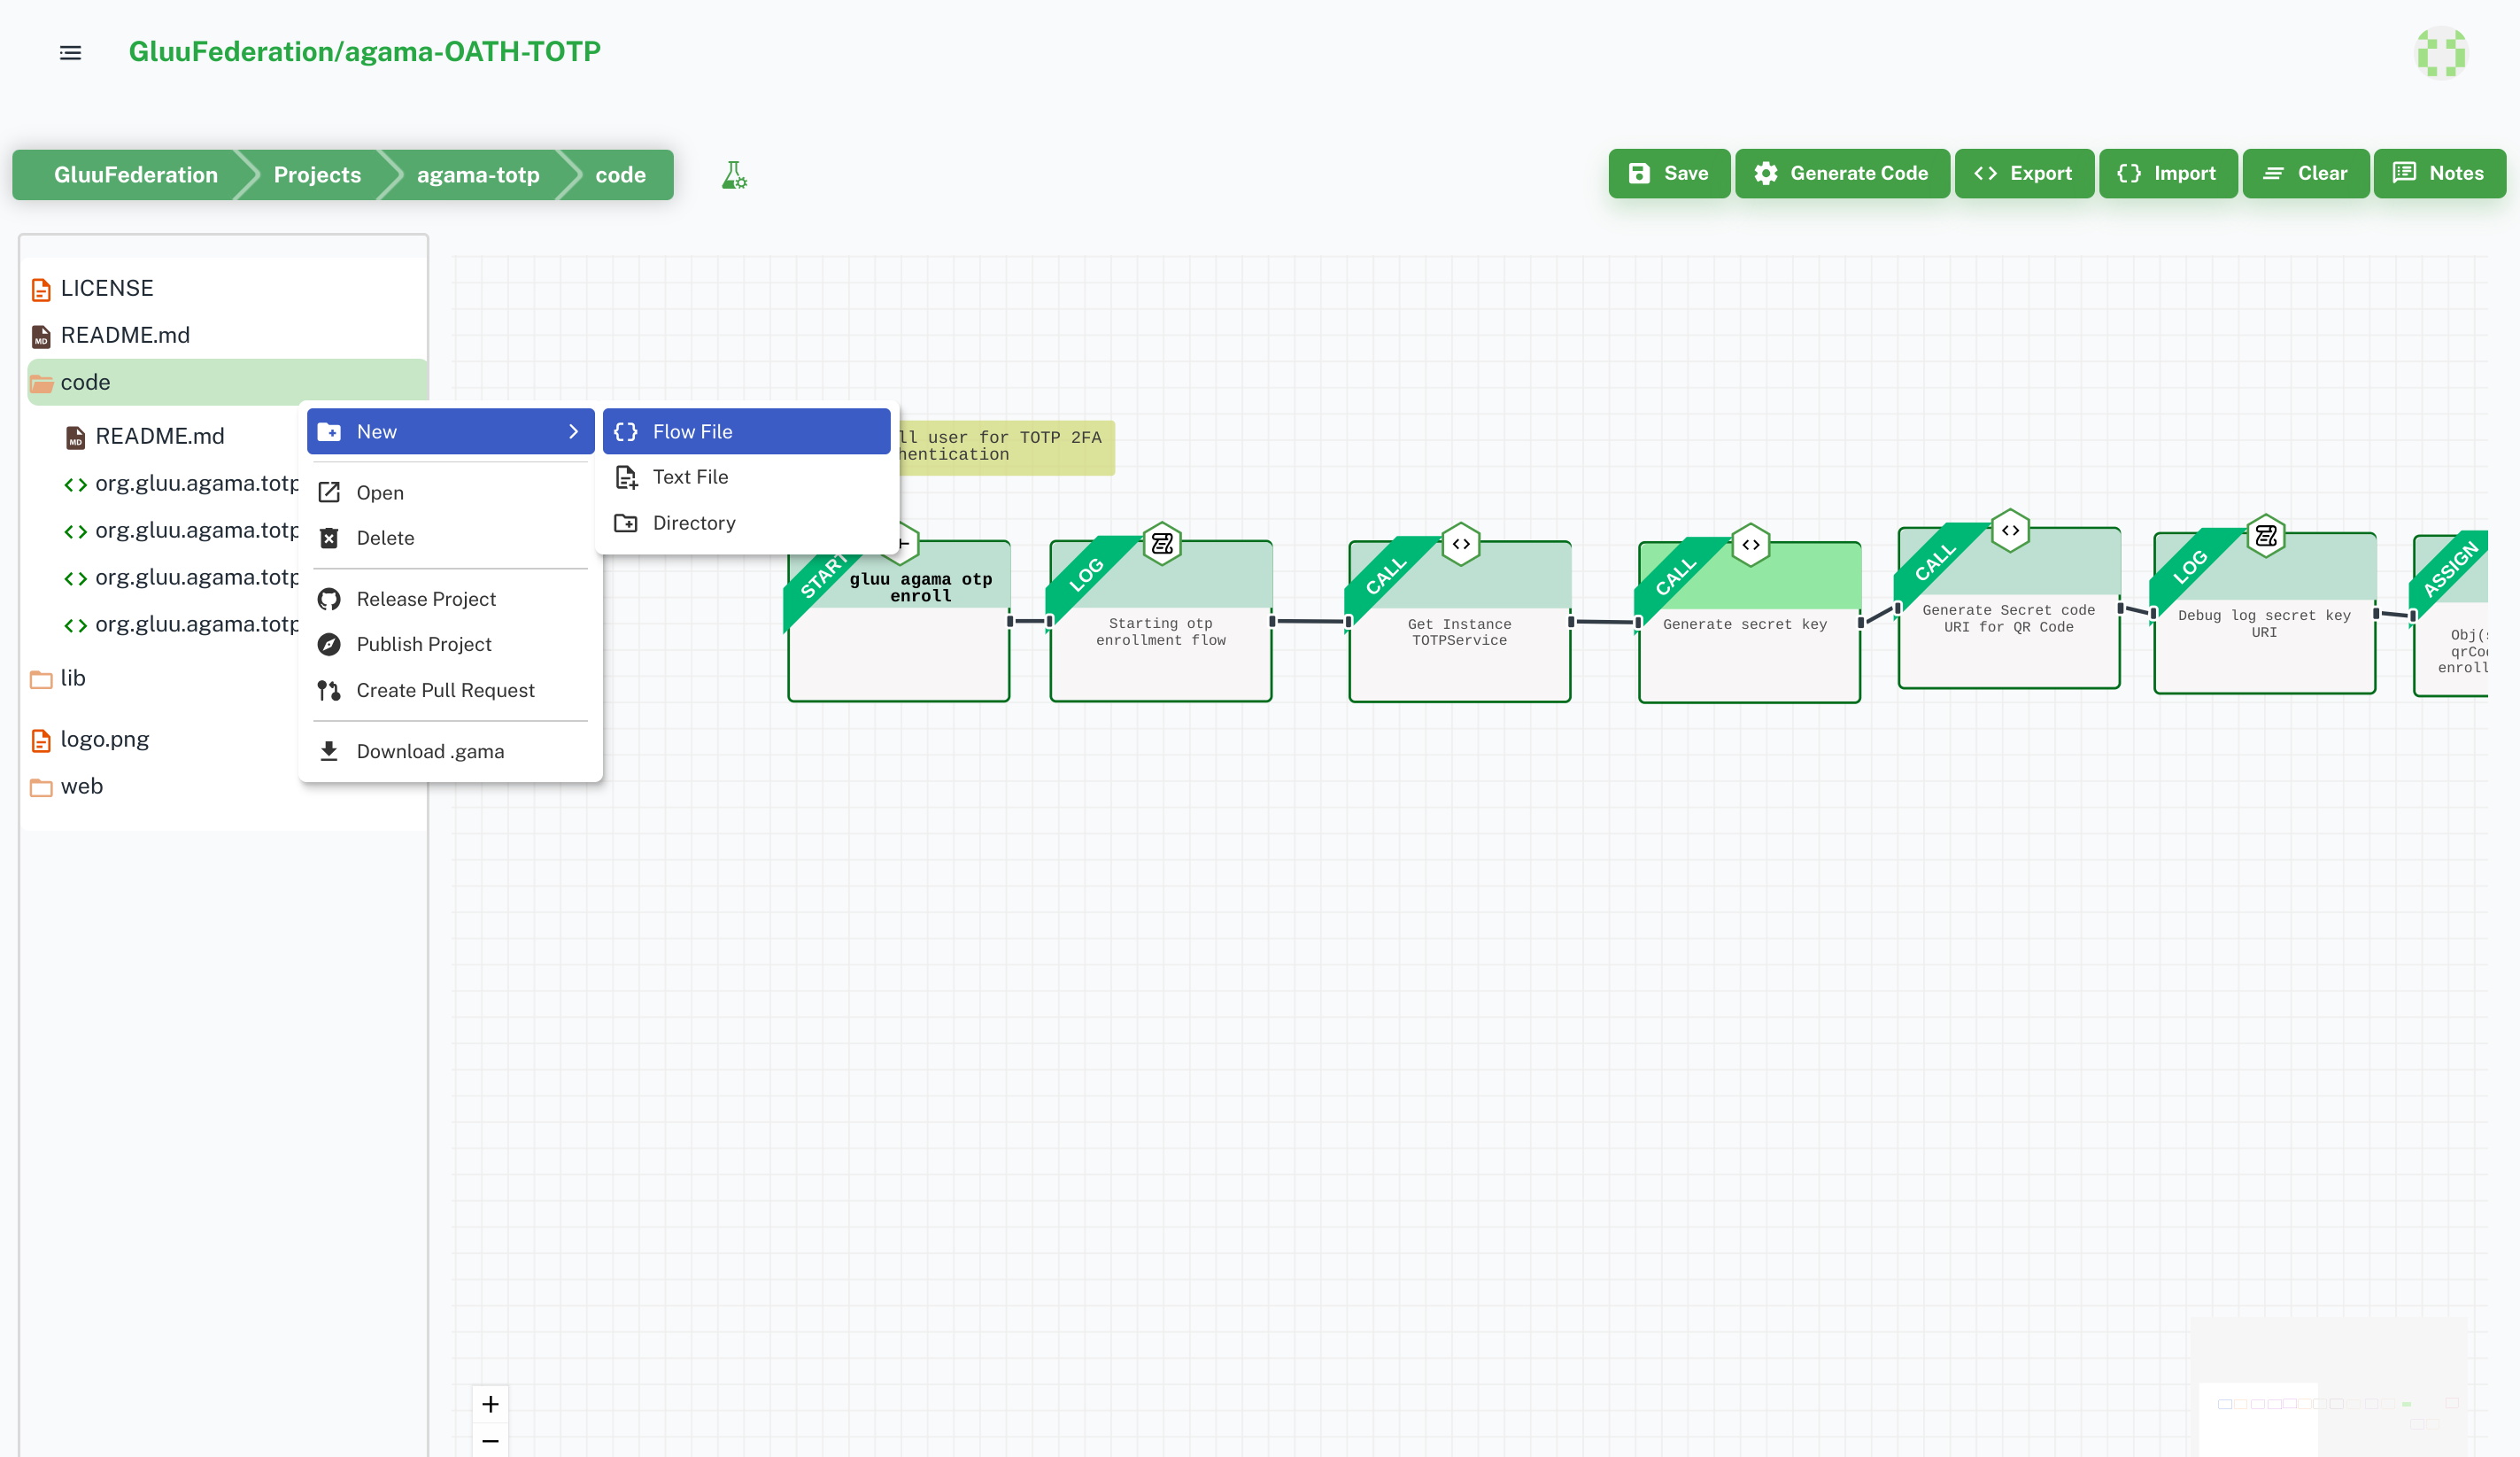
Create new flow
code folder is for Flows. Right click on code folder to add flow file.
co.acme.SmsOTP. Check here for details. 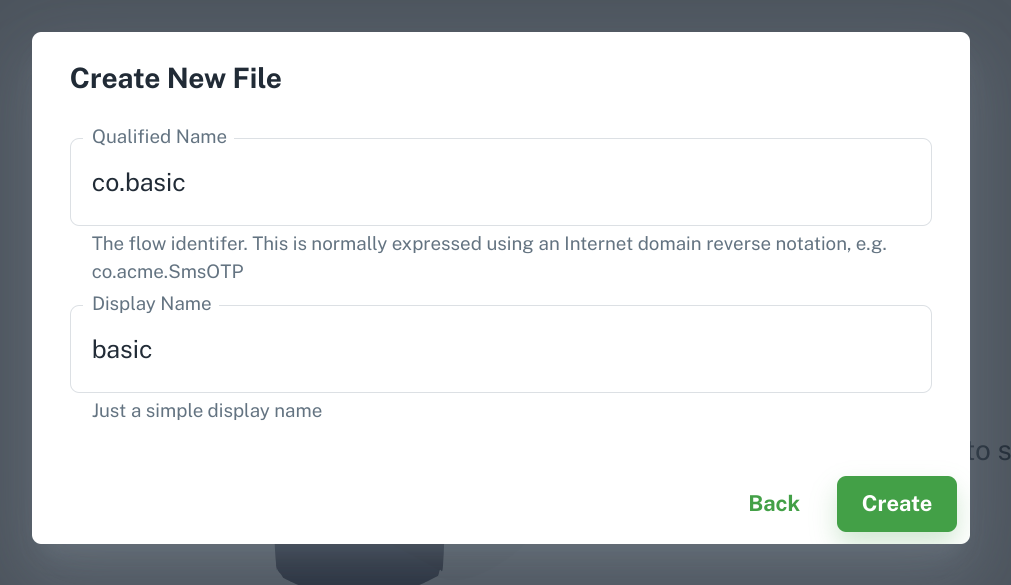
Start Widget
Start node. It contains several information about flow. 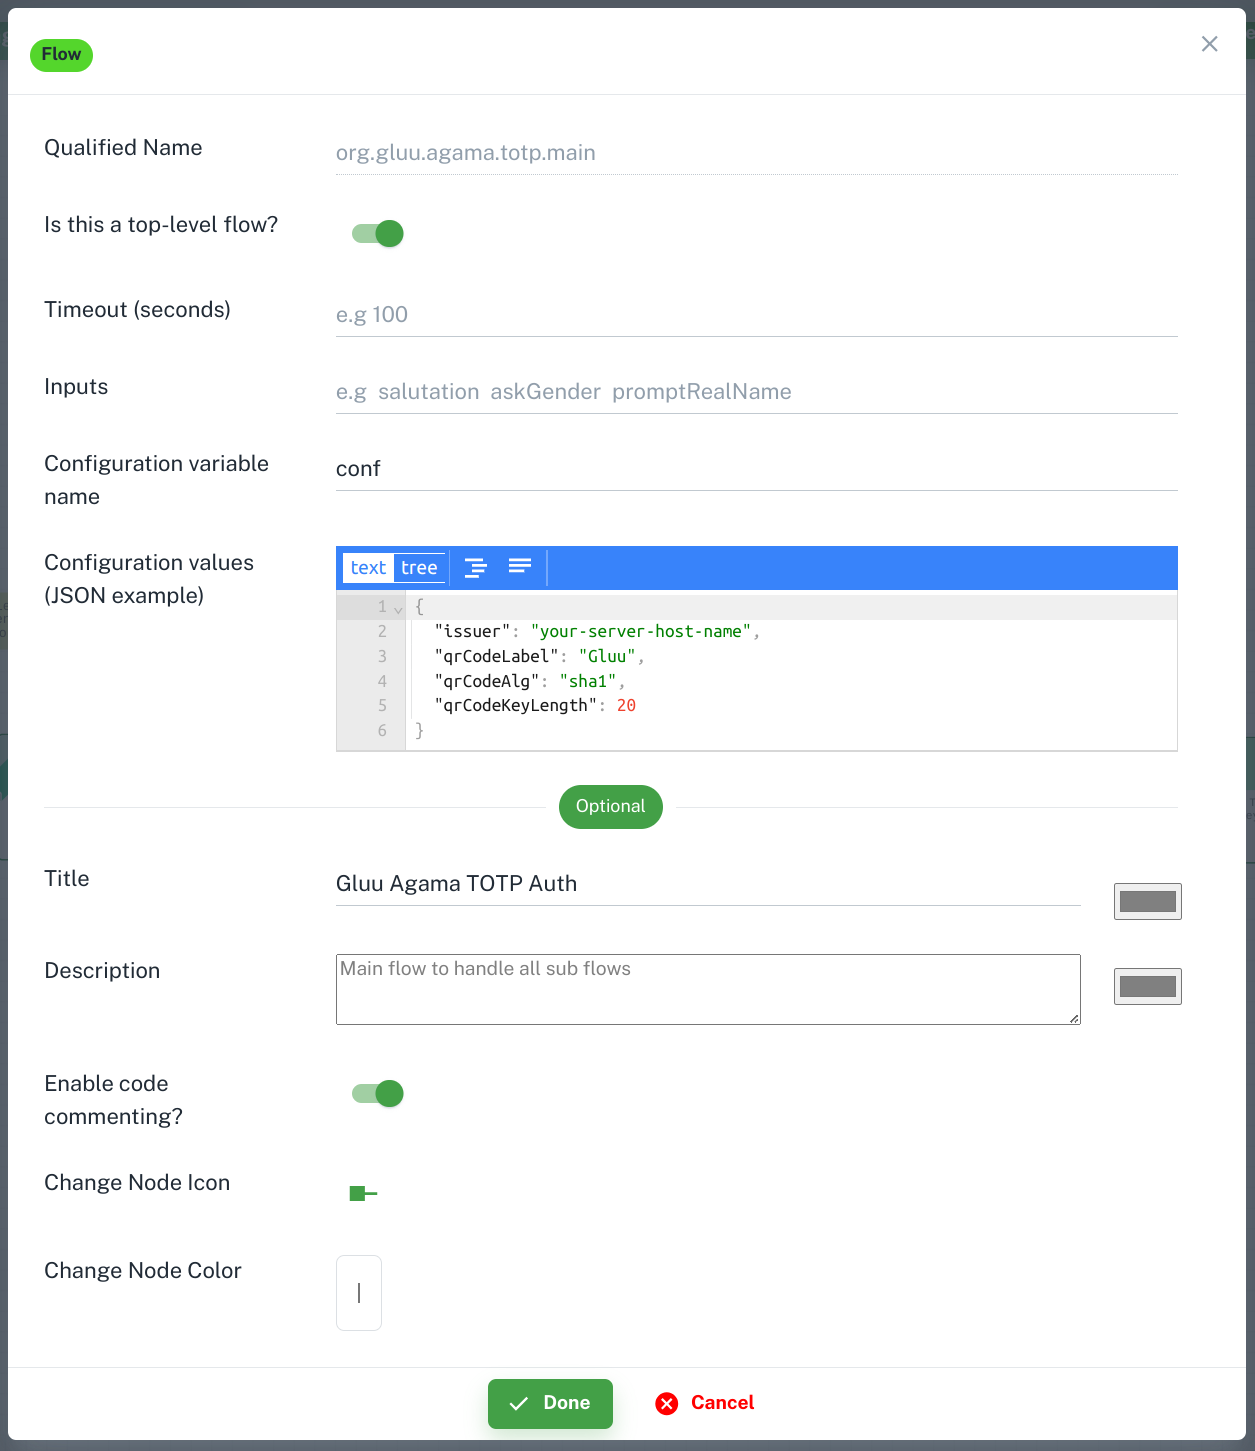
Qualified Name: It is same name which you added during flow file creation. Currently there is no feature to rename flow. You need to delete and create new one with new name. More detailsIs this a top-level flow?: This feature help to prevent flows to be launched directly from a web browser. It’s a security measure to avoid end-users triggering flows at will. If it istruethen user can trigger it from browser otherwise not. Agama-lab uses it to populatenoDirectLaunchproperty inads.jsonandproject.json. More DetailsTimeout (seconds): This is the maximum amount of time the end-user can take to fully complete a flow. More DetailsInputs: Flows may receive inputs from their callers. More DetailsConfiguration variable name: It used to define config variable name. TheConfigskeyword may be used to designate a variable so the flow’s properties can be accessed in the code. You can use belowConfiguration valuesto add properties and values for flow. More DetailsConfiguration values: Add properties and its value for flow. Which you can use in flow. Likeclient id,client secret, etc.- There are some common tools which you can find in every widget.
Title,Description,Enable code commenting,Change node icon, andChange node colorthese tools are useful for widget design.
Log Widget
jans-auth.log. On Jans server you can find log file at /opt/jans/jetty/jans-auth/logs/jans-auth.log location. 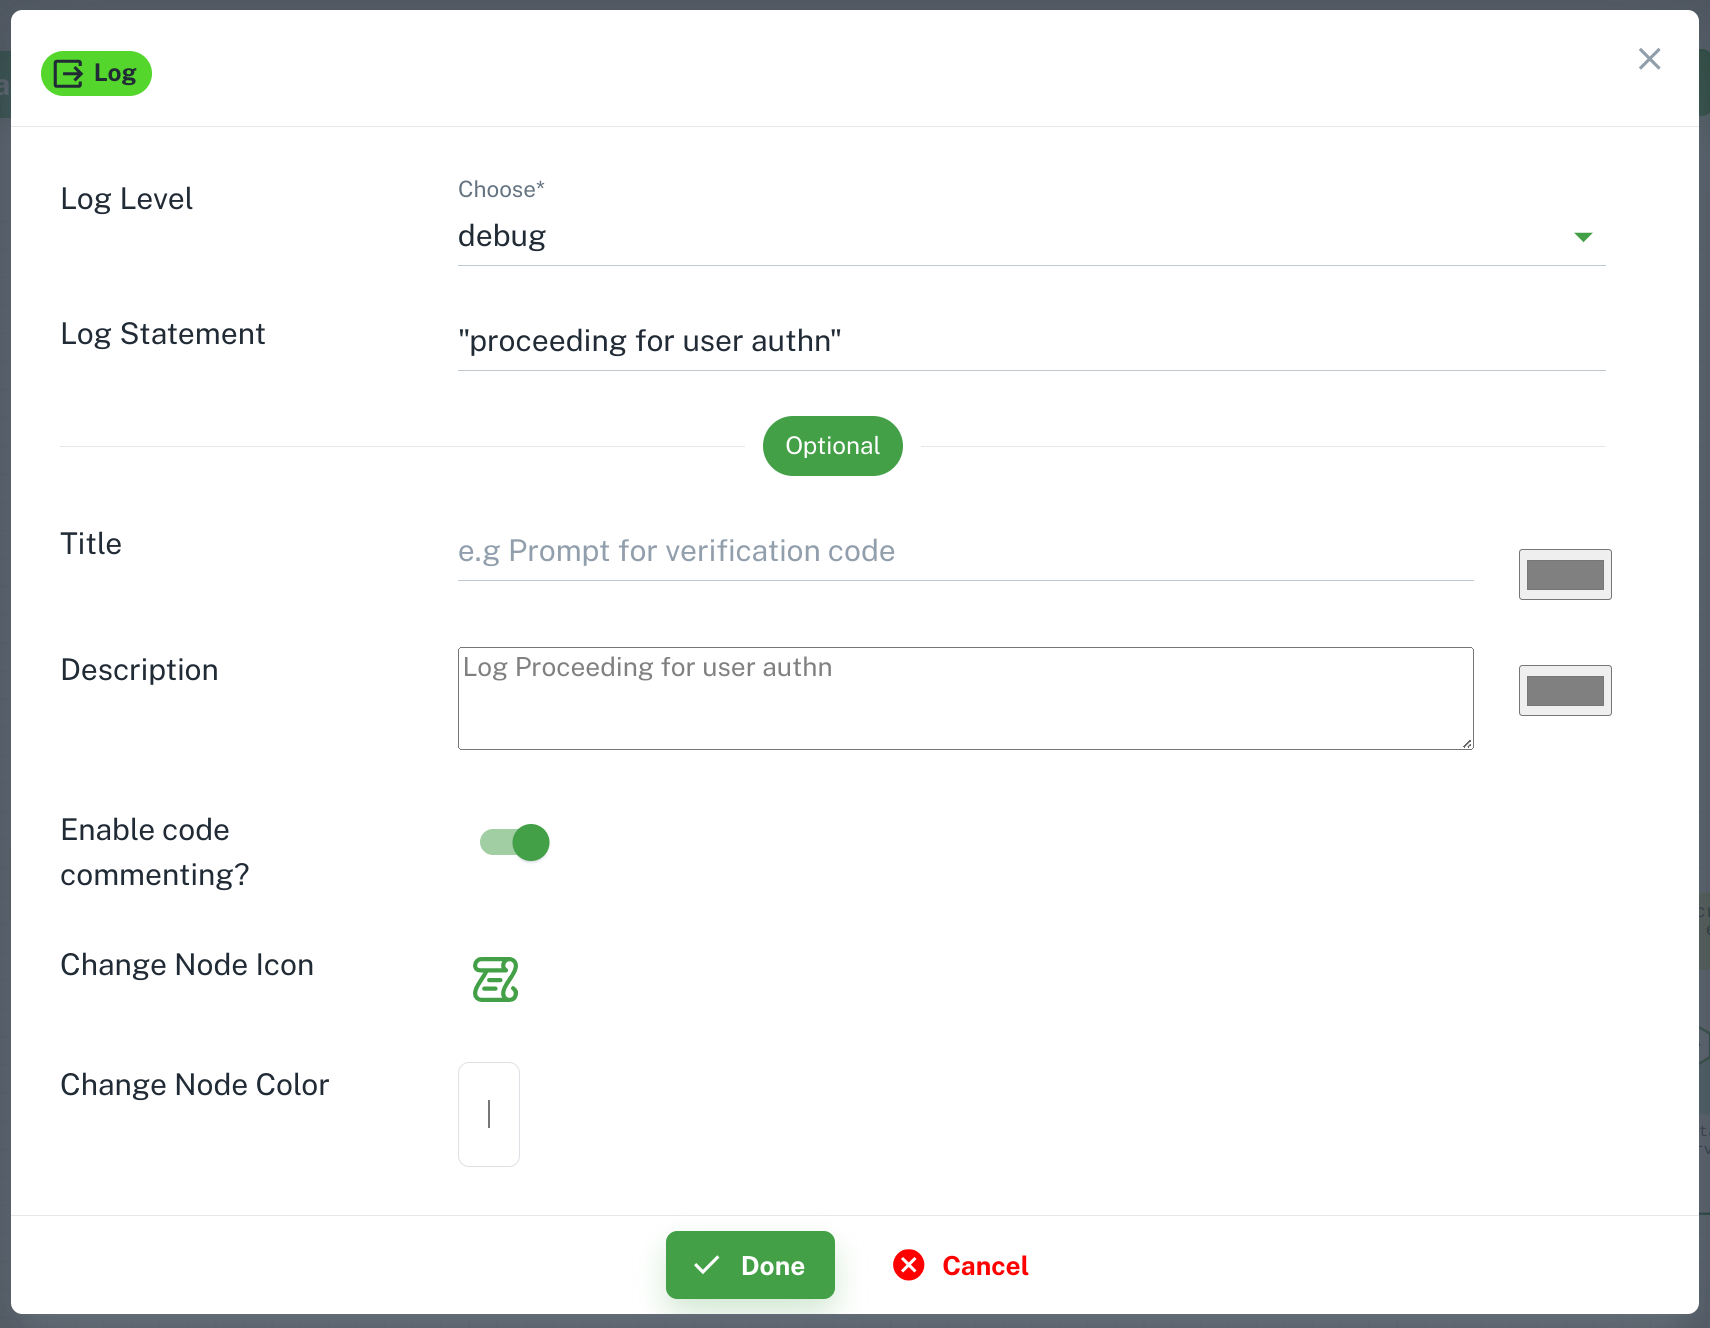
Log level: Every message can be associated a severity level. Choose it as per your need.Log statment: Your log message. You can add variable also check here for more details.
Assignment Widget
+ Add More Variables to add variable. Check String Type? if value is string. You can add multiple variable. 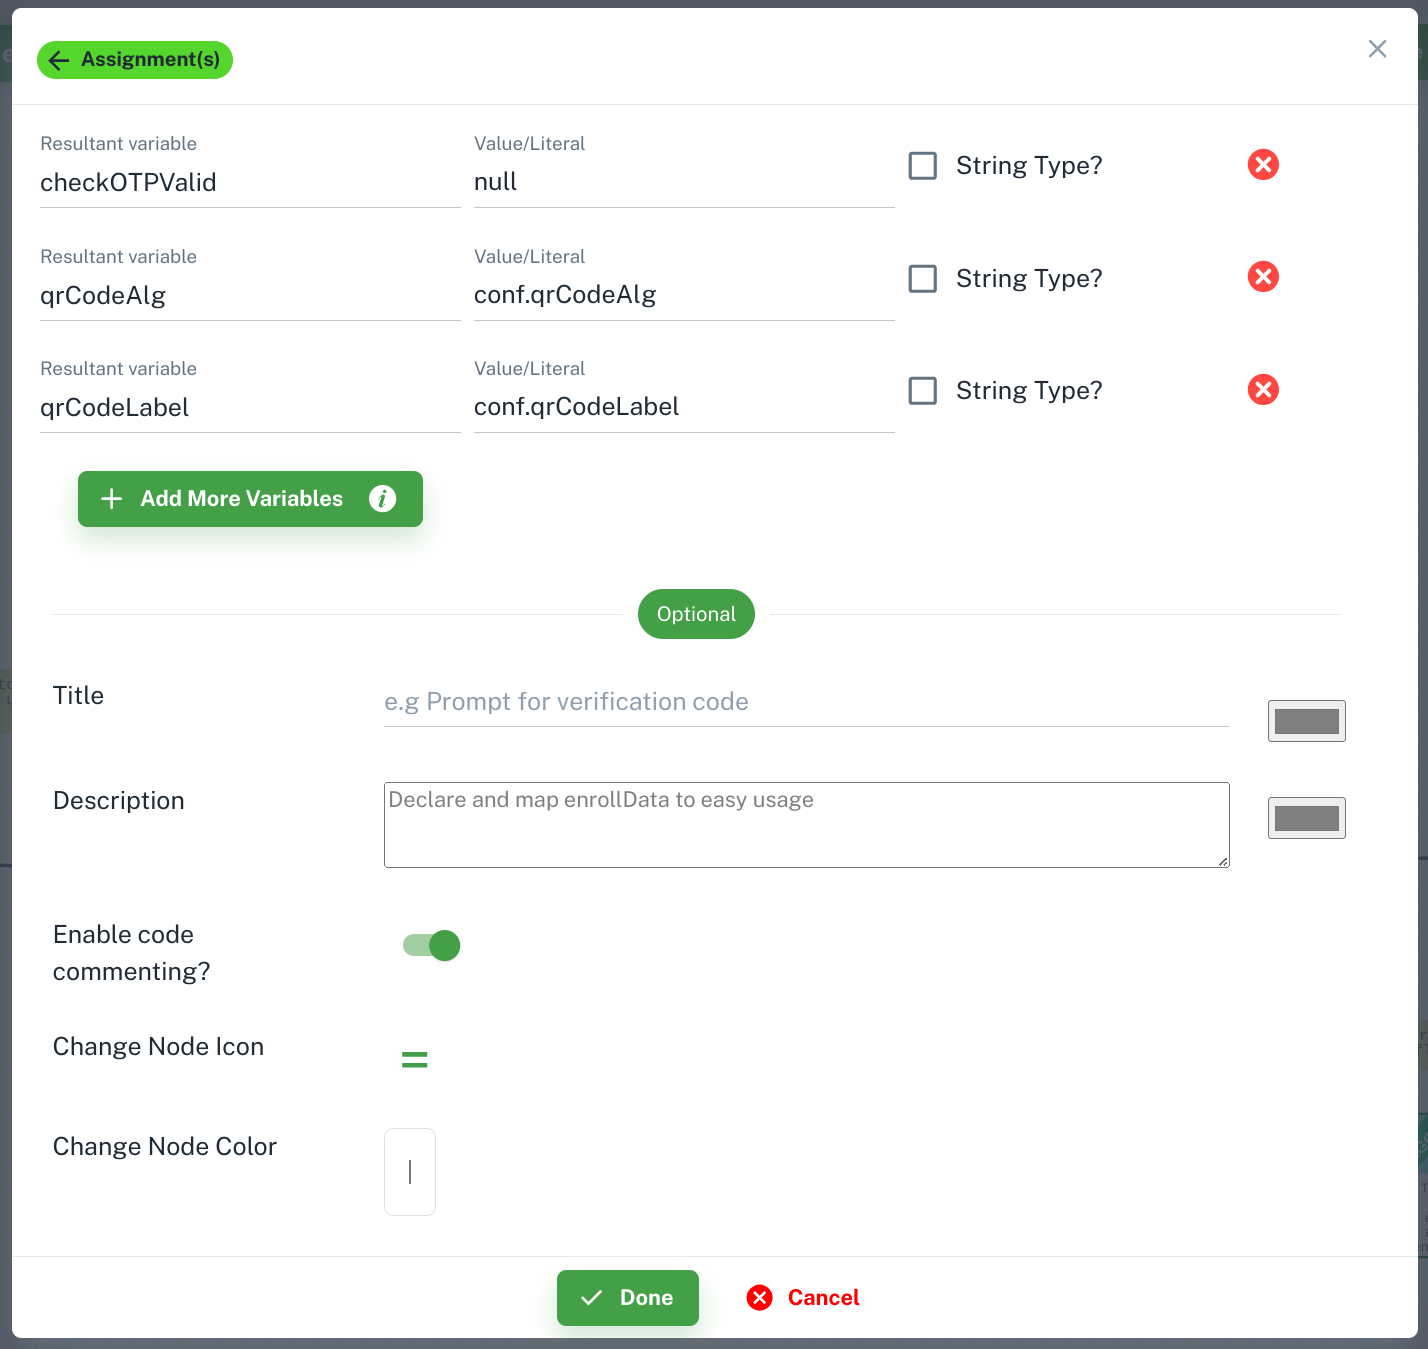
Call Widget
Call instruction in flow code. Business logic implemented in languages other than Agama can be re-used by means of the Call instruction. Call plays a key role because Agama code serves fundamentally as a depiction of a flow hiding most of the internal details and low-level computations which are in turn delegated to foreign routines. More Details. 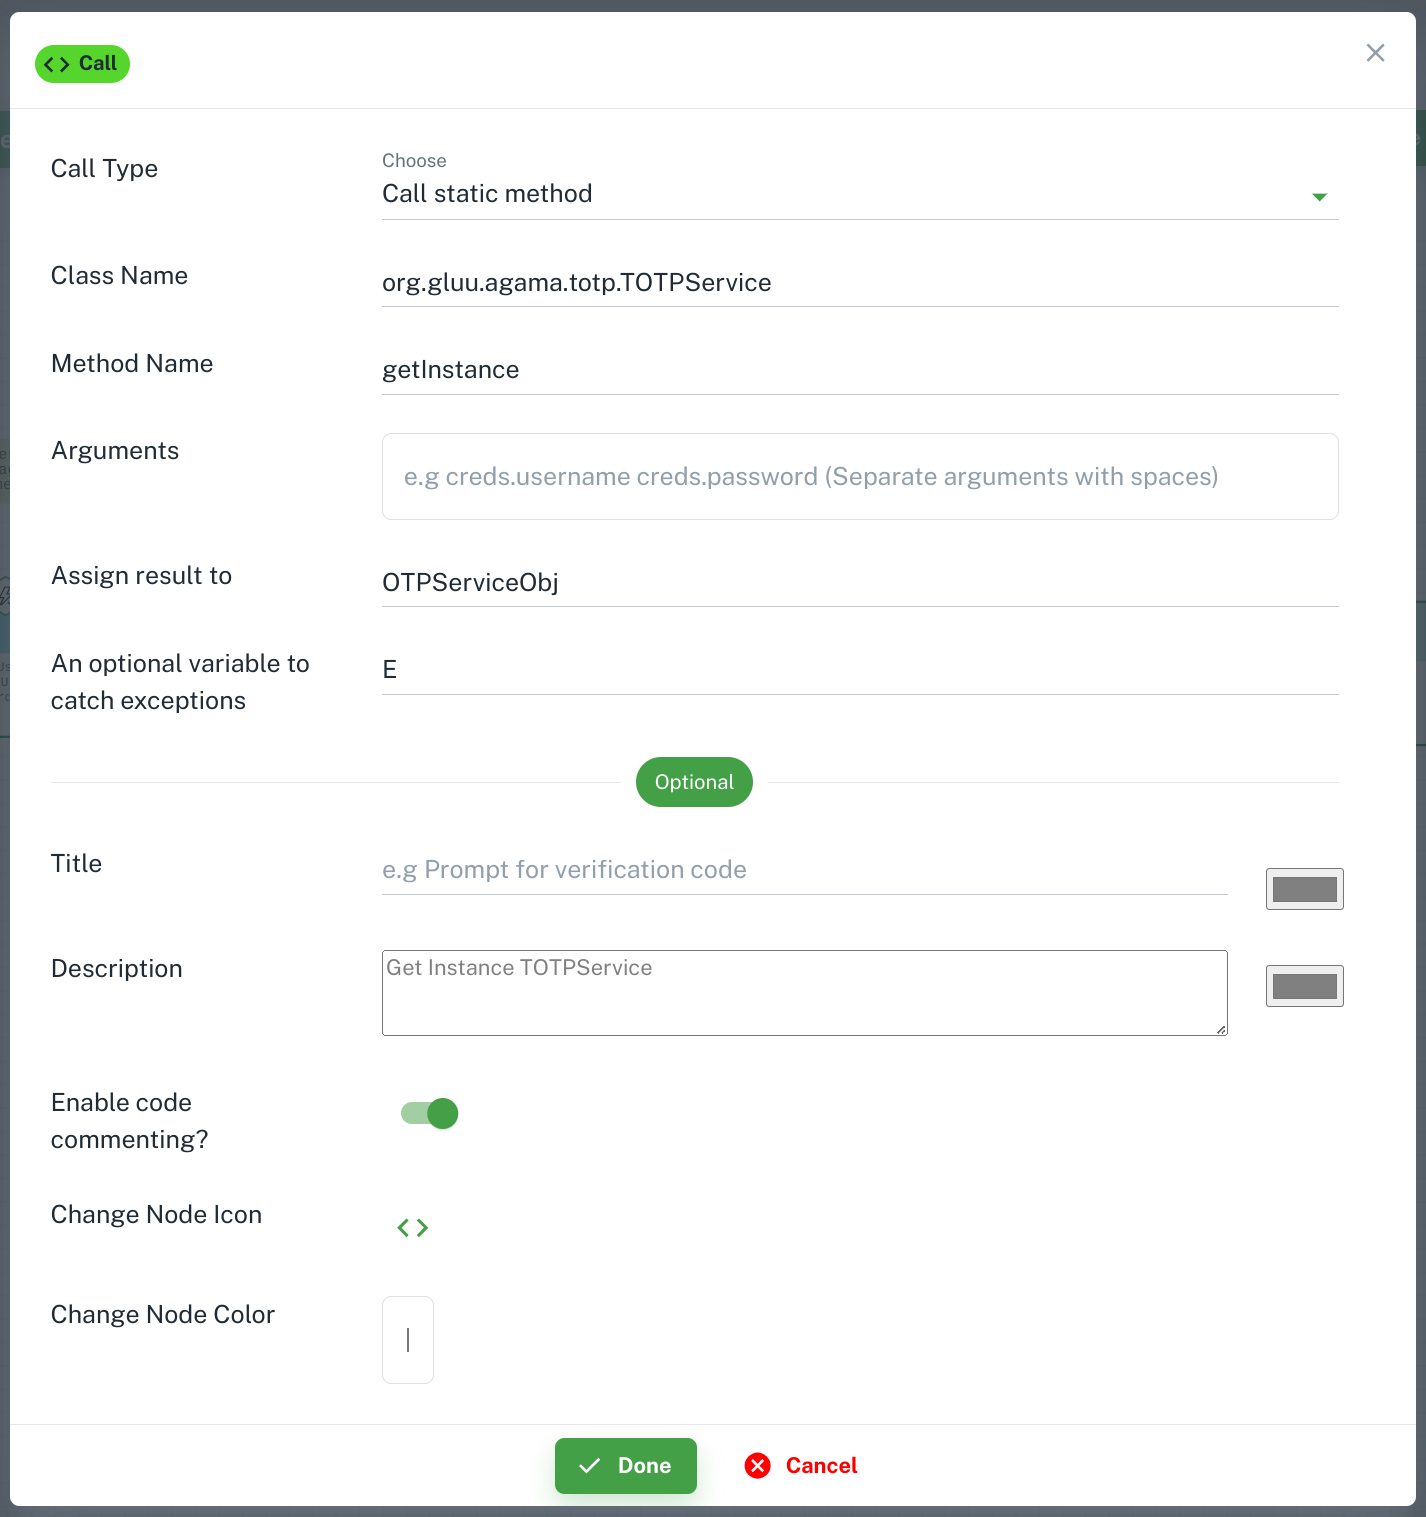
Call instruction. Call static method
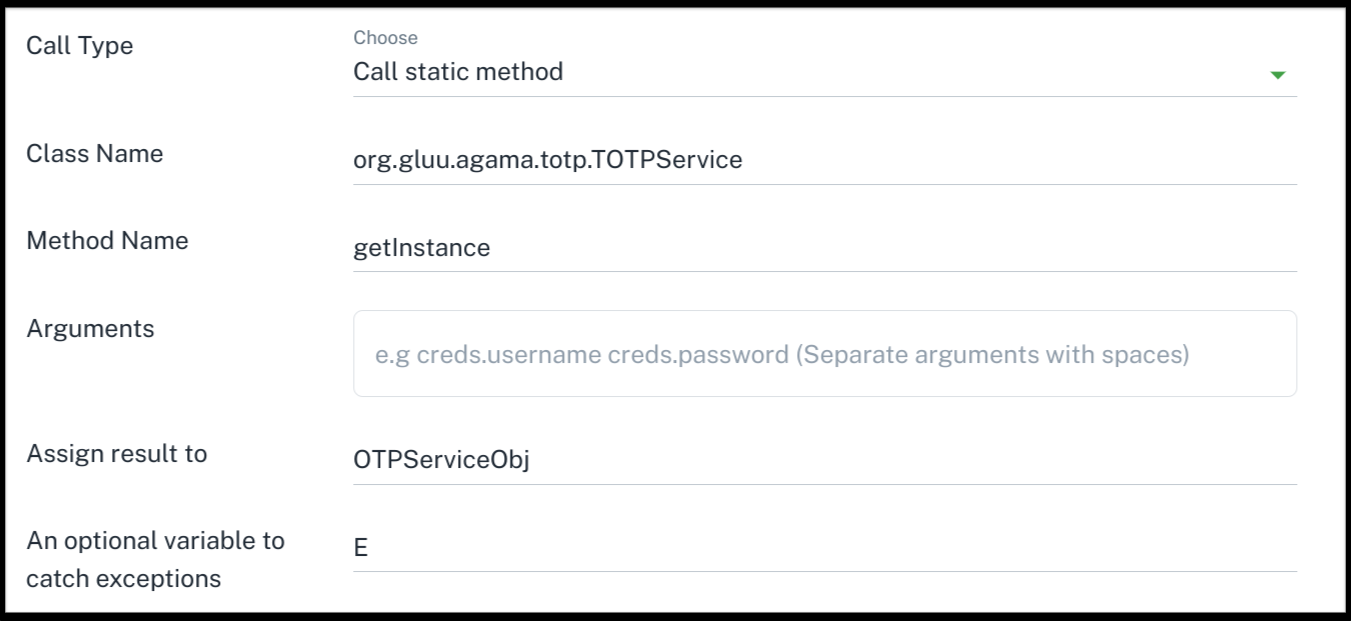
This will generate the flow code:
OTPServiceObj | E = Call org.gluu.agama.totp.TOTPService#getInstance
E store the exception. You can log in to find errors in your code.
Call method on instance
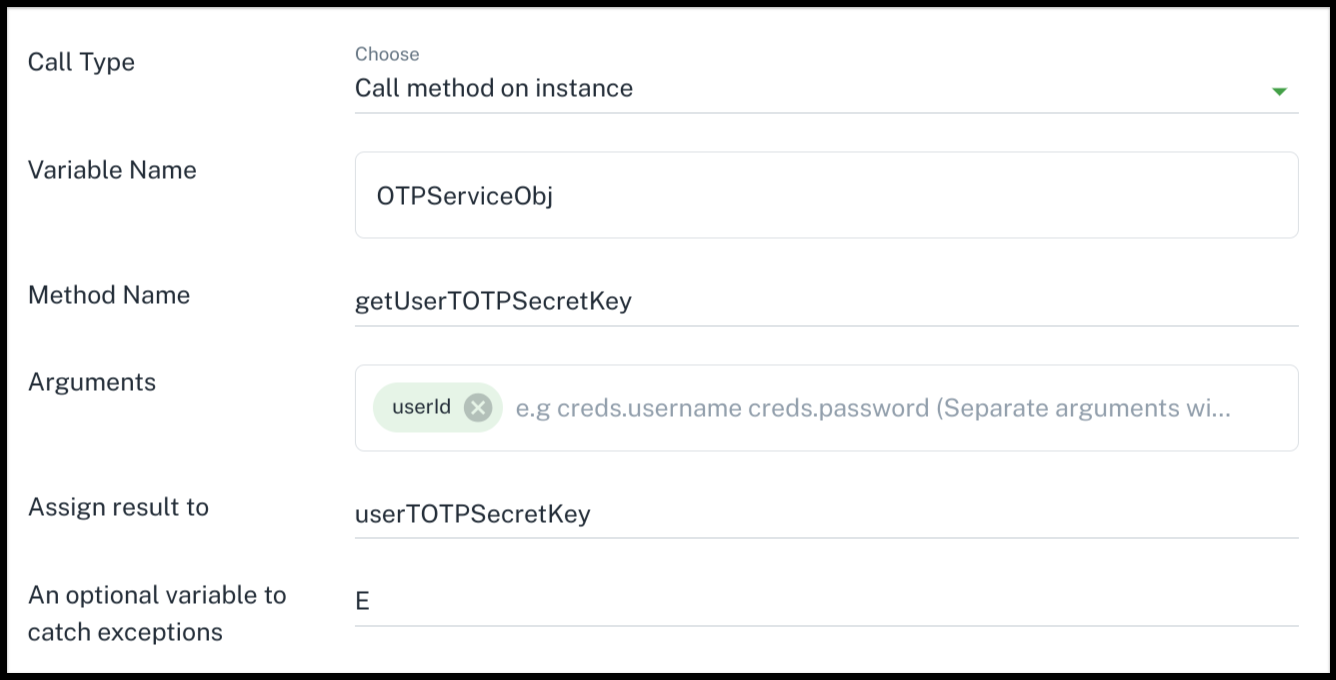
This will generate the flow code like:
userTOTPSecretKey | E = Call OTPServiceObj getUserTOTPSecretKey userId
Create a instance
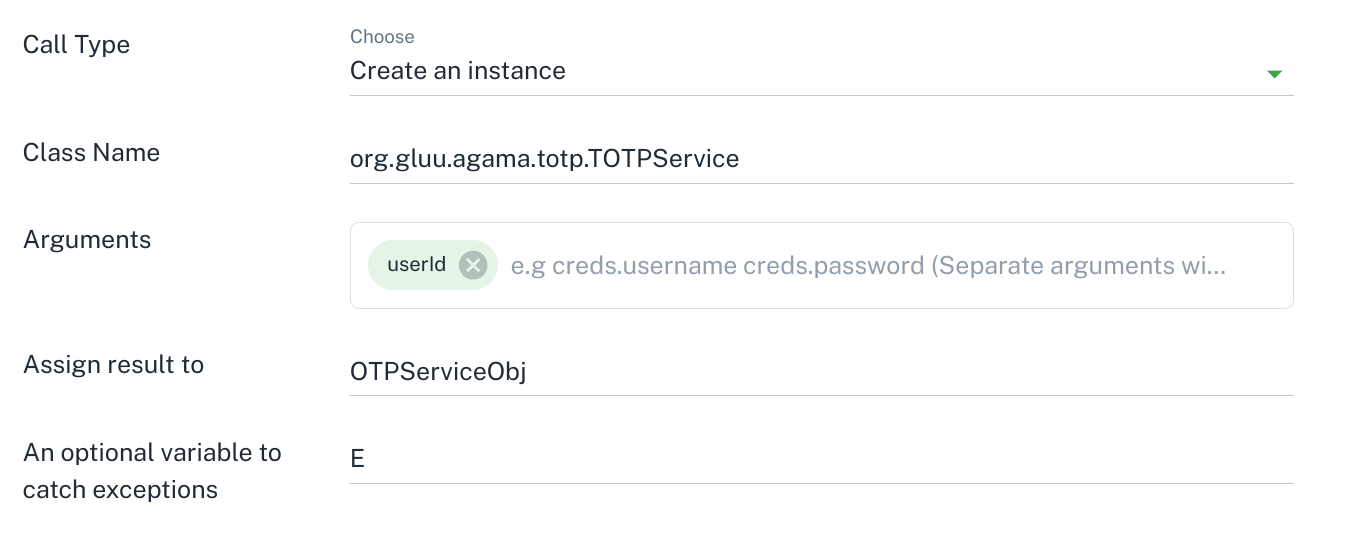
This will generate the flow code:
OTPServiceObj | E = Call org.gluu.agama.totp.TOTPService#new userId
Get class object
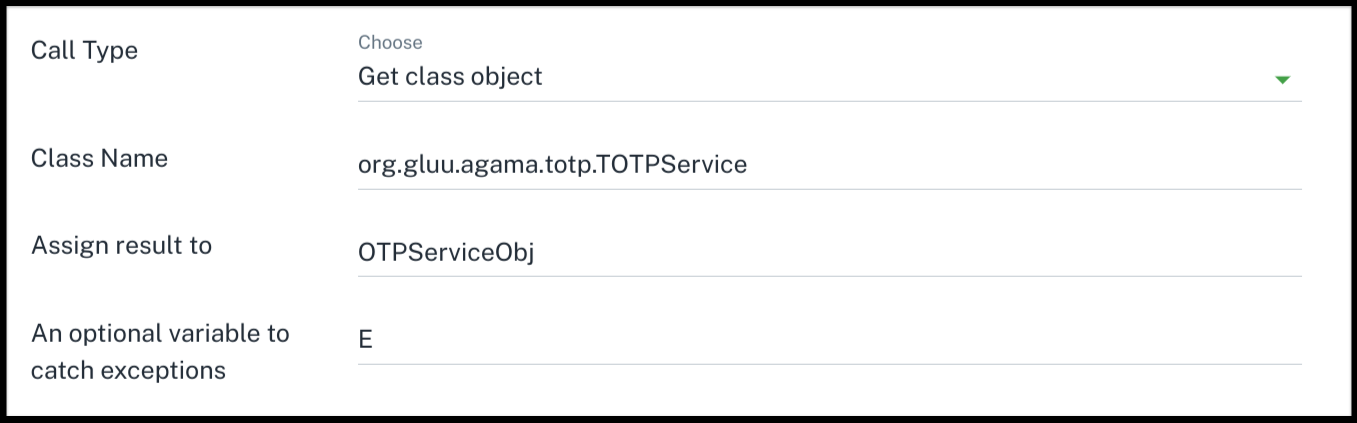
This will generate the flow code like:
OTPServiceObj | E = Call org.gluu.agama.totp.TOTPService#class
RRF Widget
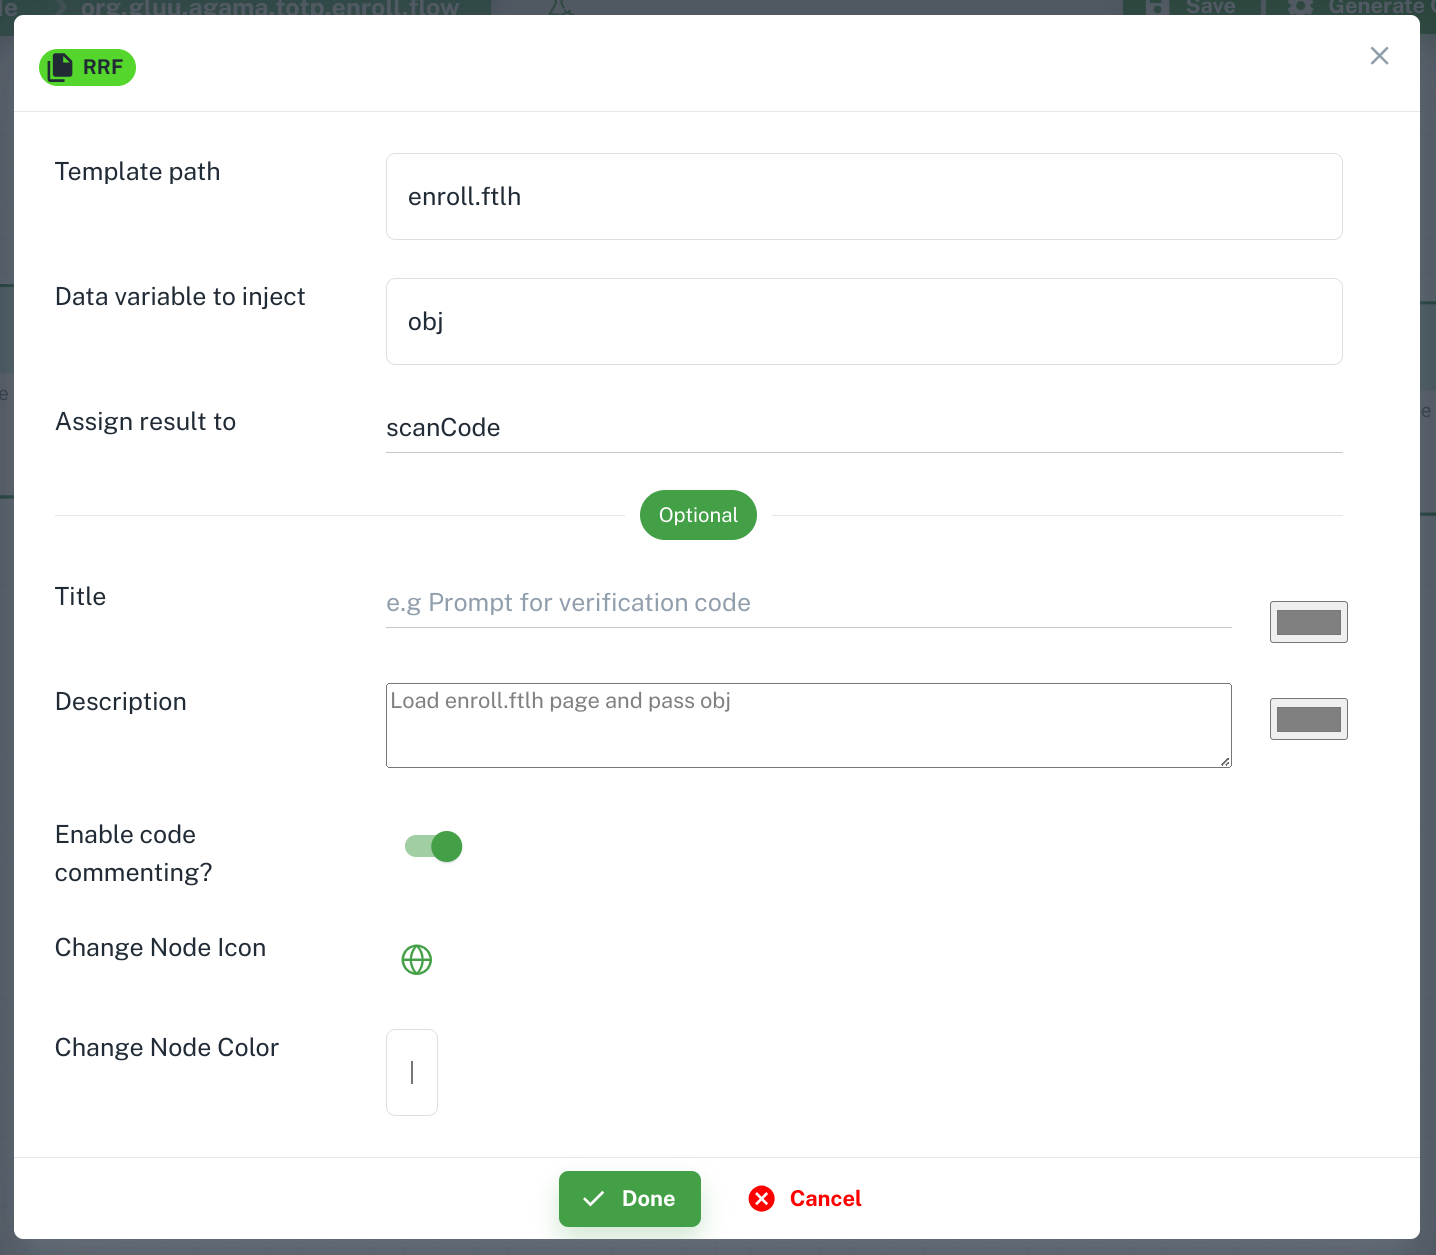
scanCode = RRF "enroll.ftlh" obj
Template path: Used to specify the your web template file path. Examples:- If your file is in
web/login.ftlhthen its value should belogin.ftlh - If your file is in
web/first/login.ftlhthne its value should befirst/login.ftlh
- If your file is in
Data variable to inject: It used to define the variable which used to pass data to template.Assign result to: It used to define variable which used to stored data send by user – a map whose keys are named according to the form fields present in.ftlhpage.
RFAC Widget
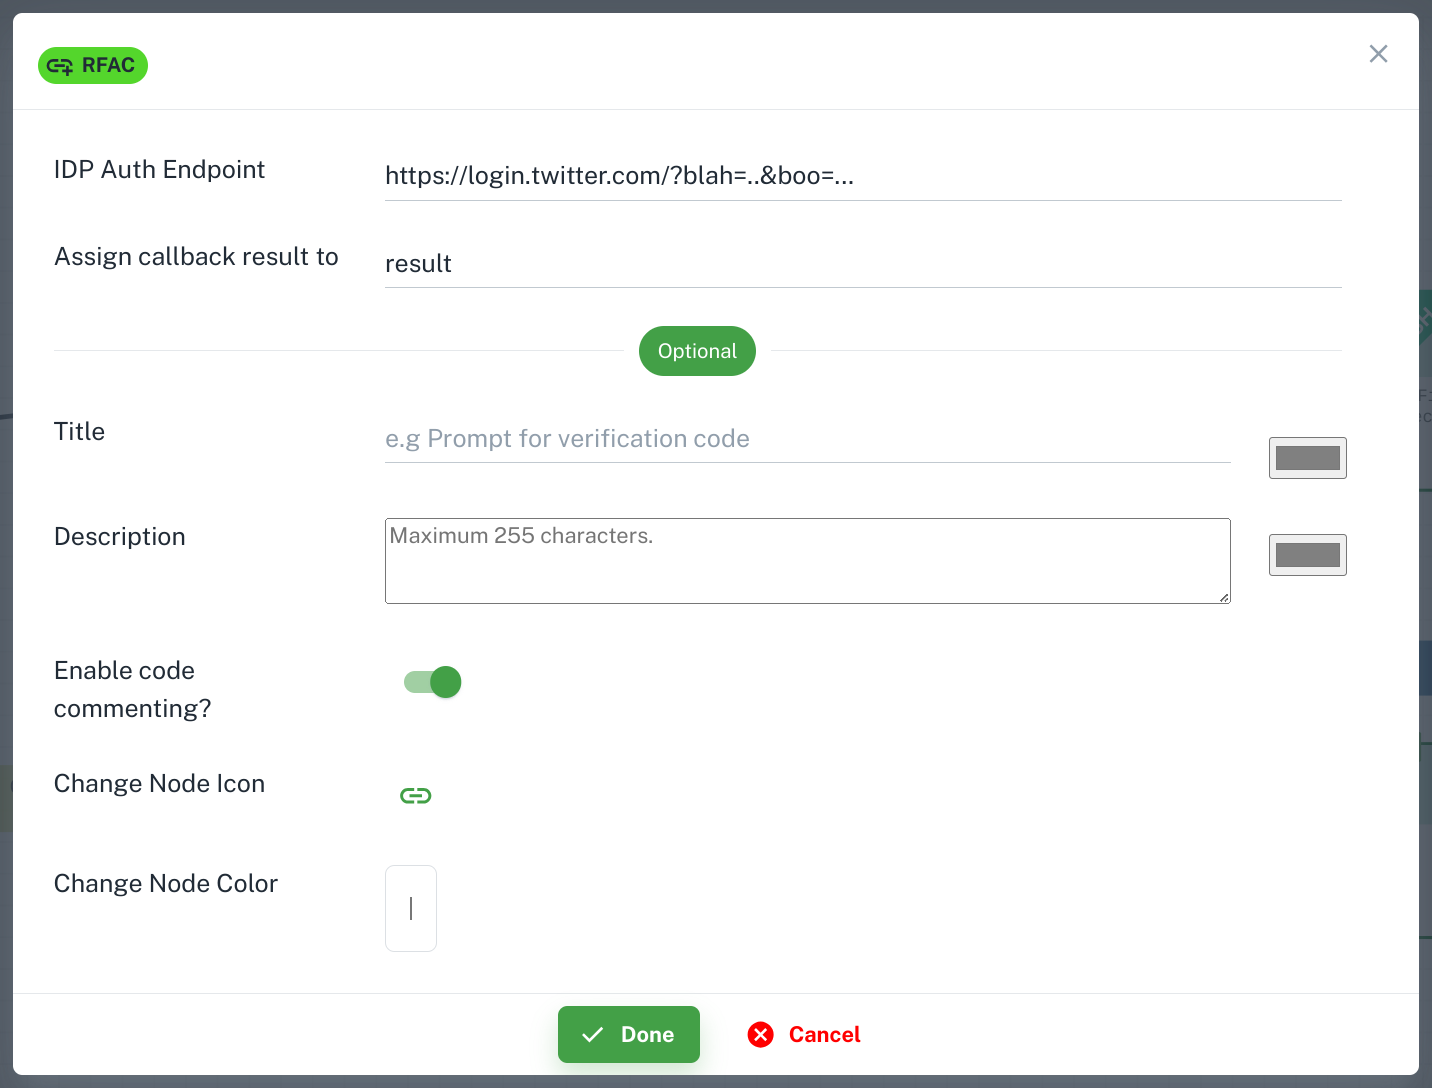
IDP Auth Endpoint: Its your IDP endpoint where you want to redirect user.Assign callback result to: Once the user browser is taken to the callback URL by the external site, the data included in the query string or payload is stored in result (a map) for further processing.
Trigger Widget
Trigger instruction in flow. A flow can trigger another flow (a.k.a subflow) and grab its response when Finished. This feature materializes flow composition and re-use in Agama. More details. 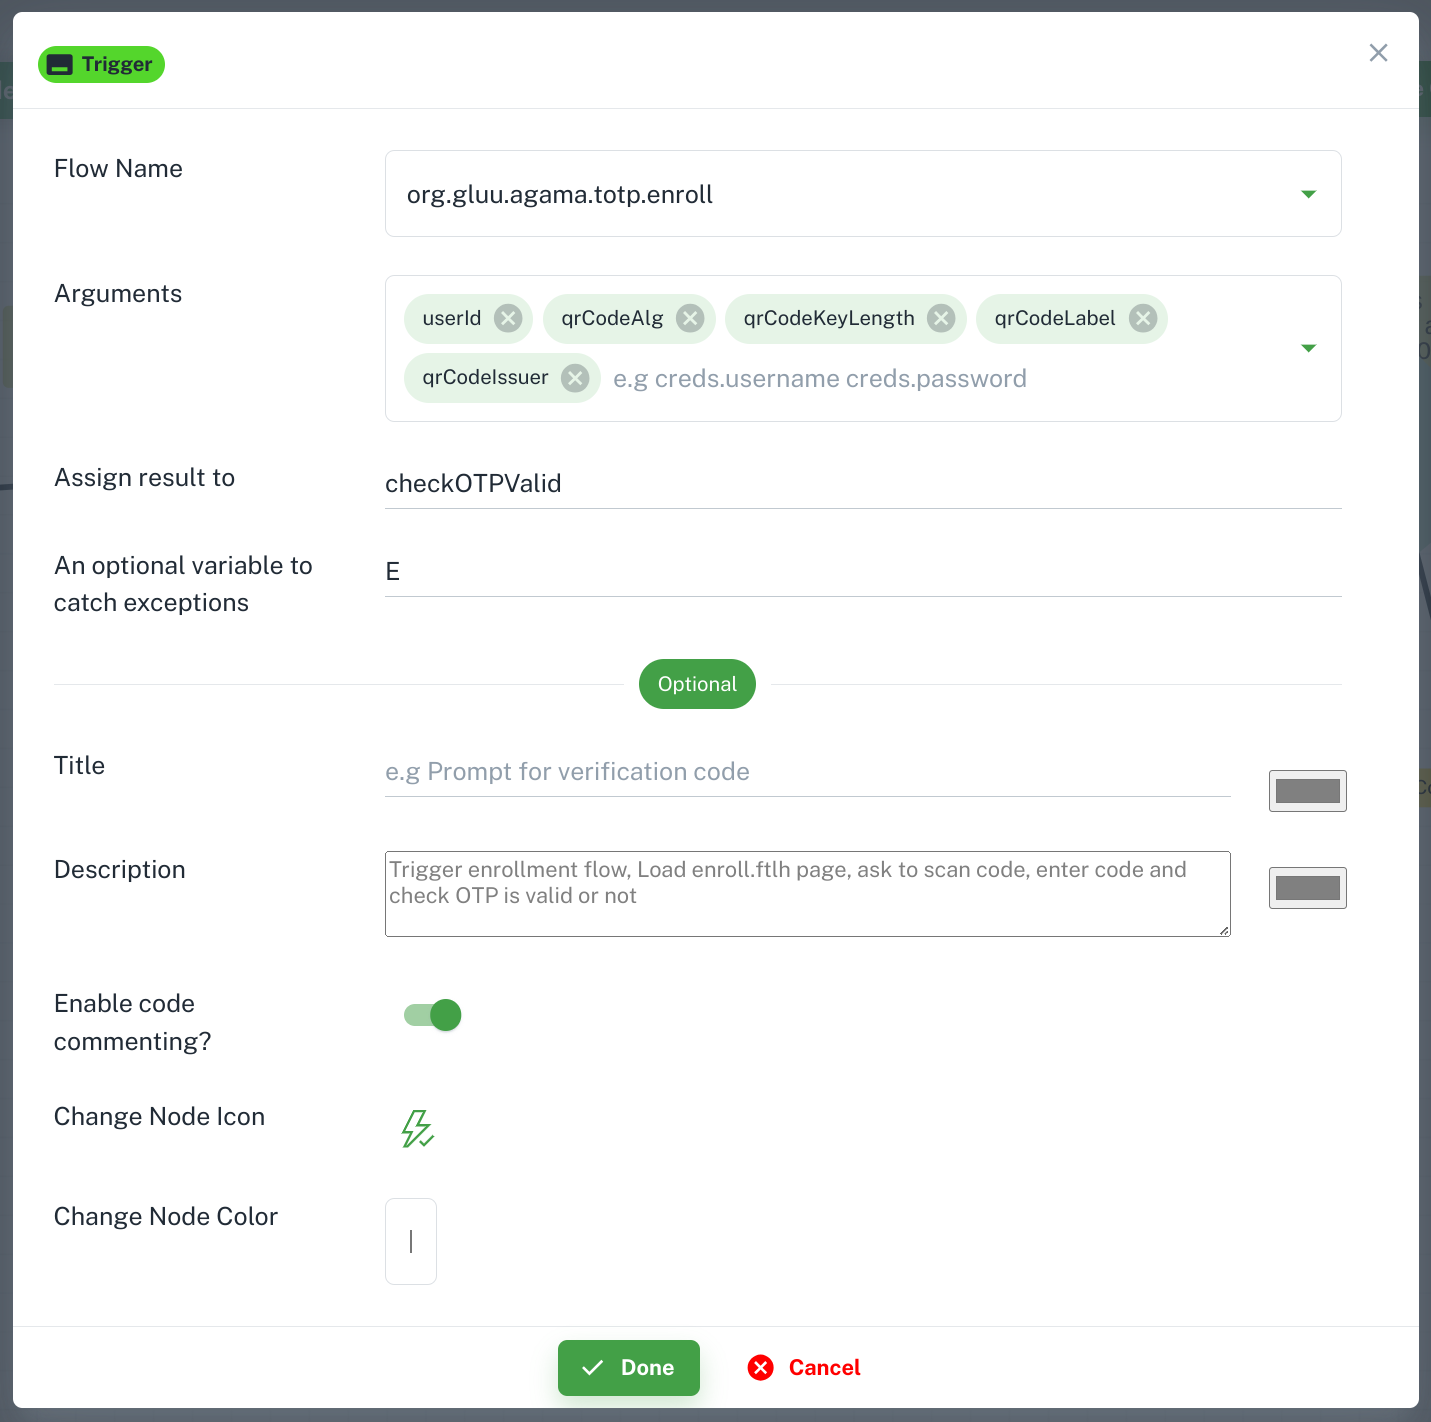
Flow name: Used to define which subflow you want to trigger.Arguments: Used to pass values to subflow. Which you can later used in subflow by usingInputsby defining in header.Assign Result to: Store subflow response in variable.
Repeat Widget

In Repeat Block to add instructions inside Repeat Block otherwise it will add instructions out side of repeat block. 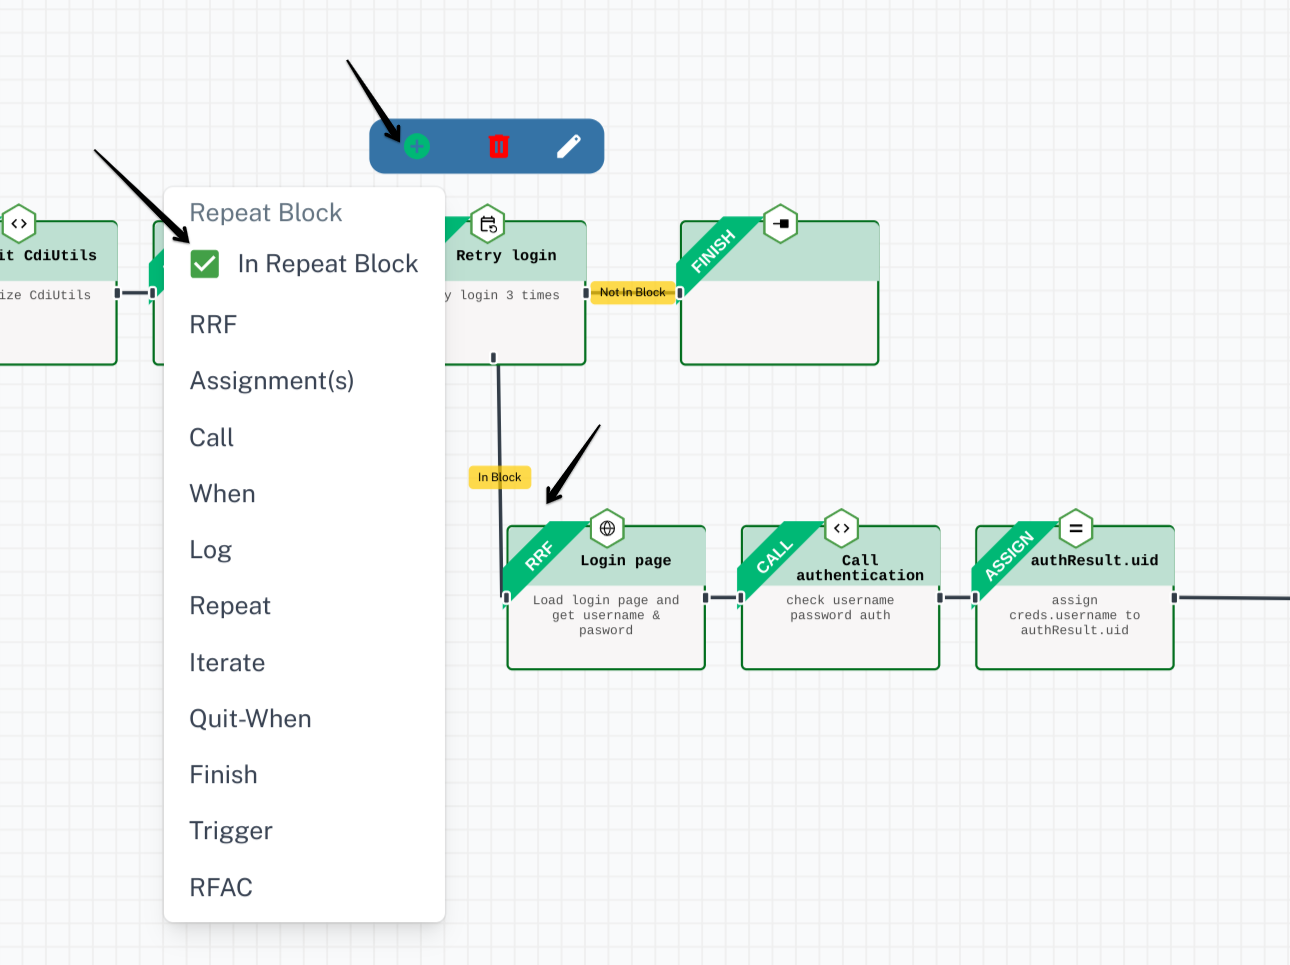
When Widget
+ Rule button to add condition and Combinator to add conditional operator in multiple condition case. 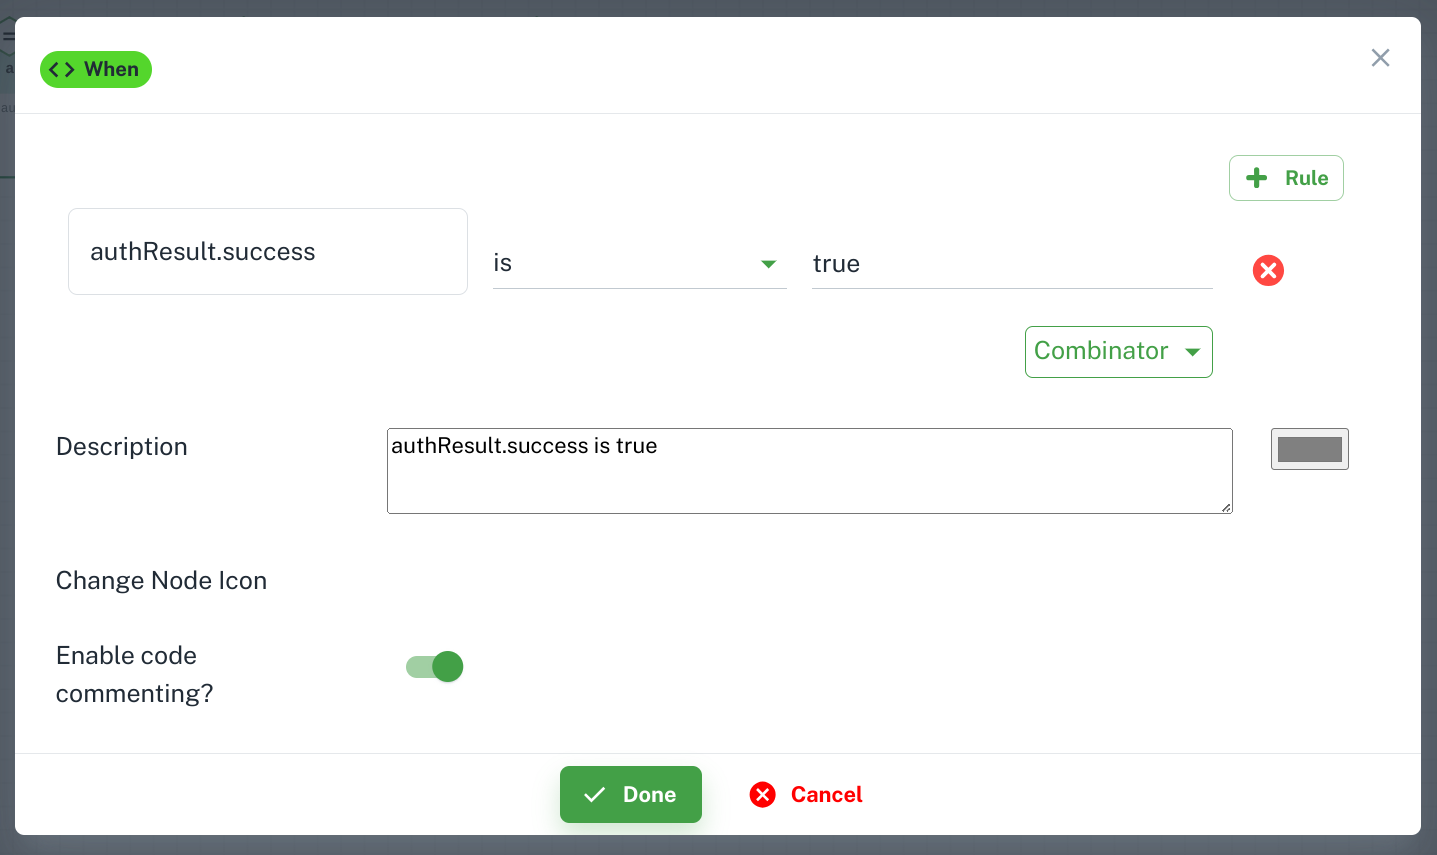
When widget, Click on + icon and you will get 3 options. 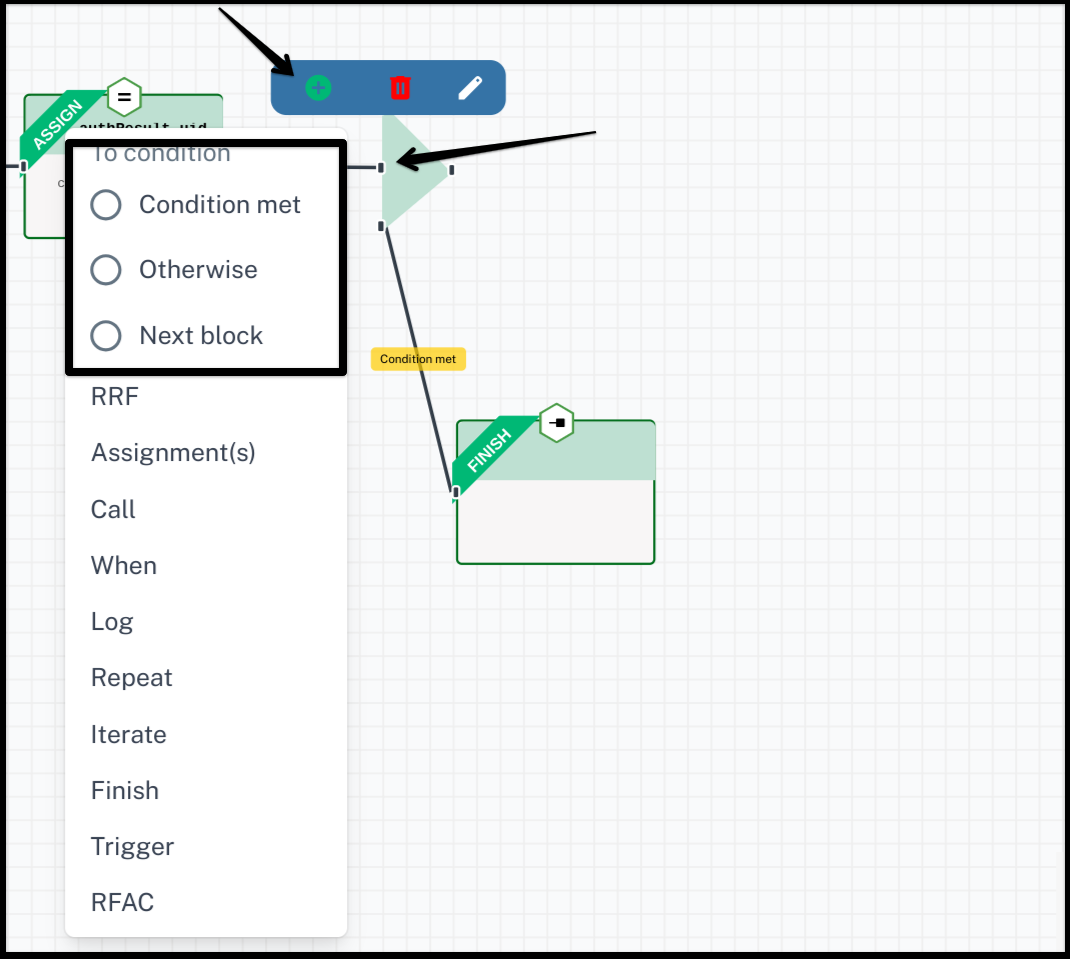
Condition met: Instructions in this block will execute when your condition will be true.Otherwise: Instructions in this block will execute when your condition will be false.Next block: Use this option to add instructions outside ofWhenblock.
Iterate Widget
Iterate over is used to traverse the items of a string, list, or the keys of a map. At every iteration, a variable is set with the current item or key name. More details. 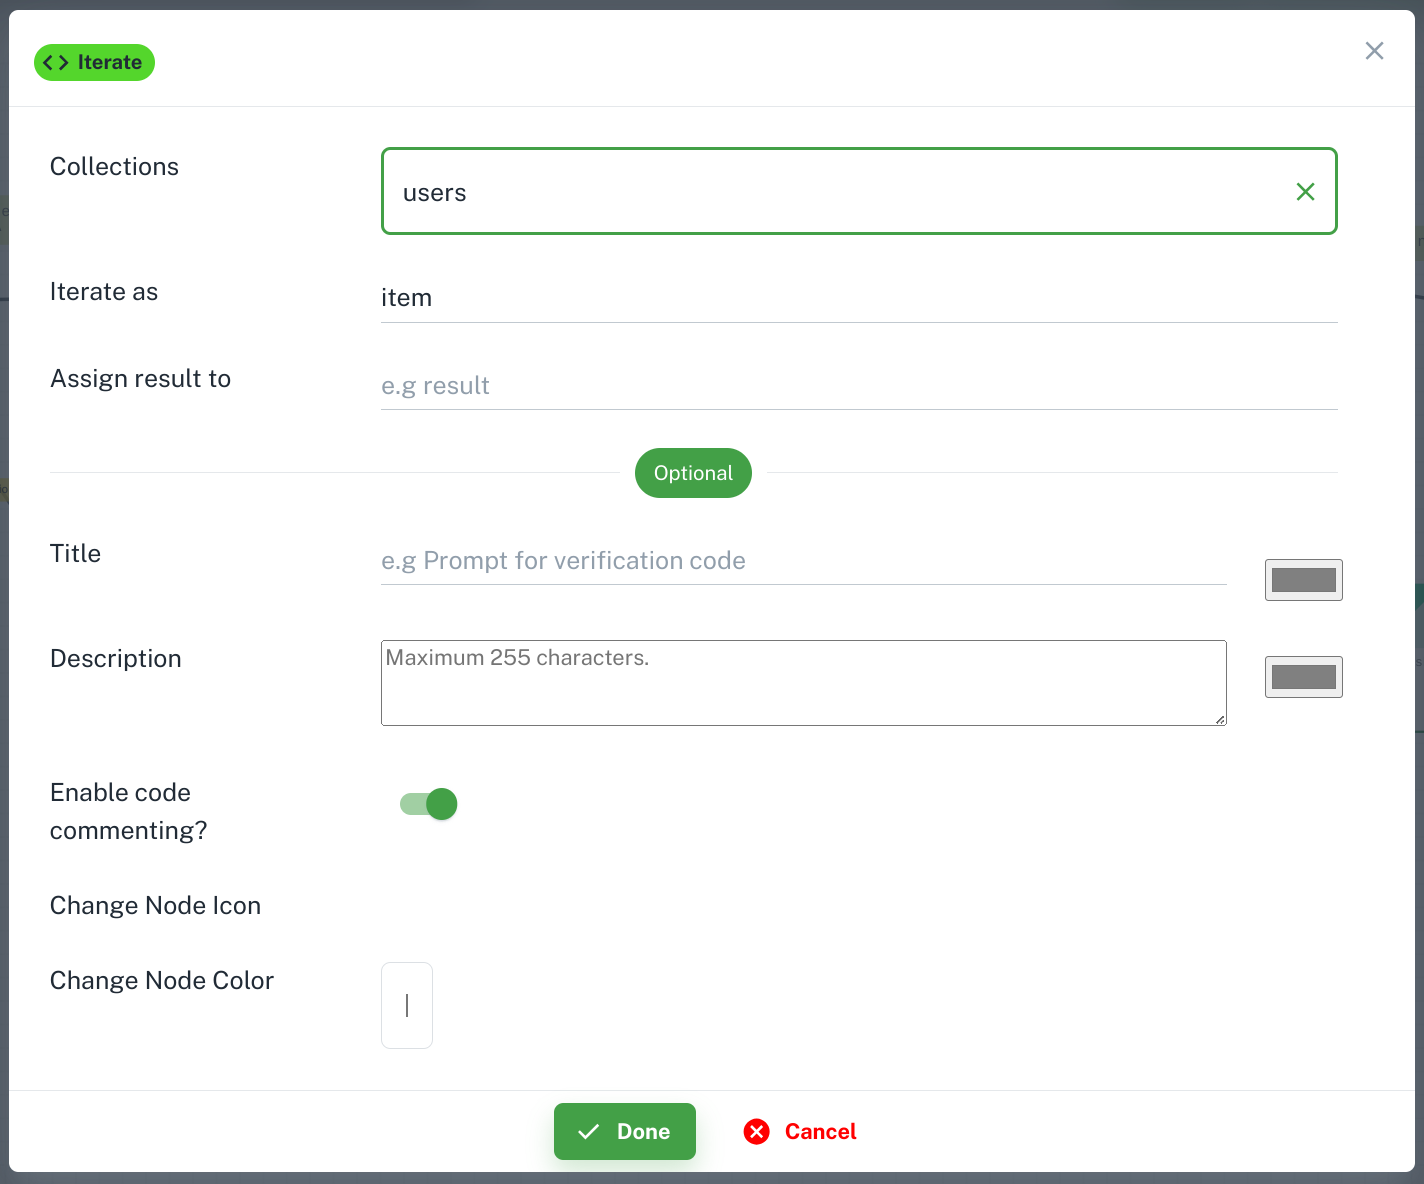
Finish
Success Finish
Flow finished successfully in flow success case. 
Start widget if you have set flow as a top level then you need to pass userId in finish widget in success case. Like in below example: 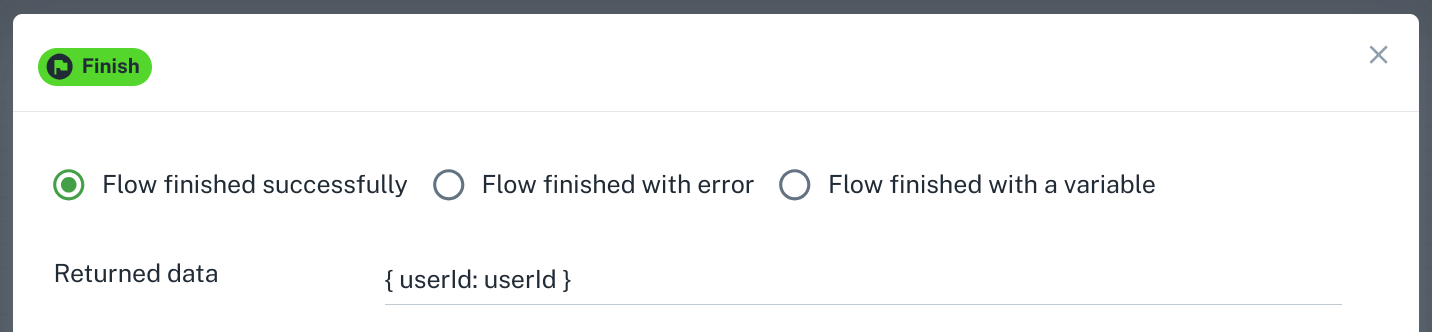
Fail Finish
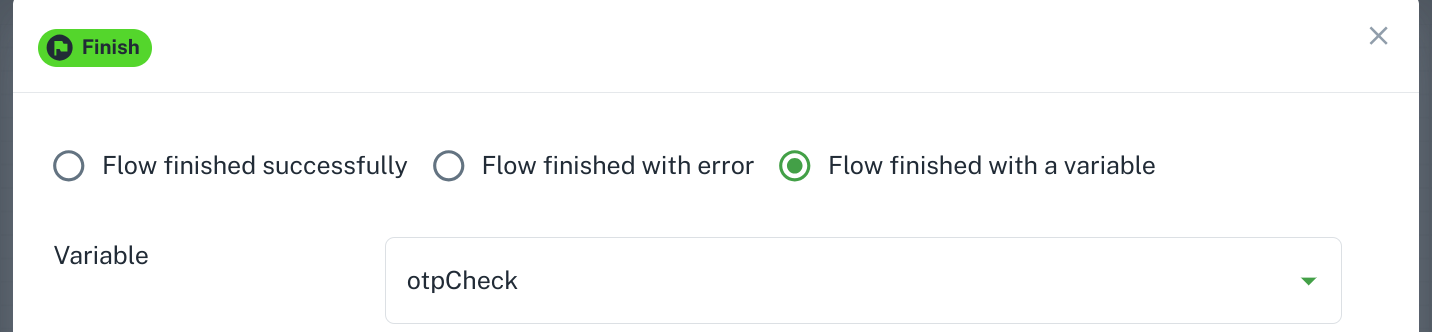
Flow finished with error is for failed case. You can pass variable or value or string in response. 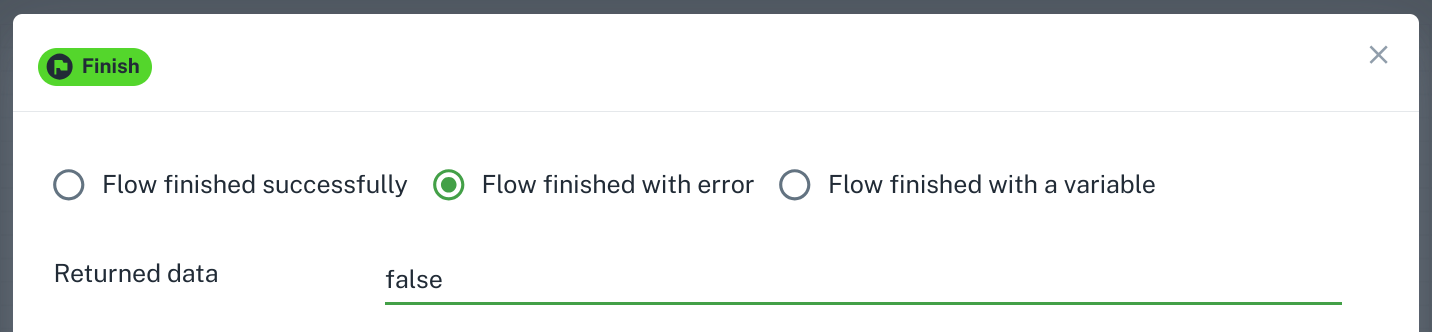
Flow finished with a variable