UMA Claims Gathering Authorization Tutorial#
Overview#
In this tutorial, we will use the GLUU-UMA-Auth and GLUU-UMA-PEP plugins to implement claims gathering workflow, where an authenticated user is prompted to input information to satisfy access policies.
In the demo, the user will be prompted to enter their country and city before being able to access a protected page. If the values entered are correct (US, NY), the user is granted access. If not, access is denied.
Parties#
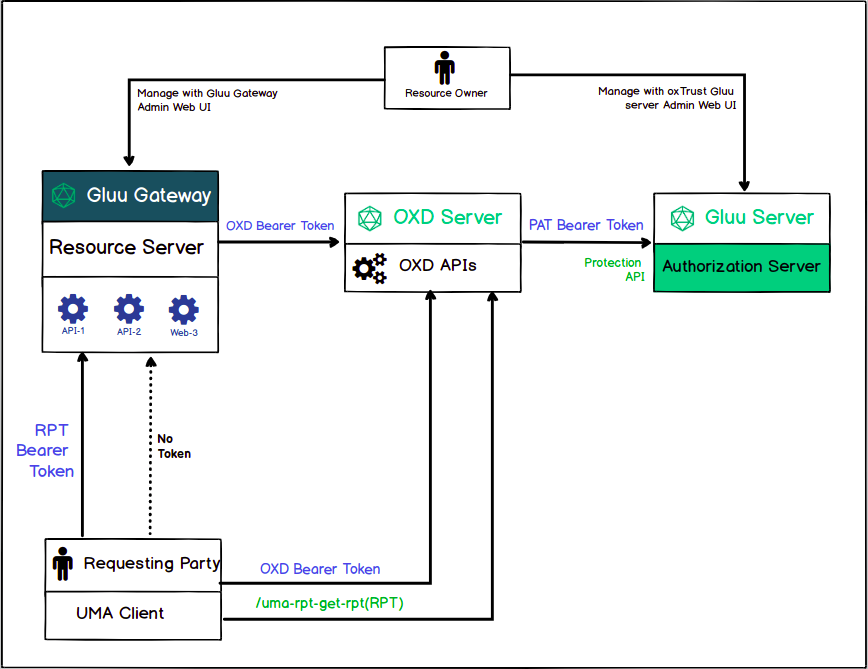
The following diagram presents all the actors that are part of the UMA Authorization flow. The person configuring this demo is the Resource Owner, who registers the resources in Gluu Gateway - Resource server and configures Gluu Server - Authorization Server. Further details are later in this tutorial.
Flow#
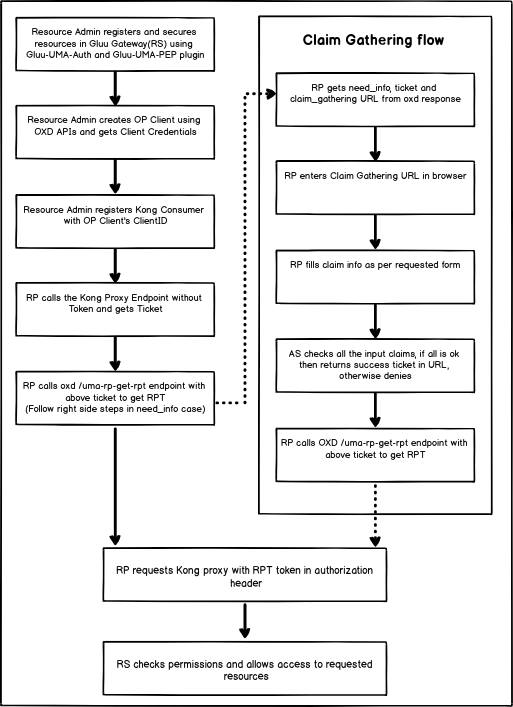
The following flow diagram shows the step-by-step activities performed by the actors in the UMA Claim Gathering authorization.
Requirements#
-
Gluu Gateway 4.2.0: This is our UMA Resource Server (RS), where policies are enforced, a.k.a. Policy Enforcement Point (PEP). Install Gluu Gateway. OXD Server is a static APIs web application which will install during GG installation.
-
Gluu Server 4.2.0: This is our UMA Authorization Server (AS), where policies are stored and evaluated, a.k.a. the Policy Decision Point (PDP). Install Gluu
-
Python CGI script demo app: This is our UMA Requesting Party (RqP), which will be making authentication and authorization requests on behalf of the user. Installation instructions below
-
Protected(Upstream) API: In our demo, we are using a demo Node.js App. Take Node.js demo from here.
Gluu Gateway configuration (RS)#
Note
The GG UI is only available on the localhost. Since it is on a remote machine, we need SSH port forwarding to reach the GG UI. Plugin configuration can be done either via REST calls or via the Gluu Gateway web interface.
Applications and their ports:
| Port | Description |
|---|---|
| 1338 | Gluu Gateway Admin GUI |
| 8001 | Kong Admin API |
| 8000 | Kong Proxy Endpoint |
| 443 | Kong SSL Proxy Endpoint. Kong by default provide 8443 port for SSL proxy but during setup, it changes into 443. |
| 8443 | oxd Server |
Login into Gluu Gateway Admin GUI(:1338) and follow the below steps.
Add Service#
Register your upstream API as a Service. For more details, see the Gluu UMA Auth and UMA PEP service docs.
We are using http://localhost:3000 as the Upstream API, it is your application where you want to add UMA Claim gathering authorization.
Follow these step to add Service using GG UI
- Click
SERVICESon the left panel - Click on
+ ADD NEW SERVICEbutton - Fill in the following boxes:
- Name: claim-gathering
- URL: http://localhost:3000

Add Route#
Follow these steps to add a route:
-
Click
claim-gatheringon the services -
Click on the
Routes -
Click the
+ ADD ROUTEbutton -
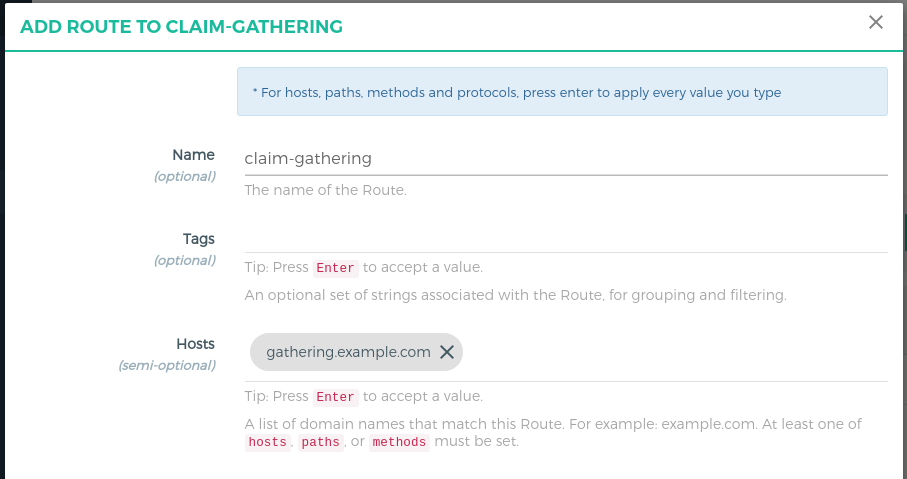
Fill in the following boxes:
- Name: claim-gathering
- Hosts: gathering.example.com,
Tip: Press Enter to accept value
Configure Plugin on Service#
Configure Gluu-UMA-Auth and Gluu-UMA-PEP with UMA scopes and resources.
-
Click
claim-gatheringon the services -
Click on the
Plugins -
Click on the
+ ADD PLUGINbutton -
Click on the
+of the titleGluu UMA Auth & PEP -
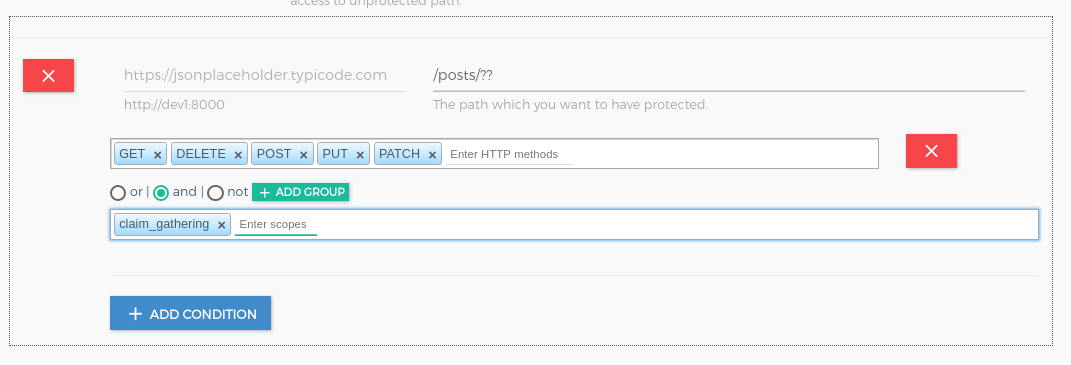
It will show the plugin configuration form. Click on
+ ADD PATHand Add/posts/??path,http methodsandclaim_gatheringscope.
Add Consumer with OP Client#
OP Client is used to correlating an access token with a Kong consumer. You must create an OP client before you can register it here as a way to identify a consumer.
Follow these steps to make a new OP Client and consumer using GG UI:
-
Click
CONSUMERSon the left panel -
Click on
+ CREATE CLIENTbutton -
Add
nameand submit the form
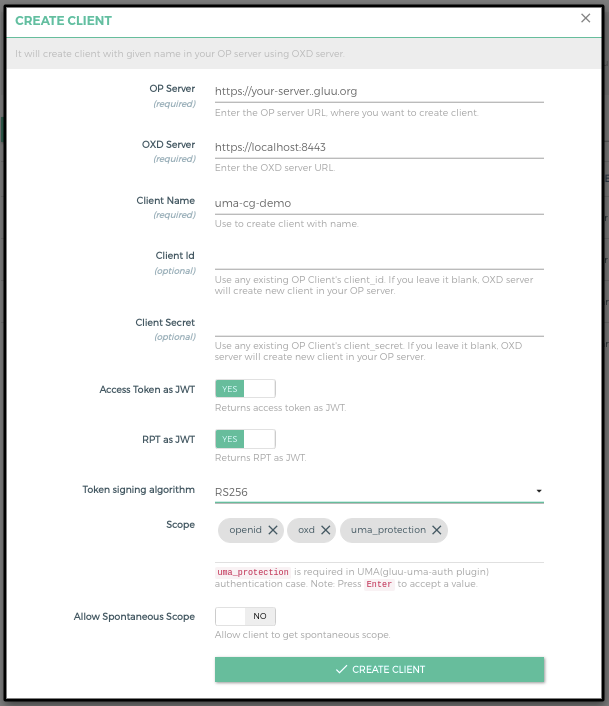
- It will create the client in your OP Server and show you all the client details. You need to copy all the details. let's call it consumer_op_client so it will help you in the next steps.
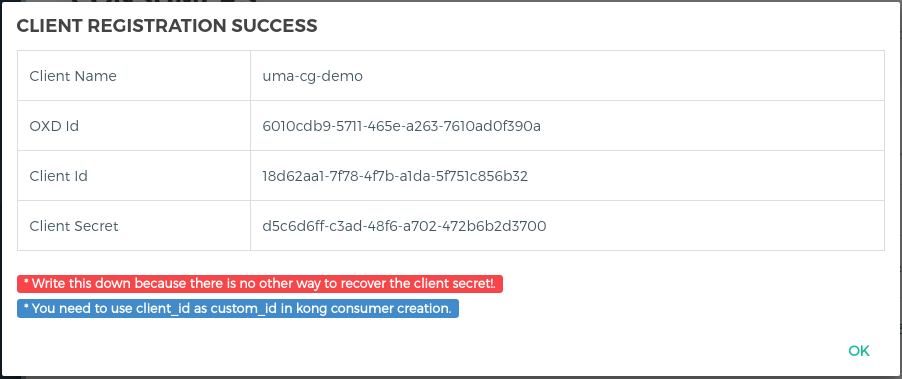
- Click on the
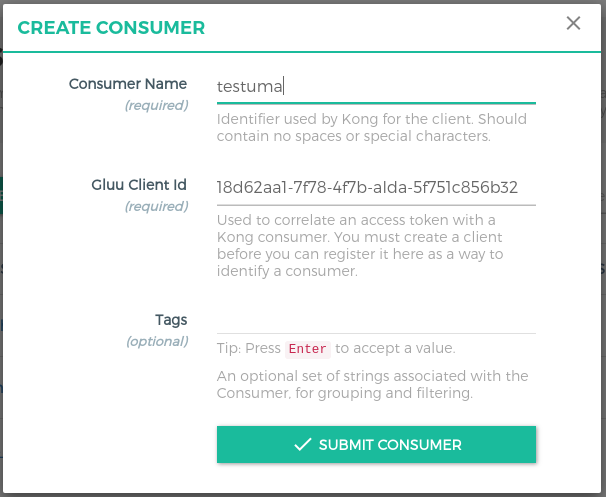
+ CREATE CLIENTbutton and addclient_idin theGluu Client Id.
Gluu Server configuration (AS)#
To enable UMA Claims Gathering, configure the following settings inside your Gluu Server:
-
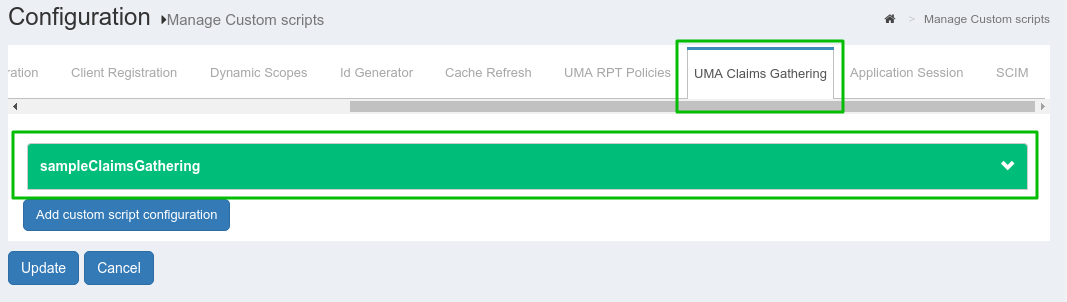
In oxTrust, navigate to
Configuration>Manage Custom Scripts -
Enable
UMA RPT Polices&UMA Claims GatheringThere is one
uma_rpt_policyincluded in the script. During authorization, it checks Country=US and City=NY. If you want to change the value, update this script or add your own new script. For more details, take a look at Gluu CE Documentation.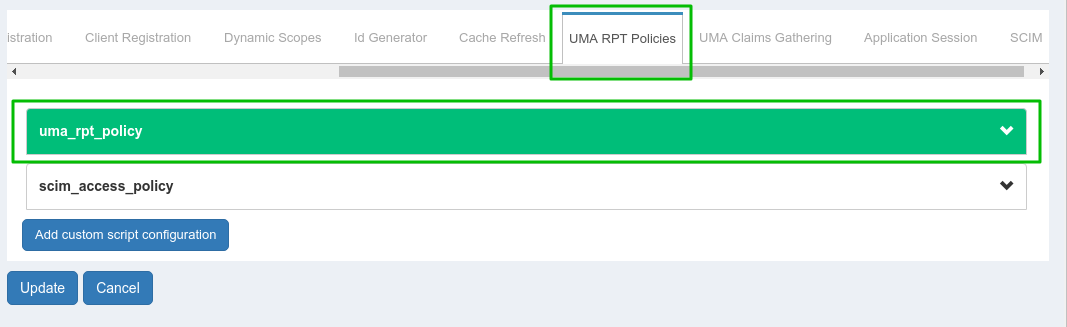
-
Add Authorization Policy in
claim_gateringUMA scope. Navigate toUMA>Scopes.
-
Update the
consumer_op_clientwithclaim_redirect_urisusing the oxd command forupdate-site:curl -X POST https://gg.example.com:8443/update-site --Header "Authorization: Bearer <ACCESS_TOKEN>" --Header "Content-Type: application/json" --data '{"oxd_id": "<CONSUMER_OP_CLIENT_OXD_ID>","claims_redirect_uri":"<your_claims_redirect_uri>"}'If your cgi script is in
/usr/lib/cgi-bin/index.pyfolder, your claims_redirect_uri will be<your_cgi_server_url>/cgi-bin/index.py. It will update your OP Client.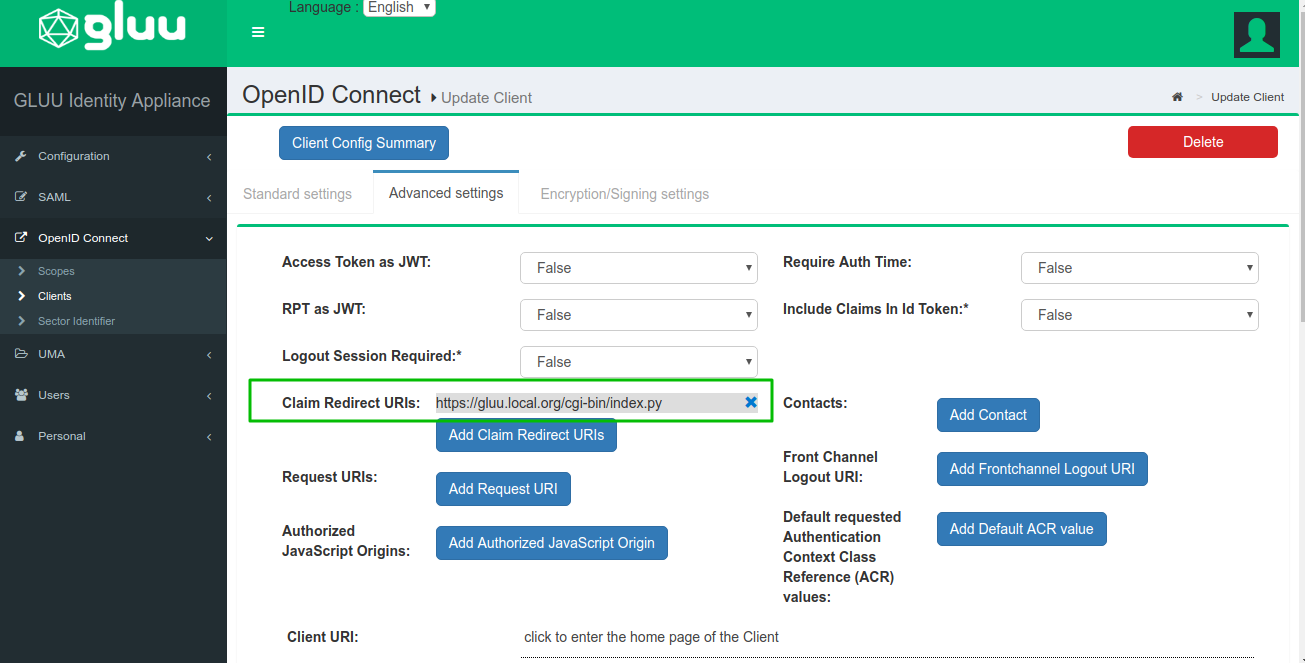
Demo app configuration (RqP)#
The demo app is a Python CGI script. It needs to be installed on a CGI-enabled web server.
The script is divided into 3 parts:
index.pyis the main scripthelper.pyincludes REST calls and the HTML templateconfig.pyis for custom configuration
Download the app from the repository.
Deploy#
Since we are using a Python CGI script for simplicity, we first need to get a working webserver to act as the Relying Party (RP). This tutorial is using Ubuntu 16.04 LTS.
First, install the Apache web server:
# apt-get update
# apt-get install apache2
# ln -s /etc/apache2/mods-available/cgi.load /etc/apache2/mods-enabled/
You will use Python's requests module to interact with oxd's REST API:
# apt-get install python-requests
Put all 3 files in /usr/lib/cgi-bin and give them 755 permission.
# chmod 755 index.py helper.py config.py
Configuration#
Use the config.py file to add your configuration
| Properties | Description |
|---|---|
| gg_admin_url | Gluu Gateway kong admin URL |
| gg_proxy_url | Gluu Gateway kong proxy URL |
| oxd_host | OXD server URL |
| ce_url | CE OP Server URL |
| api_path | your API path which you register during plugin configuration. Example: request path /posts/1. Check here for more details about path regular expression. |
| host_with_claims | Kong Router object's host which you configure for claim gathering flow. As per above configuration, its value is gathering.example.com. |
| host_without_claims | Ignore this for now. You can make a policy without claim flow. |
| client_oxd_id, client_id, client_secret | Consumer OP Client credentials |
| claims_redirect_url | Claims redirect URL. As per the above configuration, it is <your-server.com>/cgi-bin/index.py. |
UMA Authorization#
If all the things configured well, request this <your-server.com>/cgi-bin/index.py?claim=true URL in a browser. Below is the step by step output of the demo application.
-
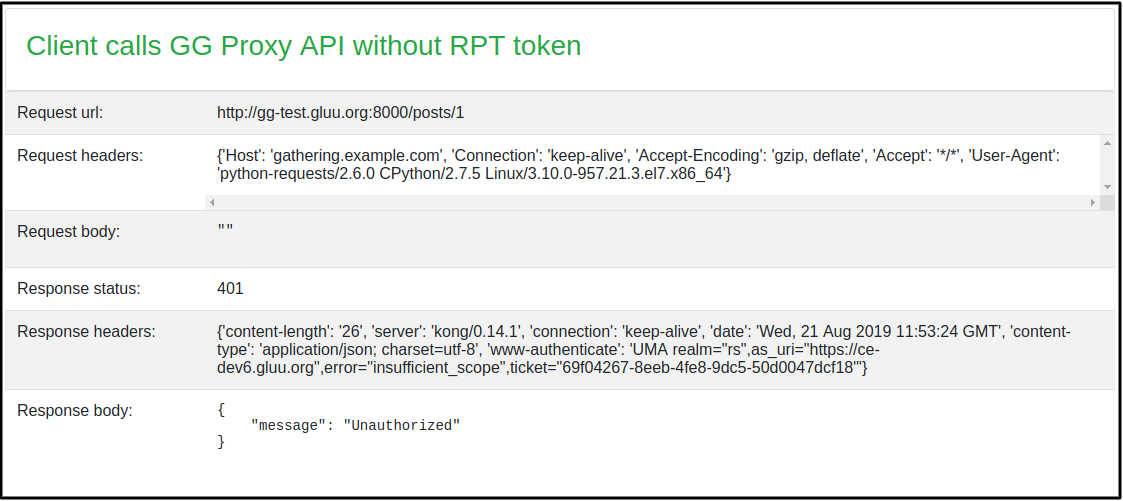
Request to resources and get a ticket
-
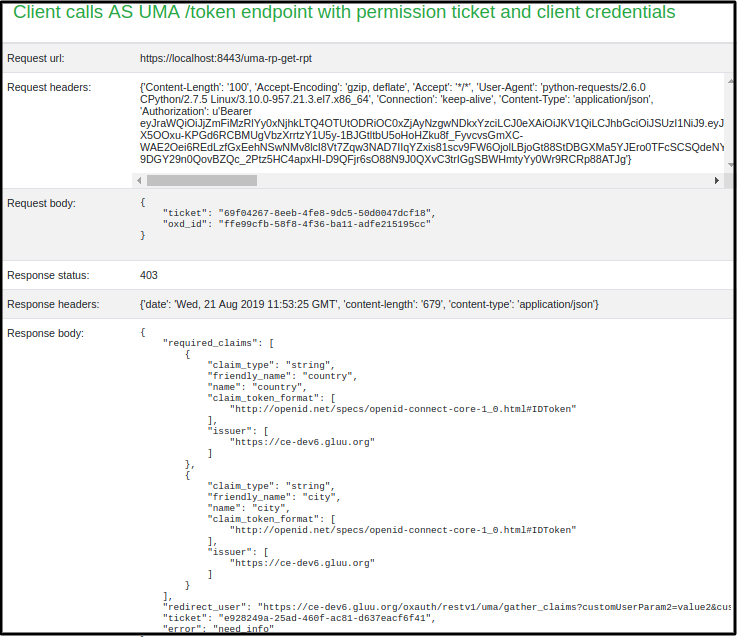
need_info response
-
Get Claim Gathering URL. It will show you Claim gathering URL, Click on URL and it will redirect you to AS for claims.

-
Here AS ask the user to enter some extra information to authorize a user. AS will first ask the user to enter a value for
Country. EnterUSin a country.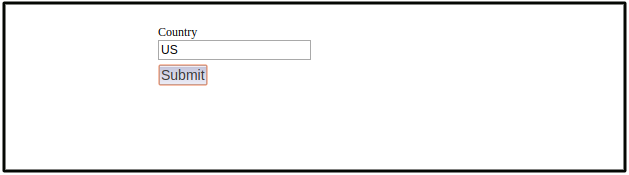
-
After submitting a Country claim, AS will ask the user to enter a value for
City. EnterNYin the city.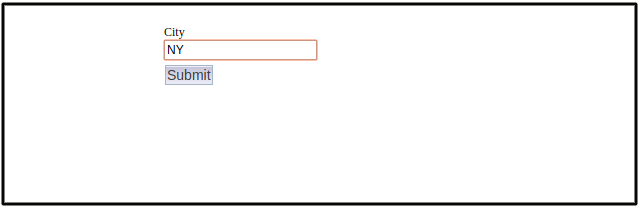
-
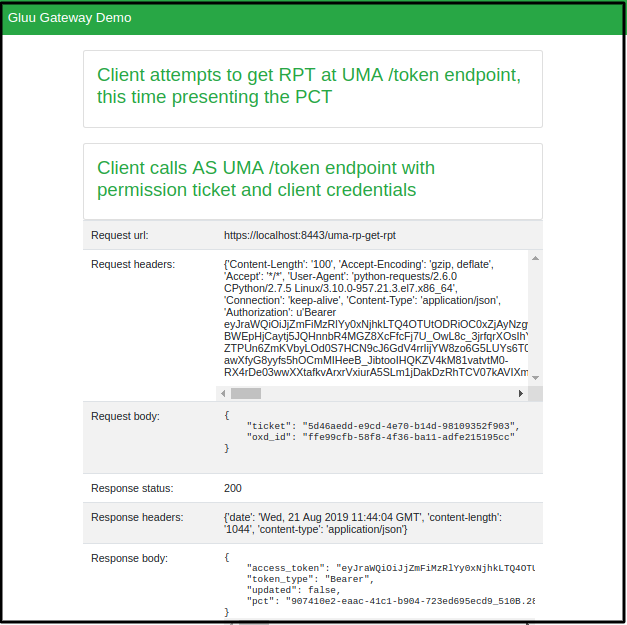
After the redirect, the demo app gets the ticket from url and get a new RPT Token.
-
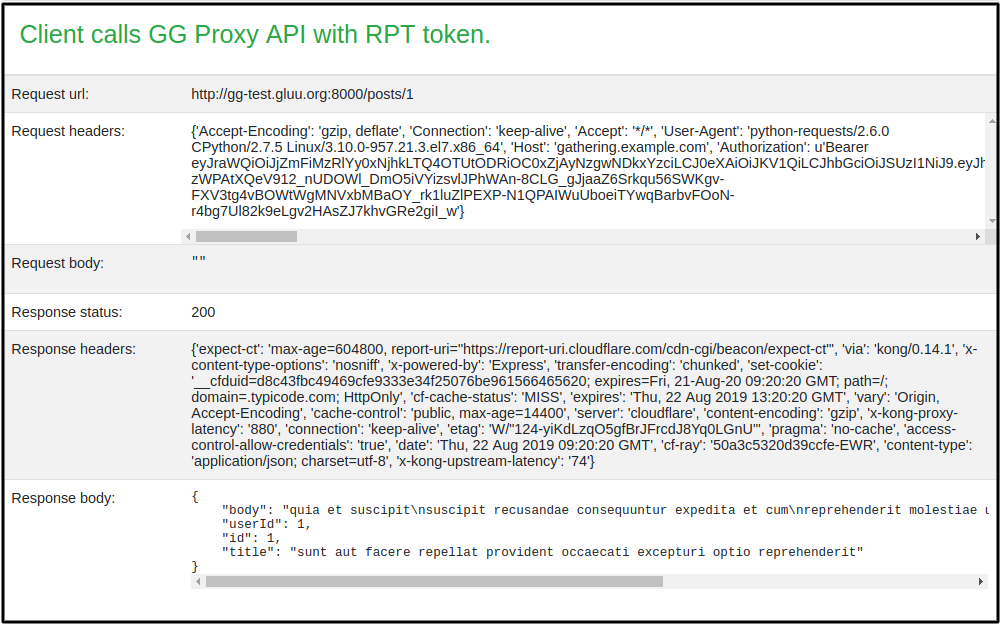
Request resources with new RPT Token and show the requested resource output
Steps by Steps implementation#
Below are the steps performed by the Demo Application(Requesting Party).
-
Request to protected resources and Get a resource ticket
  curl -X GET http://gg.example.com:8000/posts/1
      --Header "Host: gathering.example.com"
When you make this call, you'll receive a ticket in the WWW-Authenticate header with a permission ticket.
-
Request for RPT token and you will get a need_info ticket for one more step i.e. claim gathering
  curl -X POST https://gg.example.com:8443/uma-rp-get-rpt
      --Header "Authorization: Bearer <ACCESS_TOKEN>"
      --Header "Content-Type: application/json"
      --data '{"oxd_id": "<CONSUMER_OP_CLIENT_OXD_ID>","ticket":"<PERMISSION_TICKET>"}'
When you make this call, you'll get a
need_info ticketandredirect_userurl. -
Get Claim gathering URL
You can use oxd
uma-rp-get-claims-gathering-urlcommand or concat your claims_redirect_uri to redirect_user URLFor Example: Suppose you get
https://<your_op_server_host>/oxauth/restv1/uma/gather_claims?.....as a redirect_user(in need_info response) then your final claim redirect url will behttps://<your_op_server_host>/oxauth/restv1/uma/gather_claims?.....&claims_redirect_uri=<your_claim_redirect_uri>.Request URL in the browser and add country and city data. Per default uma_rpt_policy, you need to enter US in Country and NY in City. If you change location values in the script, enter corresponding values here.
If all claims are correct, the Gluu Server will redirect you to the
your_claim_redirect_uriwith a new permission ticket. -
Get an RPT token with a new permission ticket
  curl -X POST https://gg.example.com:8443/uma-rp-get-rpt
      --Header "Authorization: Bearer <ACCESS_TOKEN>"
      --Header "Content-Type: application/json"
      --data '{"oxd_id": "<CONSUMER_OP_CLIENT_OXD_ID>","ticket":"<NEW_PERMISSION_TICKET>"}'
When you make this call, you'll receive an RPT access token.
-
Request resource with new RPT Token
  curl -X GET http://gg.example.com:8000/<YOUR_PATH>
      --Header "Authorization: Bearer <YOUR_NEW_RPT>"
      --Header "Host: gathering.example.com"
Info
You can make policy without claim flow and just check requests and return true and false. For Example, You can pass the id token as a push claim token, check the values in UMA Policy script and return true to allow and false to deny. In this case, there is no need_info response and no claim gathering process. Check Gluu UMA Docs here for more details.
For none claim gathering, you need to set host_with_claims and request url of demo will be <your-server.com>/cgi-bin/index.py without ?claim=true.