User Guide - Gluu Casa#
Overview#
Gluu Casa ("Casa") is a self-service web portal for end-users to manage account security preferences like two-factor authentication (2FA) and social login.
Note
Options and features will depend upon which settings have been enabled by the administrator.
Sign in for the first time#
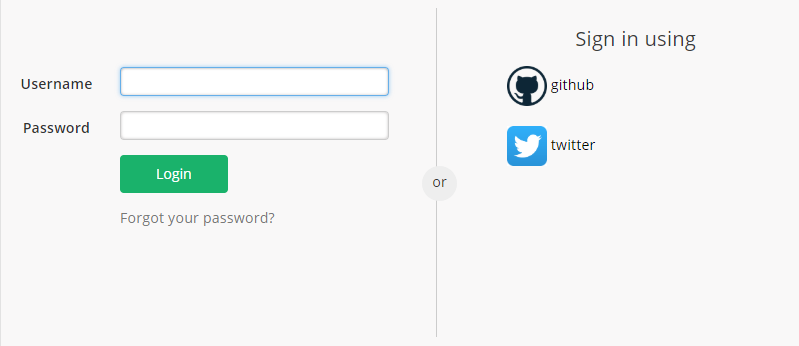
To access Casa, navigate to its web URL. By default, it will be: https://<yourdomain>/casa.
Sign in with your standard username and password. If you don't have an account but social login is enabled, a new account can be created via social login.
Credential Dashboard#
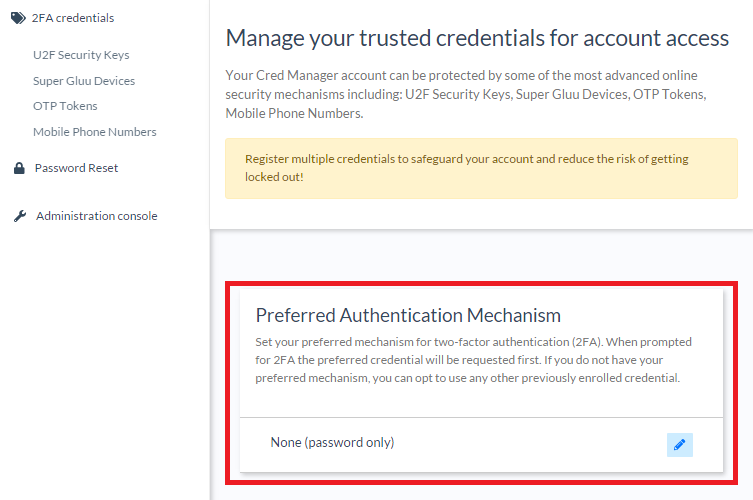
Your dashboard displays summary details about your 2FA preferences and enrolled credentials.
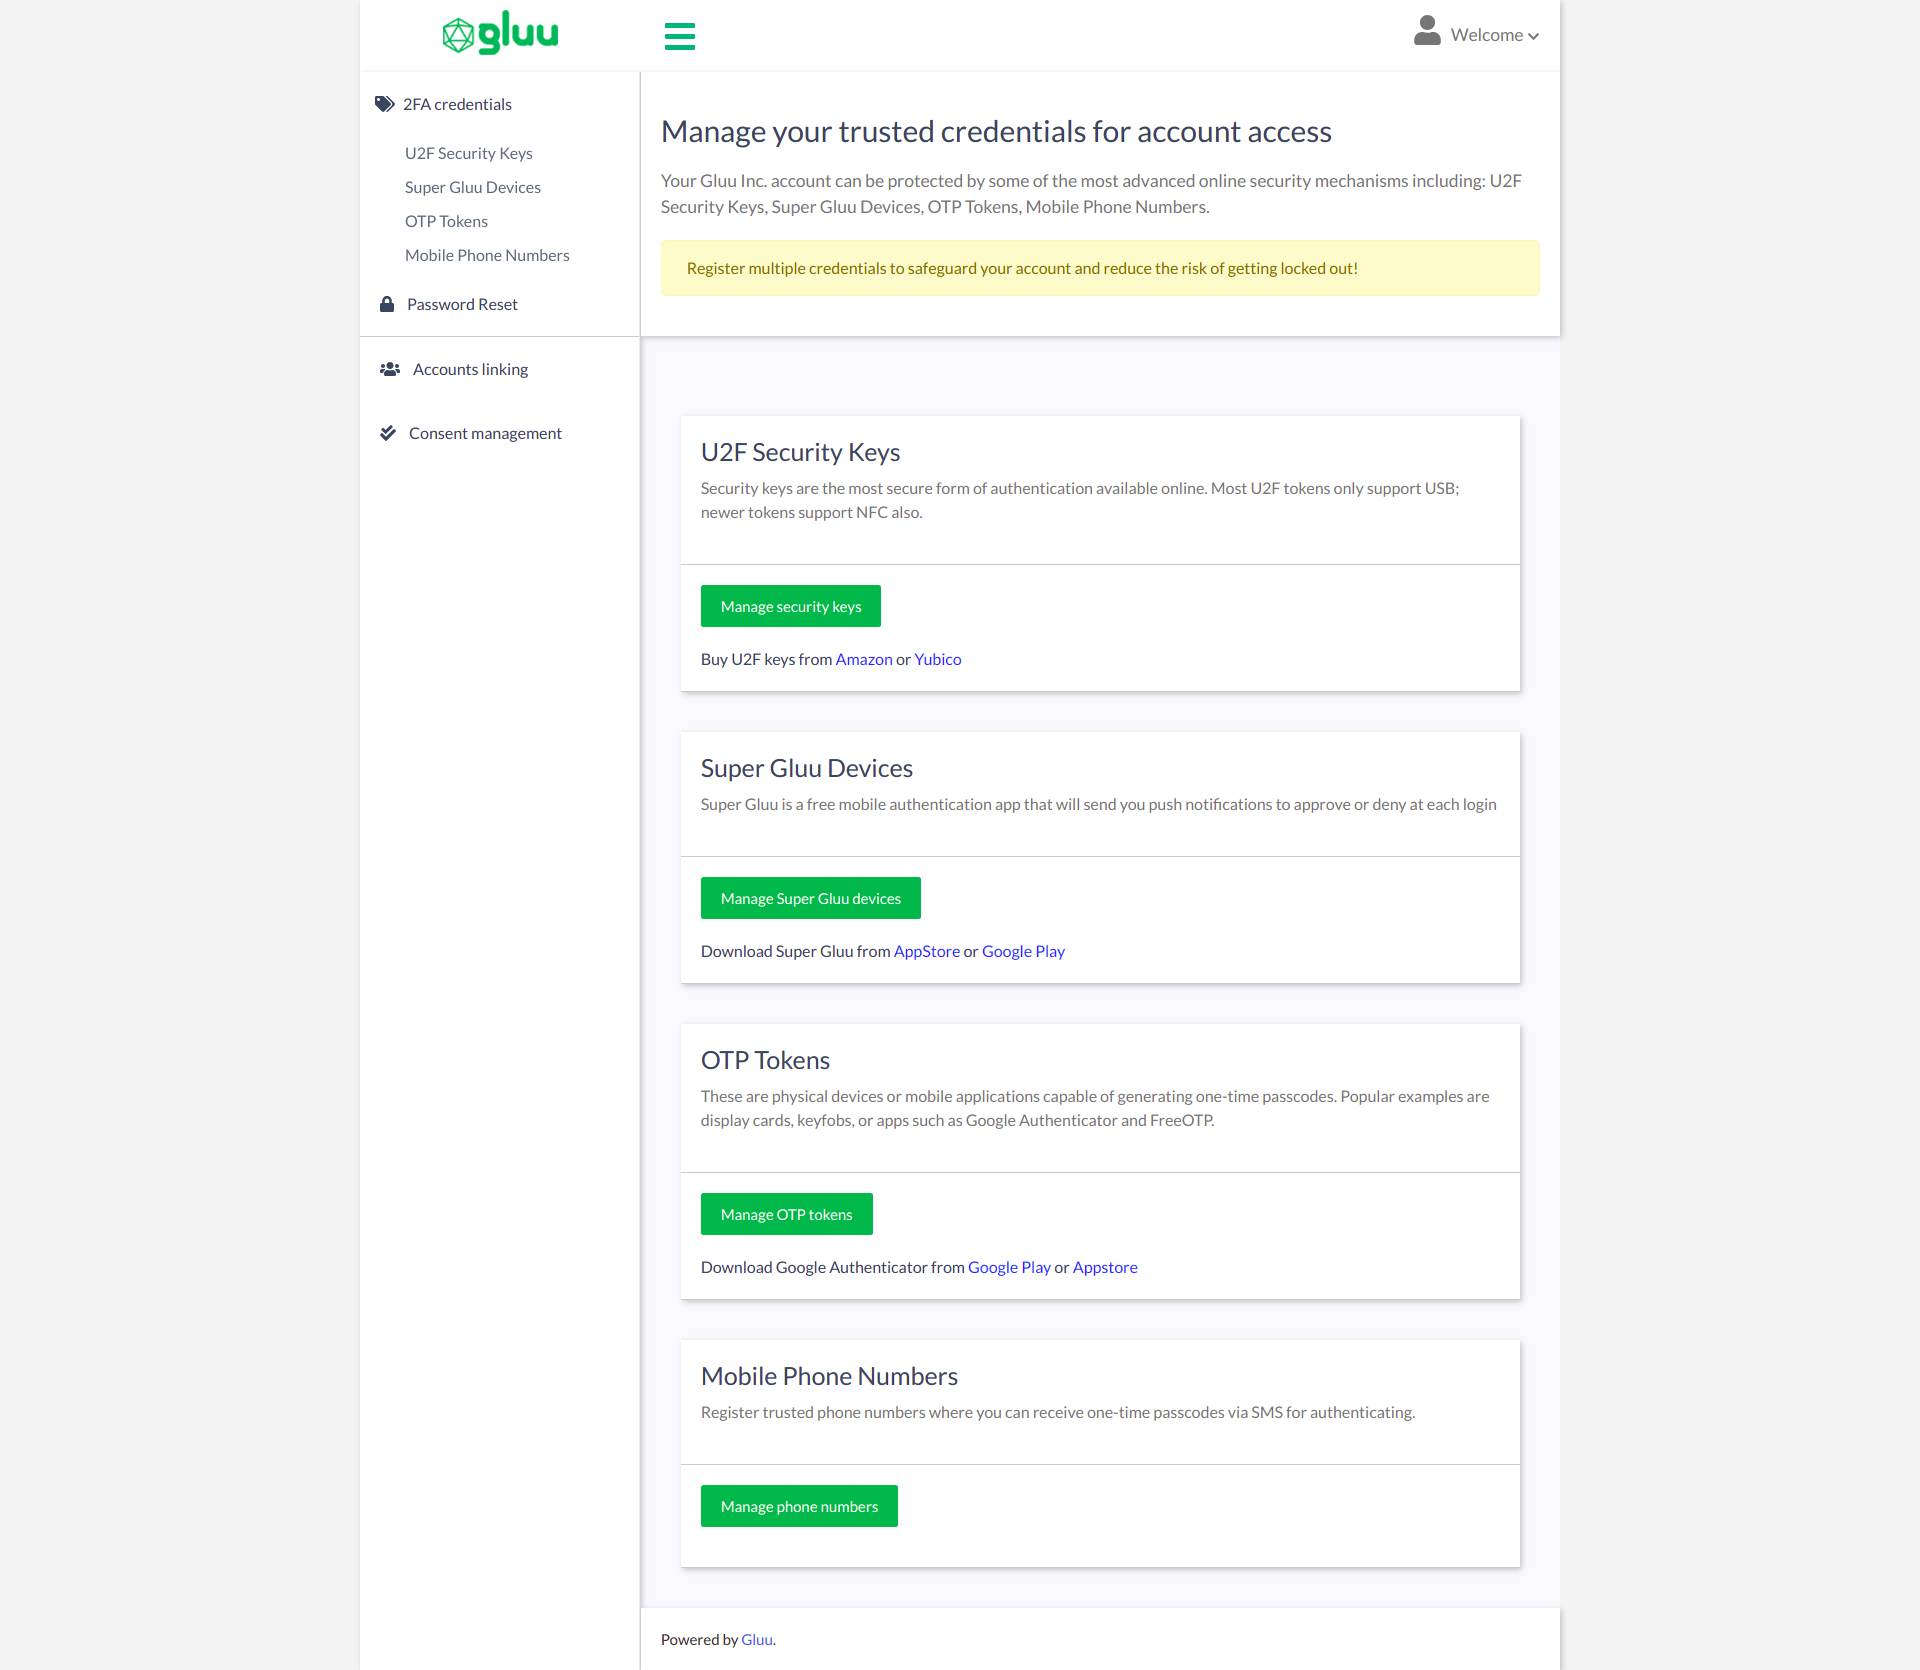
Enroll 2FA credentials#
Click the Manage button for any supported type of 2FA to enroll that type of credential.
For example, if you have an OTP authentication app, like Google Authenticator, click the Manage OTP tokens button and follow the instructions below to enroll an OTP token.
If you have a FIDO key, click the Manage Security Keys button and follow the instructions below to enroll your key:
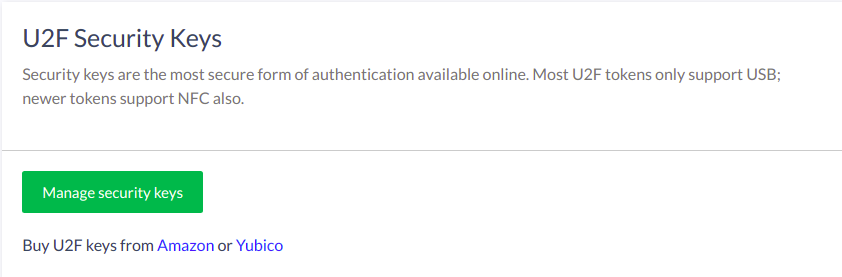
U2F security keys#
U2F security keys are available from many vendors, such as Yubico.
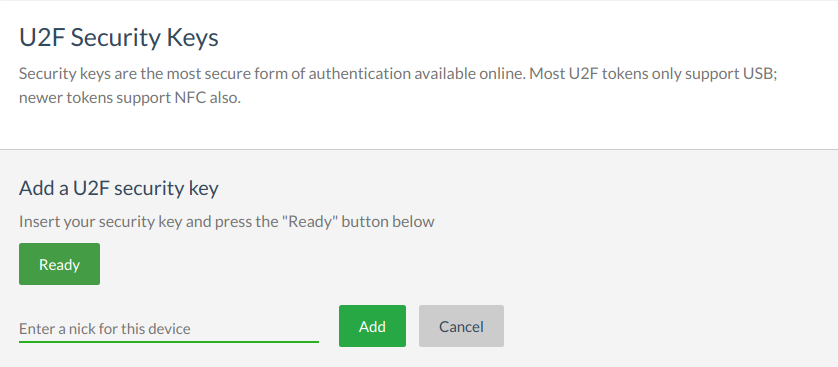
To add a new U2F key, navigate to 2FA credentials > U2F Security Keys. Insert your U2F key in your computer and clickReady. Casa will prompt you to press the button on your U2F key.
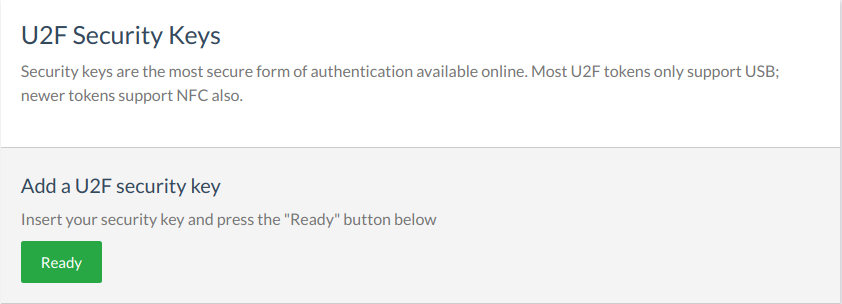
Casa will now prompt you to add a nickname for the credential. Give it a recognizable name, and click Add
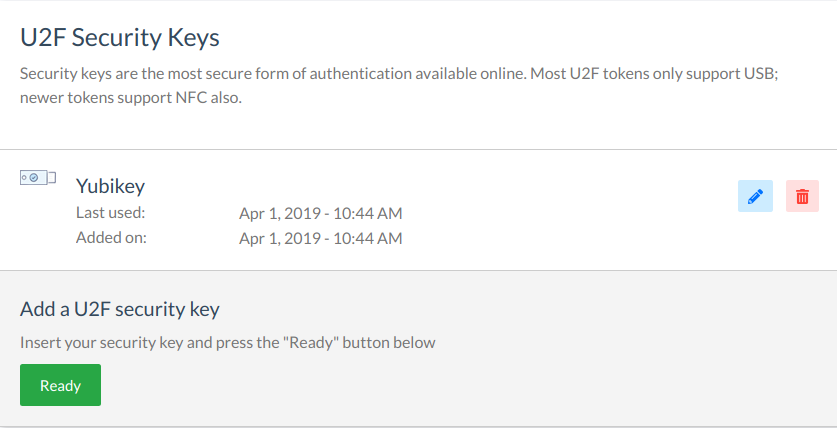
Once complete, the new device will appear in a list on the same page. Click the pencil to edit the device's nickname, or the trashcan to delete the device.
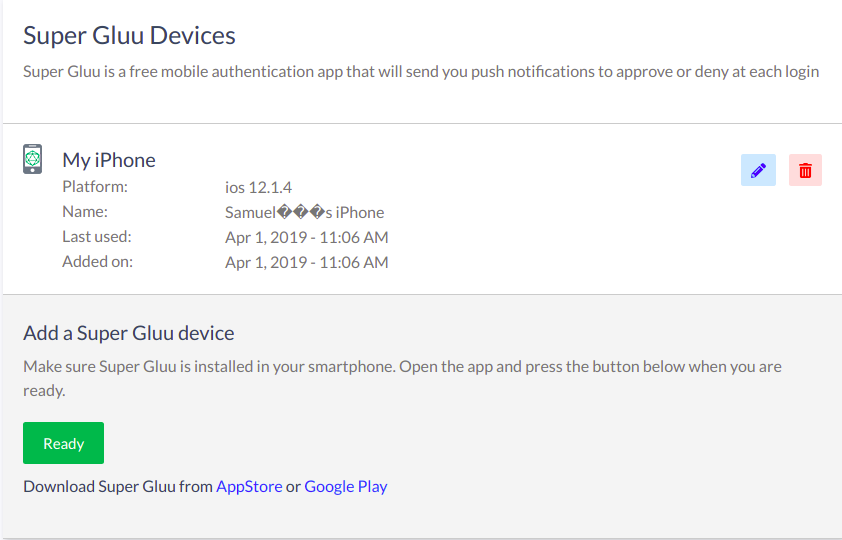
Super Gluu Devices#
Super Gluu is available for iOS and Android.
To add a new Super Gluu device, navigate to 2FA credentials > Super Gluu Devices.
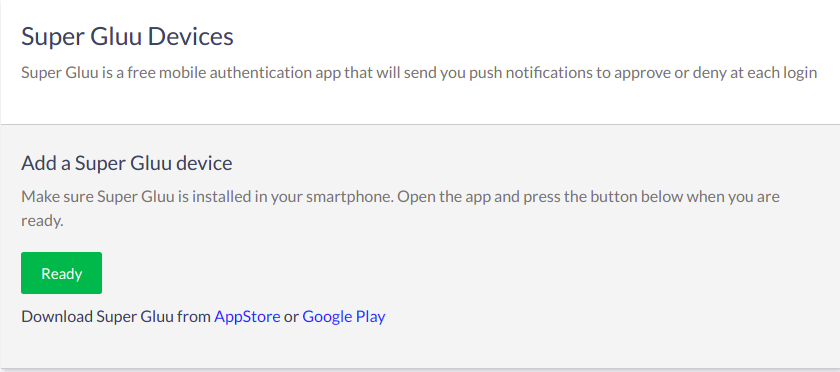
Click Ready and an enrollment QR code will pop up. Scan it with your Super Gluu app and approve the enrollment in the app.
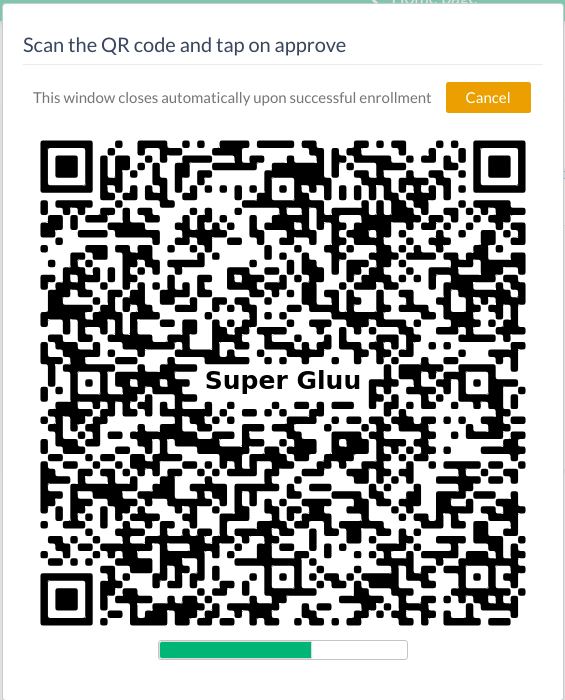
Casa will now prompt you to add a nickname for the credential. Give it a recognizable name, and click Add

Once complete, the new device will appear in a list on the same page. Click the pencil to edit the device's nickname, or the trashcan to delete the device.
OTP Tokens#
To add a new OTP token, navigate to 2FA credentials > OTP Tokens.
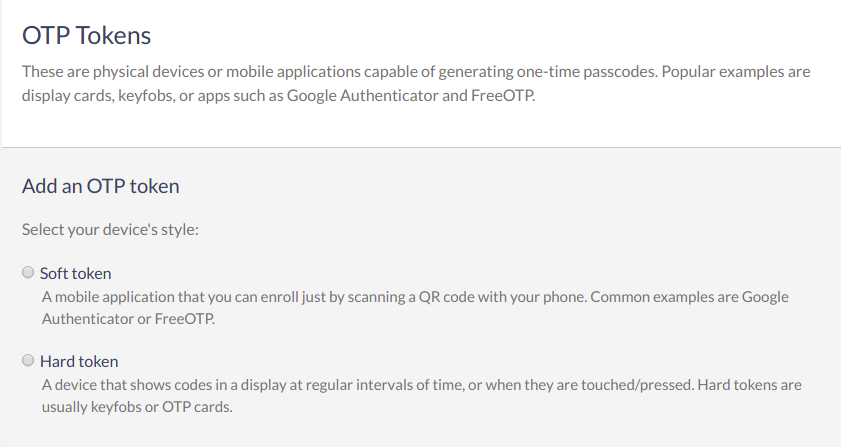
Soft tokens#
To add a soft token OTP, e.g. a mobile app like Google Authenticator, click the radio dial for Soft token.
Click Ready and an enrollment QR code will pop up. Scan it with your OTP mobile app. Casa will now prompt you to enter the OTP from your mobile app. Confirm it, then give the credential a nickname.
Hard tokens#
To add a hard token OTP, e.g. a single button "dongle" like this, select Hard Token.
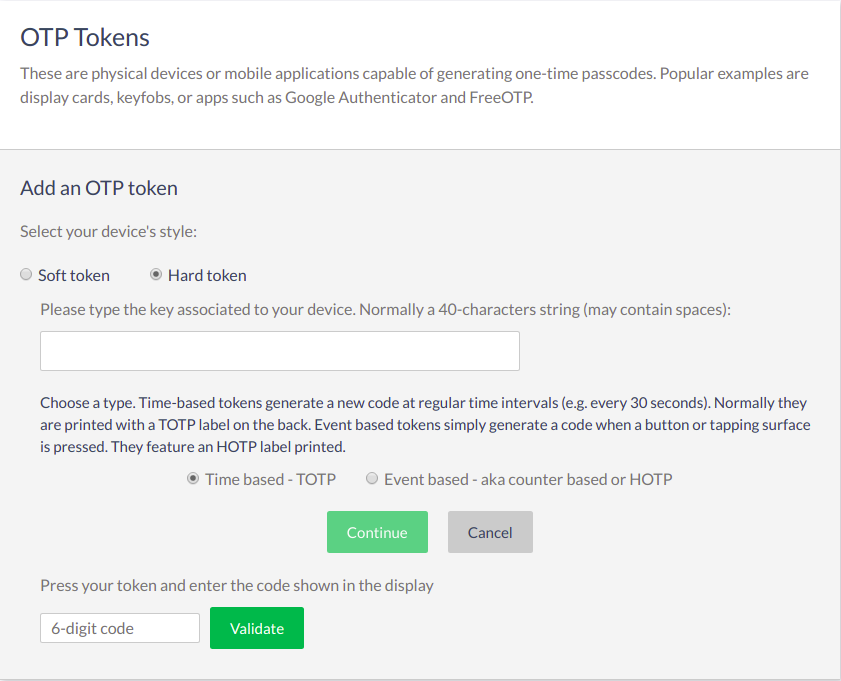
Add the key associated with the device and the 6 digit code. Add a nickname for the device and click Add.
Once it's added, the new device will appear in a list on the same page. Click the pencil to edit the device's nickname or the trashcan to delete the device.
Mobile Phone Numbers#
To add a new mobile phone number for one-time passcodes, navigate to 2FA credentials > Mobile Phone Numbers.
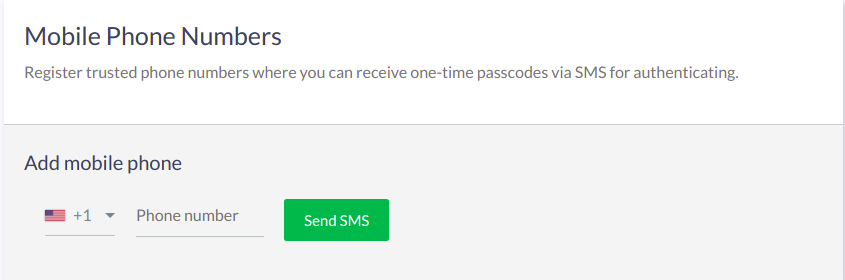
Enter a phone number and click 'Send SMS' to get the passcode. Enter the code received, nickname the mobile number, and click Add.
Once it's added, the new mobile number will appear in a list on the same page. Click the pencil to edit the mobile number's nickname or the trashcan to delete the mobile number.
Enforcing 2FA#
Turn on 2FA#
After the minimum number of 2FA credentials have been enrolled (as specified by the system admin -- typically two), a new widget will appear on your dashboard to manage your preferred authentication mechanism.
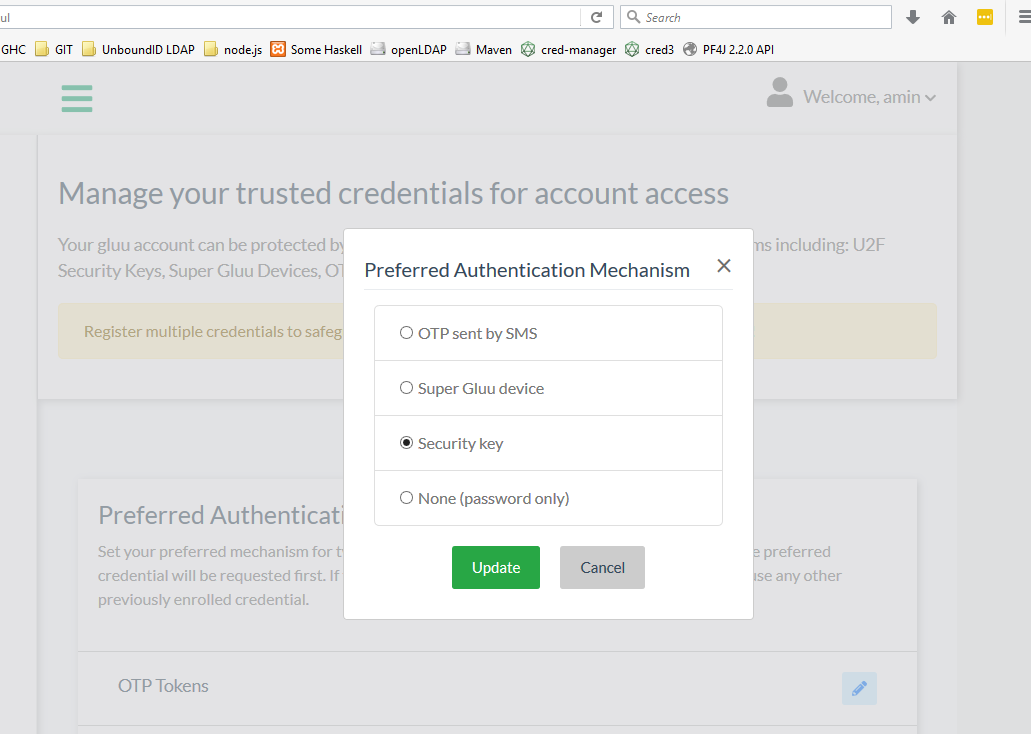
Click the pencil icon in the preferred credential widget, and selecting one of your enrolled 2FA mechanisms as your preferred 2FA mechanism:
Choose your preferred 2FA option. Click Update to save your settings.
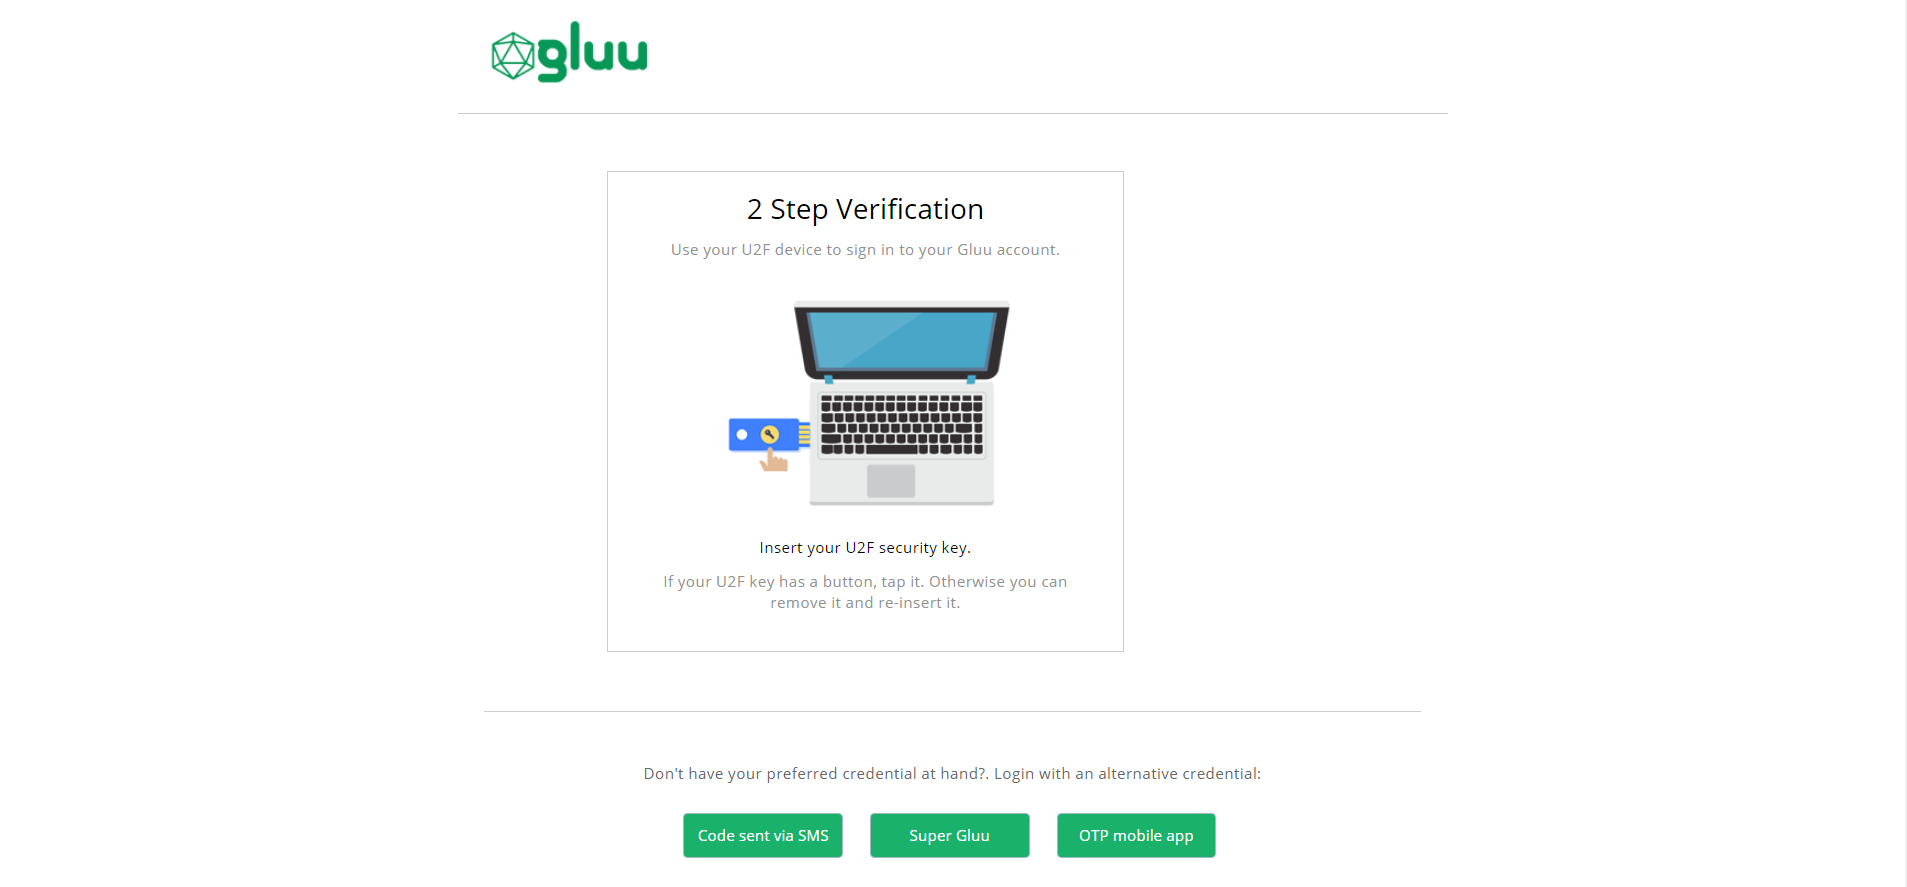
Now, when prompted for 2FA, the preferred credential will be requested first. If the preferred credential is unavailable, any other previously enrolled 2FA credential can be used instead.
Turn off 2FA#
To turn off 2FA, simply set the preferred credential back to password.
2FA settings & trusted devices#
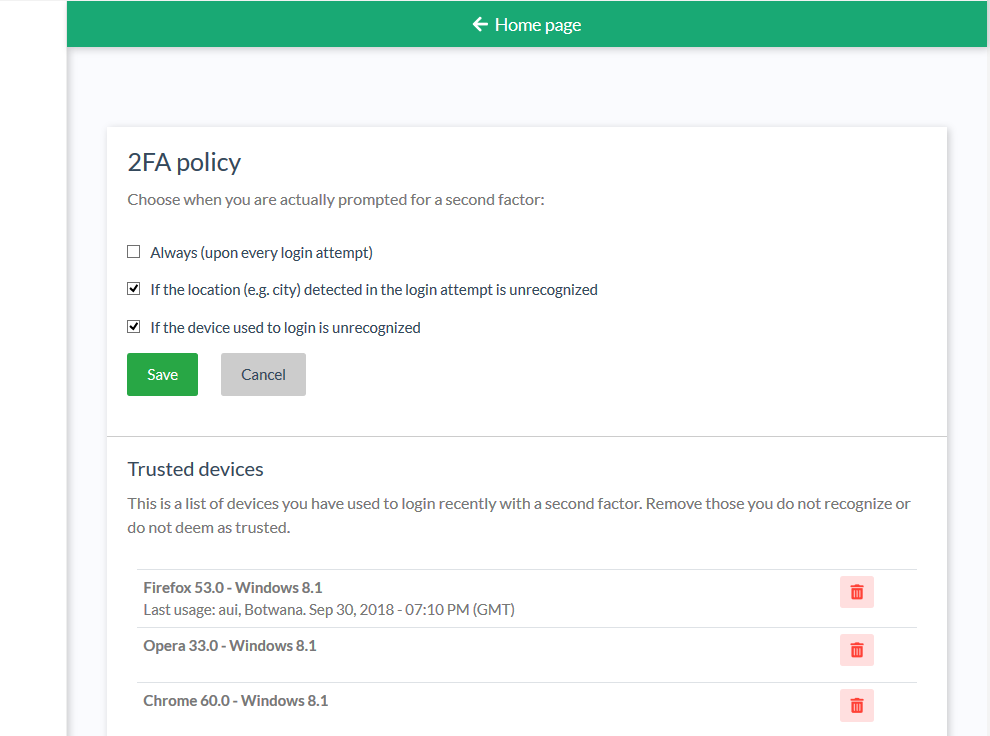
If enabled by the system administrator, you can set your own policy for when 2FA should be enforced.
To set your 2FA policy, after enrolling and turning 2FA on, click the Manage your 2FA settings button in the Preferred Authentication Mechanism widget.
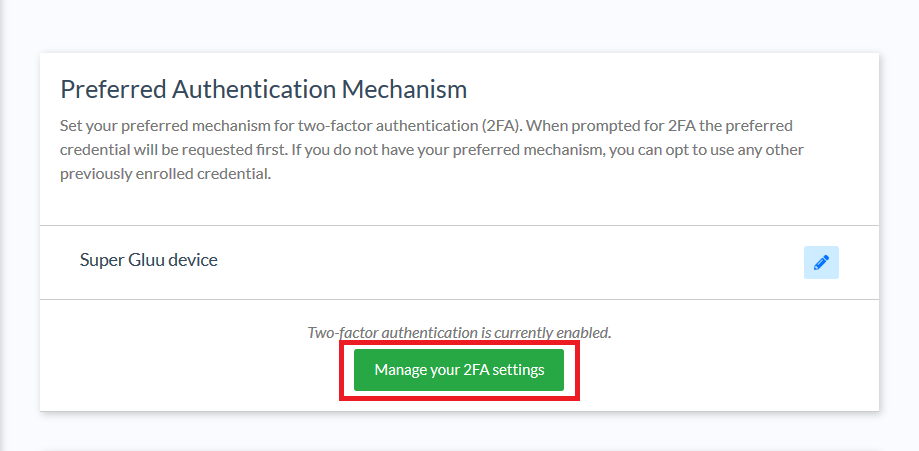
You will be able to choose from a few pre0defined options for when 2FA is presented:
- Always (upon every login attempt)
- If the location (e.g. city) detected in the login attempt is unrecognized
- If the device used to login is unrecognized
If you opt for 2FA based on location, device, or both, a new widget will appear to display your trusted devices.
2FA best practices#
The context of an authentication attempt can determine which type of credental is most convenient to use. For instance, U2F keys are not compatible with mobile phones or non-Chrome browsers.
To reduce the chance of account lockout, enroll at least two different types of 2FA credentials -- e.g. one U2F token and one OTP app; or one OTP app and one SMS phone number, etc. This way, regardless which device you're using to access a protected resource, you will have a usable option for passing strong authentication.
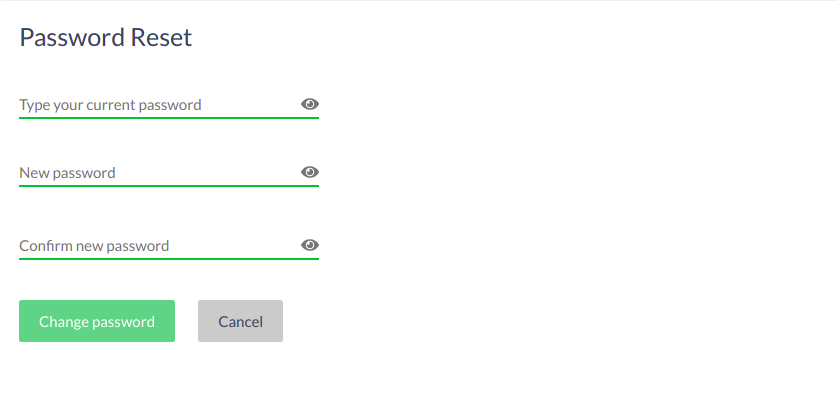
Password Reset#
If enabled by the system administrator, Casa can also be used to change your password.
Navigate to the Password Reset widget. Enter your current and new passwords, then click Change password.
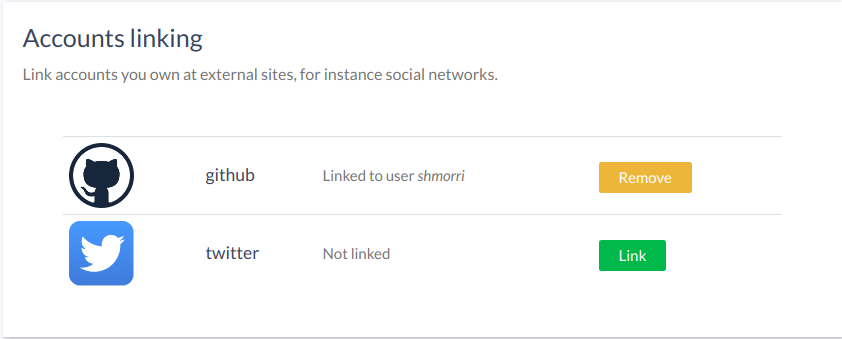
Account linking#
To manage the external accounts you've used to sign in, use the left-hand menu to navigate to the page for Account Linking. This will present the option to link new external accounts, or remove existing linked accounts.
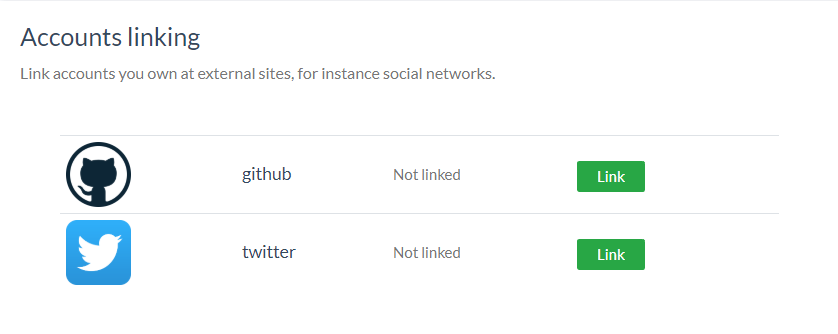
Once an account is linked, it can be removed as necessary.
Sign in with a linked account#
By default, a list of the available external providers is displayed in the right panel of the sign in page.
Click any supported provider for which you've previously linked an account to sign in. After authentication, you will be sent to the protected page you were attempting to access, e.g. the Casa dashboard.
Consent Management#
If the administrator has enabled the Consent Management plugin, it will appear in the navigation menu for all users.
New entries are added automatically whenever the user is prompted for, and authorizes the release of their personal data to an application accessed using their Gluu account.

Revoking consent#
When a previously granted consent decision is revoked, the user will be re-prompted to authorize release of their data if/when they attempt to access the application again.