FIDO U2F#
Overview#
FIDO Universal 2nd Factor (U2F) is an open authentication standard that strengthens and simplifies two-factor authentication using specialized USB or NFC devices based on similar security technology found in smart cards.
Learn more about the U2F standard on Gluu's website.
This document will explain how to use Gluu's U2F interception script to configure the Gluu Server for a two-step authentication process with username and password as the first step, and any U2F device as the second step.
U2F Devices#
Some well known U2F devices and manufacturers include:
- Yubico
- HyperFIDO
- Feitian Technologies
- Vasco DIGIPASS SecureClick
Check FIDO's certified products for a comprehensive list of U2F devices (sort by Specification == U2F).
Purchase U2F devices on Amazon.
Prerequisites#
- A Gluu Server (installation instructions);
- U2F interception script (included in the default Gluu Server distribution);
- At least one U2F device for testing, like one of the devices listed above.
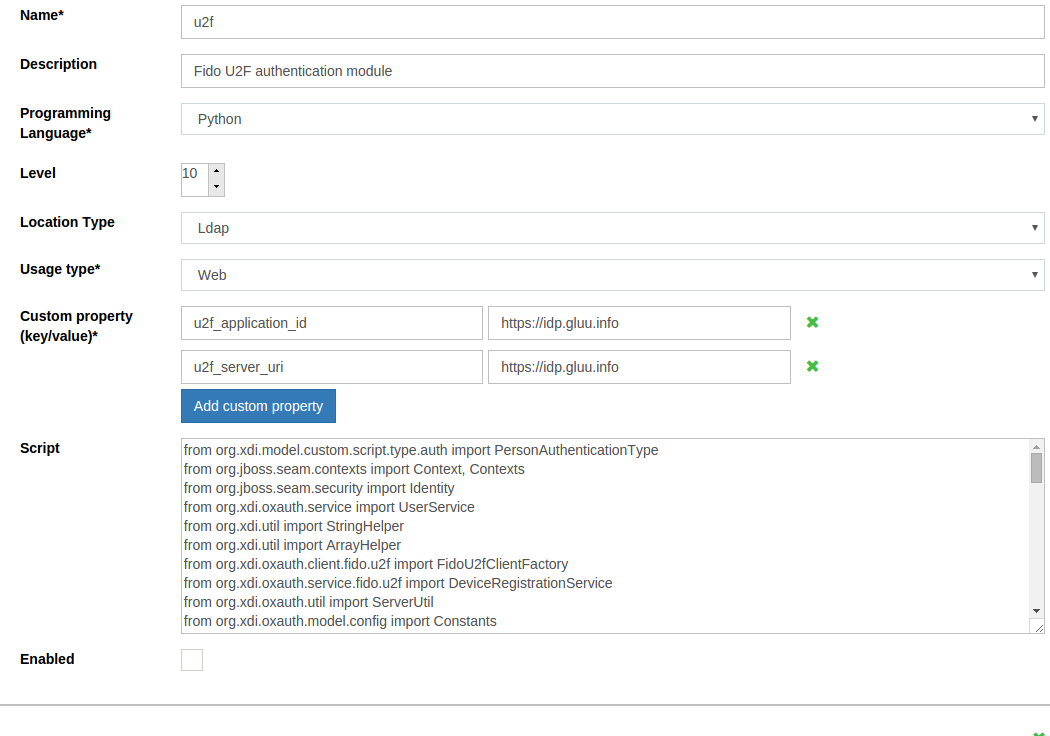
Properties#
The script has the following properties
| Property | Description | Example |
|---|---|---|
| u2f_application_id | URL of the application | https://idp.gluu.info |
| u2f_server_uri | DNS/URL of the oxauth/u2f server | https://idp.gluu.info |
| u2f_server_metadata_uri | URL of the u2f server metadata | https://idp.gluu.info |
Configure U2F#
Follow the steps below to configure the U2F module in the oxTrust Admin GUI.
-
Navigate to
Configuration>Manage Custom Scripts. -
Click on the
Person Authenticationtab

-
Find the U2F script
-
Enable the script by ticking the check box

-
Click
Update
Now U2F is an available authentication mechanism for your Gluu Server. This means that, using OpenID Connect acr_values, applications can now request U2F authentication for users.
Note
To make sure U2F has been enabled successfully, you can check your Gluu Server's OpenID Connect
configuration by navigating to the following URL: https://<hostname>/.well-known/openid-configuration.
Find "acr_values_supported": and you should see "u2f".
Make U2F the Default Authentication Mechanism#
Now applications can request U2F authentication, but what if you want to make U2F your default authentication mechanism? You can follow these instructions:
- Navigate to
Configuration>Manage Authentication. - Select the
Default Authentication Methodtab. - In the Default Authentication Method window you will see two options:
Default acrandoxTrust acr.
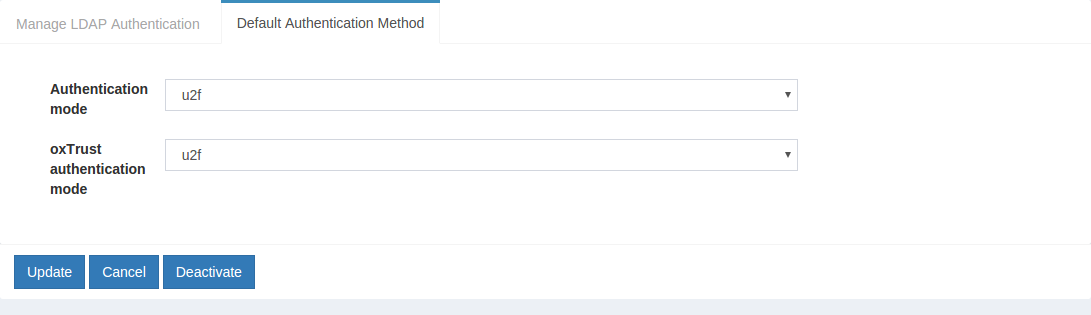
- The
oxTrust acrfield controls the authentication mechanism that is presented to access the oxTrust dashboard GUI (the application you are in). - The
Default acrfield controls the default authentication mechanism that is presented to users from all applications that leverage your Gluu Server for authentication.
You can change one or both fields to U2F authentication as you see fit. If you want U2F to be the default authentication mechanism for access to oxTrust (the admin portal) and all other applications that leverage your Gluu Server, change both fields to U2F.
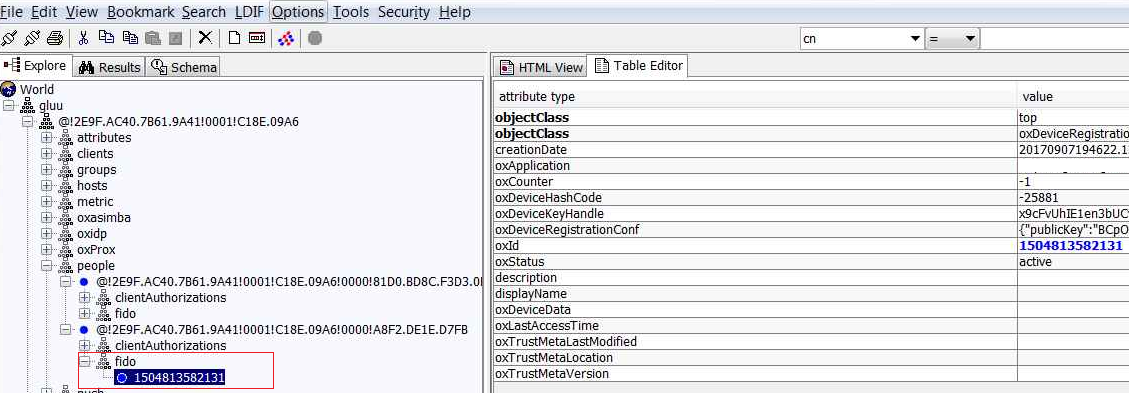
FIDO entries in LDAP#
Entries of FIDO U2F can be found in LDAP under the user section as in the below. You can use your preferred LDAP browser to view the entries.
FIDO Discovery Endpoint#
Your Gluu Server FIDO discovery endpoint can be found at https://<hostname>/.well-known/fido-u2f-configuration
FIDO SCIM APIs#
The SCIM standard is concerned with two classes of resources, namely, users and groups. However, according to spec, the service can be extended to add new resource types. The Gluu Server implementation of SCIM contains a resource type called "Fido device".
FIDO devices#
A FIDO device represents a user credential stored in the Gluu Server LDAP that is compliant with the FIDO standards. These devices are used for strong authentication.
Including FIDO devices as a resource type will allow application developers to query, update and delete a users existing FIDO devices. Adding devices does not take place through the service though since this process requires direct end-user interaction, i.e. device enrollment.
The following is a summary of features of a FIDO Device SCIM resource:
- Schema urn:
urn:ietf:params:scim:schemas:core:2.0:FidoDevice - Name of resource:
FidoDevice - Endpoint URL (relative to base URL of service):
/scim/v2/FidoDevices - Device attributes: Attributes pertaining to this resource type are listed by visiting the URL
https://<host-name>/identity/restv1/scim/v2/Schemas/urn:ietf:params:scim:schemas:core:2.0:FidoDevice.
Currently the service supports:
* Device search and retrieval (via GET and POST)
* Single device update via PUT
* Single device deletion via DELETE
Example: querying enrolled Super Gluu devices#
Say we are interested in having a list of iOS supergluu devices a user has enrolled. In a setting of test mode, we may issue a query like this:
curl -G -H 'Authorization: Bearer ...access token...' --data-urlencode 'filter=deviceData co "ios"' -d count=10 -o output.json https://<host-name>/identity/seam/resource/restv1/scim/v2/FidoDevices/
Your result list might look like:
{
  "totalResults": ...,
  "itemsPerPage": ...,
  "startIndex": 1,
  "schemas": [
    "urn:ietf:params:scim:api:messages:2.0:ListResponse"
  ],
  "Resources": [
    {
      "id": "...",
      "meta": {...},
      "schemas": ["urn:ietf:params:scim:schemas:core:2.0:FidoDevice"],
      "userId": "...",
      ...
      "deviceData": "{\"uuid\":\"ABC123\", \"type\":\"iPhone\", \"platform\":\"ios\", \"name\":\"Someone's iPhone\", \"os_name\":\"iOS\", \"os_version\":\"10.0.1\"}",
      "displayName": ...,
    }
  ]
}