Deploying a Gluu Cluster#
Follow this doc to deploy a cluster of Gluu Servers using Cluster Manager!
Getting Started#
Note
Cluster Manager must be accessed in Chrome or Firefox.
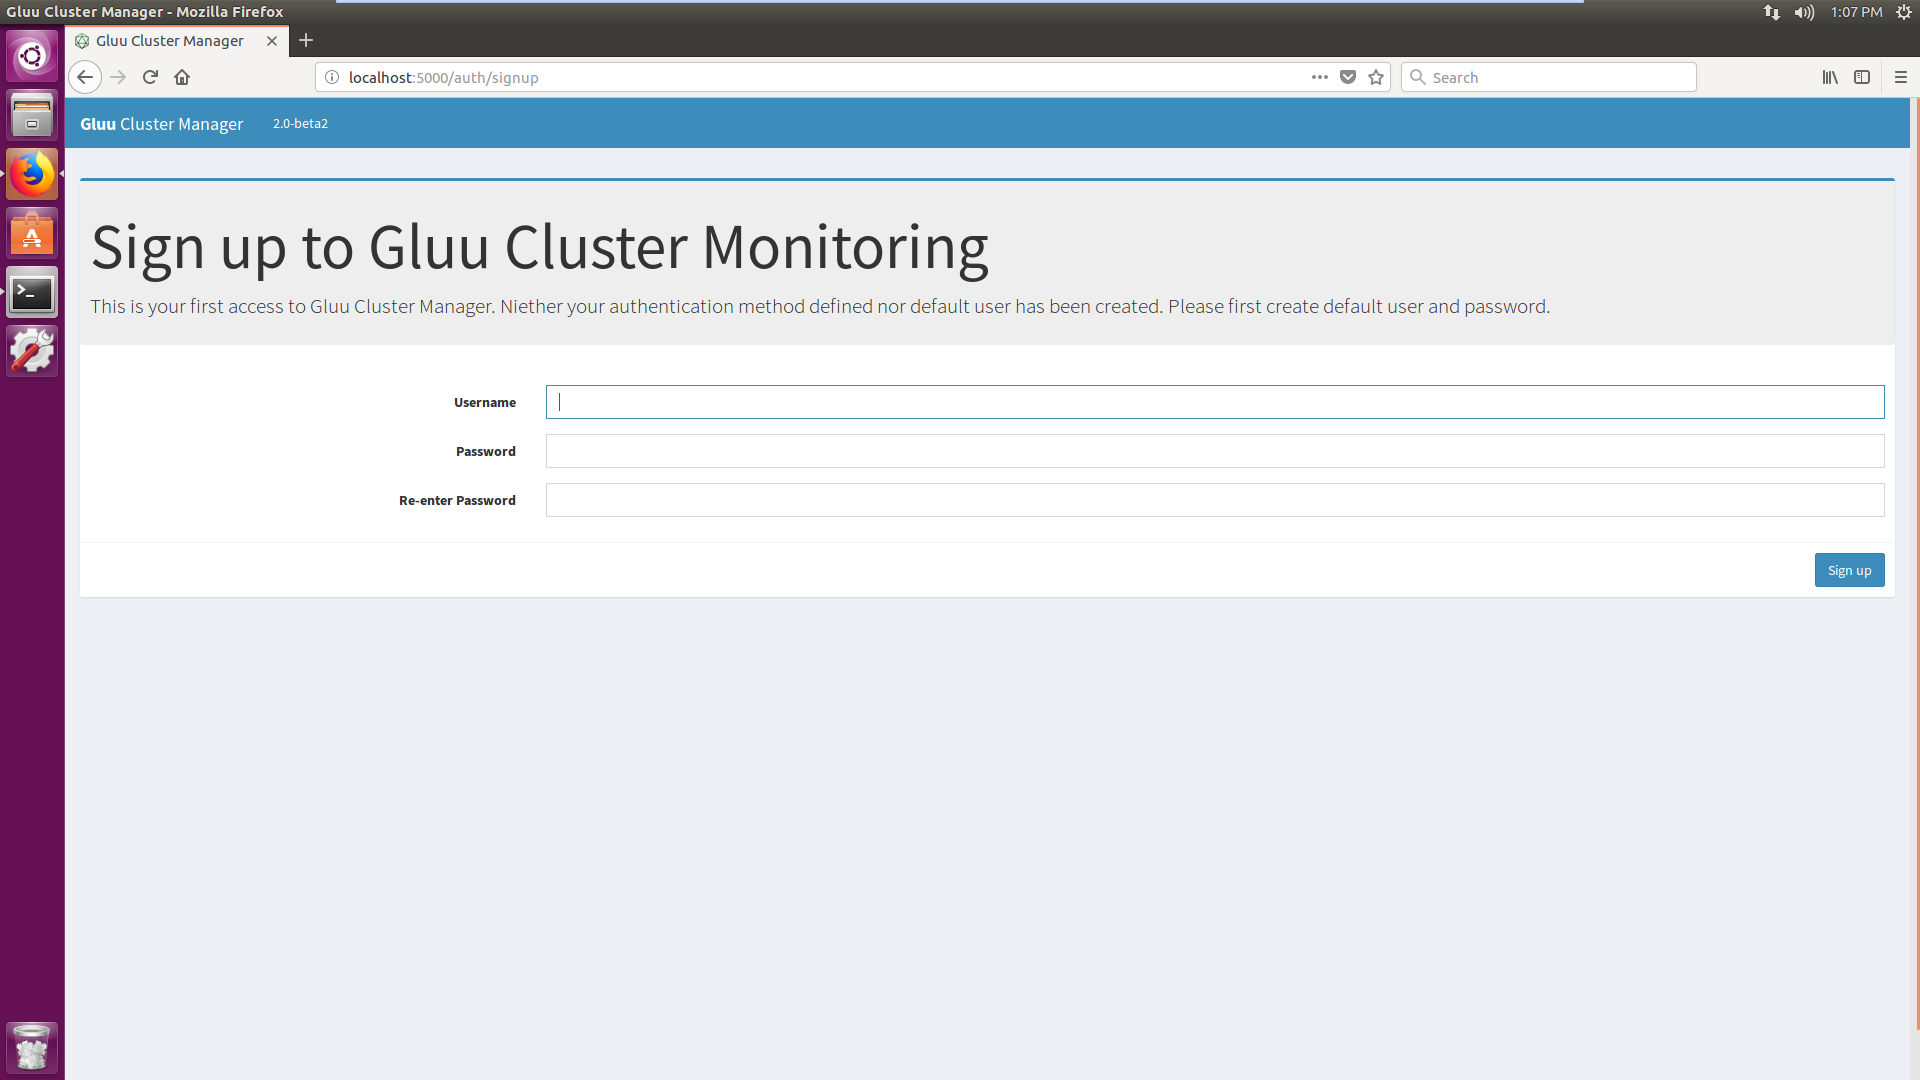
Upon initial launch of Cluster Manager, the following screen will be presented to create an admin username and password:
After the administrator is created, start the process of building a cluster by clicking the Setup Cluster button:
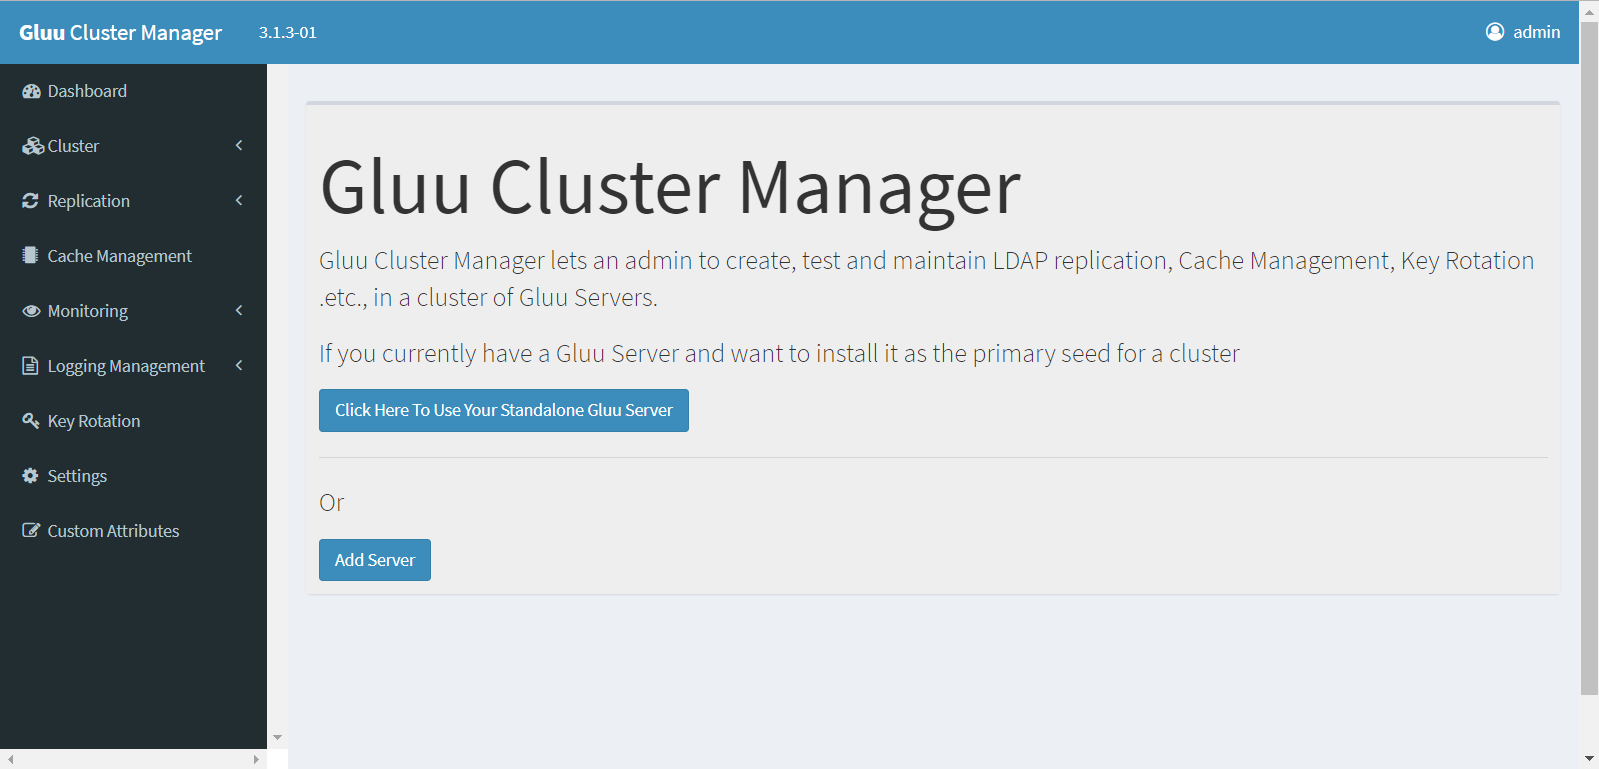
The two options are Click Here To Use Your Standalone Gluu Server and Create a New Gluu Server Cluster.
Click Here To Use Your Standalone Gluu Server:#
This method is used to take a standalone Gluu Server deployment and prepare it for clustering. This is achieved by changing the hostname of the Gluu Server to that of the load-balancing server, which will act as a front-end proxy between all the Gluu Server nodes. From there, it will use the standalone server as your seed for each new server added.
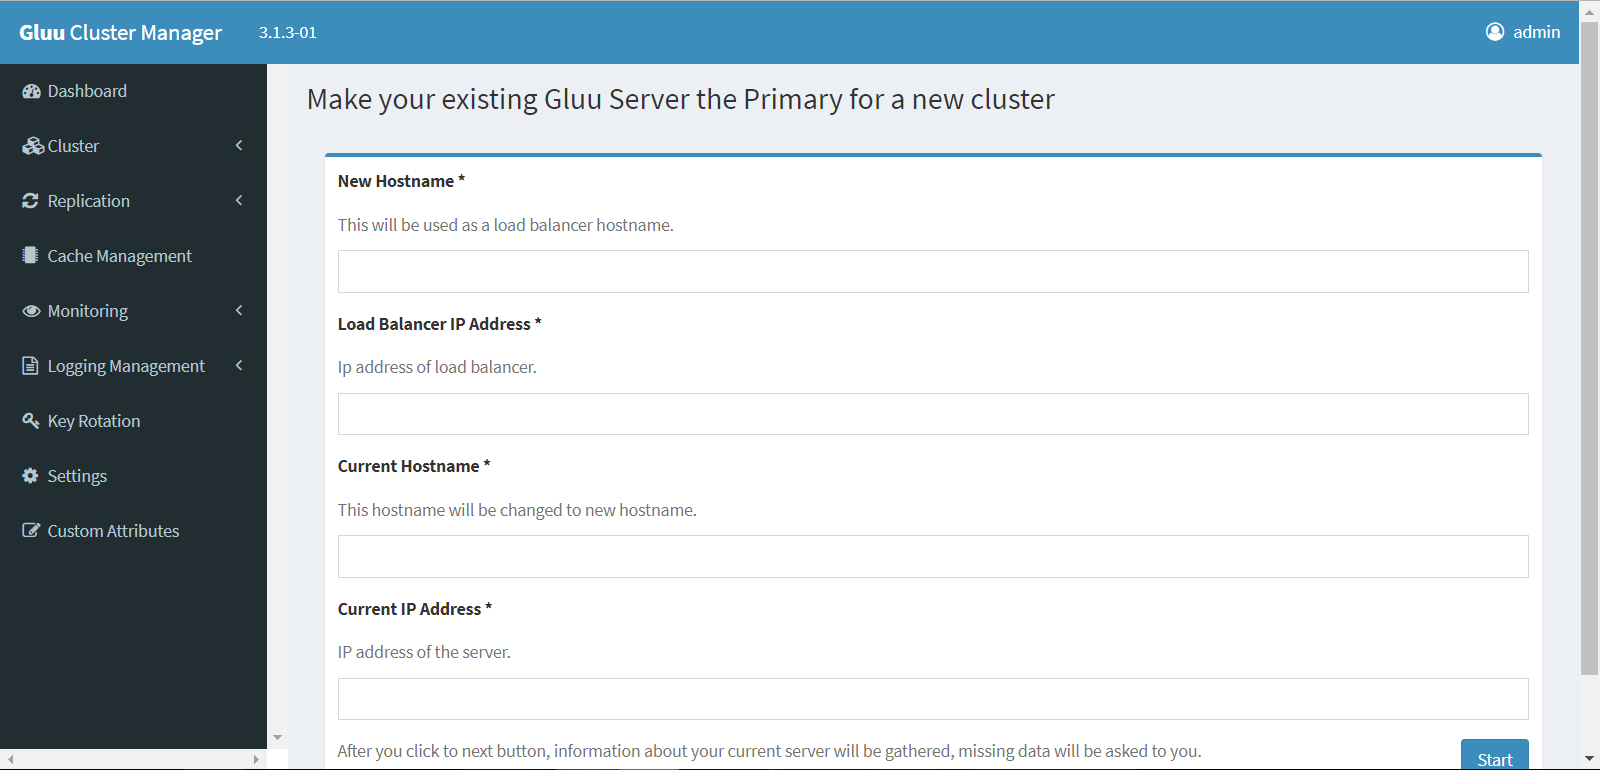
After it's finished, click the Start button to move on to the dashboard.
Create a New Gluu Server Cluster:#
-
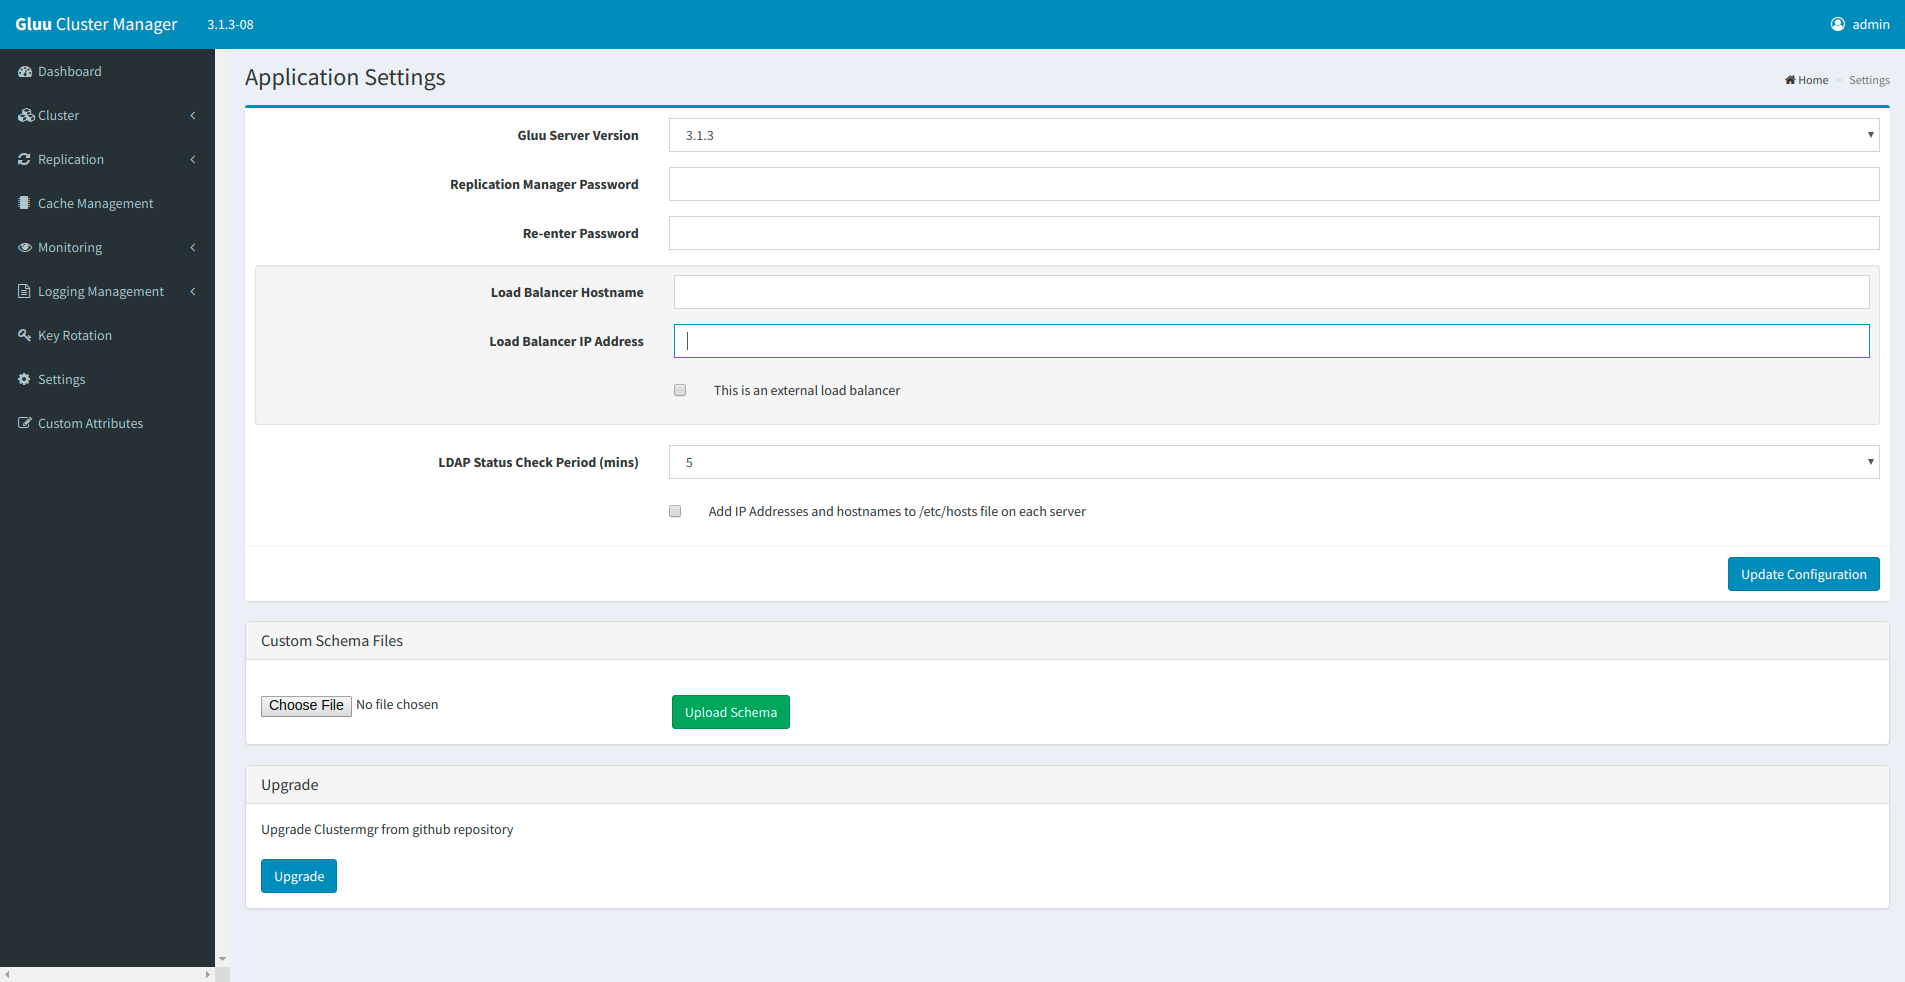
Replication Manager Passwordwill be used in OpenDJ for replication purposes. You generally won't use this password ever, as OpenDJ replication is handled automatically, but it's useful to have on hand, for operations and maintenance. It can be the same as the LDAP password -
Load Balancer Hostnamewill be the hostname of either the NGINX proxy server, or any other load balancing server in use for the cluster. Check theThis is an external load balancerbox if you are using an external load balancer like Amazon ELB or F5 -
This is an external load balancerwill remove the requirement for an IP address and you will only need to use a hostname here. There will be additional options here for caching;Cache Proxy HostnameandCache Proxy IP Address. You will need to either use a cache proxy server specifically for twemproxy to handle the multiple redis servers you deploy, or you can use a redis-cluster. Cluster Manager will automatically install a twemproxy and redis-server cache configuration for you, with Stunnel protecting communication. Using redis-cluster requires some manual configuration on your end. -
Cache Proxy Hostnamewill be the hostname of the server you'll be using to proxy TCP traffic for redis. This is necessary as the redis cache data needs to be sharded and twemproxy detects redis-server failure. If you're deploying a redis-cluster configuration, you can enter some fake information here, as you'll be skipping theCache Managementprocess later.
If you want to demo redis-cluster, please read this wiki first to fully understand how the implementation of redis-cluster works and if it is a fit for your operational requirements. If you still want to use it, then follow the instructions on this cluster manager wiki to help implement this function.
Warning
The load balancer hostname cannot be changed easily after Gluu Server has been deployed. Please follow these instructions for every Gluu Server in your cluster if you must change the hostname.
-
LDAP Status Check Period (mins)is how often you would like Cluster Manager to ping the LDAP server for liveness, as can be seen in the Dashboard and Replication menus. -
If any servers do not have Fully Qualified Domain Names (FQDNs), enable the
Add IP Addresses and hostnames to /etc/hosts file on each serveroption. This will automatically assign hostnames to IP addresses in the/etc/hostsfiles inside and outside the Gluu chroot -
Custom Schema Filescan be added here as well. -
Upgradewill automatically upgrade your Cluster Manager instance to the latest version. This requires you restart the instance withclustermgr-cli restart. Alternatively this can be done manually withpip install clustermgrand restarting Cluster Managerclustermgr-cli restart.
Once the settings are configured, click the Update Configuration button.
A successful configuration will prompt you Gluu Replication Manager application configuration has been updated. at the top of the screen.
Now we should navigate to the Dashboard so we can add our Gluu Servers and prepare to connect them.
Click Add Server
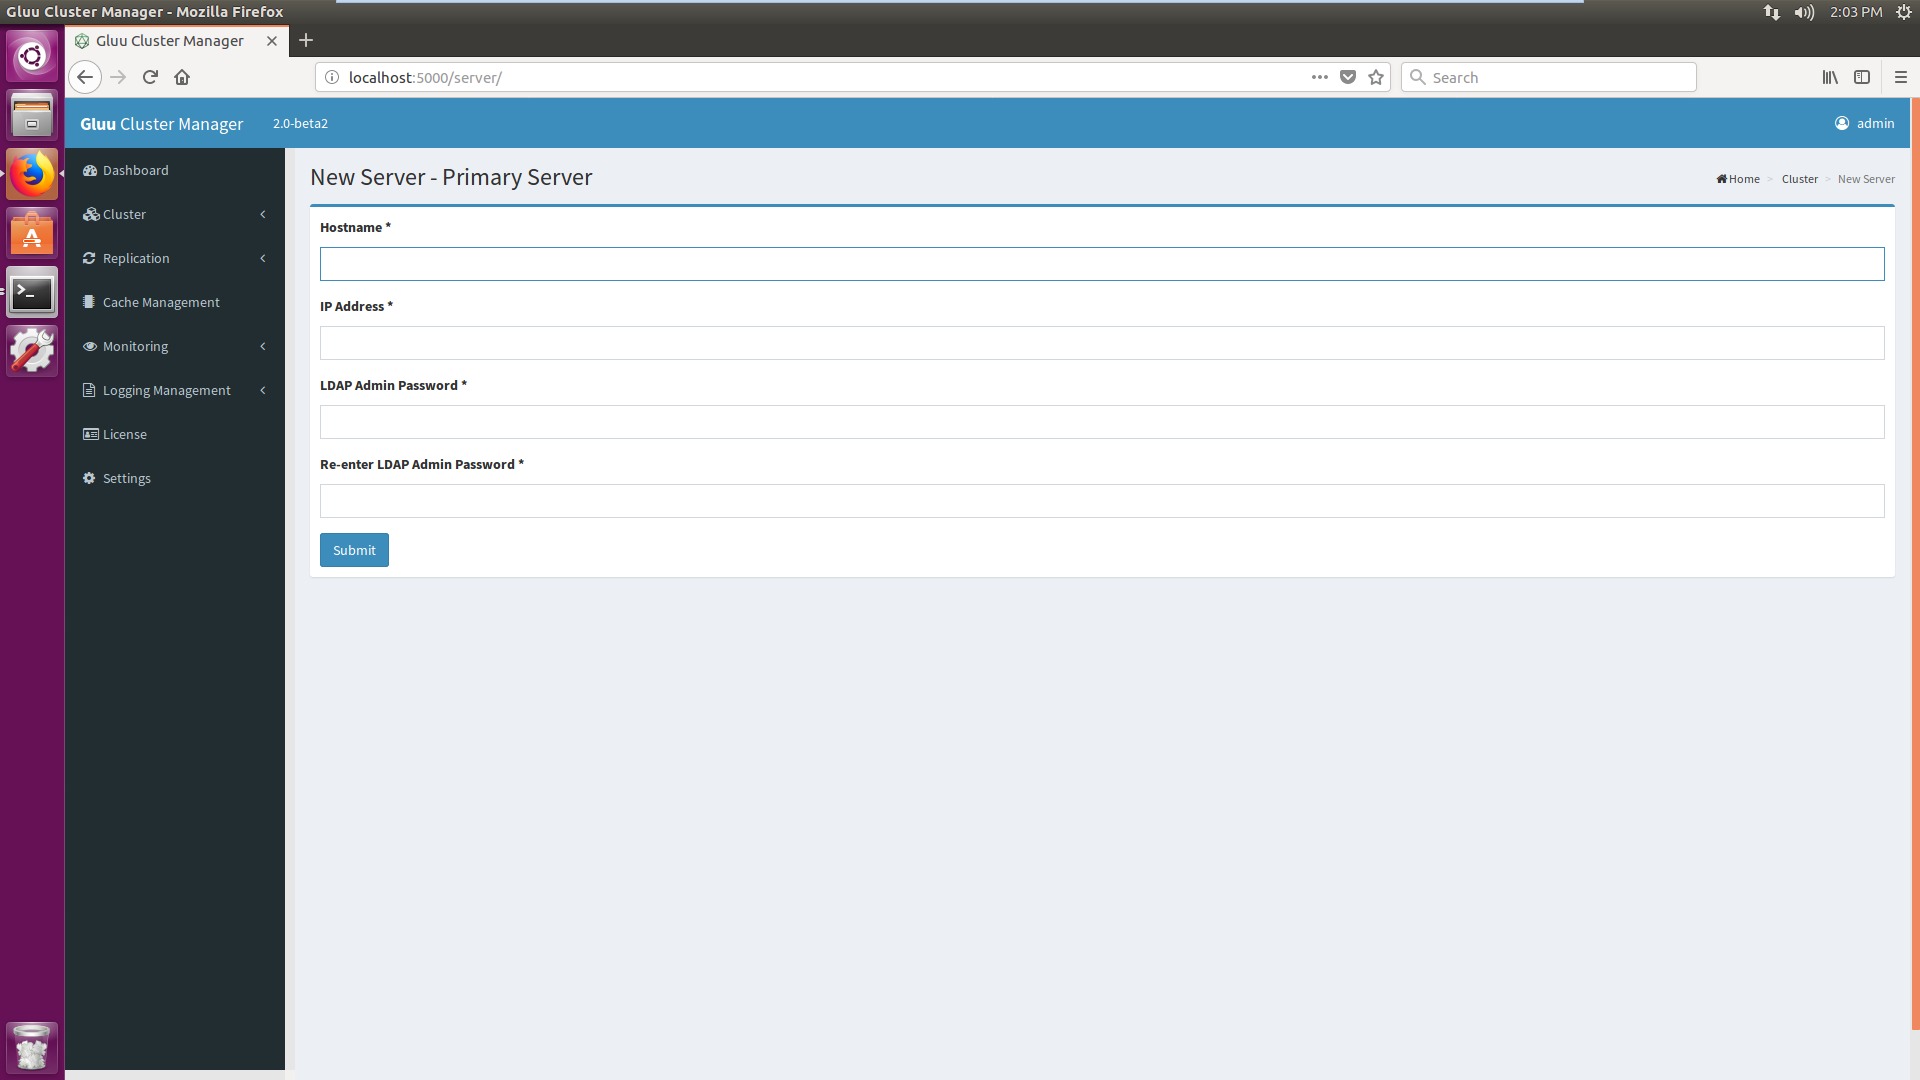
The following screen is used to add the Primary Server, which will be used as a "seed" by other nodes to pull their Gluu configuration and certificates. After deployment, all servers will function in a Master-Master configuration.
Note
Hostname here will be the actual hostname of the server, not the hostname of the NGINX/Proxy server. This is so that Cluster Manager can discover and connect to the server for installation and configuration. If the Add IP Addresses and Hostnames to/etc/hosts file on each server option was enabled in the Settings menu, the hostname here will be embedded automatically in the /etc/hosts files on this machine.
Click Submit to get routed to the Dashboard.
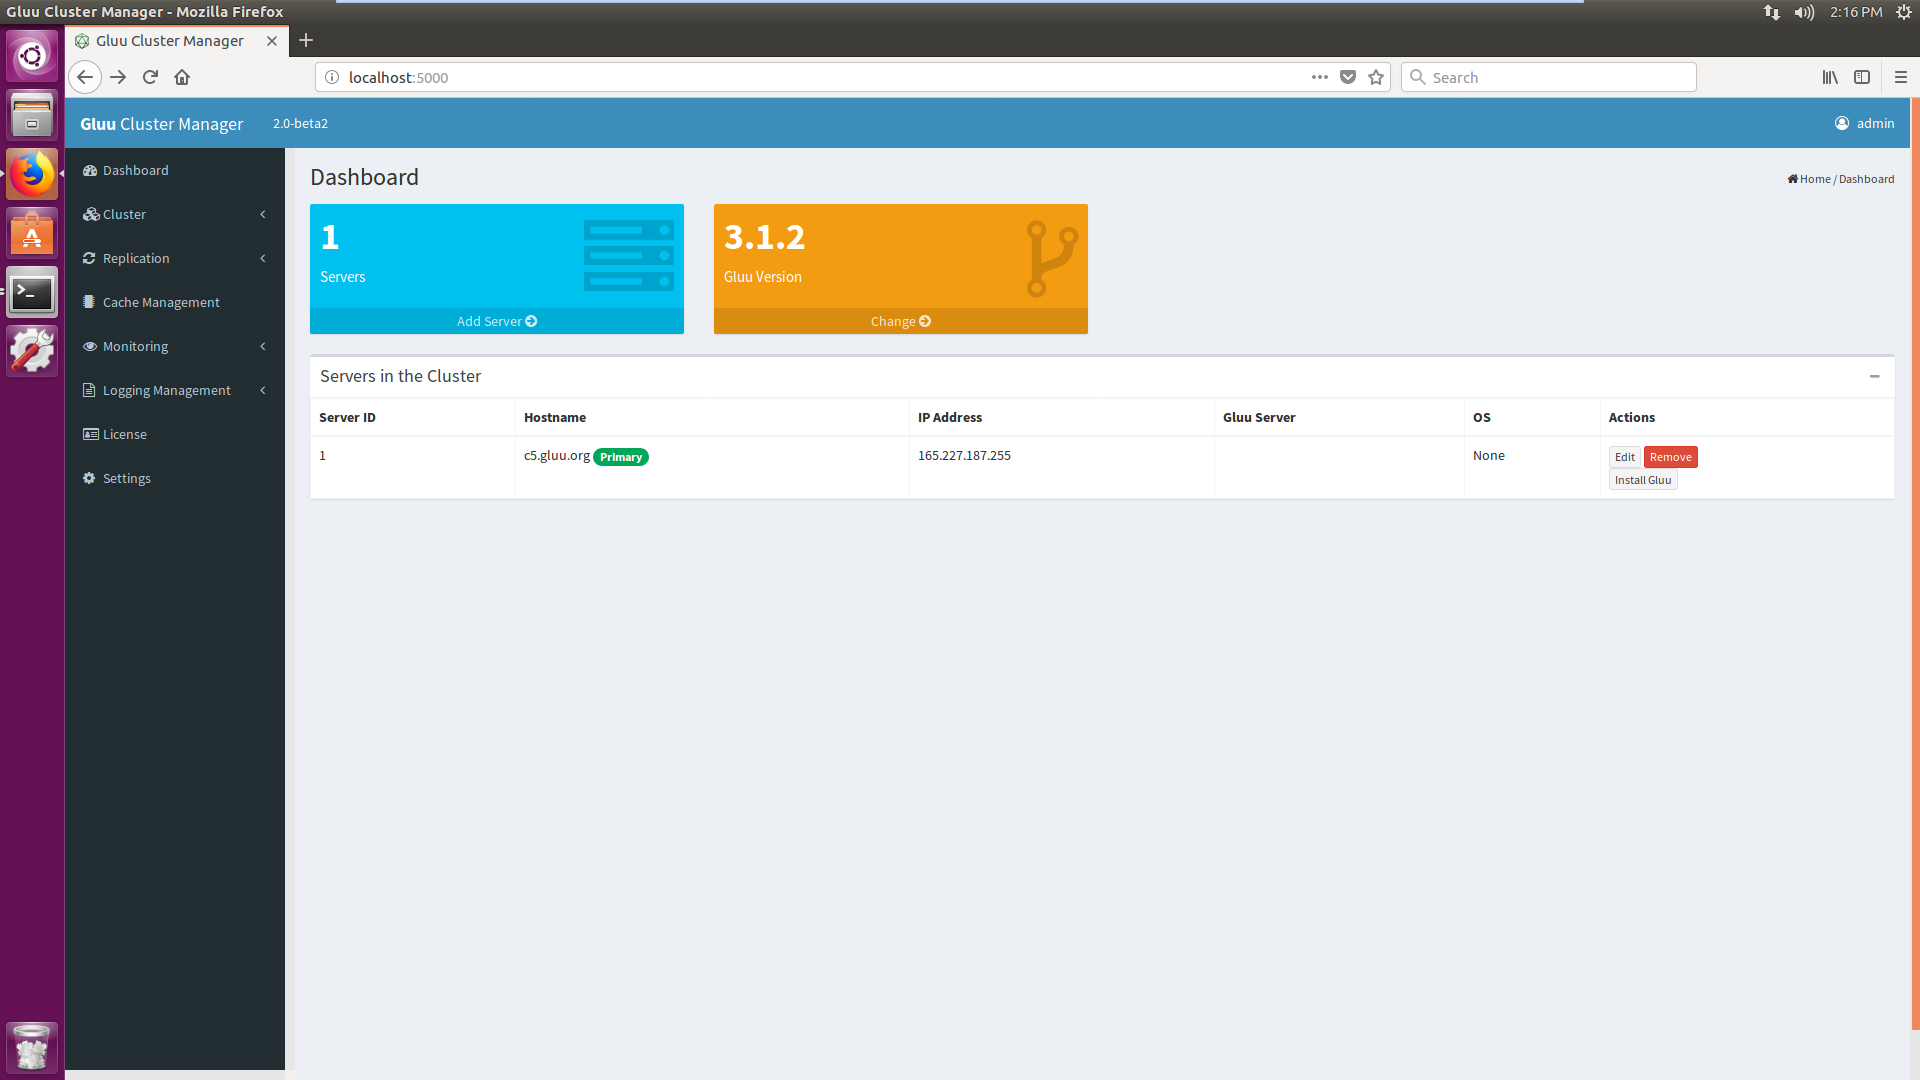
The Dashboard lists all servers in the cluster and provides the ability to add more servers, edit hostnames and IP addresses, and install Gluu automatically.
Click the Add Server button to add another node.
Note
The admin password set in the Primary Server is the same for all the servers.
Once all servers have been added to the cluster, Install Gluu on the Primary Server.

- The values for the first five fields are used to create certificates
- Next, select which modules should be installed. The default Gluu components are pre-selected. For more information on each component, see the Gluu docs
- Currently only OpenDJ is supported in Cluster Manager. This is pre-selected
- Accept the license agreements if you agree to the terms
Click Submit to begin installation.

Note
This may take some time, so please be patient.
Once completed, repeat the process for the other servers in the cluster.
When all the installations have completed, and you're not using your own loadbalancer, you should install NGINX:
- Navigate to
Clusterin the left menu - Select
Install Nginx
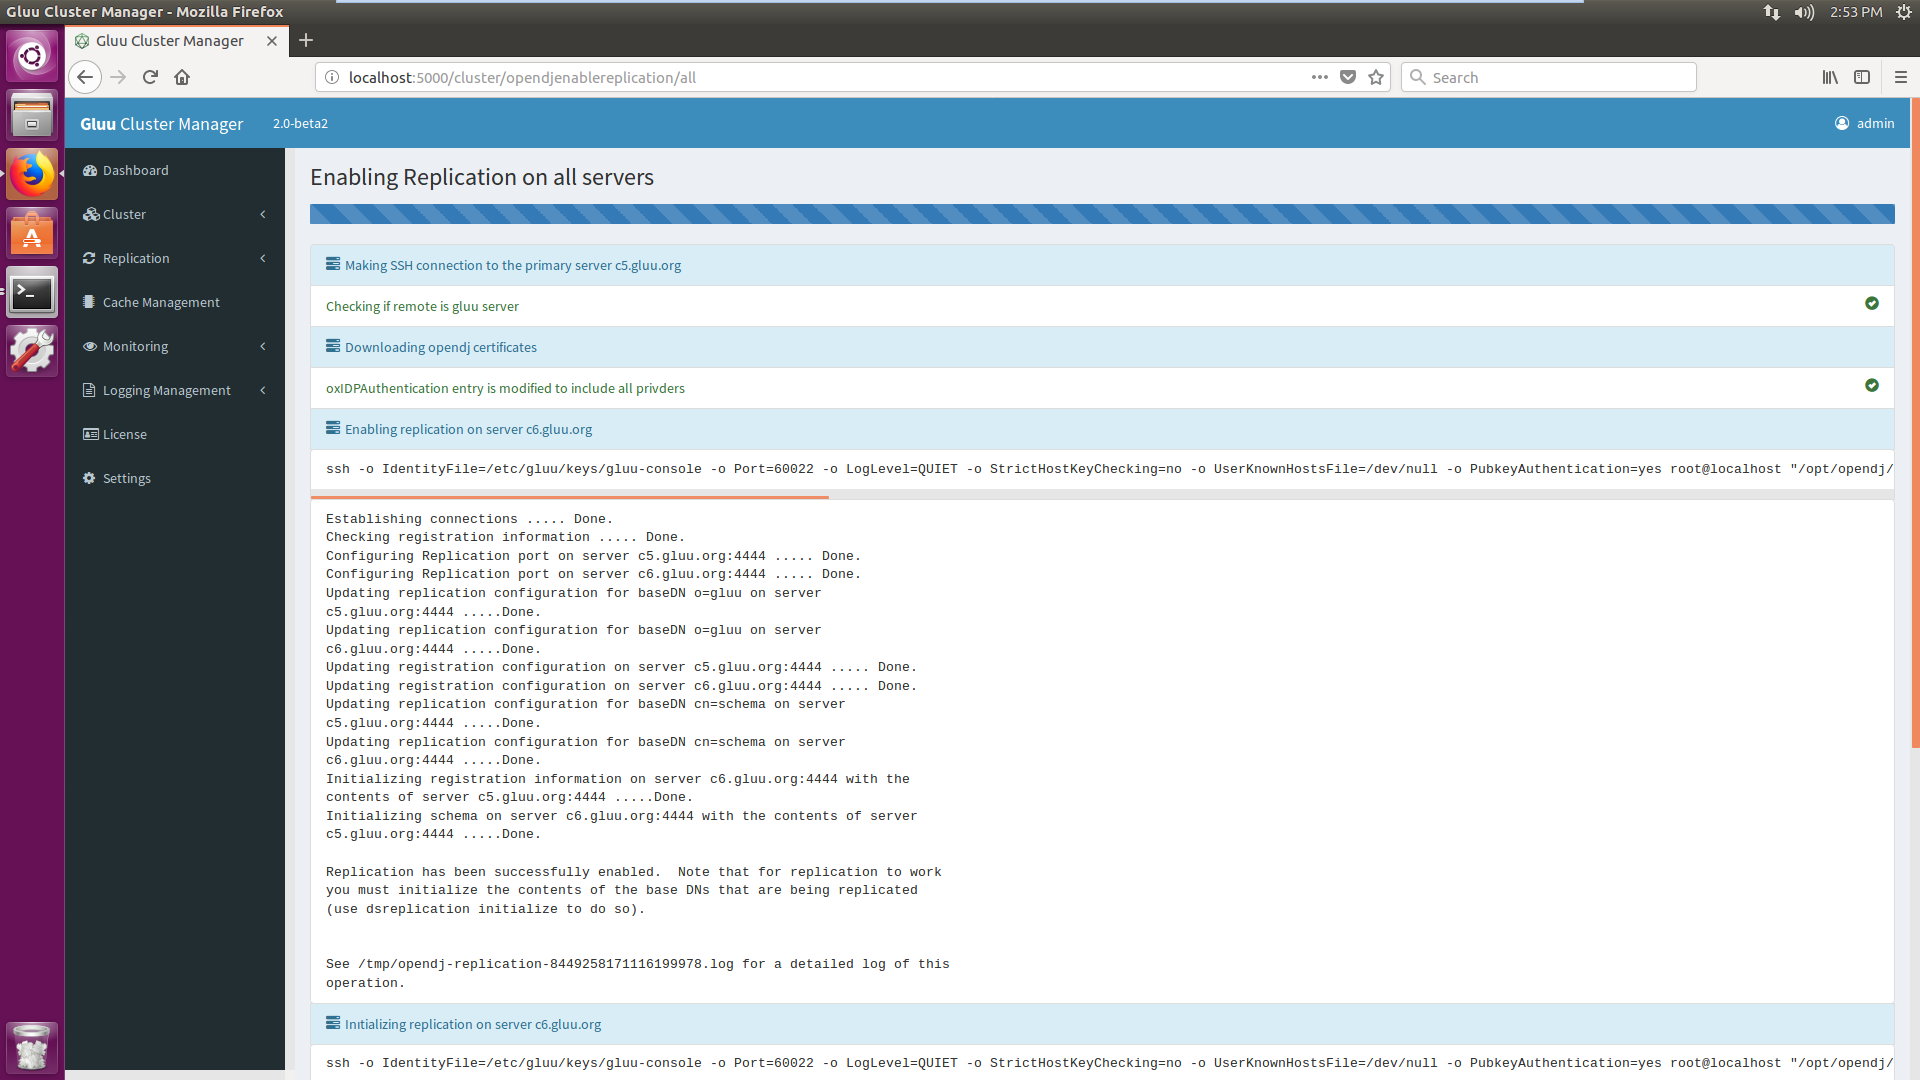
Finally, the LDAP Replication screen will appear, where LDAP replication can be enabled and disabled.
During initial deloyment click the Deploy All button and wait for the process to finish.
External Load-balancers#
Load balancing Gluu Server is relatively easy, there are some caveats with how connections should be made. Please refer to the Nginx template for reference on how to properly route paths. For default functionality you should use the following as guidance:
-
/should redirect to/identity -
/identity,/passportand/idprequire sticky sessions. You can see this in the Nginx template as denoted by the ip_hash.
There is further explanation about sticky sessions for F5 here and AWS ELB [0][1][2]. We also have documentation on how to deploy an AWS Application Load Balancer in front of a cluster: Configure AWS Load Balancer.
/oxauthis stateless unless you're using SCIM, wherein it will need sticky sessions as mentioned above.
All the necessary paths are as follows:
- /
- /.well-known
- /oxauth
- /identity
- /passport
- /idp
Replication#
Next navigate to the Replication tab to set up replication across the cluster.
Click the deploy all button to enable LDAP replication between all the nodes in your cluster.
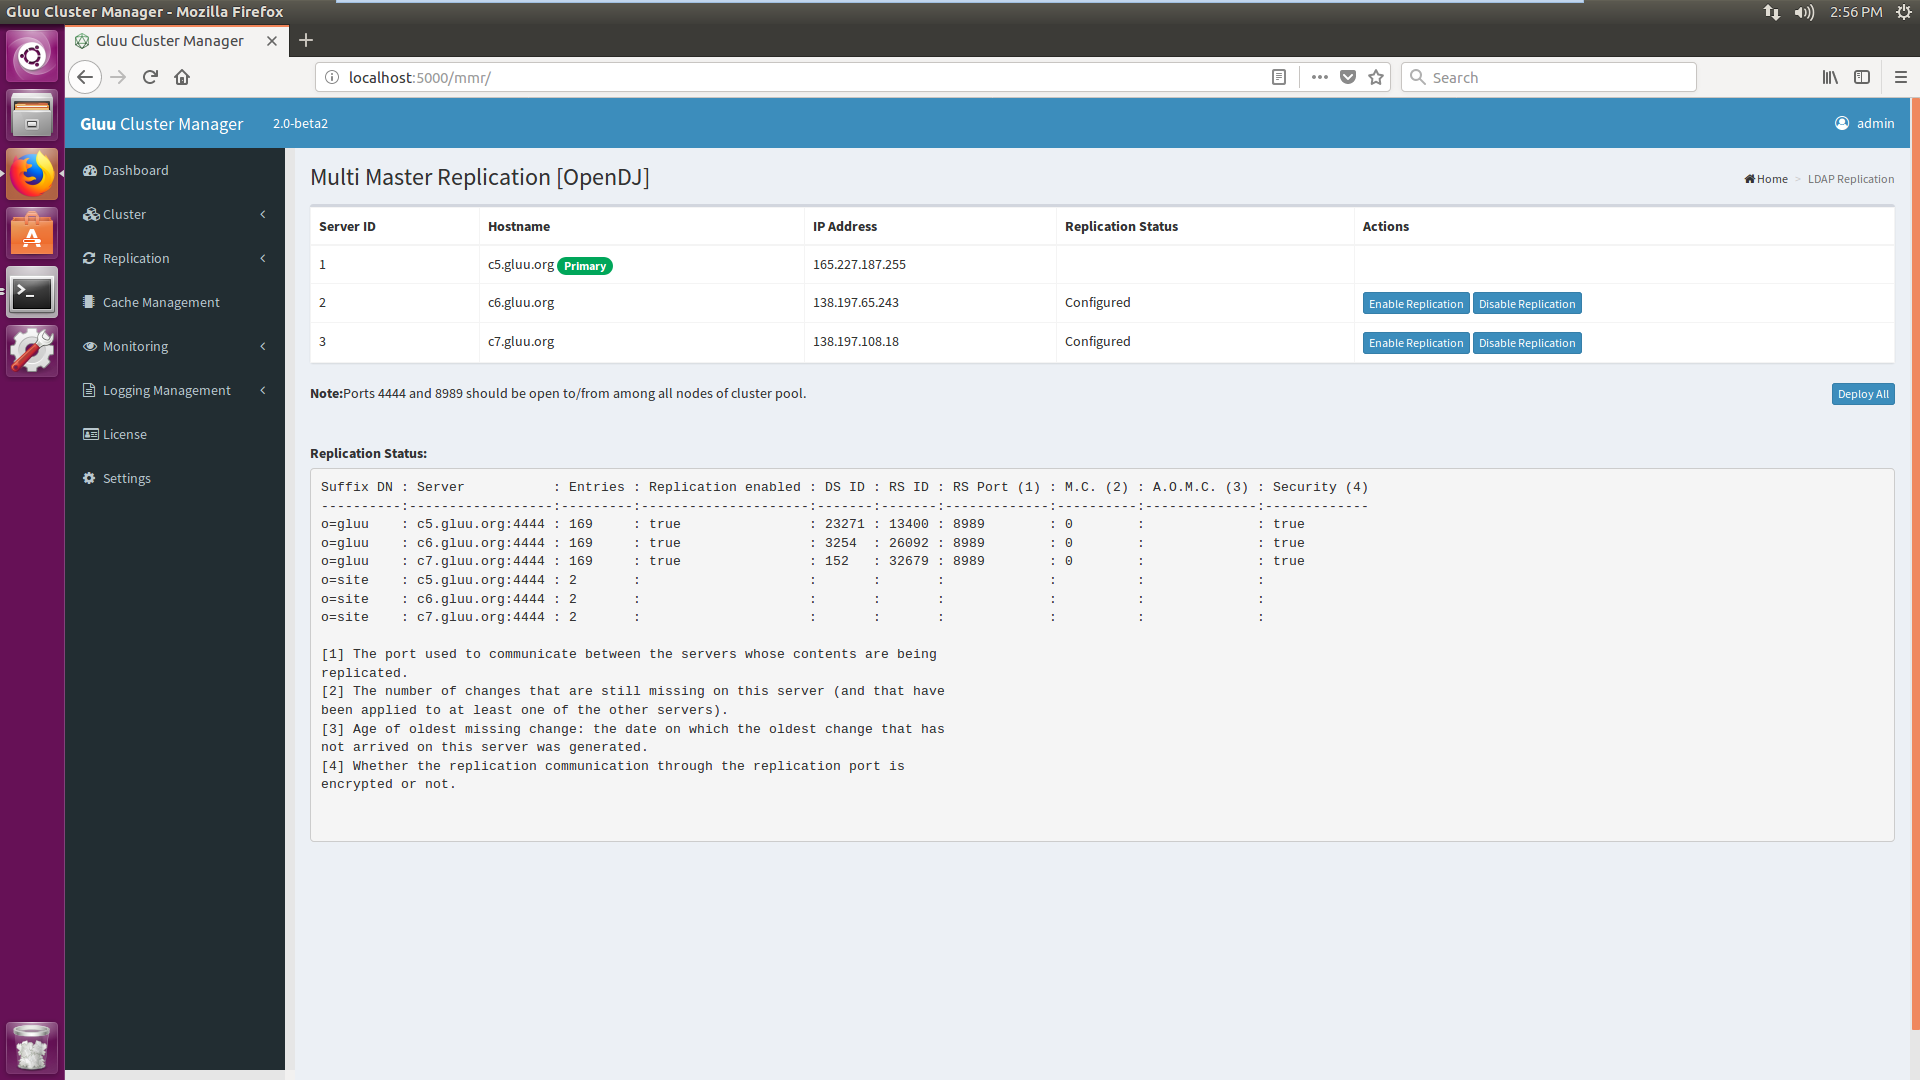
After configuring OpenDJ replication for the first time, this page will display replication status and other replication information.
If using Shibboleth, enable file system replication by clicking Replication on the left menu and selecting File system Replication. Click Install File System Replication to install and configure Csync2 and replicate necessary configuration files.
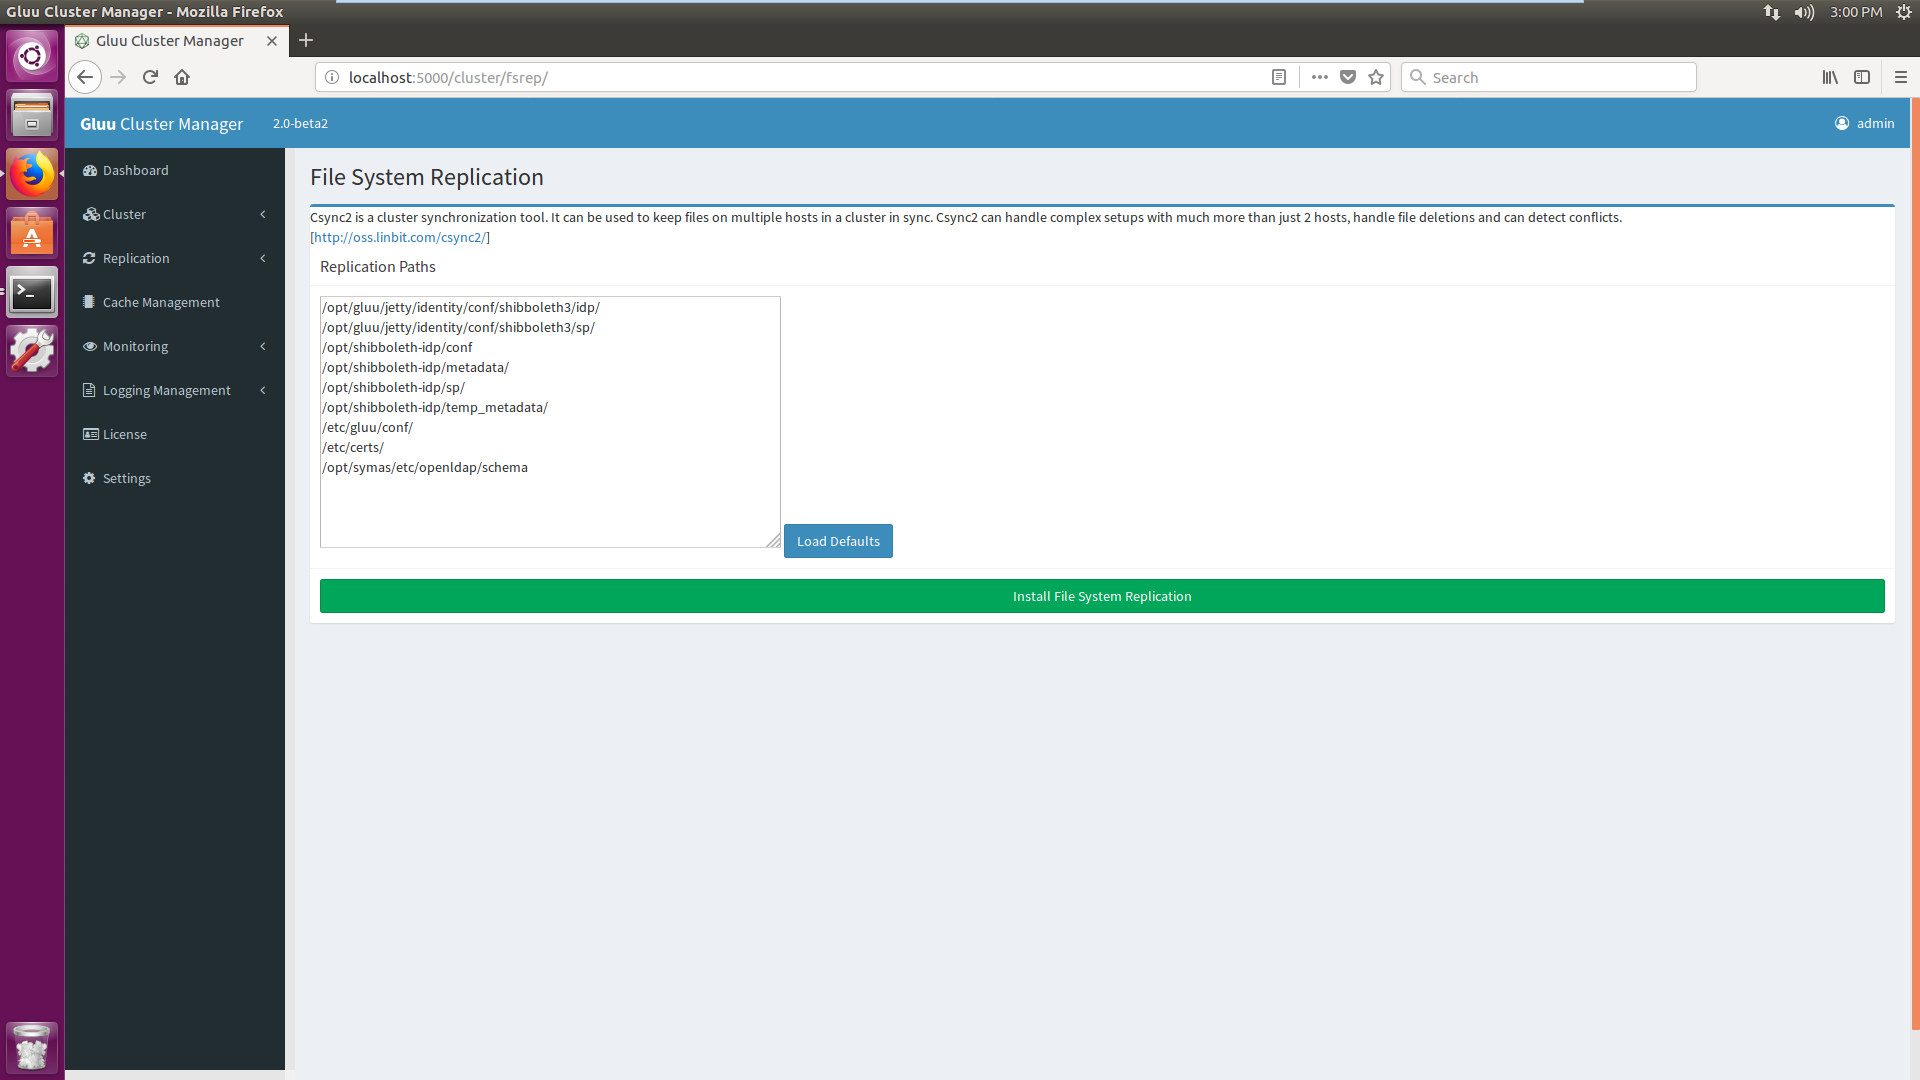
Note
If necessary, replication paths for other file systems can be added here as well. Be careful as this may lead to unexpected results if you don't know what you're doing.
Warning
Do not try to replicate databases with Csync2.
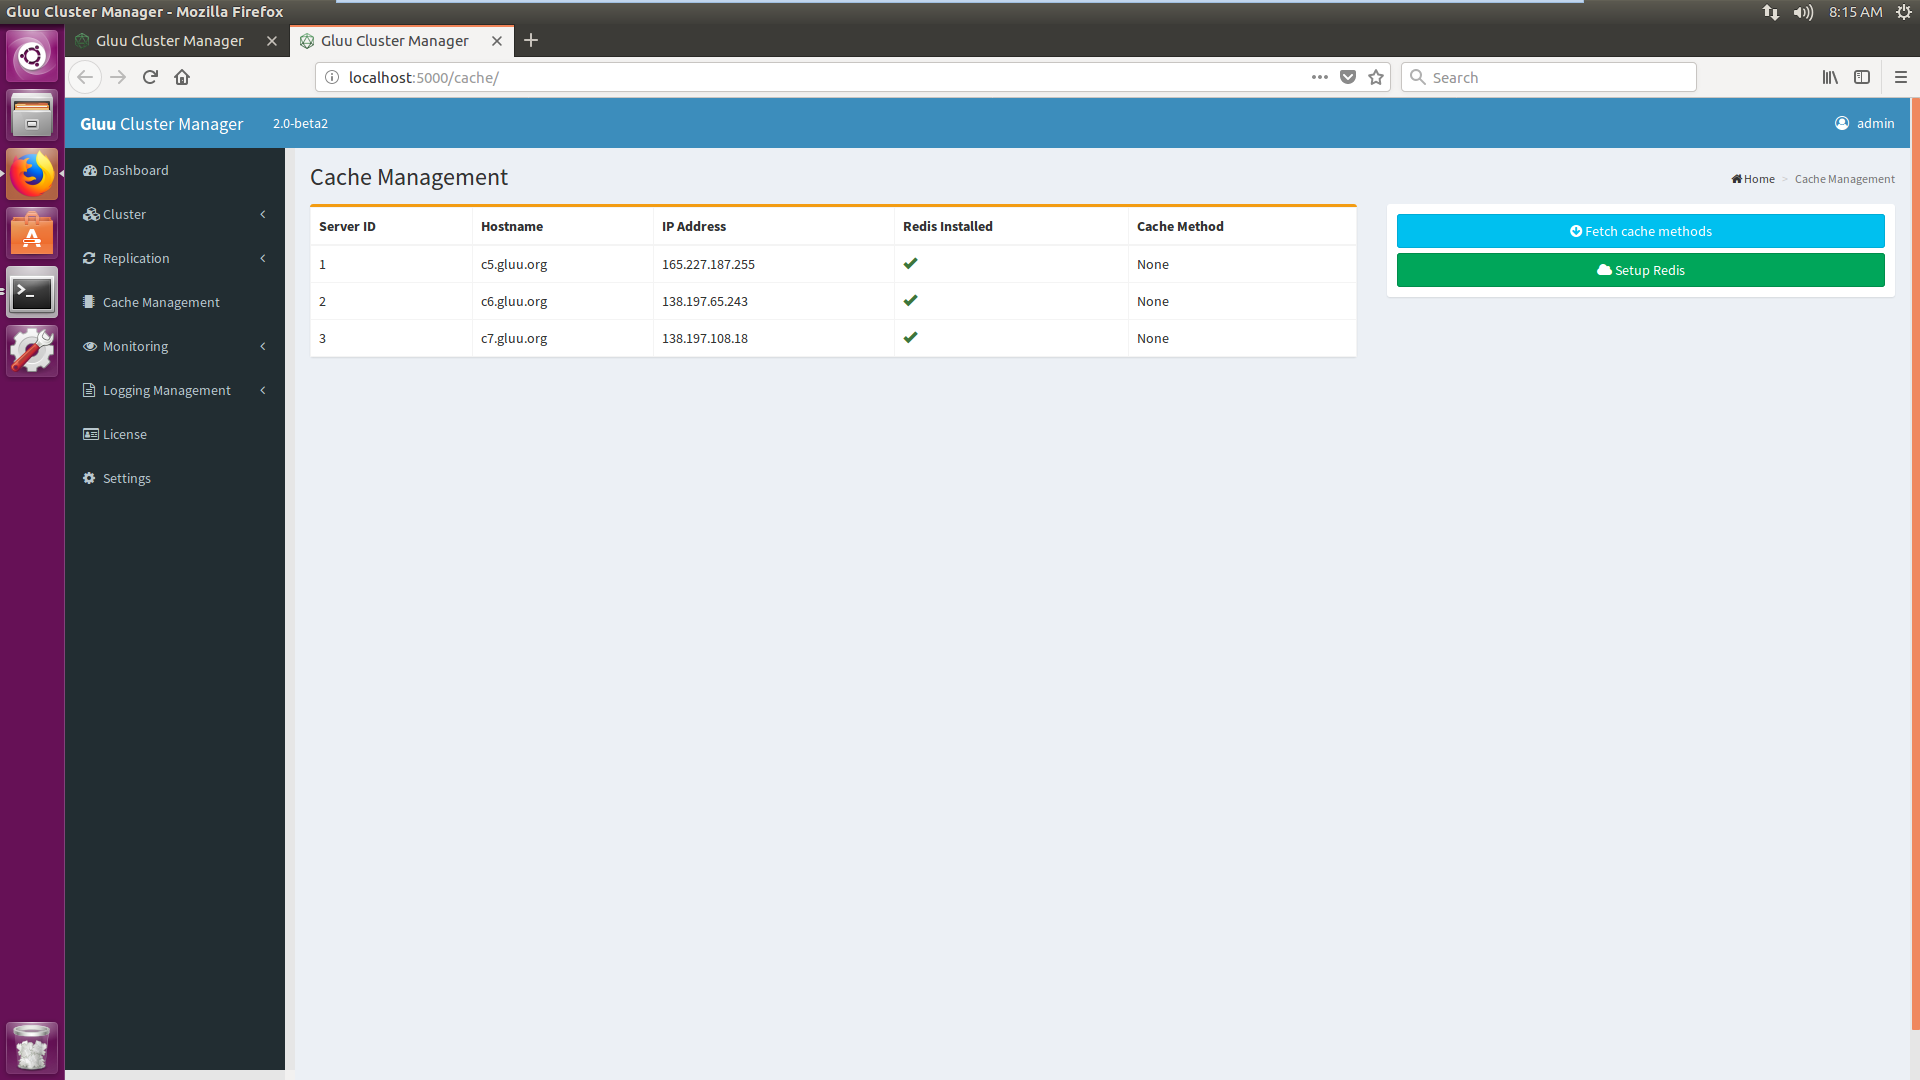
Navigate to Cache Management in the left menu to complete the cluster configuration.
Cache#
Note
This step can be skipped if you're using a redis-cluster configuration.

oxAuth caches short-lived tokens, and in a balanced cluster all instances of oxAuth need access to the cache. To support this requirement and still enable high availability, Redis is installed outside the chroot on every Gluu Server. Configuration settings inside LDAP are also changed to allow access to these instances of Redis.
The Fetch Cache Method button is used to determine whether or not your LDAP is properly configured to utilize Redis or if it's still using IN_MEMORY, which will cause failures. It's not necessary to click, but good to have to make sure everything is configured properly.
Click Setup Redis
Note
Redis does not utilize encrypted communication, so Stunnel is installed and configured on all servers to protect information with SSL/TLS.
Note
Twemproxy is also installed on the NGINX/Proxy server to achieve redundancy. Twemproxy can detect Redis server communication failure to ensure high availability.
Cache configuration settings can be customized per the component configuration documentation and also inside oxTrust.
Once this task is complete, the Gluu Server cluster is fully functional.
Navigate to the hostname of the proxy server provided in the Settings option.
You can also go back to the cache management screen and check the status of Redis and Stunnel.
Monitoring#
Cluster Manager monitors the servers in the cluster to help better understand performance and potential issues.
Note
Cluster Manager must be connected to the cluster in order to take advantage of monitoring features.
Navigate to the Monitoring tab in the left-hand menu to see details about the servers in the cluster.

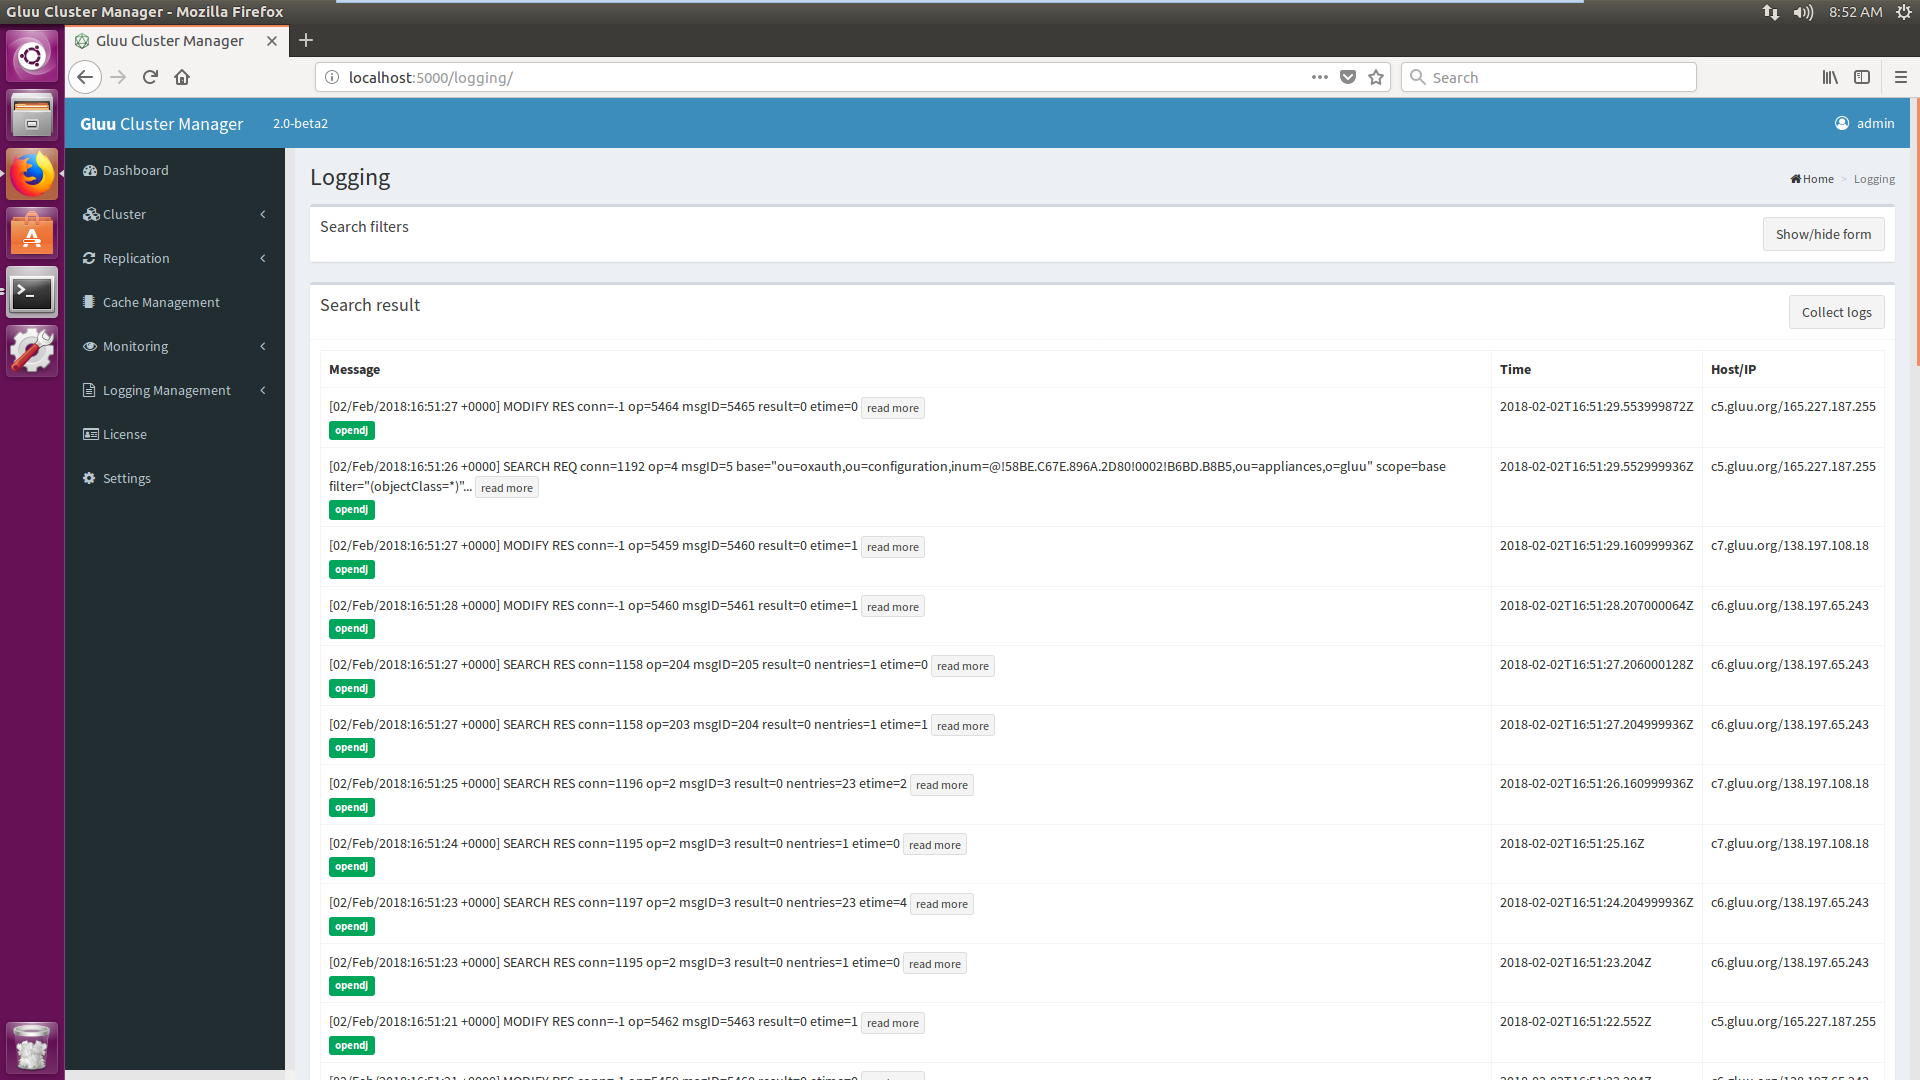
Logging#
Cluster Manager gathers logs from all the nodes in the cluster for troubleshooting. Logs can be sorted by log type (oxAuth, oxTrust, HTTPD[Apache2], OpenDJ and Redis), Host and string search filters for easy sorting.
Note
Cluster Manager must be connected to the cluster in order to take advantage of logging features.
Navigate to the Logging tab in the left-hand menu to view and sort logs related to servers in the cluster.
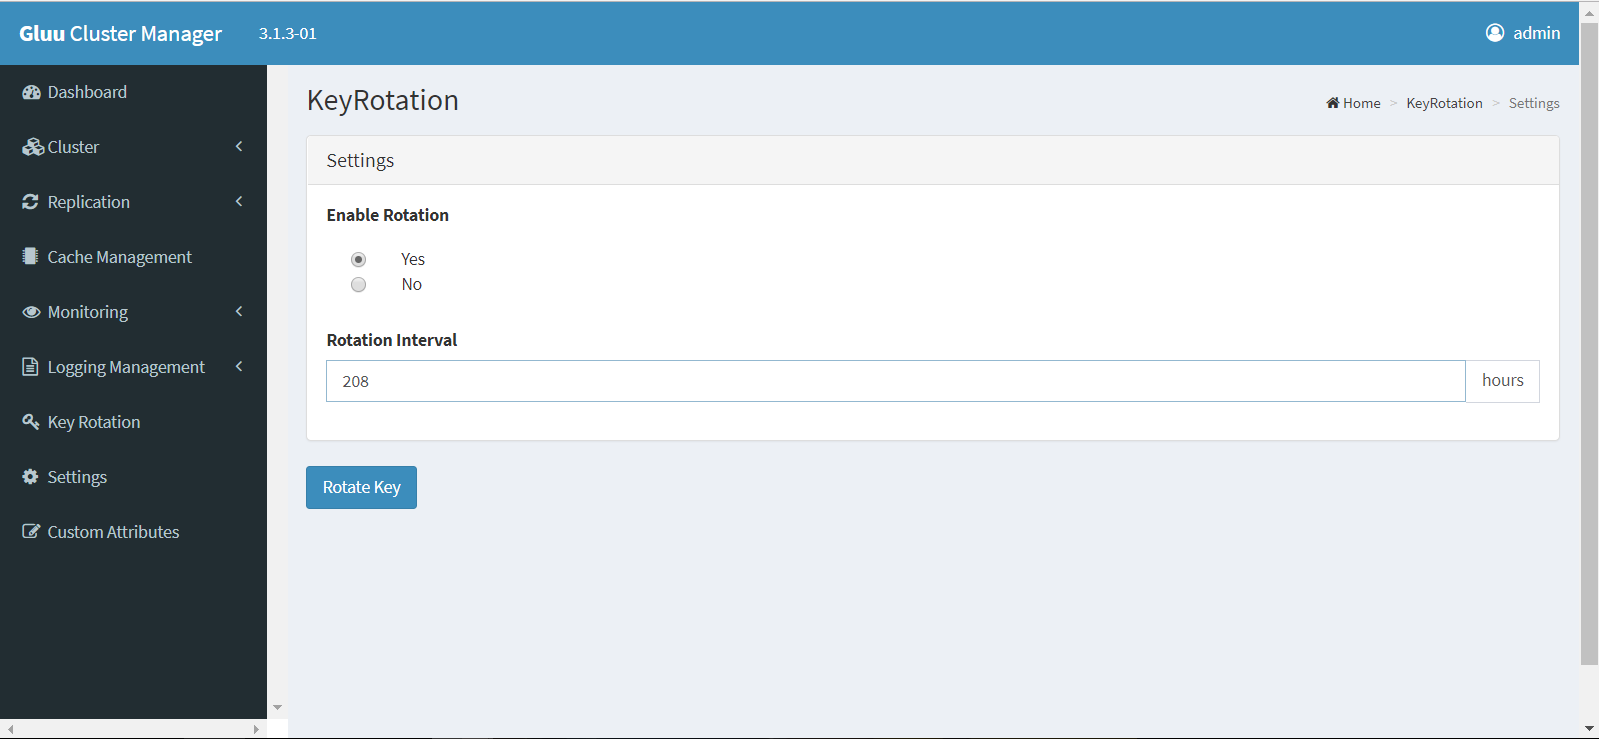
Key Rotation#
Key rotation is important for security.
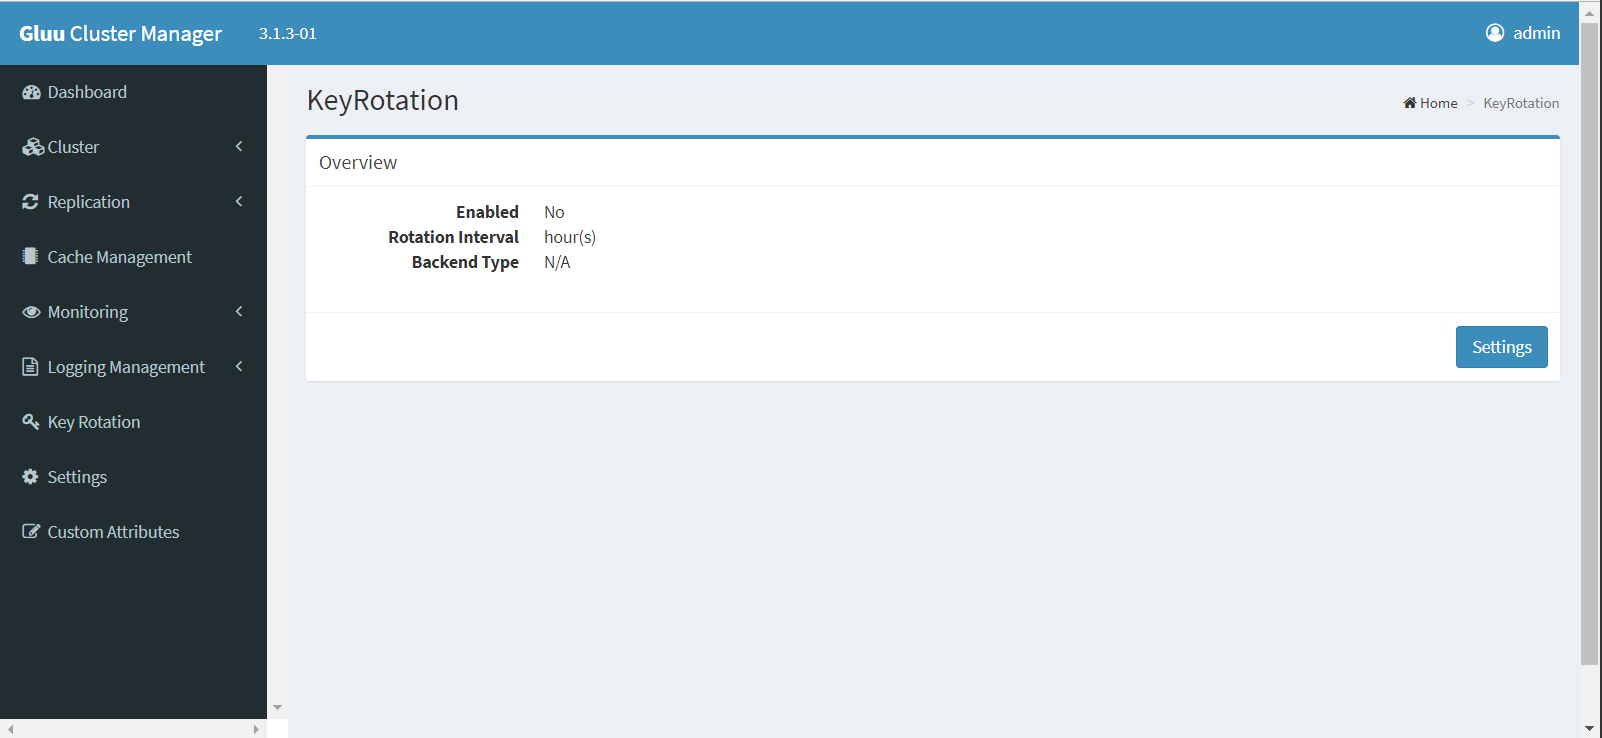
Click Settings to enable this functionality, as well as setting the time interval in hours.
Custom Attributes#
It can be a pain to add custom attributes into OpenDJ properly, so we've created a method to do it through the GUI. It will create a custom attribute object class you can define and then add attributes to that object class, which you can register in oxTrust.
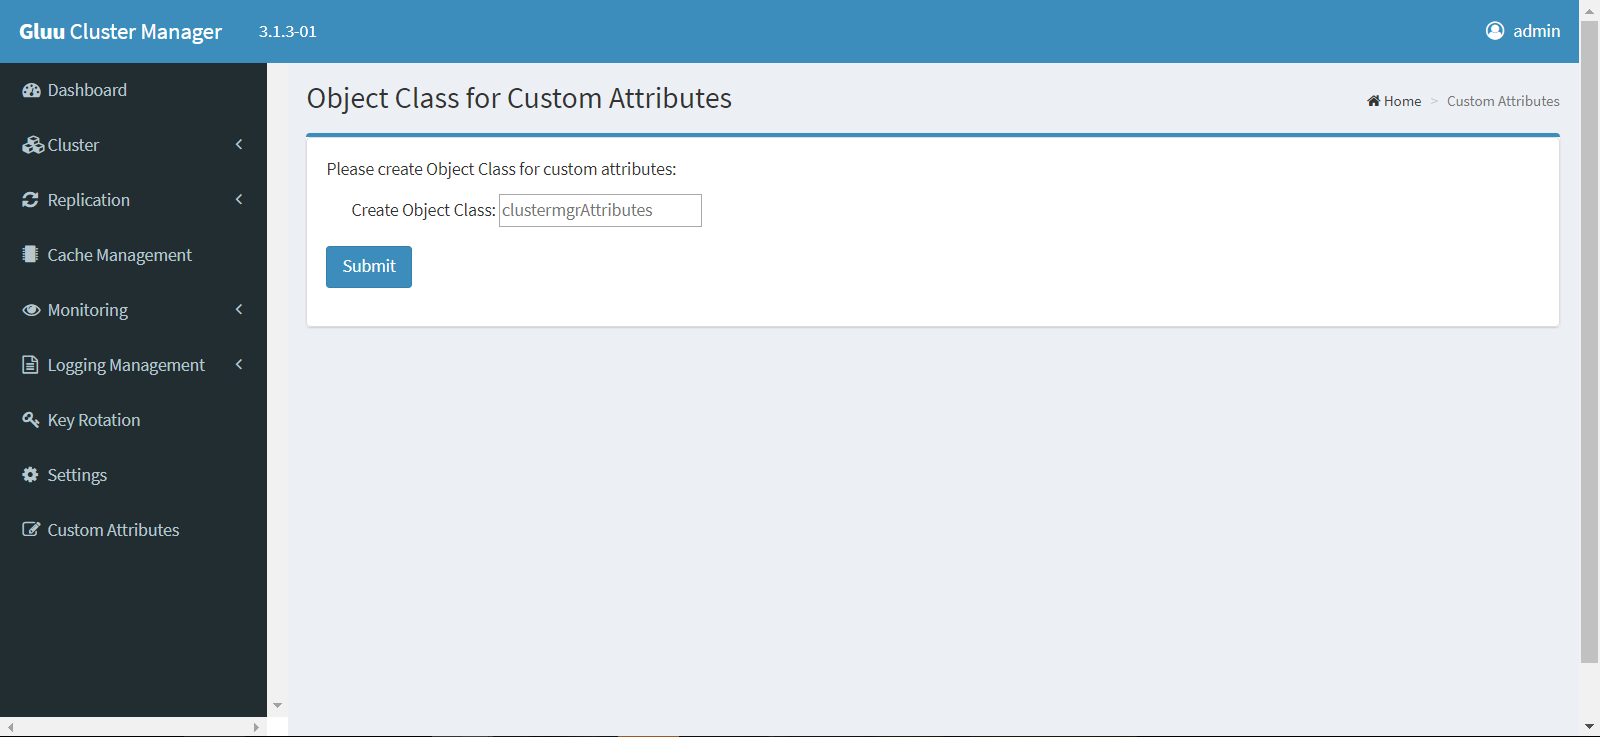
Now hit Submit
Create Custom Attribute:
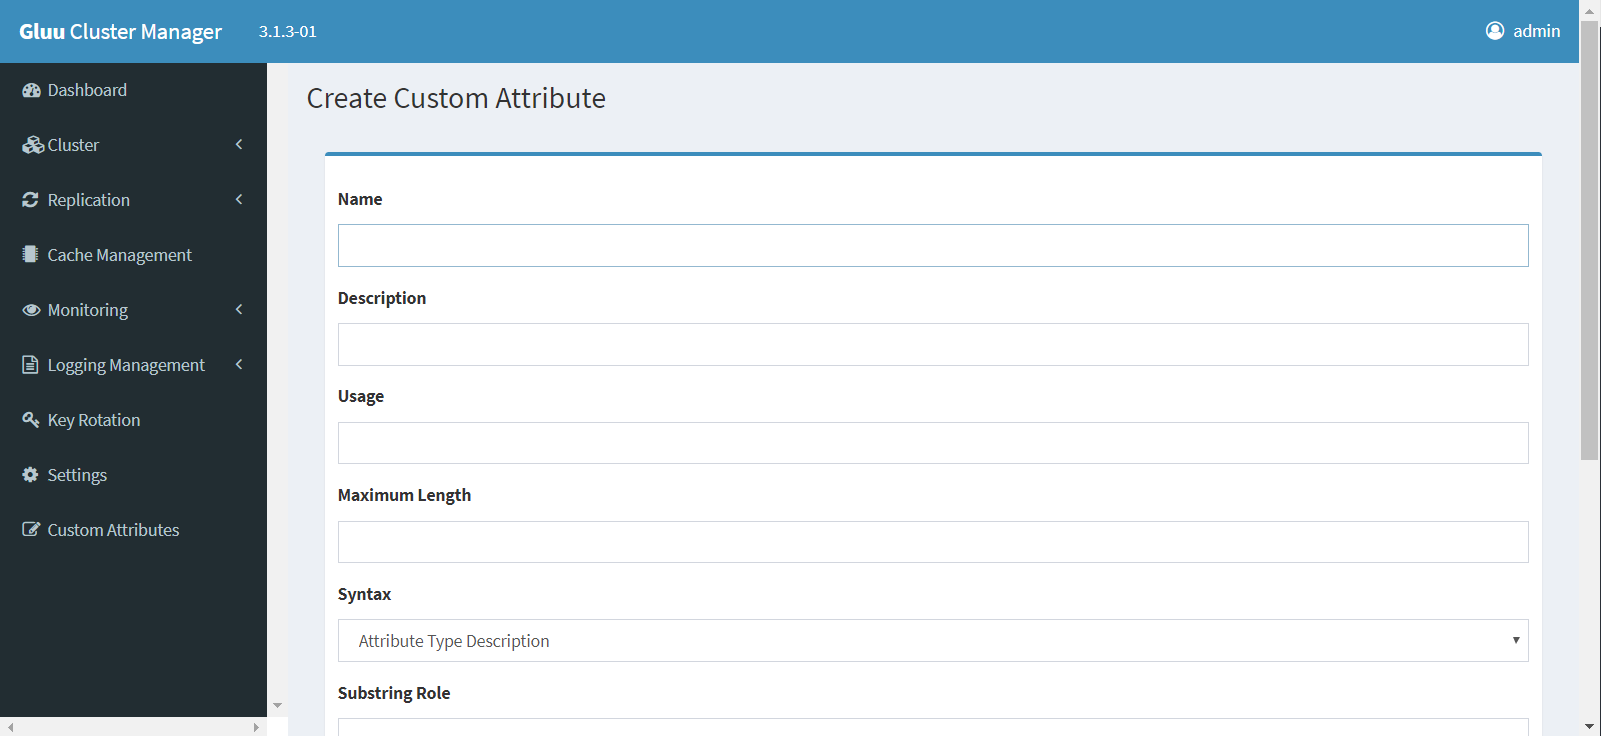
Please refer to the LDAP Schema RFC and this documentation on descriptions of LDAP schema attributes, if you're not already familiar with them.