RoundCube OpenID Connect Single Sign-On (SSO) Plugin By Gluu#
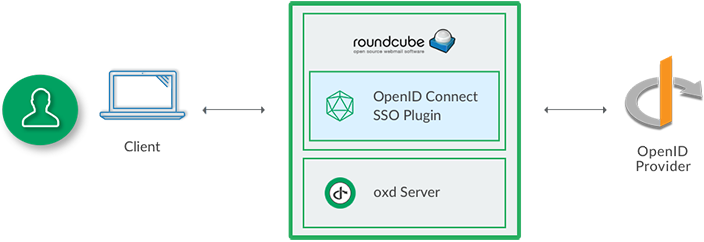
The oxd OpenID Connect single sign-on (SSO) plugin for RoundCube enables you to use a standard OpenID Connect Provider (OP), like Google or the Gluu Server, to authenticate and enroll users for a RoundCube site.
Requirements#
In order to use the Roundcube Extension you will need a Roundcube site, standard OP (like Google or a Gluu Server) and an active oxd server. Some additional notes:
-
This plugin is compatible with RoundCube Versions : 0.6.0 <= 1.3.3
-
If you prefer to have your own OP server, you can deploy the free open source Gluu Server.
-
You will need a valid license to start the oxd server. You can get a license and a $50 credit by signing up on the oxd website.
Note
Here standard OpenID Connect provider means the Gluu Server, because Google OpenID Connect provider is not supported in RoundCube plugin.
Installation#
Download#
You can download the plugin from Github source.
To install RoundCube OpenID Connect Single Sign On (SSO) Plugin By Gluu via Composer, execute the following command
$ composer require "gluufederation/roundcube_oxd_plugin": "3.1.1"
Gluu Server customization for RoundCube plugin#
IMAP Scopes#
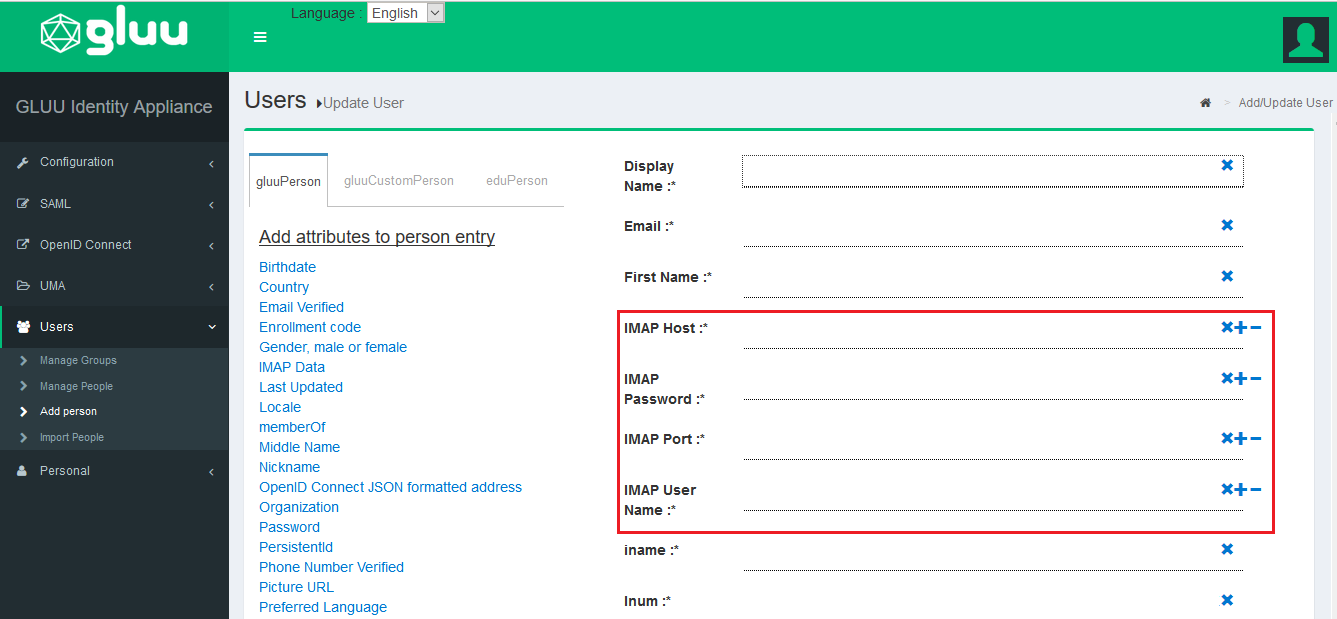
For doing login to your RoundCube site, it is very important that your OpenID Connect provider supports imapData scope, which contains your imap connection claims (imapHost,imapPort,imapUsername,imapPassword).
This is not configurable in all OpenID Connect provider's. It is configurable if you are using a Gluu Server.
For example : imapHost = ssl://imap.email.com ; imapPort = 993 ; imapUsername = username@email.com ; imapPassword = password ;
All these scopes are to be added with the help of this following link https://gluu.org/docs/ce/admin-guide/attribute/
Navigation steps#
Navigate to your Gluu Server admin GUI. Click the OpenID Connect tab in the left hand navigation menu. Select Scopes. Find imapData and click on it. Now click Add Claim, search for IMAP, select the required claims and then click OK.

Once you add the required claim, then you need to assign claim values (IMAP Host, IMAP Password, IMAP Port, IMAP User Name) to the user.
Configuration#
General#
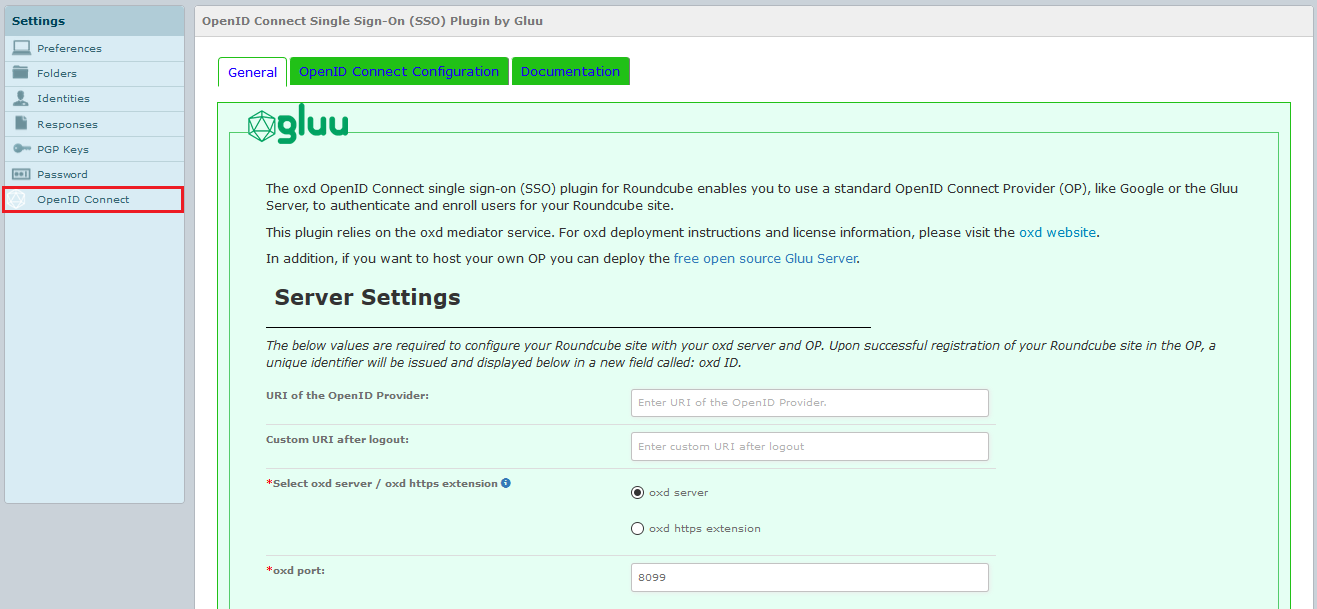
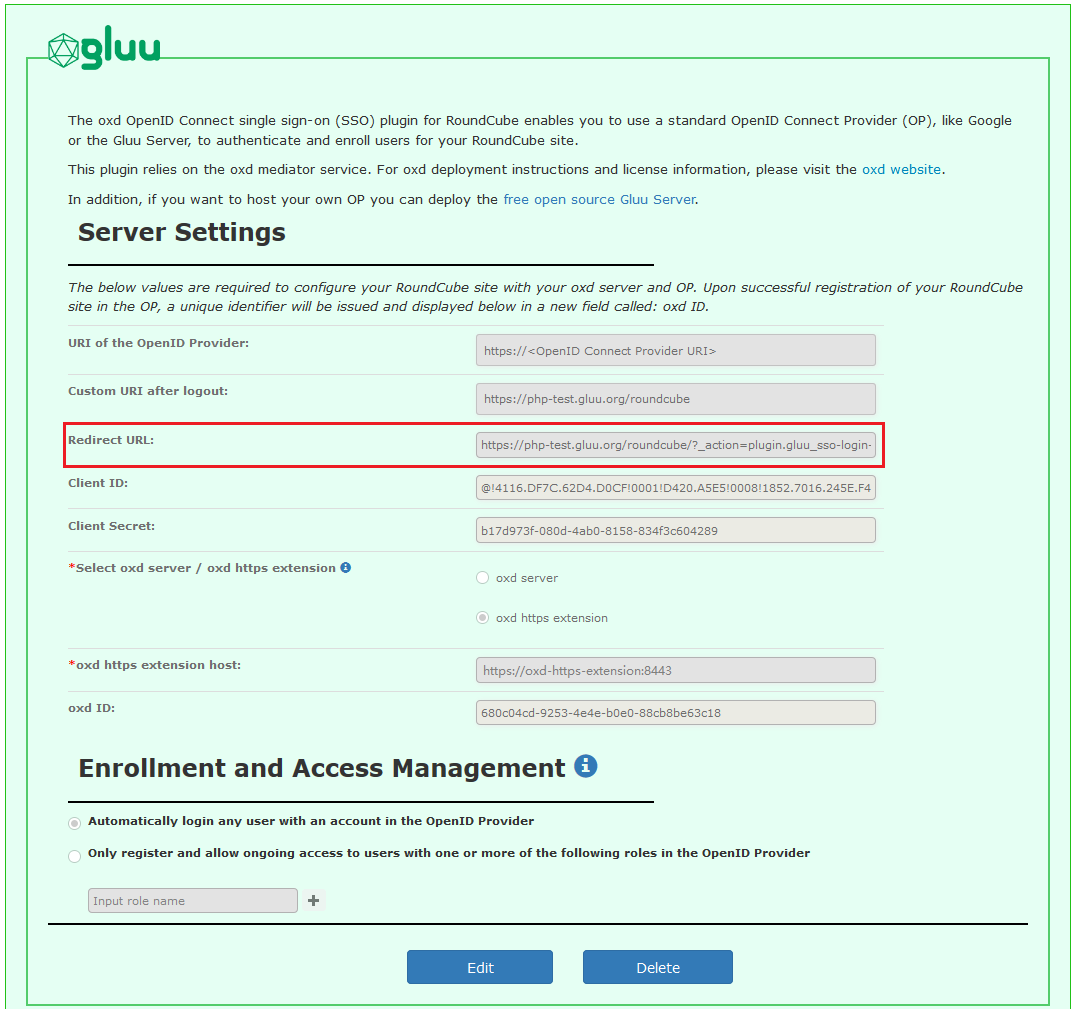
For the first time configuration, after logging in as admin(for example : admin@email.org), you should now see your RoundCube admin menu panel and the OpenID Connect menu tab. Click the link to navigate to the General configuration page:
Note
To configure oxd-server Roundcube plugin you need to login as admin@yourdomain.com . This is done to prevent other user to edit oxd-server plugin settings.
A short description of each field follows:
-
URI of the OpenID Provider: insert the URI of the OpenID Connect Provider, for example :
https://idp.example.com. -
Custom URI after logout: Provide a URL for a landing page to redirect users after logout of the RoundCube site, for instance
https://roundcube.email.com/Logout. If you don't have a preferred logout page we recommend simply entering your website homepage URL. If you leave this field blank the user will see the default logout page presented by RoundCube. -
oxd server: Enter the oxd-server port, which you can find in youroxd-server/conf/oxd-conf.jsonfile. The default port no is 8099
oxd https extension : Enter the oxd-https-extension host, if you are using oxd-https-extension.
- Click
Registerto continue.
Note
If you are using a Gluu server as your OpenID Provider, you can make sure everything is configured properly by logging into to your Gluu Server, navigate to the OpenID Connect > Clients page. Search for Roundcube.
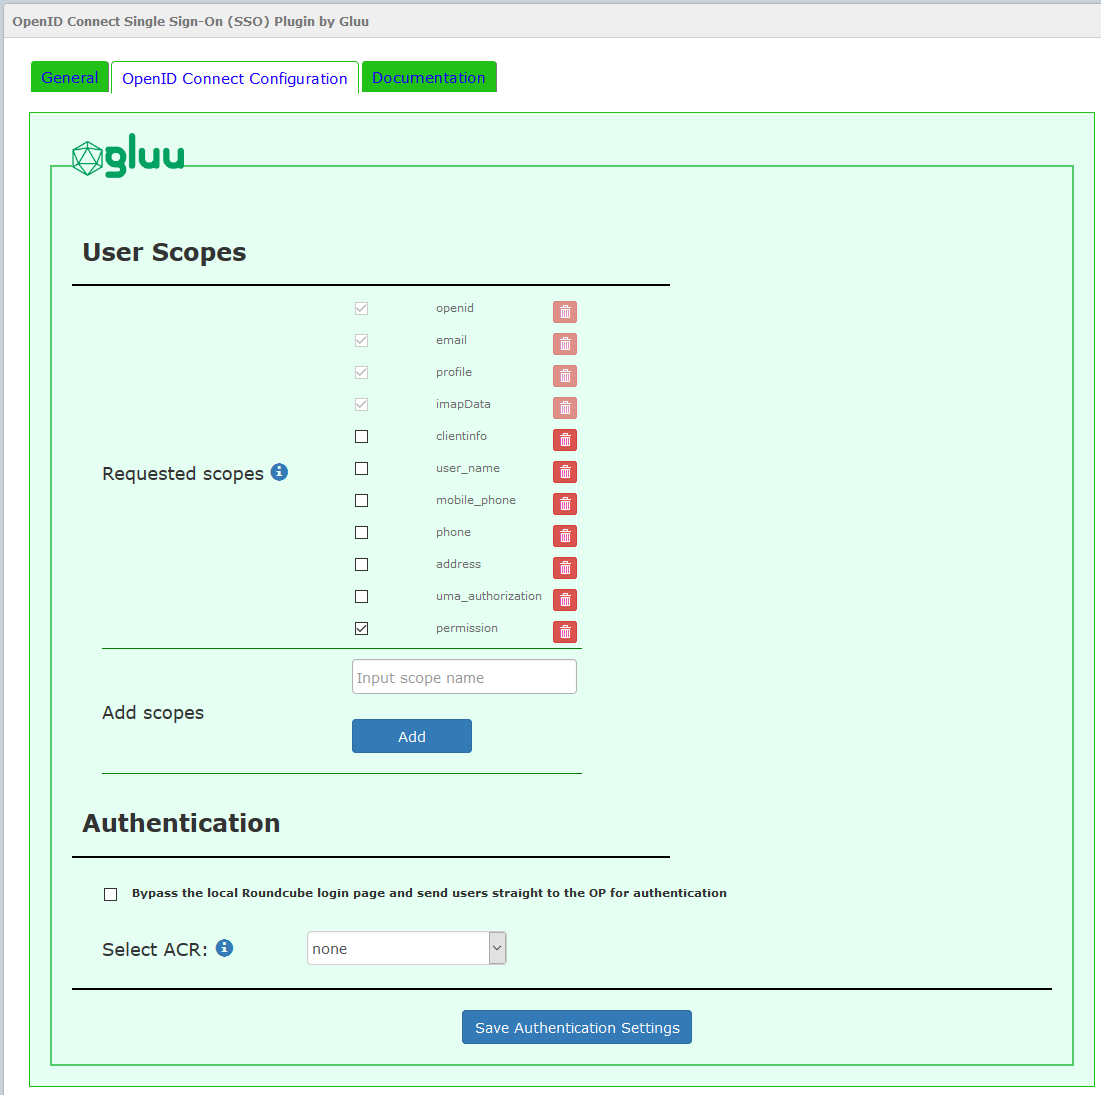
User Scopes#
Navigate to your Gluu Server admin GUI. Click the Users tab in the left hand navigation menu. Select Manage People. Find the person(s) who should have access. Click their user entry. Add the User Permission attribute to the person and specify the same value as in the plugin. For instance, if in the plugin you have limit enrollment to user(s) with role = roundcube, then you should also have User Permission = roundcube in the user entry. Update the user record, and now they are ready for enrollment at your Roundcube site. For admin access you can set User Permission = admin
OpenID Connect Configuration#
Enrollment and Access Management#
Scopes are groups of user attributes that are sent from the OpenID Connect provider to the application during login and enrollment. By default, the requested scopes are profile, imapData, email, and openid.
To view your OpenID Connect provider's available scopes, in a web browser navigate to https://OpenID-Provider/.well-known/openid-configuration.
If you are using a Gluu server as your OpenID Provider, you can view all available scopes by navigating to the Scopes interface in Gluu CE Server Admin UI
OpenID Connect > Scopes
In the plugin interface you can enable, disable and delete scopes.
Note
If you have chosen to limit enrollment to users with specific roles in the OP, you will also need to request the Permission scope, as shown in the above screenshot.
Authentication#
Bypass the local RoundCube login page and send users straight to the OpenID Connect provider for authentication#
-
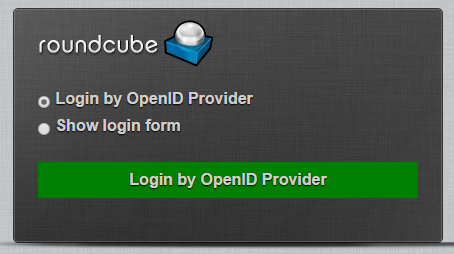
Bypass the local RoundCube login page and send users straight to the OP for authentication: Check this box so that when users attempt to login they are sent straight to the OP, bypassing the local RoundCube login screen. When it is not checked, users will see the following screen when trying to login:
-
Select ACR:
acris an OpenID Connect specific value that enables applications to request a specific type of authentication from the OP, e.g. SMS based two factor authentication, or FIDO U2F tokens. If you are using Google as your OP, you will have to accept their default authentication mechanism. If you are using a Gluu Sever, you will be able to request any supported form of authentication. To view the OP's supported ACR values, navigate to your OpenID Provider configuration page,https://<hostname>/.well-known/openid-configurationand findacr_values. In theSelect acrfield you can choose your preferred authentication mechanism. IfSelect acrisnone, users will be sent to pass the OP's default authentication mechanism.
Support#
Please report technical issues and suspected bugs on our support page. If you do not already have an account on Gluu Support, you can login and create an account using the same credentials you created when you registered for your oxd license.