OpenID Connect Provider (OP)#
The Gluu Server is a fully certified OpenID Provider (OP) that supports the following OpenID Connect specifications:
- Core (spec)
- Dynamic Client Registration (spec)
- Discovery (spec)
- Form Post Response Mode (spec)
- Session Management (spec)
- Front Channel Logout (draft)
Protocol Overview#
OpenID Connect is an identity layer that profiles OAuth 2.0 to define a sign-in flow for applications (clients) to authenticate a person and obtain authorization to gather information (or "claims") about that person. For more information, see http://openid.net/connect
It's handy to know some OpenID Connect terminology:
-
The end user or subject is the person being authenticated.
-
The OpenID Provider (OP) is the equivalent of a SAML Identity Provider (IDP). It holds end user credentials (like a username/ password) and personally identifiable information. During a single sign-on (SSO) login flow, end users are redirected to the OP for authentication.
-
The Relying Party or RP or client is software, like a mobile application or website, which needs to authenticate the subject. The RP is an OAuth client.
Note
To learn more about the differences between OAuth, SAML and OpenID Connect, read this blog.
OpenID Connect APIs#
Review the Gluu Server's OpenID Connect API endpoints in the API Guide.
OpenID Connect Flows#
The Gluu Server supports all flows defined in the OpenID Connect Core spec, including implicit, authorization code, and hybrid flows.
Implicit Flow#
The implicit flow, where the token and id_token are returned from the authorization endpoint, should only be used for applications that run in the browser, like a Javascript client.
Authorization Code / Hybrid Flow#
The code flow or hybrid flow should be used for server side applications, where code on the web server can more securely call the token endpoint to obtain a token.
The most useful response type for the hybrid flow is code id_token. Using this flow, you can verify the integrity of the code by inspecting the c_hash claim in the id_token.
If you are using the code flow, the response type should only be code. There is no point in using response type code token id_token--the extra tokens returned by the authorization endpoint will only create additional calls to the database server and slow you down.
If you are going to trade the code at the token endpoint for a new token and id_token, you don't need them from the authorization endpoint too.
Flow Comparison Chart#
| Step | Authorization code flow | Implicit flow | Hybrid flow |
|---|---|---|---|
| 1 | User accesses an application. | User accesses an application. | User accesses an application. |
| 2 | The application/relying party (RP) prepares an authentication request containing the desired request parameters and sends it to the OpenID Provider (Gluu Server). The response_type requested is code. |
The application/relying party (RP) prepares an authentication request containing the desired request parameters and sends it to the OpenID Provider (Gluu Server). The response_type requested is id_token or id_token token. |
The application/relying party (RP) prepares an authentication request containing the desired request parameters and sends it to the OpenID Provider (Gluu Server). The response_type requested is code id_token, code token, or code id_token token. |
| 3 | The OpenID Provider (Gluu Server) verifies the user’s identity and authenticates the user. | The OpenID Provider (Gluu Server) verifies the user’s identity and authenticates the user. | The OpenID Provider (Gluu Server) verifies the user’s identity and authenticates the user. |
| 4 | The OpenID Provider (Gluu Server) sends the user back to the application with an authorization code. | The OpenID Provider (Gluu Server) sends the user back to the application with an ID Token (id_token or id_token token) and an Access Token (token). |
The OpenID Provider (Gluu Server) sends the user back to the application with an authorization code (code id_token, code token, or code id_token token) and an Access Token (token). |
| 5 | The application sends the code to the Token Endpoint to receive an Access Token and ID Token in the response. | The application uses the ID Token to authorize the user. At this point the application/RP can access the UserInfo endpoint for claims. |
The application sends the code to the Token Endpoint to receive an Access Token and ID Token in the response. |
| 6 | The application uses the ID Token to authorize the user. At this point the application/RP can access the UserInfo endpoint for claims. |
The application uses the ID Token to authorize the user. At this point the application/RP can access the UserInfo endpoint for claims. |
Configuration / Discovery#
The configuration endpoint publishes core details about the OpenID Connect service. These details can be found by accessing the following URL:
https://{hostname}/.well-known/openid-configuration
The Gluu Server also supports WebFinger, as specified in the OpenID Connect discovery specification.
Client Registration / Configuration#
OAuth clients need a client_id and redirect_uris to indicate to the Authorization Server where users should be redirected post authorization.
Clients can be created manually in oxTrust or dynamically registered via the standard API.
Manual client registration#
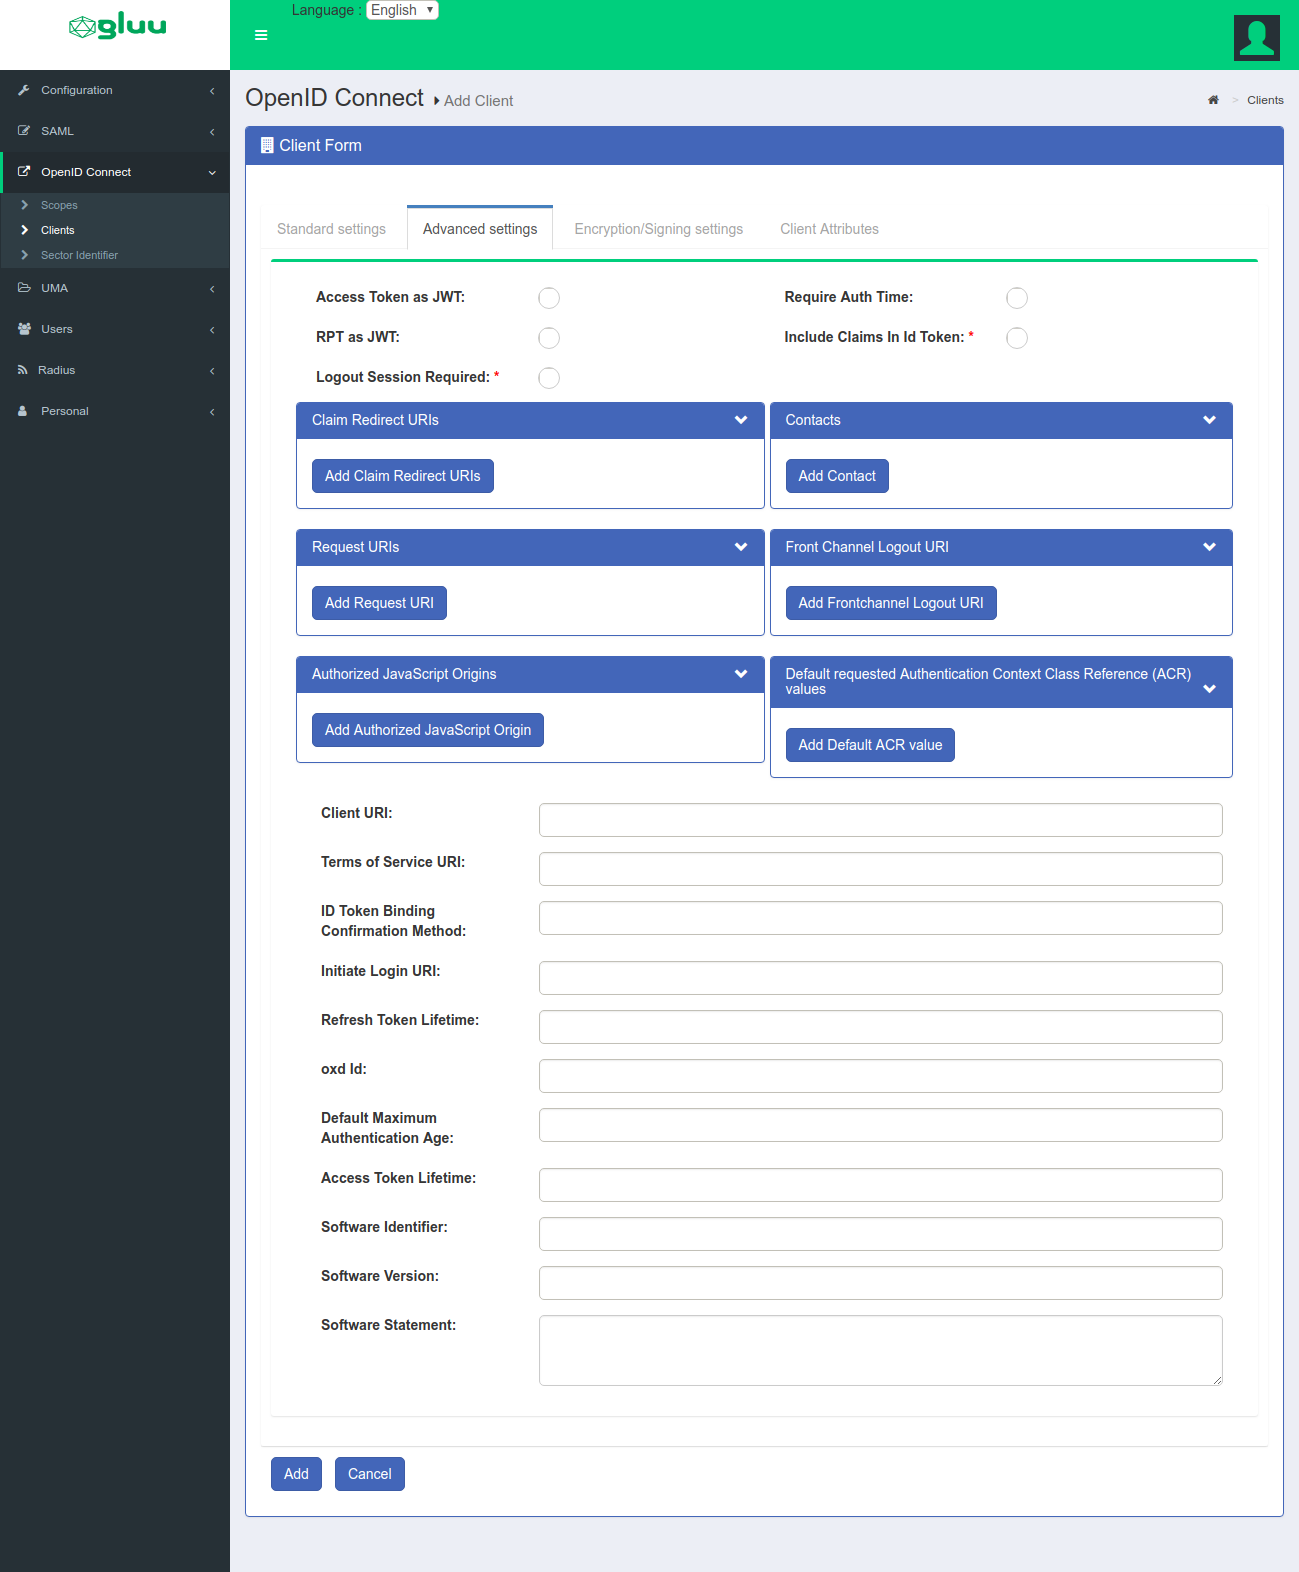
To add a client manually in oxTrust, navigate to OpenID Connect > Client and click the Add Client button to access the following forms:
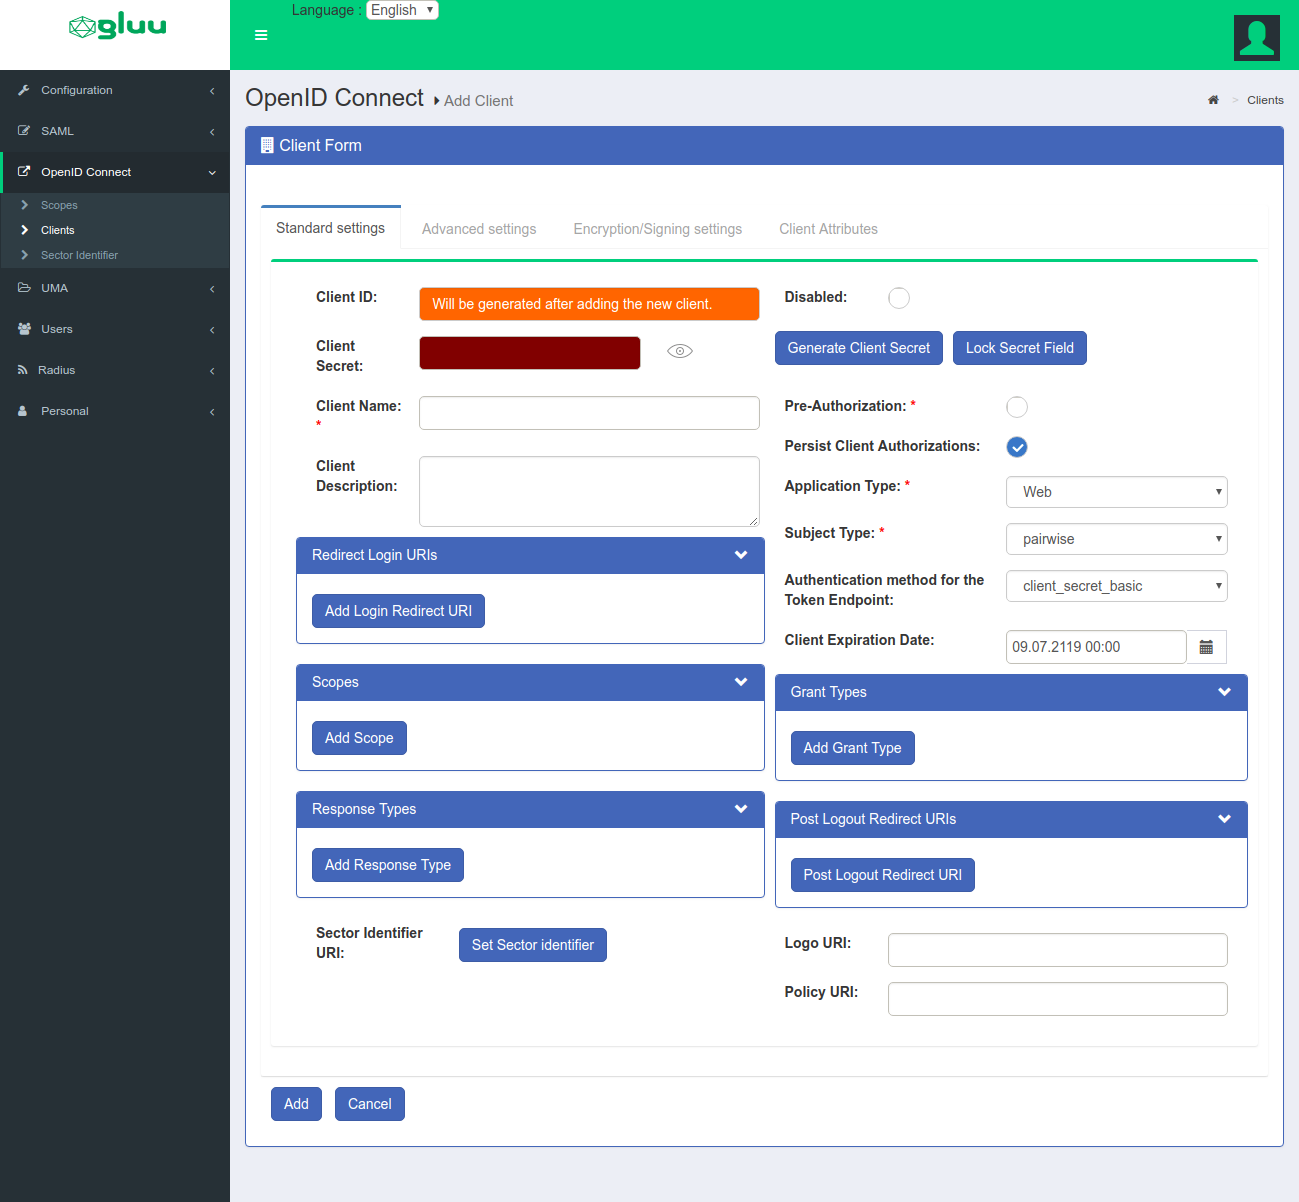
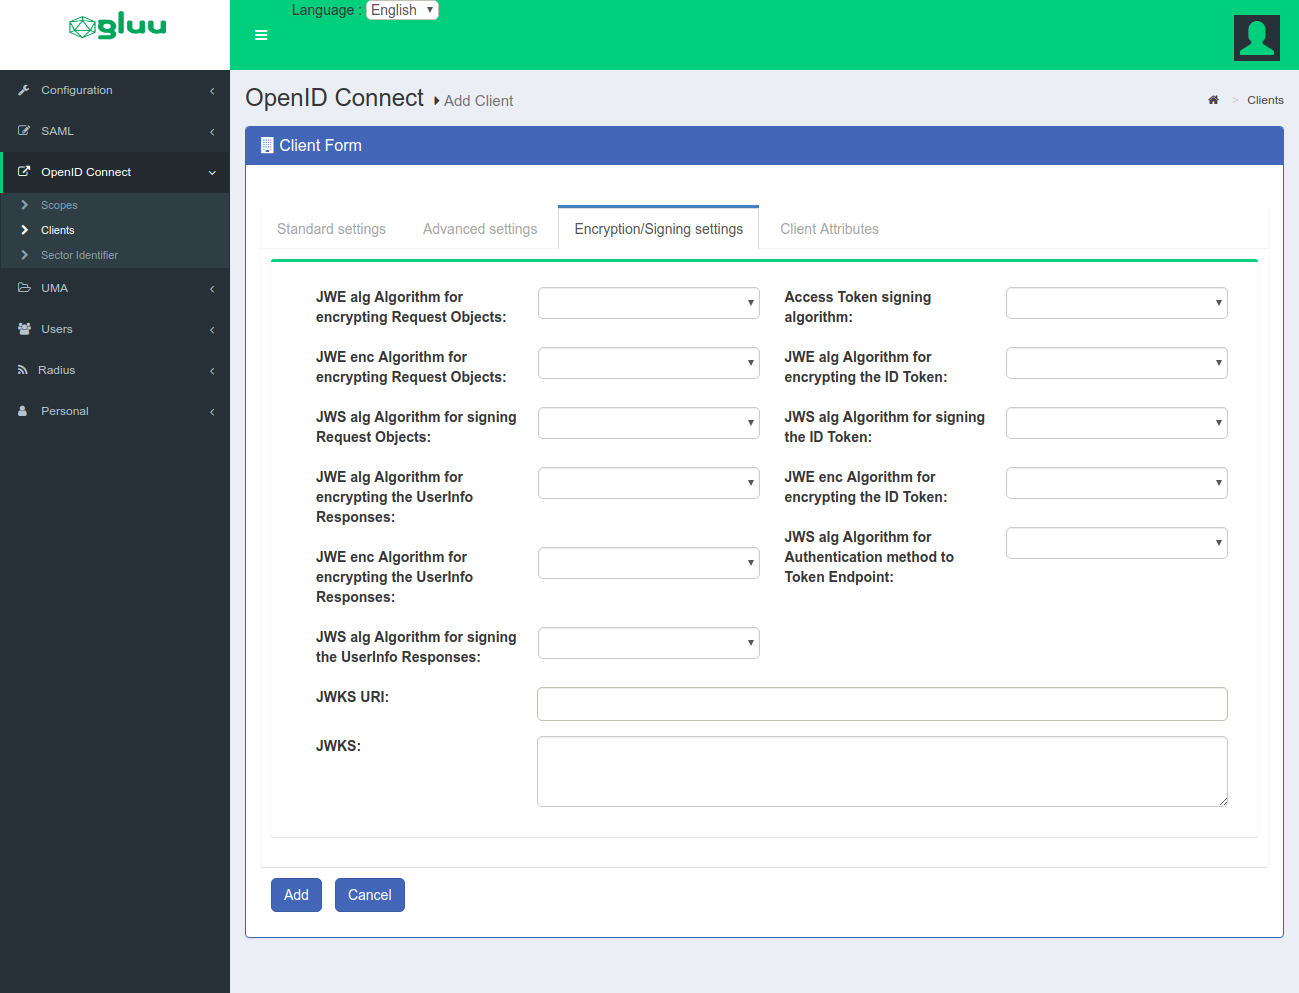
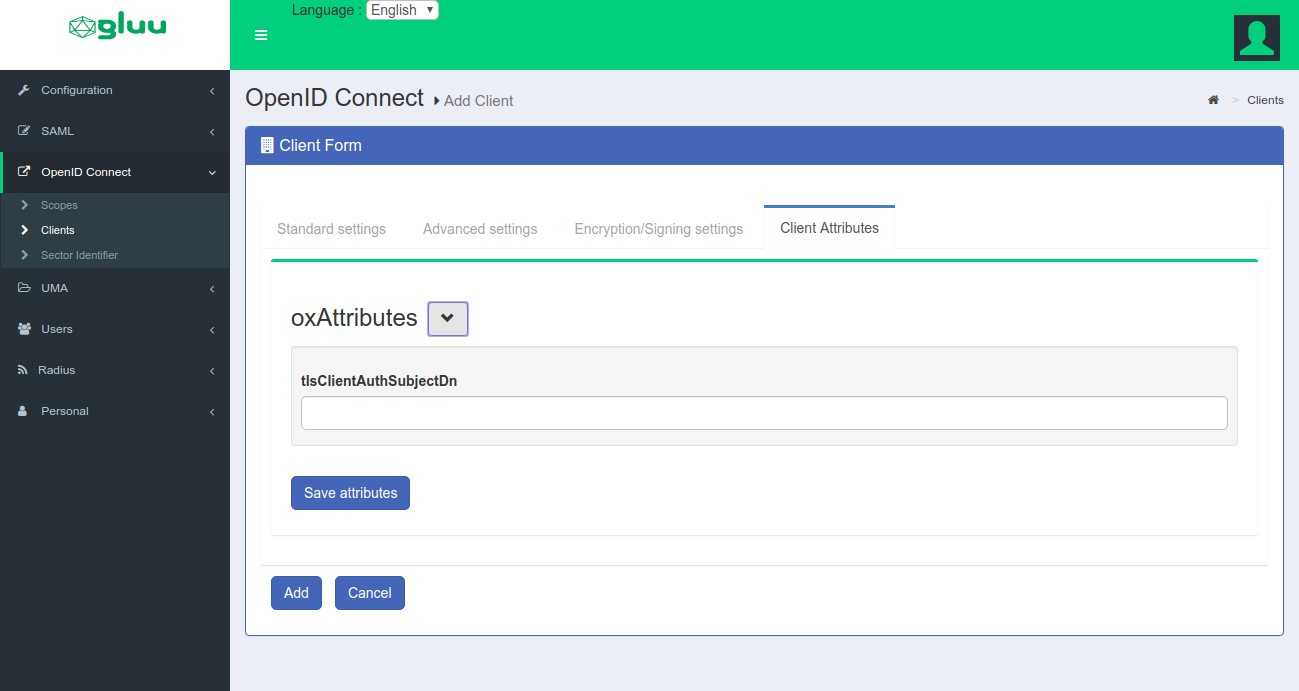
There are many client configuration parameters. Most are specified in the Client Registration section of the OpenID Connect specification. The Client Secret field features a Lock Secret Field button to prevent accidental edits or autofill.
There are two configuration parameters that can only be configured via oxTrust by an administrator. These include:
-
Pre-Authorization: If the OAuth authorization prompt should not be displayed to end users, set this field to
True. This is useful for SSO to internal clients (not third party) where there is no need to prompt the person to approve the release of information. -
Persist Client Authorizations: If end users should only be prompted for authorization the first time they access the client, set this field to
True. All data will be persisted under the person's entry in the Gluu database and the end user will not be prompted to release informationd during subsequent logins. This feature is automatically set toTrueif Pre-Authorization is enabled.
Dynamic client registration#
OpenID Connect defines a standard API for Dynamic Client Registration. The registration URL can be found at the configuration endpoint: https://<hostname>/.well-known/openid-configuration.
To manage this feature in oxTrust, navigate to Configuration > JSON Configuration > oxAuth configuration, and find the dynamicRegistrationEnabled property. Set it to true or false to enable or disable dynamic client registration, as needed.
Expiration of dynamically registered clients is controlled by the dynamicRegistrationExpirationTime property, which can also be found in the oxAuth configuration table. Find more details about these oxAuth properties and others in the reference section.
Customizing client registration#
During client registration, custom interception scripts can be used to implement custom business logic. For instance, data could be validated, extra client claims could be populated, scopes could be modified, or APIs could be called to determine whether the client should get registered at all.
Client registration custom script interfaces can be found by navigating to Configuration > Custom Scripts > Client Registration.
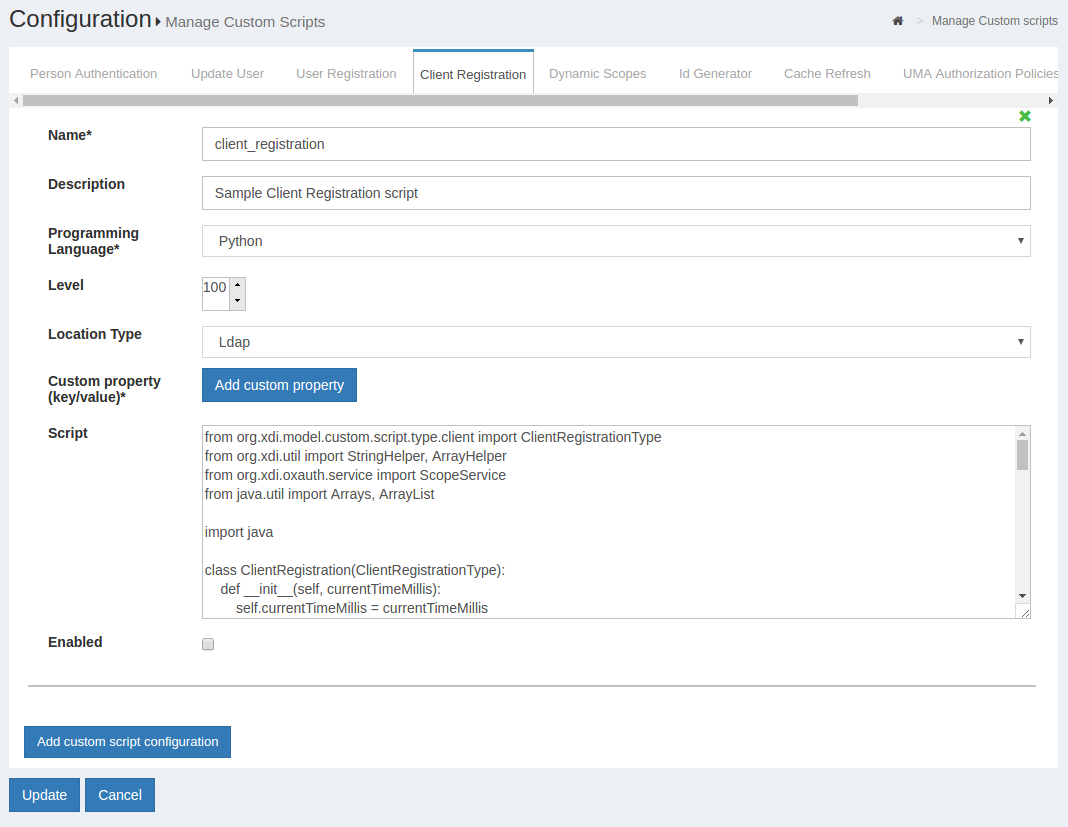
The sample client registration script is available here
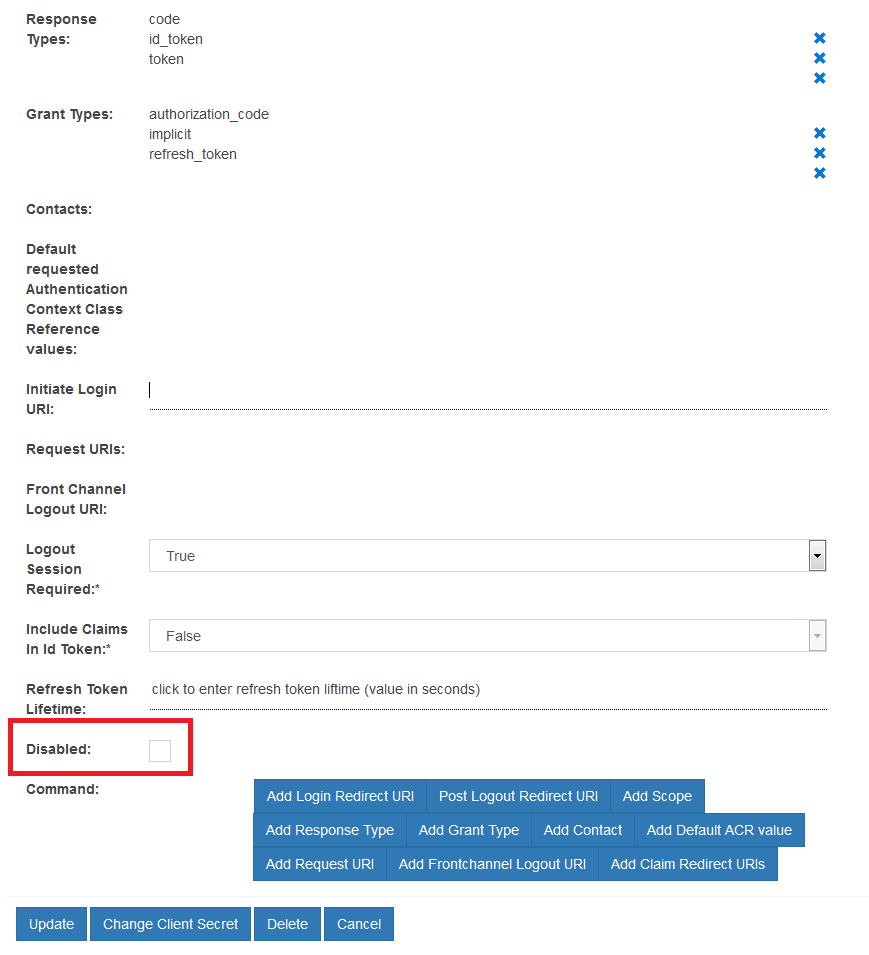
Disable client entry#
Setting up clients can be cumbersome and time consuming. Instead of deleting clients that should be inactive, it may be preferable to simply disable the client. To achieve this:
- Navigate to
OpenID Connect>Clients>Standard settings - Find and click the target client
- Check the
Disabledcheckbox - Click the "Update" button
Adding Redirect URIs to Client#
If the redirect URI to be added to a client is in the same domain as the server, the URI can be added via the Add Redirect URI field in the Client Registration form.
If the URI is in a different domain, it must be added via a sector identifier.
Client Summary#
Each client's entry in oxTrust contains an at-a-glance summary page. All configuration settings are portrayed on a single, easy-to-read page, and can be exported in Markdown to the clipboard with one click. Follow these steps:
- Navigate to
OpenID Connect>Clients - Find and click the target client
- Click the
Client Config Summarybutton at the top of the page - To export, click the
Copy as markdown to clipboardbutton

Scopes#
In OAuth, scopes are used to specify the extent of access. For an OpenID Connect sign-in flow, scopes correspond to the release of user claims. Out-of-the-box, Gluu supports the standard scopes defined in the OpenID Connect specification.
Custom scopes can be defined and mapped to any registered user attributes.
To add OpenID Connect Scopes and Claims:
-
Navigate to
Configuration>OpenID Connect>Scopes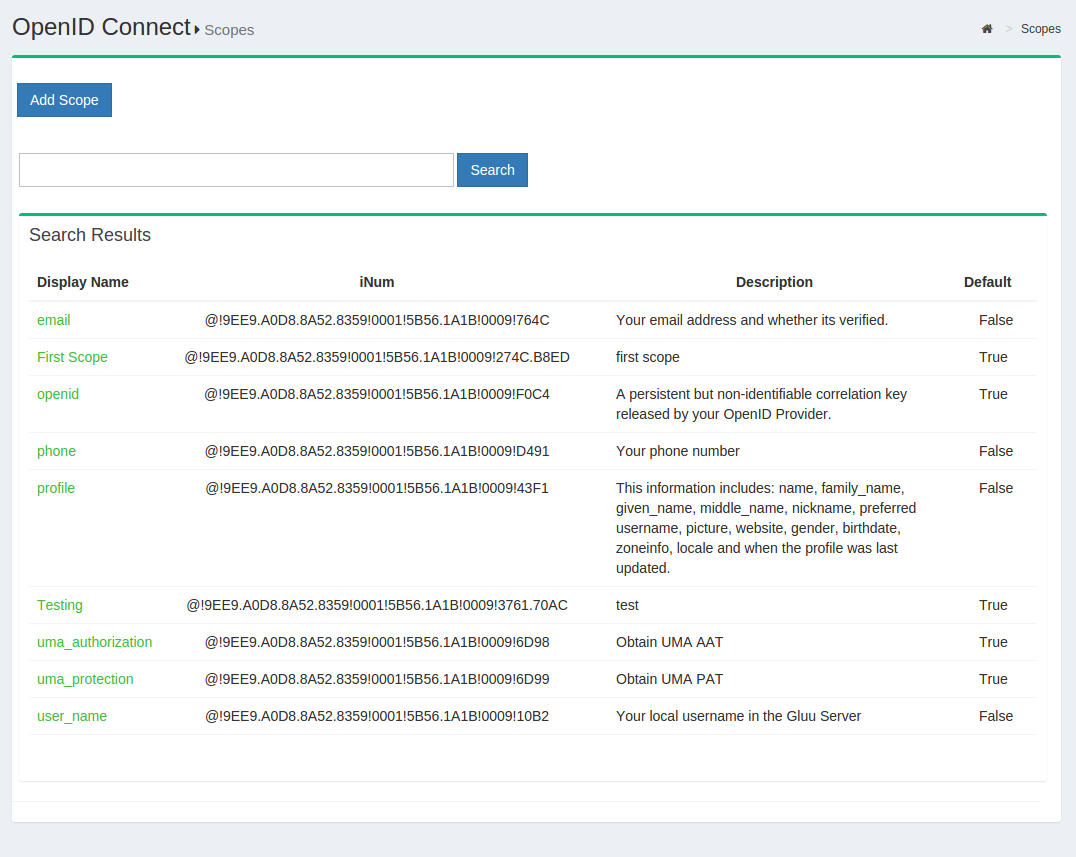
-
Click the
Add scopebutton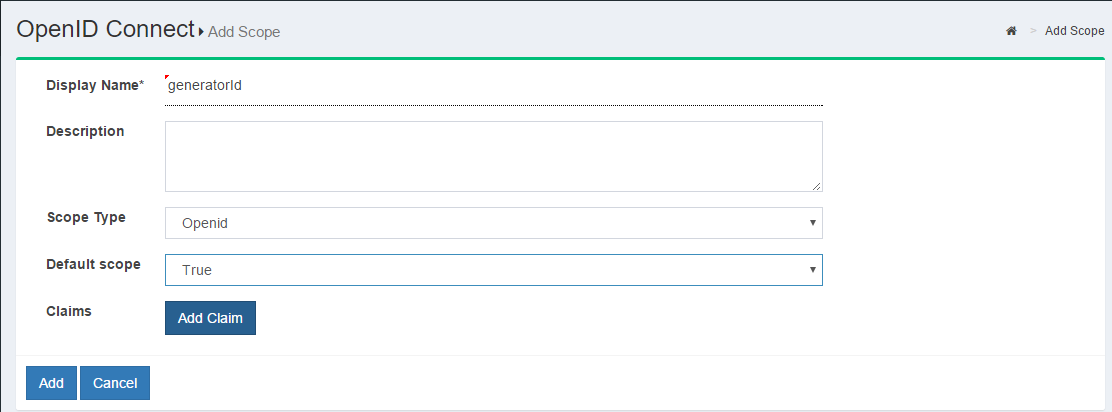
A description of the fields in the add scope page:
-
Display Name: Name of the scope which will be displayed when searched.
-
Description: Text that will be displayed to the end user during approval of the scope.
-
Scope Type:
- OpenID: specifies to the Gluu Server that this scope will be used to map user claims.
- Dynamic: specifies to the Gluu Server that scope values will be generated from the result of the Dynamic Scopes custom interception script.
-
OAuth: specifies to the Gluu Server that the scope will have no claims, it will be meaningful to an external resource server.
-
Allow for dynamic registration: Select whether a client using the scope is allowed to dynamically register the scope, as well.
Spontaneous scopes#
Spontaneous scopes are scopes with random part in it which are not known in advance. For example: transaction:4685456787, pis-552fds where 4685456787 or 552fds are generated part of the scope.
Spontaneous scopes are disabled by default and can be enabled per client. There are following client properties available during dynamic registration of the client related to spontaneous scopes:
allow_spontaneous_scopes- OPTIONAL, boolean, false by default. Whether spontaneous scopes are allowed for given clientspontaneous_scopes- OPTIONAL, array of strings. Regular expressions which should match to scope. If matched scope is allowed. Example:["^transaction:.+$"]. It matchestransaction:245but nottransaction:.
Dynamic registration example:
...
"allow_spontaneous_scopes": true,
"spontaneous_scopes": ["^transaction:.+$"]
...
Authorization request example (note transaction:245 and transaction:8645 scopes in request)
https://example.gluu.org/oxauth/restv1/authorize?response_type=code&scope=openid+profile+transaction%3A245+transaction%3A8645&client_id=c8592b26-8984-484d-8aba-9f475be73af0&redirect_uri=https%3A%2F%2Fexample.gluu.org%2Foxauth-rp%2Fhome.htm&state=2dccaf64-c0b9-4c35-8008-f754ad964c3b&nonce=9cf5c813-578b-44e5-a353-b7446c1b9358
If allow_spontaneous_scopes=true and spontaneous_scopes regular expression has match then spontaneous scope is persisted and allowed to be handled as usual scope.
Spontaneous scope has lifetime and is cleaned up from persistence when expired (and thus not available anymore). Configuration property spontaneousScopeLifetime specifies lifetime in seconds.
In addition there is spontaneous scope interception scripts which give additional flexibility. The sample spontaneous scope script is available here.
Customizing scopes#
Similar to client registration, scopes can be customized using interception scripts. The interface can be found in oxTrust by navigating to Configuration > Manage Custom Scripts > Dynamic Scopes.
The sample dynamic scope script is available here.
Subject Identifier Types#
A Subject Identifier is a locally unique and never reassigned identifier within the Issuer for the End-User, which is intended to be consumed by the Client. The can be found by navigating to Configuration > oxAuth Configuration. Two Subject Identifier types are defined in oxAuth: public and pairwise.
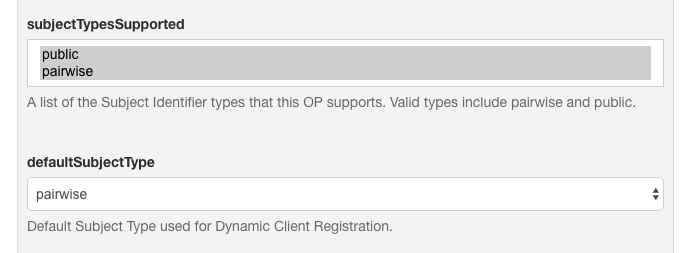
Public Subject Identifier Type#
This provides the same sub (subject) value to all Clients. It is the default if the provider has no subject_types_supported element in its discovery document.
You can configure the LDAP attribute to be used in the sub claim.

Pairwise Subject Identifier Type and Sector Identifier Client Claim#
When pairwise Identifiers are used, Gluu calculates a unique sub (subject) value for each Sector Identifier. The Subject Identifier value must not be reversible by any party other than the OP. This is similar to persistent identifiers in SAML.
Sector identifiers provide a way to group clients from the same adminstrative domain using pairwise subject identifiers. In this case, each client needs to be given the same pairwise ID for the person to maintain continuity across all the related websites.
Gluu allows two types of pairwise implementations that can be configured:
-
PairwiseIdType.PERSISTENT: oxauth creates a Unique ID (java.util.UUID) for the pair of Sector Identifier and local account Id and stores this value under:dn: ou=pairwiseIdentifiers,inum=PEOPLE_INUM,ou=people,o=ORG_INUM,o=gluu -
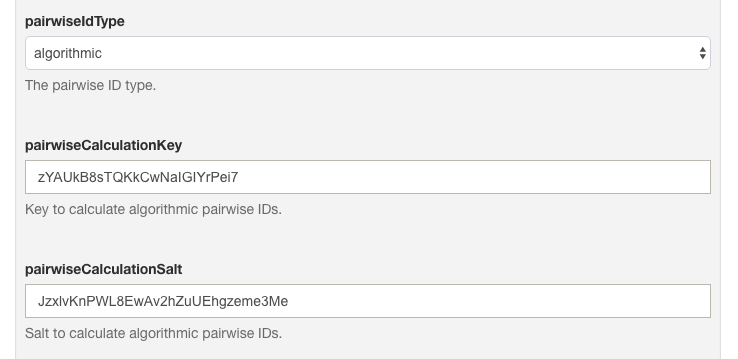
PairwiseIdType.ALGORITHMIC: The sub value is calculated as follows:sub = base64urlencode(HS256Signature(sectorIdentifier + userInum + salt, key))
Key and salt are read from oxAuth configuration entries pairwiseCalculationKey and pairwiseCalculationSalt:
A user's associated Pairwise IDs can be viewed and managed directly in the database, or more conveniently in their oxTrust user record. Check the Manage People doc for more information.
Add Sector Identifier#
oxAuth provides an easy way to manage and publish a sector_identifier_uri. The Gluu admin can use this feature to select certain clients or even add ad-hoc redirect_uri values. oxAuth will publish a valid sector identifier JSON object as defined in OpenID Connect dynamic client registration spec. A client could then register this sector identifier URI in addition to redirect URIs.
Follow these steps to add a sector identifier:
-
In oxTrust, navigate to
OpenID Connect>Sector Identifier.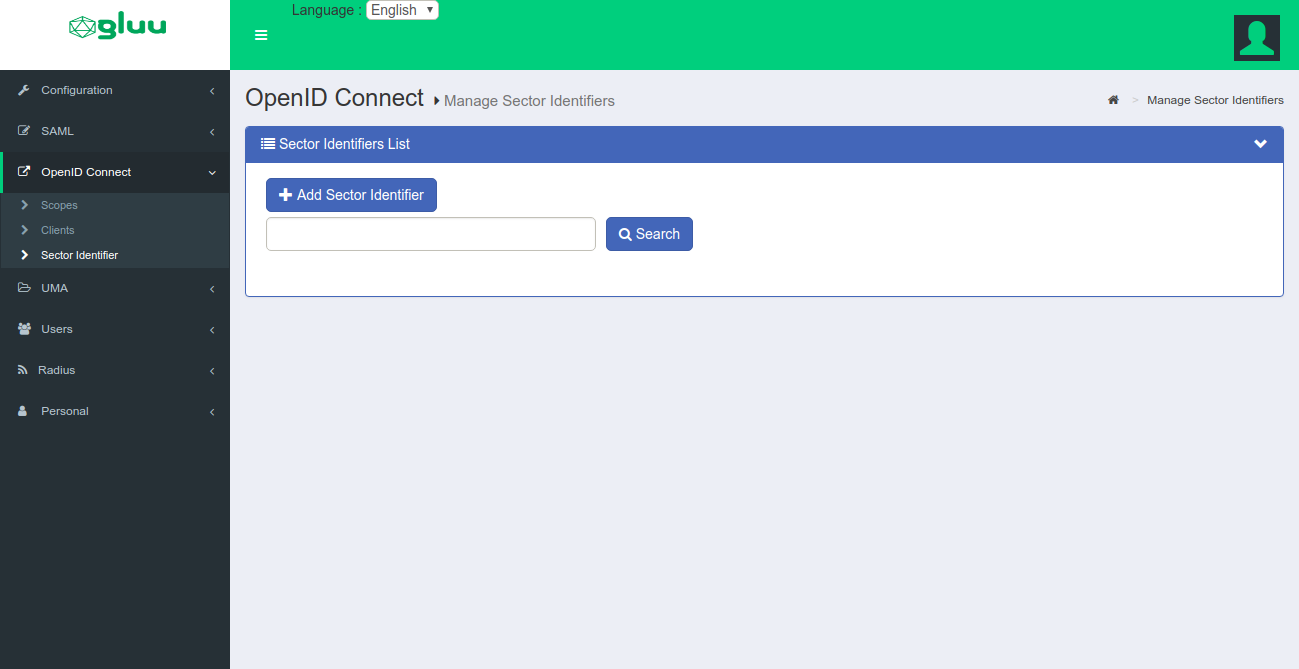
-
Click
Add Sector Identifier.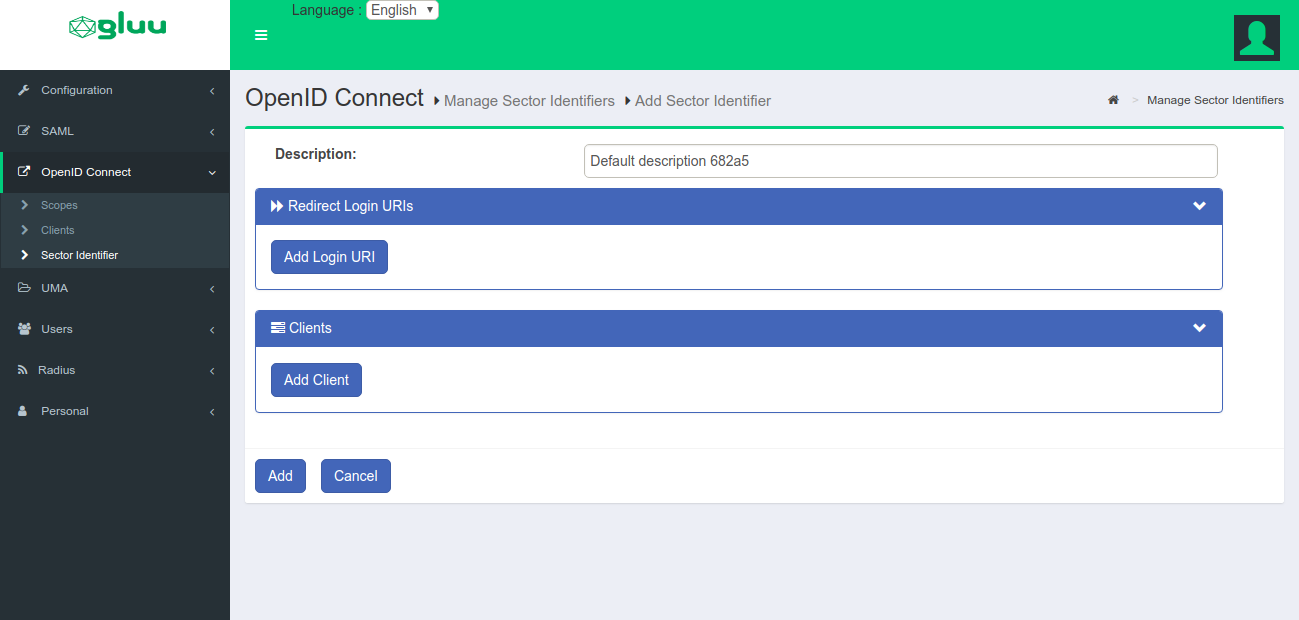
-
Add redirect URIs to the
Sector Identifier.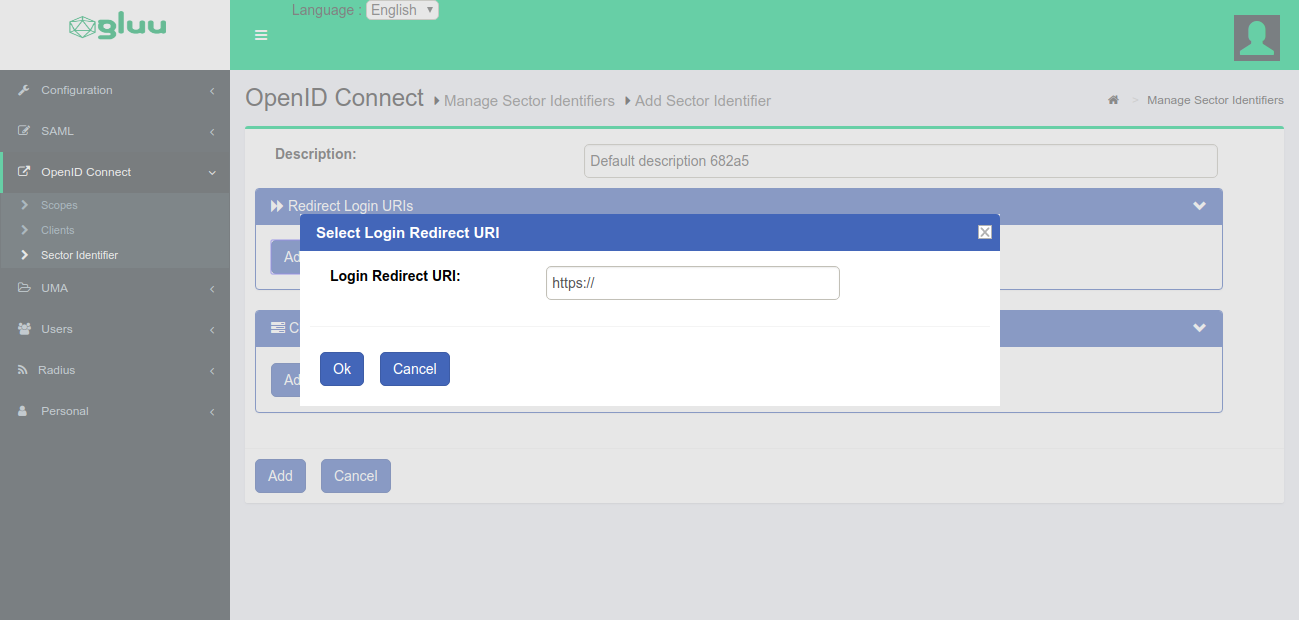
-
Add clients that uses the
Sector Identifier.
Authentication#
The OpenID Connect acr_values parameter is used to specify a workflow for authentication. The value of this parameter, or the default_acr_values client metadata value, corresponds to the "Name" of a custom authentication script in the Gluu Server.
The default distribution of the Gluu Server includes custom authentication scripts with the following acr values:
| ACR Value | Description |
|---|---|
| u2f | FIDO U2F Device |
| fido2 | FIDO 2.0 U2F Device |
| thumb_sign_in | Use of ThumbSignIn for biometric authentication |
| super_gluu | Multi-factor authentication |
| duo | Duo soft-token authentication |
| cert | Smart card or web browser X509 personal certificates |
| saml | Inbound SAML via Asimba authentication module |
| otp | OATH one time password |
| passport_saml | Passport SAML authentication module |
| passport_social | Passport authentication module |
| twilio_sms | Use of the Twilio Saas to send SMS one time passwords |
| yubicloud | Yubico cloud OTP verification service |
| uaf | experimental support for the FIDO UAF protocol |
| basic_lock | Enables lockout after a certain number of failures |
| basic | Sample script using local database authentication |
Clients can request any enabled authentication mechanism. To enable an authentication script in oxTrust, navigate to Configuration > Manage Custom Scripts, find the desired script, check the Enabled box, scroll to the bottom of the page and click Update.
Learn more in the authentication guide.
Setting the Default ACR#
To set the default acr_value for a client, follow these steps:
- Navigate to
OpenID Connect>Clients - Select the client you wish to set
- Click the
Advanced Settingstab - Click the
Add Default ACR valuebutton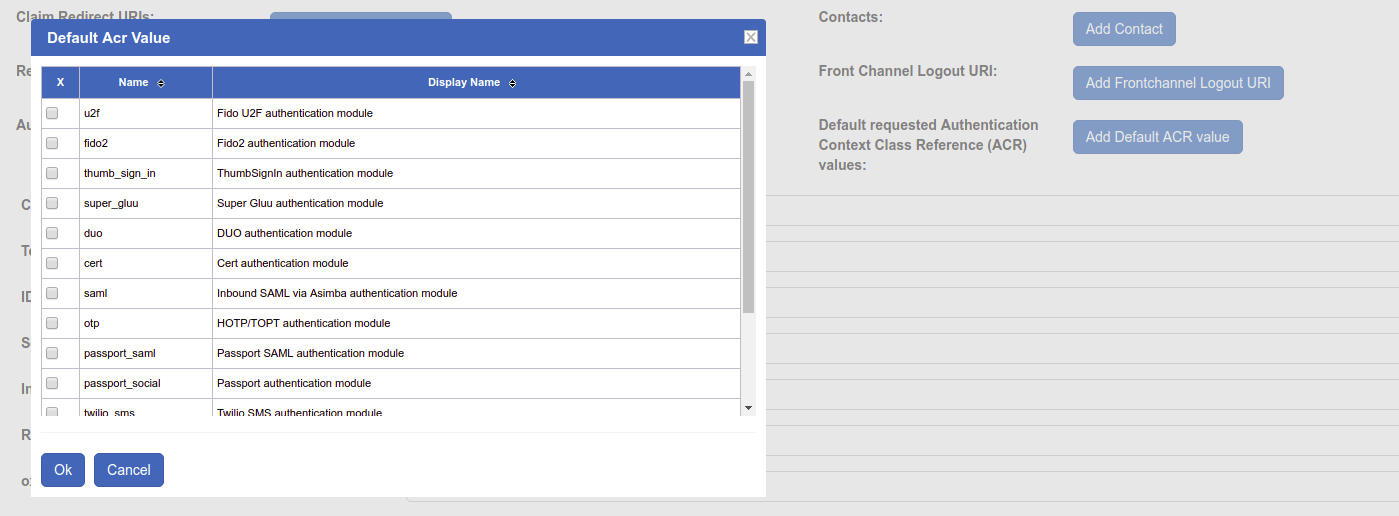
- A list of available ACR values will pop up. Select the desired default value
- Click the
Okbutton - Scroll to the bottom of the page and click the
Updatebutton
Logout#
The OpenID Connect Session Management specification is still marked as draft, and new mechanisms for logout are in the works. The current specification requires JavaScript to detect when a session has been ended in the browser. It works... unless the tab with the JavaScript happens to be closed when the logout event happens on another tab. Also, inserting JavaScript into every page is not feasible for some applications.
The Gluu Server also support the draft for Front Channel Logout. This is our recommended logout strategy. Using front channel logout, an html page is rendered which contains one iFrame for each application that needs to be notified of a logout event. The Gluu Server keeps track of which clients are associated with a session (i.e. your browser).
Back Channel Logout is also supported.
Front channel logout is also not perfect. If the end user's web browser is blocking third party cookies, it may break front channel logout. Also, the Gluu Server has no record if the logout is successful--only the browser knows. This means that if the logout fails, it will not be logged or retried. The good thing about front channel logout is that the application can clear application cookies in the end user's browser. To use front channel logout, the client should register logout_uri's, or frontchannel_logout_uri for clients using the Dynamic Client Registration API.
See the Logout doc for details on configuring Front Channel Logout.
OpenID Connect Relying Party (RP)#
In order to leverage your Gluu Server OpenID Provider (OP) for central authentication, web and mobile apps will need to support OpenID Connect. In OpenID Connect jargon, your app will act as an OpenID Connect Relying Party (RP) or "client".
There are many ways to go about supporting OpenID Connect in your apps. When possible, it is best to use existing client software implementations that have been verified to implement OpenID Connect properly (and securely!) A good OpenID Connect client will do much of the heavy lifting for you.
Review the SSO integration guide to determine which software and strategy will be best for your target application(s).
oxAuth RP#
The Gluu Server ships with an optional OpenID Connect RP web application called oxauth-rp which is handy for testing. During Gluu Server setup you'll be asked if you want to install the oxauth-rp (it should be installed on a development environment). If you decide to install it, oxAuth RP will be deployed on https://<hostname>/oxauth-rp.
Using the oxAuth RP you can exercise all of the OpenID Connect APIs, including discovery, client registration, authorization, token, userinfo, and end_session.
Access Token#
Access token usually is random string, but it's possible to return the access token as a JWT. It can be controlled per client. There are two client properties:
access_token_as_jwt- Boolean controlling whether to return theaccess_tokenas a JWT. It is false by default.access_token_signing_alg- signing algorithm that has to be used during JWT signing. If it's not specified, then the default OP signing algorithm will be used (specified viadefaultSignatureAlgorithmoxAuth configuration property).
JWT will contain following claims:
scope- string containing a space-separated list of scopes associated with this tokenclient_id- Client identifier for the OAuth 2.0 client that requested this token.token_type- Type of the token as defined in Section 5.1 of OAuth 2.0 [RFC6749].exp- Integer timestamp, measured in the number of seconds since January 1 1970 UTC, indicating when this token will expire, as defined in JWT [RFC7519].iat- Integer timestamp, measured in the number of seconds since January 1 1970 UTC, indicating when this token was originally issued, as defined in JWT [RFC7519].sub- Subject of the token, as defined in JWT [RFC7519]. Usually a machine-readable identifier of the resource owner who authorized this token.aud- Service-specific string identifier or list of string identifiers representing the intended audience for this token, as defined in JWT [RFC7519].iss- String representing the issuer of this token, as defined in JWT [RFC7519].
Also it is possible to run introspection script before JWT creation and transfer claims from script response into JWT. Read more about introspection script here.