Single Sign-On (SSO) to Salesforce.com#
By default, Salesforce suggests deployers implement IDP-initiated SSO. The initialization of IDP-initiated SSO is complex and requires a long hostname which includes the IDP's SSO link, as well as the SP's login URI. For this reason, we recommend SP-initiated SSO. This documentation presents a very simple SP-initiated SSO integration with Salesforce and Gluu Server. If necessary, IDP-initiated SSO is also possible. Further documentation is available at the Salesforce.com site.
Prepare Salesforce.com#
- Log in to Salesforce.com with your administrative account.
- Click on Setup in the right upper corner of the page.
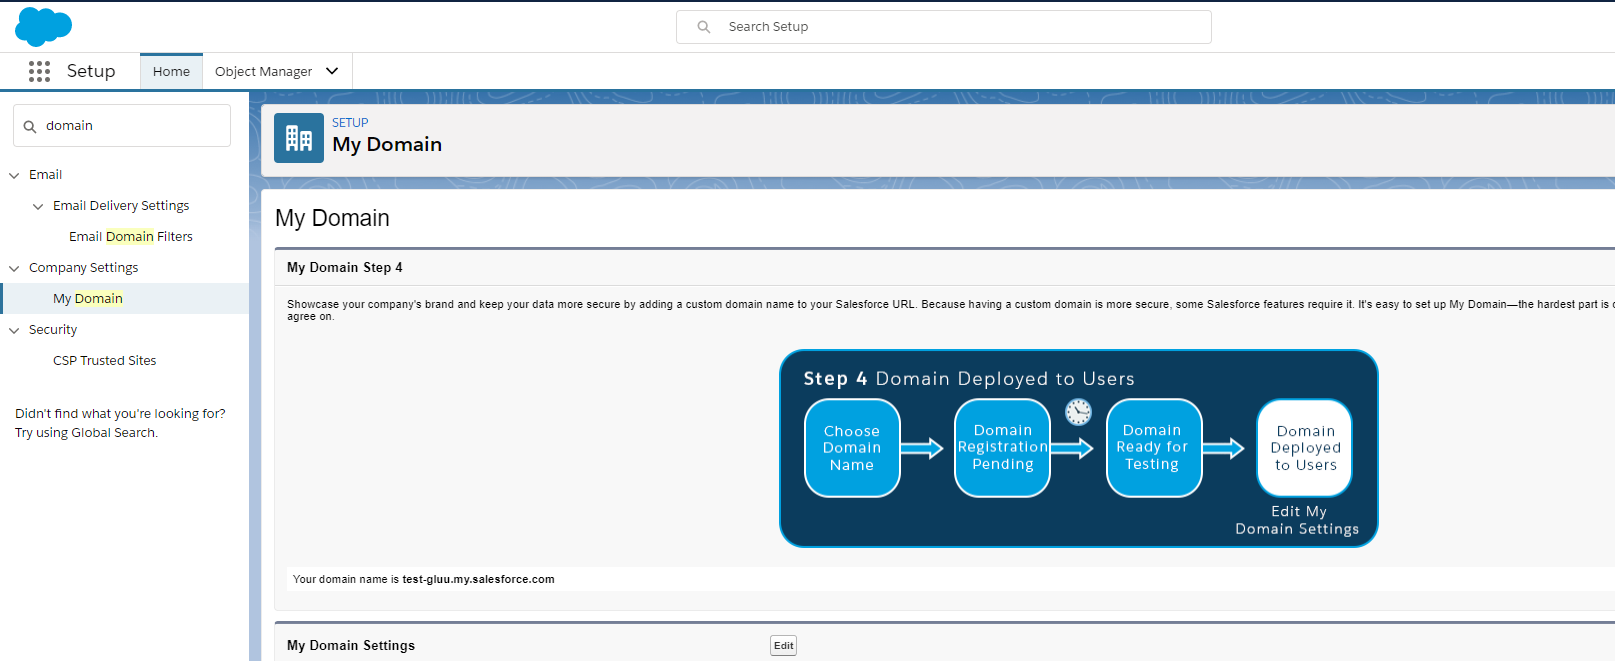
- You need to add a custom domain name for your Salesforce.com site if you do not have any yet.
- Go to
Company Settings>My Domain - Add your custom domain or use Salesforce issued domain for testing purpose.
- Wait for some time. Salesforce.com will register this domain name
for you. As an example we use
test-gluu.my.salesforce.comhere.

- Register your Gluu Server information in Salesforce.com
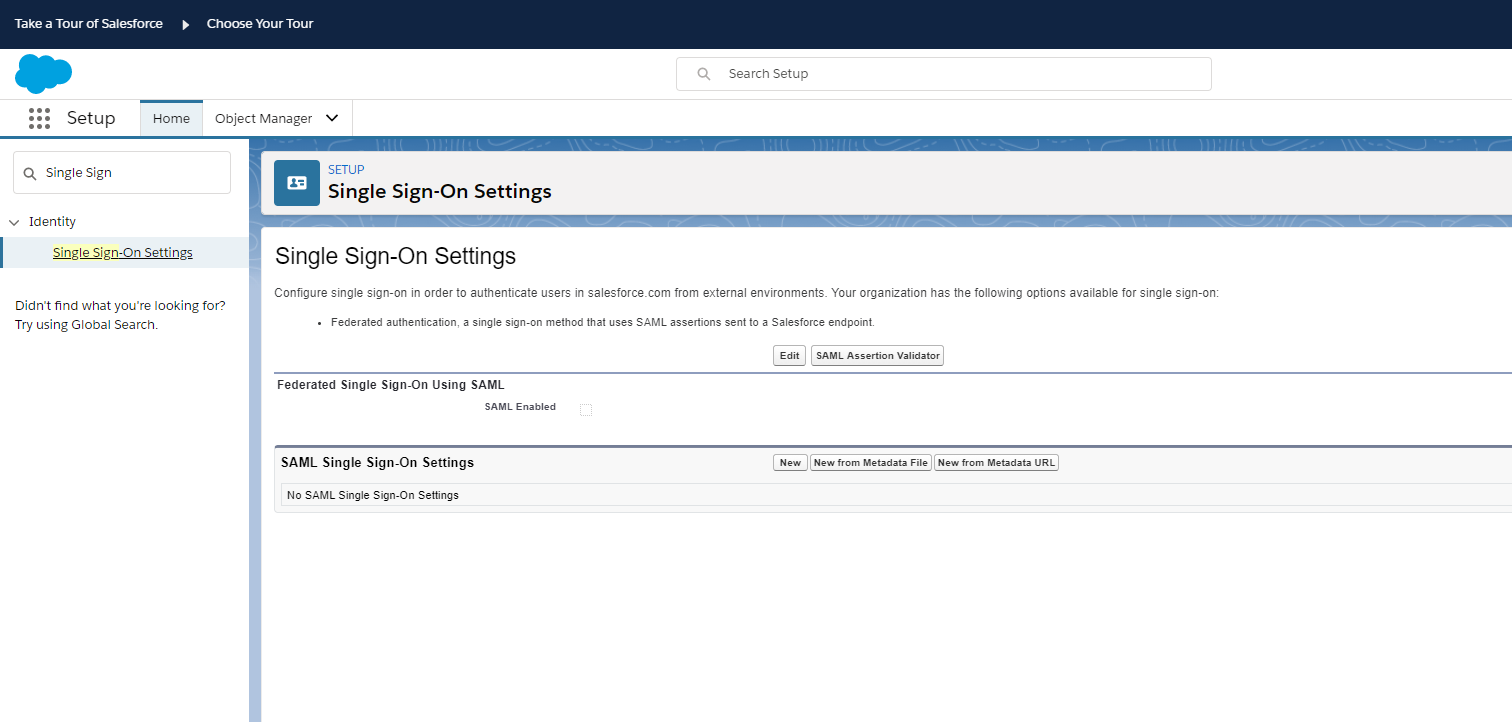
- Go to
Identity>Single Sign On Settings - Click
New

-
Now you need to add the information of your Gluu Server here
- Name: Anything, whichever is easier for you to recognize this
setup, i.e.
Gluu Server - API Name: Gluu Server.
- Issuer: EntityID of your Gluu Server, i.e.
https://ce317.gluu.org/idp/shibboleth - EntityID: Your Salesforce.com custom domain name as chosen
above, i.e.
https://test-gluu.my.salesforce.com - Identity Provider Certificate: Grab your Gluu Server's "idp-signing"
certificate. SAML certificate can be grabbed from your Gluu Sever's
metadata or from
/etc/certslocation. Save the certificate and upload it. - Request Signing Certificate: Default certificate
- Request Signature Method: RSA-SHA256
- Assertion Decryption Certificate: Assertion not encrypted.
- SAML Identity Type: Assertion contains user's Salesforce.com username
- SAML Identity Location: Identity is in an Attribute element
- Attribute Name: Provide 'SAML2 URI' of your attribute. For our test case we are using the urn value of Gluu Server's Email attribute. How to check the information of your attribute is available here.
- NameID Format: Leave this field empty.
- Identity Provider Login URL:
https://ce317.gluu.org/idp/profile/SAML2/Redirect/SSO - Service Provider Initiated Request Binding: HTTP-Redirect
- Here is how our example setup looks like:

- Name: Anything, whichever is easier for you to recognize this
setup, i.e.
-
After confirmation you should get a page like below

Prepare Gluu Server#
- How to create SAML trust relationship is available here.
- Grab Salesforce.com metadata from the Salesforce.com website. There is
an option named
Download Metadata: - Create Trust Relationship:
- Display Name: Anything, whichever is easier for you to recognize this trust relationship.
- Description: Anything, whichever is easier for you to recognize this trust relationship
- Metadata Type: 'File'
- Upload Salesforce's metadata
- Releases attributes: TransientID and Email
- 'Add' this trust
- Configure Specific Relying: It can be done from Gluu Server's GUI (named: oxTrust)
- Select
SAML2SSO- includeAttributeStatement: Enabled
- assertionLifetime: keep the default one
- assertionProxyCount: keep the default one
- signResponses: conditional
- signAssertions: never
- signRequests: conditional
- encryptAssertions: never
- encryptNameIds: never
- Save it
- Select
-
Updatethe trust relationship -
Here is how it looks like in our example setup:

Test SSO#
- Log in to Salesforce.com setup
- Create a sample user. You need to make sure that this user is also available in Gluu Server.
- Click
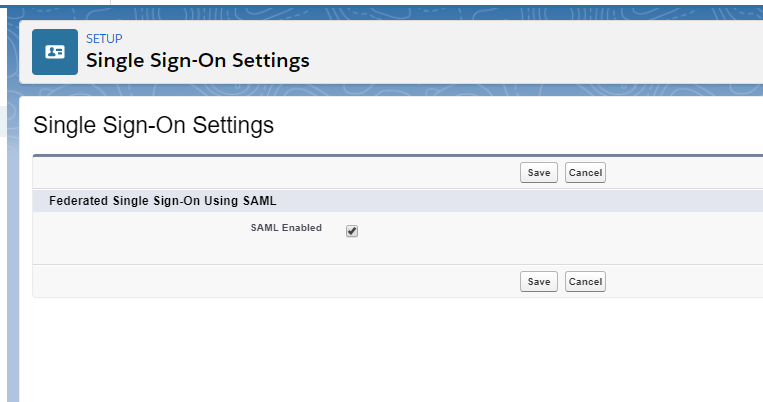
Identity>Single Sign On Settings - Enable
Federated Single Sign-On Using SAML: 
- Go to
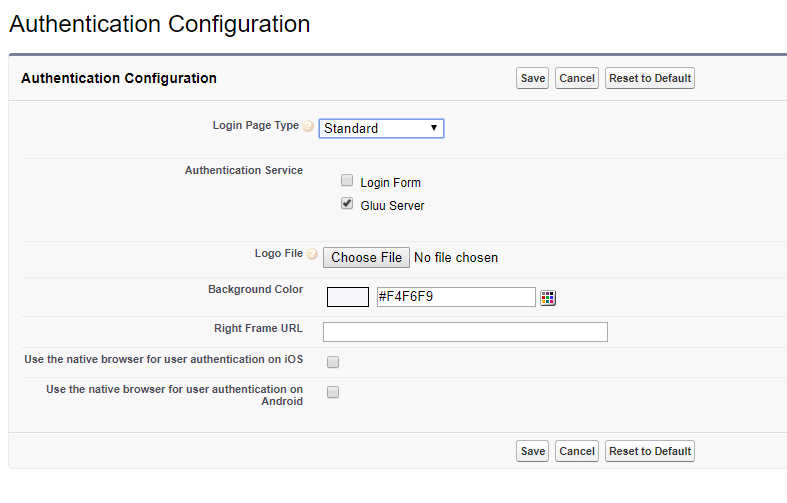
Company Settings>My Domain - Configure
Authentication Configuration - Hit
Edit - Select
Gluu Server - Save it
-
Here is how the
Authentication Configurationlooks like:
Note
This is an SP-initiated SSO, so it needs to be initiated from Salesforce.com.
Salesforce Demo Video#
You can watch a video demo of this SSO Here